WoW WotLK Classic Alliance Death Knight 55-61 Leveling Guide

Get the quest [55] In Service Of The Lich King. I suggest to zoom out your minimap to the maximum, that way you’ll see the yellow “?” from far away on your minimap.

Go northwest to Instructor Razuvious, turn in the quest and get the follow up [55] The Emblazoned Runeblade.

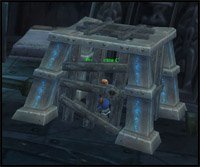
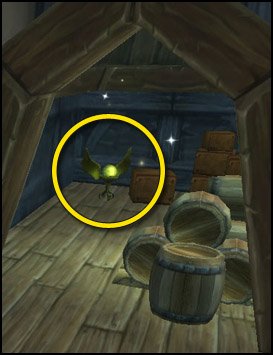
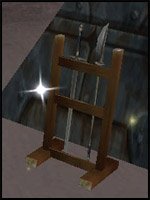
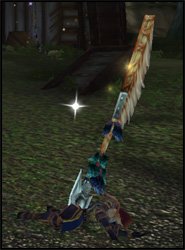
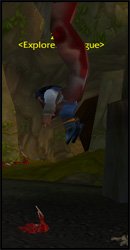
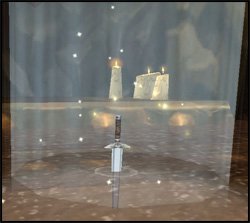
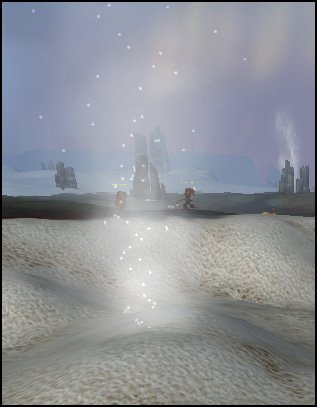
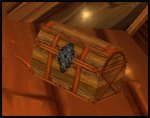
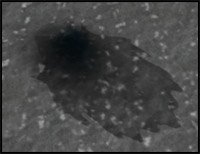
Now look for glowing weapon rack like the one in the picture below:
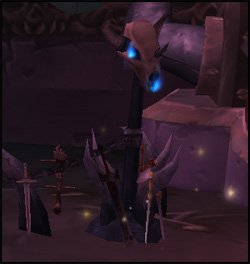
55sk1.jpg

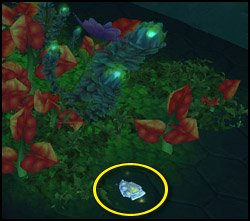
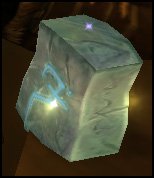
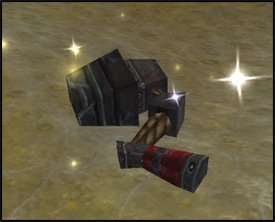
Right-click it to loot a Battle-worn Sword. Open your inventory and right-click the sword while standing next to a runeforge:
55sk2.jpg

Go back to Instructor Razuvious, turn in the quest and get the follow up [55] Runeforging: Preparation For Battle.

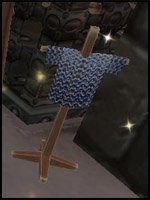
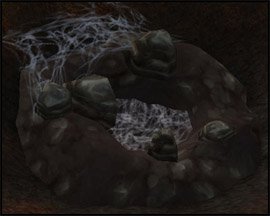
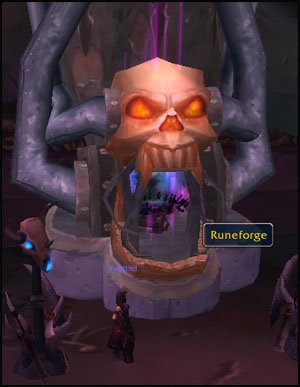
Go to the nearest runeforge, open your spellbook and click on runeforging:

55sk3.jpg

Engrave your weapon with a Rune of Cinderglacier.

Go back to Instructor Razuvious, turn in the quest and get the follow up [55] The Endless Hunger.

Now time for our first fight. It’s pretty straight forward, use your attacks in this order:


Icy Touch –> Plague Strike –> Blood Strike –> Blood Strike –> Icy Touch –> Plague Strike –> Death Coil –> Restart the cycle

If one of your abilities get dodged or misses, keep re-casting it until it works. Your target must always have both the Icy Touch and the Plague Strike disease on before you use Blood Strike on them, that way you get the maximum damage out of Blood Strike.


Go down in the pit, right-click an Acherus Soul Prison, wait for the Unworthy Initiate to become attackable and kill it.

Go back to Razuvious, turn in and get the follow up [55] The Eye Of Acherus.

Go to The Lich King, turn in and get the follow up [55] Death Comes From On High.

To the left and right of The Lich King you should find an Eye of Acherus Control Mechanism. Right-click it.

Your ability bar will be replaced by a new bar with the eye’s abilities.

After a short trip down, you’ll get control on the Eye of Acherus. First, rise higher in the air to be out of firing range of any scarlet mob and then use Ability #3 to become invisible.

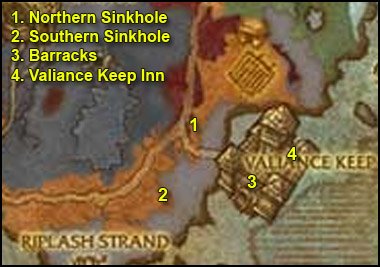
After that, find the first location we’re going to analyze: the New Avalon Forge.
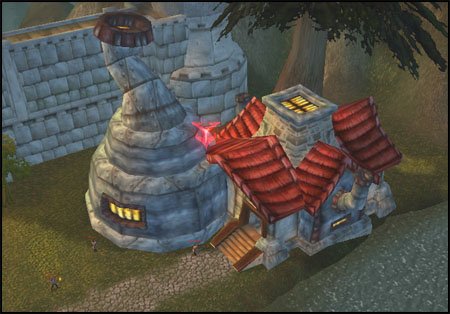
55sk4.jpg

Very easy to spot thanks to the red arrow floating over it.

Use Ability #2 and try to target as many scarlet npcs as you can. This will summon ghouls on each of them to distract them while you use Ability #1 to analyze the building.

When done, rise up in the air and go invisible again. If the Eye of Acherus is low on health, you can wait a little for his HPs to regen.

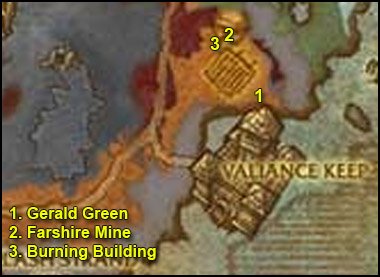
On to the next building, just south of the forge, you’ll find The Scarlet Hold. Apply the same strategy.

Directly west you’ll find the New Avalon Town Hall, analyze it:
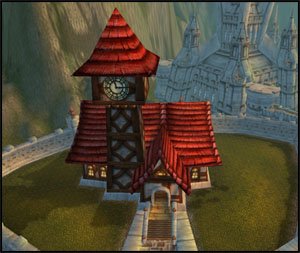
55sk5.jpg

Finally go directly south and you’ll find the Chapel of the Crimson Flame:
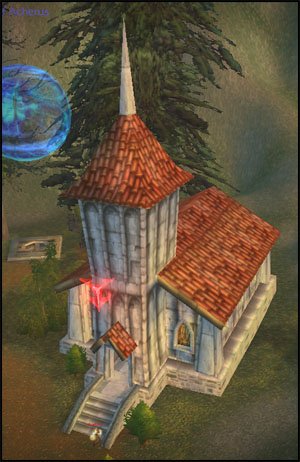
55sk6.jpg

Analyze it and the quest should be complete.

Use Ability #5 and you’ll be back to your character. Turn in the quest, get the follow up [55] The Might of the Scourge.

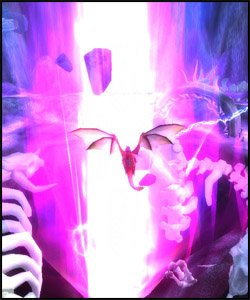
A few paces behind The Lich King you’ll find a glowing pink teleporter. Step on it and you’ll be teleported to another floor.

Go northwest to Highlord Darion Mograine, turn in the quest and get the follow up [55] Report To Scourge Commander Thalanor.

Equip your new necklaceBladed Ebon Amulet

Further southwest is another quest called [55] The Power of Blood, Frost and Unholy, complete it immediately.

Go back to the balcony (not the teleporter) and turn in the quest at Scourge Commander Thalanor. Get the follow up [55] The Scarlet Harvest.

Right-click one of the Scourge Gryphons and fly down to Death’s Breach.

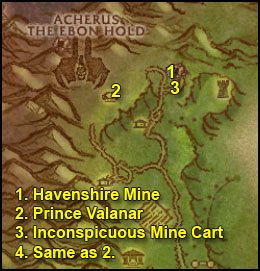
Go a few paces south and turn in the quest at Prince Valanor, get the follow up [55] If Chaos Drives, Let Suffering Hold The Reins.

3 other quests should have appeared on your minimap now, get them all.

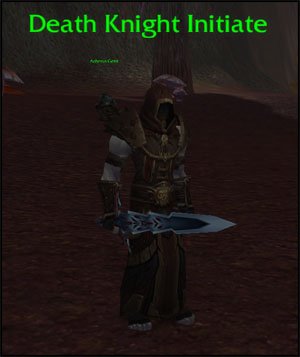
First thing, we’re gonna look around the camp for Death Knight Initiates:
55sk7.jpg

Right-click them, challenge them to a duel and defeat them. You can also challenge other players, but that’s more difficult. Repeat this 5 times. Use the food you have in your inventory if you’re low HP after a duel.

When done, go turn in [55] Death’s Challenge. You’ll get one talent point to spend as a reward. We’ll only put our points in the Unholy tree for now.


Spend your first talent point in Morbidity.


Time to kill stuff, finally!
sk55circuit1.jpg

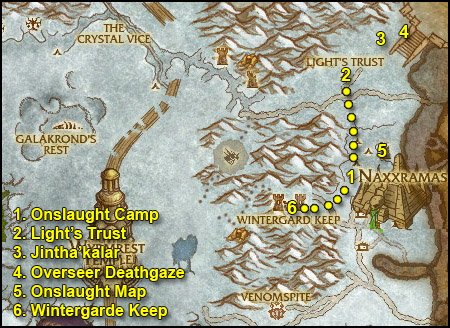
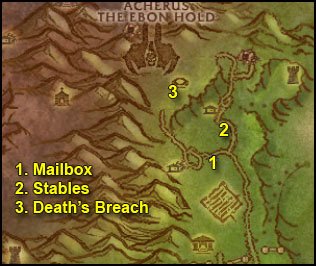
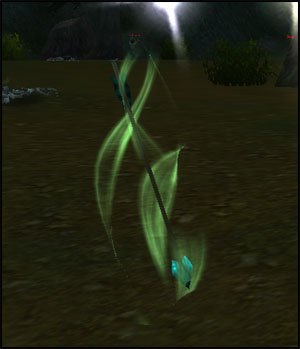
1. Go south down the path and then southeast towards the yellow “!” on your minimap while killing everything on the way and also picking up Saronite Arrows.
55sk8.jpg

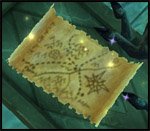
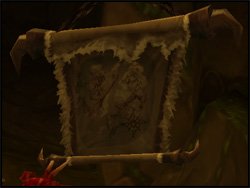
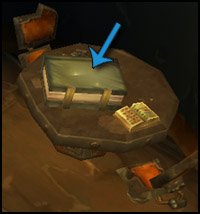
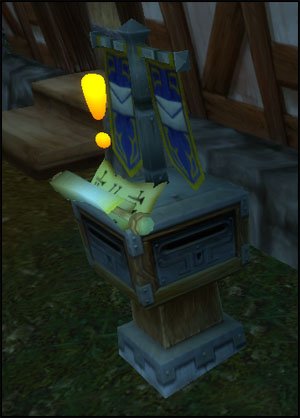
When you get to the yellow “!“, you’ll be infront of a mailbox with a scroll on top.
55sk9.jpg

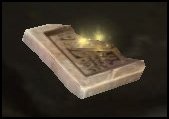
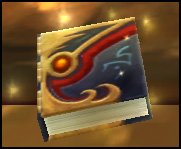
Right-click the scroll and complete the quest. You can then open the mailbox and get a book from it. It’s just lore though, you can read it if you want. I personally read it quickly and destroyed it, it can’t be sold.

After that go back to killing stuff and looting Sardonite Arrows until you finish both quests.

2. Once done, go to the stables, which are located on the northeastern part of the field.

Go to the nearest horse you can find and right-click it to mount it, then go back to Death’s Breach, you can use the horse’s Ability #2 to gallop.

3. Go to Salanar the Horseman, he stands right in the middle of Death’s Breach, then use the horse’s Ability #1 to deliver it to Salanar.

Turn in [55] Grand Theft Palomino and get the follow up [55] Into the Realm of Shadows.


Put your new talent point in Morbidity.


You’ll be in the shadow world after accepting this quest. Go down back in the fields and look for a Dark Rider of Acherus, kill it and then right-click his horse.

Ride back to Death’s Breach and once there, use Ability #1, Horseman’s Call. A few seconds later you’ll be back in the normal world.

unmounticon.jpg Click on the “Leave Vehicle” button, go to Salanar the Horseman and turn in the quest.

You can now summon your own Deathcharger. To do that, open the character window (“c” key), go to the Pets tab, drag the Acherus Deathcharger icon on a free action bar slot. Click it and voila!

Turn in:

  • [55] If Chaos Drives, Let Suffering Hold The Reins
  • [55] Tonight We Dine in Havenshire

It doesn’t matter which cloak you pick, I personally like the one with frost resistance, because it fits the rest of the equipment better.

Get the quest [55] Gothik the Harvester from Prince Valanar. Go to Gothik the Harvester and turn in the quest, get the follow up [55] The Gift That Keeps On Giving.

You should be level 56. Equip your newly acquired items:

CloakShroud of the North Wind
RelicSigil of the Dark Rider
RingValanar’s Signet Ring


Spend your talent points as follows:


Level 56

sk55circuit2.jpg

1. This time go down the path north then east and enter the Havenshire Mine (58,31).

56sk0.jpg Search your inventory for the Gift of the Havester and put it on a hotbar.

Use the Gift of the Harvester on Scarlet Miners. Repeat this step until you have 5 ghouls under your control.

Go back to Gothik the Harvester, turn in the quest and get the follow up [55] An Attack Of Opportunity.

Equip your new trinketSoul Harvester’s Charm


Put your talent point in Ravenous Dead.


2. Go to Prince Valanar, turn in the quest and get the follow up [55] Massacre at Light’s Point. Now comes a fun quest, I suggest reading the rest of point 2. before proceeding.

Outside of Havenshire Mine you’ll find an Inconspicuous Mine Car.
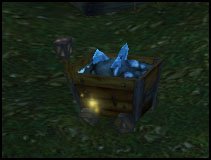
56sk1.jpg

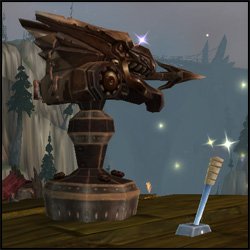
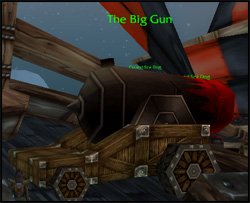
When you right-click it, you’ll be taken to a ship and will be facing 3 Scarlet Cannons.
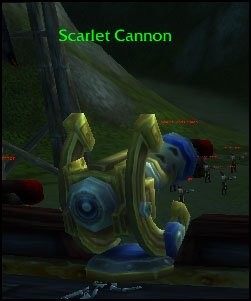
56sk2.jpg

If you right-click one of them, you’ll take control of it and will this window will appear instead of your hotbars:

56sk3.jpg

Ability #1 is your main ability, chain use it to kill as many Scarlet NPCs as you can. To aim, hold your mouse right-click button and move your mouse.

Ability #2 is to protect you. Whenever a few Scarlet NPCs make it close to you, use ability #2 to repell them.

Ability #5 is to escape. Use it once you’ve killed 100 Scarlet Defenders.

==TIP== Aim for the bridge leading to the ship every 2 or 3 shot to prevent them to get to you. If they do, there’s still Ability #2 anyway.

3. You should be more than ready now, go right-click the Inconspicuous Mine Car and have fun!

4. Go back to Prince Valanar, turn in [55] Massacre at Light’s Point, get the follow up [55] Victory At Death’s Breach!

Right-click on a Scourge Gryphon to fly back to Acherus.

Go to Highlord Darion Mograine, turn in and get the follow up [55] The Will Of The Lich King.

Equip your new items:


Spend talent points as follows:


Go to Lord Thorval (in the room just northwest of Mograine) and train your new skills:

Pestilence, Death Strike and Raise Dead.


Now things are starting to get interesting.

Raise Dead: Not much to explain, it summons a ghoul who fights for you. It’s great, the ghoul can take quite a lot of pain and deals a decent amount too.

Pestilence: this skill is very useful when fighting multiple enemies. Whenever you fight several enemies at the same time, choose a target and do this:

Icy Touch –> Plague Strike –> Pestilence

This will spread all the diseases to other nearby enemies, as long as they are close enough (about 20 yards).

Death Strike: Incredibly good skill. You’re gonna be much harder to kill from now on. The damage you do with it heals you once for each disease on your target. Needless to say, it’s better to use it after having diseased your target with Icy Touch and Plague Strike.

So from now on your attack cycle should look like this:

Icy Touch –> Plague Strike –> Death Strike –> Blood Strike –> Blood Strike –> Death Coil –> Death Strike –> Death Strike –> Blood Strike –> Blood Strike –> Death Coil –> Restart cycle

It might seem complicated, but it’s actually not. You’ll see that this rotation makes perfect sense as it uses all your cooldowns whenever they are up. You can try it on the practice dummies in Death’s Breach, close to the gryphon landing site. Of course, your enemies will die before you finish the full cycle most of the time, but that’s ok. Just try to get used to this, because dps cycles are a big part of the Death Knight class, and being able to perform them well will determine if you’re a good DK or a mediocre DK.


Go back to the Balcony and take a Gryphon ride down. Go to Prince Valanar, he’s at a new location closer to the cliff.

Turn in and get the follow up [55] The Crypt of Remembrance.

Go sell and repair at Hargus the Gimp (53,35), a few steps infront of Prince Valanar . Also buy some Corpse Dust from him (about 5), this will allow you to summon a ghoul even when there’s no corpse available.
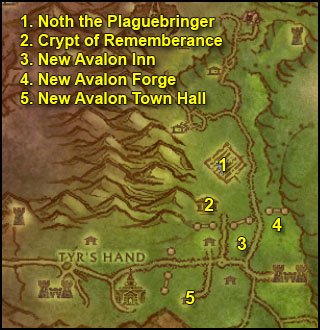
sk55circuit3.jpg

1. Mount up, ride south/southeast to Noth the Plaguebringer (56,52). Take his quest [55] The Plaguebringer’s Request.

2. You should see a yellow “?” on your minimap southwest of where you are. Go there, enter the Crypt of Rememberance (54,58) and turn in the quest.

Get [55] Nowhere To Run And Nowhere To Hide and [55] Lambs To The Slaughter.

3. Get out of the crypt and go southeast to New Avalon.

Kill everything on your way from now on. On your left-hand side after entering you should see a big building, the New Avalon Inn (58,65).

Go inside and go down to the basement cellar where you’ll find an Empty Cauldron, loot it.
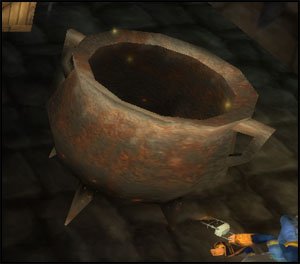
56sk4.jpg

4. Northeast of the inn you’ll find the New Avalon Forge (61,61).

Enter the building and loot an Iron Chain.

56sk5.jpg

5. Mount up and ride southwest to the New Avalon Town Hall, a big building with a clock tower (53,71).

Go inside the Town Hall, kill Mayor Quimby and loot the New Avalon Registry.
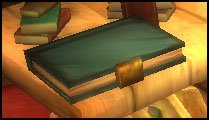
56sk6.jpg

Now just go out and kill stuff until you finish [55] Lambs To The Slaughter. You’ll find all the Citizens you need right outside the town hall (have some fun with pestilence).

Mount up and ride out of New Avalon.

First stop by Noth the Plaguebringer, turn in and get the follow up [55] Noth’s Special Brew.

Go to the cauldron next to him and turn in the quest to get 5 of those cool potions. Feel free to overuse them, we’ll get a lot more later on. You should put them on a hotbar, ready for use, just in case (but to tell you the truth, you won’t be needing them much unless you’re suicidal :P).

Go to the Crypt of Rememberance and turn in both quests, get the follow up [55] How To Win Friends And Influence Enemies

Equip your new items:


Spend your talent points as follows:

==Note== On a Pale Horse is a great talent. You have to realize that until level 77 in Northrend, you won’t be able to use a flying mount while leveling, so you will stick to ground mounts for 21 more levels starting from now. Now imagine how much time you’re going to save with this 20% extra mount speed. A very significant amount, trust me 😛 The fear and stun 20% reduction is also a nice bonus.
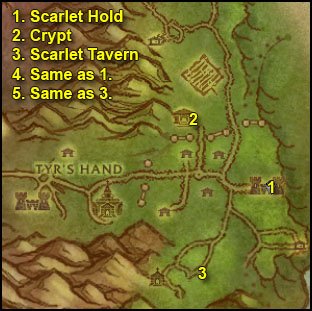

sk55circuit4.jpg

1. Go back in New Avalon, to the Scarlet Hold, it’s that big casern on the east side of New Avalon. When there, open the Ornately Jeweled Box in your inventory and equip the two One-Handed Swords. Then just start attacking people in there until one of them tells you what you want to know.

2. Go back to the Crypt of Rememberance, turn in and get the follow up [55] Behind Scarlet Lines.

Equip your new ring (instead of the green one of course): Keleseth’s Signet Ring


Spend your talent points as follows:


3. Get out, mount up and ride a long way south to the Scarlet Tavern (56,80). Go to the upper floor and turn in, get the follow up [55] The Path Of The Righteous Crusader. Also get the other quest [55] Brothers in Death and get out of this building.

4. Ride northeast to the Scarlet Hold. Clear the way up to the upper floor and go to the central main room.

On a table there you’ll find the New Avalon Patrol Schedule.
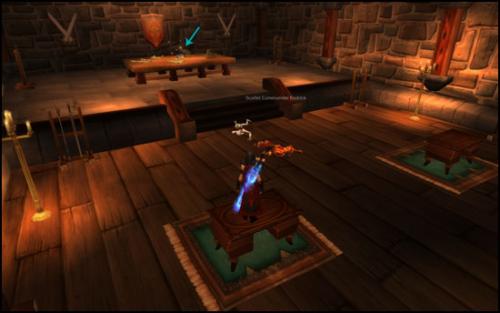
56sk7.jpg

Loot it.

After that, go down all the way to the cellar basement, where you will find Koltira Deathweaver. Turn in your quest, but before you get the follow up, read the next few lines.

Koltira will create an anti-magic barrier, you must fight inside it as much as possible to reduce the damage you’ll take from the acolytes. You can pull them inside with Death Grip as well. After about 2 minutes, High Inquisitor Valroth will come. Pull him inside the barrier with Death Grip and kill him. Mission accomplished. Don’t forget you have potions if things go wrong.

You’re more than ready now, so get the follow up [55] Bloody Breakout and protect Koltira. It doesn’t matter if you die, you’ll get resurected, but Koltira must survive.

Once Valroth is dead, his remains will appear on the floor:
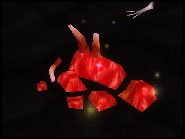
56sk8.jpg

Right-click them to loot Valroth’s Head.

5. Go back to the Scarlet Tavern. Turn in both quests, get the follow up [55] A Cry For Vengeance!

Equip your new items:

You should be level 57 by now.

Level 57


Spend your talent points as follows:

==Note== You just became godlike. The biggest upgrade here is Master of Ghouls. Now you’ll always have a ghoul fighting for you, until it dies. And if it dies, just re-summon it. You’ll also be able to control your ghoul from now on and will get a pet bar:

ghoulpetbar.jpg

Controlling your ghoul properly will be a nice advantage for you in the future. Here are a few tips to get the most out of your ghoul.

Ghoul Control Tips:

  1. Use Key bindings. The default keybindings are CTRL-1, CTRL-2, etc. I personally prefer to change them to SHIFT-1, SHIFT-2, etc, because I find reaching for CTRL plus a number is uncomfortable. That’s up to you, you can bind any key you like for your pet bar. If you want to change your pet bar key bindings, go to options > key bindings and change your Secondary Action Button 1, 2, 3, etc.Only 4 buttons are very important to bind anyway: Attack, Follow, Gnaw and Huddle.Gnaw is your pet’s stun, it’s great to interrupt spells and also to stop things from running. Use it smartly.
    Huddle is a defensive boost for 10 seconds, use it to preserve your ghoul’s health when he’s taking a lot of damage.
  2. Level your First Aid skill. It might not be very useful for now, but you’ll see in the future, when you solo difficult elites for certain quests, your ghoul will need healing after the fights, and trust me, Death Coil isn’t always enough. So instead, bandage your ghoul! Anyway, leveling first aid also gives you achievement points, so might as well get it done

Summon Gargoyle:

An amazing skill. It’s a big dps burst, which can last a total of 1 minute if you provide enough runic power. Here are a few tips:

  1. Build up 100 Runic power before activating this skill
  2. Don’t even think about using Death Coil while your gargoyle is up. If your runic power goes down to zero, your gargoyle despawns
  3. Use it at the right time, like when about to fight an elite, it’s kind of a waste in most other cases

Dirge:

Thanks to dirge, you’ll get more runic power now, that means you’ll have to try to squish in some extra death coils in your attack cycles. If you pay attention to your cooldowns, you’ll see there’s often room for an extra death coil here and there during your cycles.
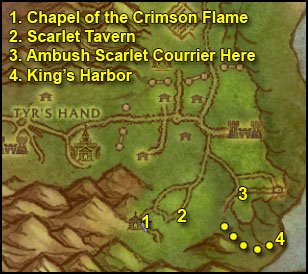

sk55circuit5.jpg

1. Go southwest to the Chapel of the Crimson Flame (53,81). Find Knight Commander Plaguefist, turn in and get the follow up [55] A Special Surprise

Go inside the long house and find the NPC corresponding to your race. (If you’re human, find the human Ellen Stanbridge. If you are Gnome, find the gnome Goby Blastenheimer, etc.)

Watch that NPC make his speech and you’ll have to kill it at the end. Put your ghoul on passive mode, because you won’t get the kill credit if the ghoul does more damage than you.

Go back to Knight Commander Plaguefist, turn in and get the follow up [55] A Sort of Homecoming.

2. Go back to the Scarlet Tavern, turn in [55] A Sort of Homecoming and get [55] Ambush at the Overlook.

Equip your new trinket (instead of the Insignia of the Scourge): Signet of the Dark Brotherhood


Spend your talent points as follows:

Reaping: This converts your blood runes into death runes when you use Blood Strike or Blood Boil (which we’ll get soon). A Death Rune is a universal rune, it counts as any type of rune. Why is that good? For many reasons. It allows you to have more flexibility in your cycles. It allows you for example to re-cast your Bone Shield in fight without messing up your Death Strike cycles. Or better, if you convert both your blood runes into death runes, you’ll then be able to use Death Strike 3 times in a row, and that’s great when you’re having a tough fight and need a lot of lifedrain. Later on, you’ll be using Scourge Strike instead of Death Strike most of the time, and you’ll understand how valuable reaping is, because Scourge Strike is the kind of ability you want to spam as often as possible 😉


3. Mount up and ride east to the Scarlet Overlook (62,77).

Find a clear spot near the path.

56sk9.jpg Look for a Makeshift Cover in your inventory

Right-click it, the Scarlet Courrier will appear, kill it and loot everything he has.

Go back to the Scarlet Tavern, turn in and get [55] A Meeting With Fate.

4. You should now be disguised as a Scarlet Courrier. Get out, mount up and ride to the Scarlet Overlook.

This time take the path south leading down to King’s Harbor, where you will find High General Abbendis (65,84).

Turn in and get [55] The Scarlet Onslaught Emerges.

5. Go back to the Scarlet Tavern, turn in the quest, but before your get the follow up, read the following paragraph.


You should have 4 talent points now, spend them as follows:


==Optional== Before going back to turn in this quest, I recommend killing some more Scarlet NPCs to get Crusader Skulls, which we you can turn in at the cauldron for extra health potions. 20 Crusader Skulls = 5 Potions, and you can carry a maximum of 20 potions. I personally farm 60 Skulls, and then I get out of this place with 20 Potions (including the 5 we got from quest earlier). The fastest way to get skulls is to kill the citizens outside of the town hall, it’s even easier if you put your ghoul on aggressive mode. However those don’t give exp, so you might want to kill other things, it will just take longer. After you have 60 skulls be sure to go back to the cauldron to turn in and get your 20 Potions *BEFORE* going back to the Scarlet Tavern. If you return to Acherus without turning the skulls in there is no way to turn them in later.

Got your 20 potions? Let’s move on then, go back to the Scarlet Tavern.

Get the follow up [55] Scarlet Armies Approach… Orbaz Bloodbane will then open a portal for you, take it and you’ll be back in Acherus.

Go to Highlord Darion Mograine, turn in and get [55] The Scarlet Apocalypse.

Equip your new pauldronsBlood-soaked Saronite Plated Spaulders

Don’t worry about talents for now, we are not gonna fight for a while.

Go see your trainer, buy Frost Presence and Mind Freeze. Don’t waste money on the rest, Rune of Spellbreaking/Shattering is not useful to us at this point. Of course, if you’re rich, feel free to buy those skills anyway.


Frost Presence: That’s the tanking stance, pretty much like the defensive stance of warriors. We won’t use it much in this guide, it’s mostly for tanking in instances. However, it’s also useful when you’re running away from something, as it increases your armor and spell mitigation, making you much much more survivable. Other than that, stay in blood stance.

Mind Freeze: Our first spell interruption (well argueably the second, because you can interrupt spells with Death Grip too, but that’s not its main purpose). It doesn’t trigger the global cooldown, which is great, because that means you can cast it at any moment without disrupting your attack rotations.

Anyway, enough talking, let’s get back to business.


Take a gryphon ride back to Death’s Breach. Go talk to The Lich King, get the follow up [55] An End to All Things.

57sk0.jpg Look in your inventory for a Horn of the Frostbrood.

Right-click it. You’ll climb on a Frostwyrm and your action bars will be replaced by this:

57sk1.jpg
  • Ability #1 is your attack. It’s just like with the canon we used before, aim by holding your mouse right-cilck button.
  • Ability #2 is to refill the Wyrm’s mana. Should you need to do that, go find a lone Scarlet Defender and use it on him (have to be within 15 yards range).

You need to kill 150 Scarlet Soldiers (a piece of cake) and to destroy 10 Ballistas. The ballistas are a little more tricky, because their javelins kinda hurt so you must dodge them.

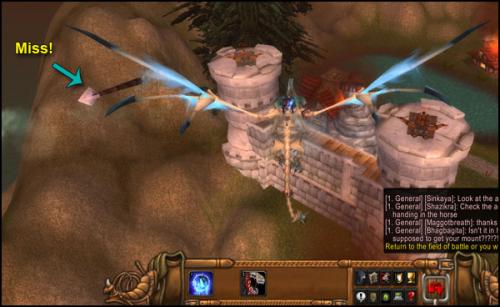
It’s quite straight forward though, you simply have to strafe to the left or to the right every time after you shoot, and the javelin will miss you. Like on the screenshot below:
57sk2.jpg

Basically it goes like this: Shoot –> Strafe left –> Shoot –> Strafe Right –> Repeat till ballista is destroyed.

For the 150 Scarlet Soldiers, go behind the walls of New Avalon, you’ll find big packs of them.

When done with that, fly back to The Lich King.

unmounticon.jpg Click on the “Leave Vehicle” button and turn in the quest, get the follow up [55] The Lich King’s Command.

Equip your new helmGreathelm of the Scourge Champion


Spend your talent points as follows:

You are now officially unkillable.

Bone Shield: A great ability for just 1 Unholy Rune. Re-cast it after every fight if possible. Not only will you take less damage, but you’ll also do more while having this shield on.

Desecration: +5% damage and slows down enemies around you, which is great to escape if things go wrong. We mostly take it for the 5% damage boost.

Scourge Strike: Rejoice. Expect a big improvement in your damage output. This replaces Death Strike in your usual rotation. Only use Death Strike when you need healing.
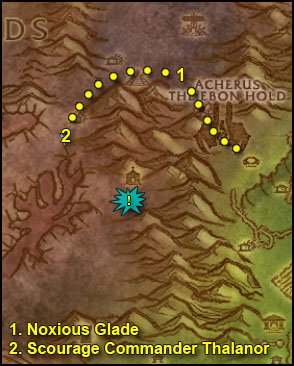

sk55circuit6.jpg

1. Mount up, go northwest through a tunnel, you’ll then be in the Noxious Glade (Eastern Plaguelands).

2. Go west and take the path going down at (40,20), all the way to Browman Mill, where you’ll find Scourge Commander Thalanor (34,30). Turn in and get the follow up [55] The Light of Dawn.

Now all you have to do is take part in a cool event, follow Highlord Darion Mograine and fight with him. You don’t actually have to fight, but I recommend doing it for fun, because you get a buff which makes you almost invincible and also makes you hit like a truck. Don’t be too reckless though, only attack the Defenders of the Light there, avoid the named NPCs such as Korfax, Duke Zverenhoff, etc.

At the end of the script, you can turn in your quest at Highlord Darion Mograine. Choose Sword or Axe, it doesn’t matter (pick the Sword if your race is human though).

Get the follow up [55] Taking Back Acherus.

Open your spell book and cast Death Gate (Unholy). Click the gate to be teleported back to Acherus. I suggest not lingering here too long, because the script will reset soon and all those imba argent dawn NPCs will soon be back to agressive mode and make quick work of you 😛

After teleporting, turn in your quest and get the follow up [55] The Battle For The Ebon Hold.

Equip your new weapon if you haven’t done that already.


Spend your new talent points as follows:


Take the pink teleporter up, kill 10 Scourge and help killing Patchwerk.

Take the teleporter back, turn in the quest at Mograine and get the follow up [55] Where Kings Walk.

Behind Mograine to the right you should see a portal to Stormwind, take it.

In Stormwind, run (yes, you can’t use your mount here for now) to King Varian Wrynn in Stormwind Keep:
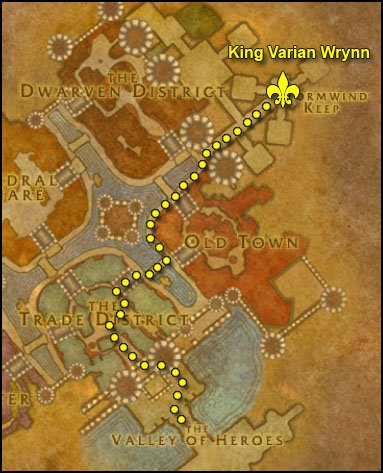
sk55circuit7.jpg

Turn in the quest.

Get the quest [62] The First and the Last from King Varian Wrynn.

1. Get out of Stormwind Keep, mount up (yes now you can!)

Find Mathias Shaw in the Old Town, he’s on the first floor of the big building named SI:7.

Turn in the quest [62] The First and the Last, get the follow up, turn it in and get the follow up [62] Flint Shadowmore.

2. Visit the auction house, put stuff on sale. Also get some better bags, because the 12-slot bags are gonna be a bother in the long run. However, if you’re low on cash, you must at least keep 3gold 50silver to buy your new skills.

3. hs.jpg Go to the inn and make Stormwind your home location.

You should be level 58 by now.

Level 58

Death Gate back to Acherus. Visit one of the trainers, get Blood Boil and Chains of Ice.


Chains of Ice: A very useful skill to prevent enemies from running away. Can also be used to kite or to escape.

Blood Boil: This will basically replace blood strike when taking on multiple targets.

So from now on, against multiple enemies, your dps cycle will be:

Icy Touch –> Plague Strike –> Pestilence –> Blood Boil –> Death Strike –> Death Coil –> Death Strike –> Blood Boil –> Blood Boil –> Death Strike –> Death Coil –> Death Strike –> Blood Boil –> Blood Boil –> Stuff should be dead.

Spend you talent point as follows:


Take the pink teleporter up. Go to a runeforge and engrave a Rune of Cinderglacier to your weapon. Also buy some Corpse Dust while you’re here.

Take the teleporter back down. Go on the balcony and take a flight path to Chillwind Camp, Western Plaguelands.

Get [52] Clear the Way from Commander Ashlam Valorfist(the quest won’t appear over his head, so just find him).
Complete the quest Argent Dawn Commission at Argent Officer Pureheart, you will receive a trinket.
When you kill undeads while wearing this trinket, you can collect Scourgestones from their bodies. Turning in these Scourgestones at Argent Officer Pureheart gets you reputation increases with the Argent Dawn and a token. However, the argent dawn faction is old and outdated, there’s nothing useful we can get from it nowadays, so I suggest to just destroy the trinket (you can get a new one whenever you want by simply talking to an argent dawn quartermaster).
Turn in [62] Flint Shadowmore and get the follow up [62] The Eastern Plagues.

Don’t get the other quests.
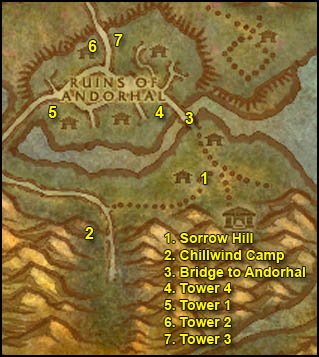
a56circuit5.jpg

1. Take the eastern path to Sorrow hill (46,81). Kill 10 Skeletal Flayers and 10 Slavering Ghouls.
Also get the quest [55] Little Pamela from Marlene Redpath, who is inside a house at (49,78).

2. Go back to Chillwind Camp and turn in [52] Clear the Way, get the two follow up [53] The Scourge Cauldrons and [56] All Along the Watchtowers.

Go to High Priestess MacDonnell and turn in [53] The Scourge Cauldrons. Get the follow up [53] Target: Felstone Field.

3. Go back through Sorrow Hill and enter the Ruins of Andorhal by the south gate (49,73).

In Andorhal try to avoid the roads as much as possible, as level 56 elite abominations patrol them. So just clear yourself a path through the destroyed houses. Also avoid the middle of the town of course, there’s a huge bunch of mobs there and Araj the Summoner (lvl 61 elite).

4. Go to the Fourth Watch Tower (46,70). Clear what’s in your way. You can drop the torch at the entrance of the watch tower without aggroing the Skeletal Warlord if you just get close to it without being in it’s line of sight. Look for the Beacon Torch in your inventory and click it while standing next to the tower’s door.

5. Go to the Tower One which is direclty to the west (40,71). It’s close to the western entrance to Andorhal. Mark it with the torch just like you did for the previous tower.

6. Go to Tower Two, northeast of tower one (42,66). It’s close to the northern entrance to Andorhal. Mark it.

7. Tower Three is right behind tower two, northeast of it. Be careful of the scarlet patrol and abomination patrol when you go there (44,63). Mark tower three. You can destroy the Beacon Torch.
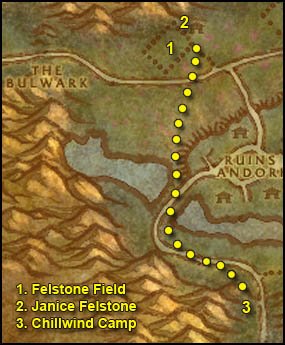
a56circuit6.jpg

1. Get out of Andorhal by the north gate then go northwest to Felstone Field (37,58).

Clear yourself a path to the Cauldron in the middle of the field, when you get close, Cauldron Lord Bilemaw will spawn, kill it and loot the Felstone Field Cauldron Key from him, then go to the cauldron and click it, turn in the quest and get the follow up [53] Return to Chillwind Camp.

2. In the Felstone Field, go to the houses on the north side of the field, enter the one which is the most to the west (37,54).

On the 2nd floor of the house you’ll find Janice Felstone, get the quest [52] Better Late than Never.

Go to the next house at (38,55) and find Janice’s Parcel inside it. Click it, turn in the quest, then click it again and get the follow up [52] Better Late Than Never.

3. Ride back to Chillwind Camp, avoid Andorhal this time.

Turn in [56] All Along the Watchtowers. Get the follow ups [55] Scholomance and [60] Alas, Andorhal.

Turn in [55] Scholomance at Alchemist Arbington and get the follow up [57] Skeletal Fragments.

Turn in [53] Return to Chillwind Camp, get the follow up [55] Target: Dalson’s Tears.
Also get the quest [58] The Mark of the Lightbringer from Anchorite Truuen.
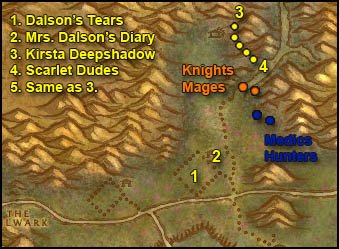
a56circuit7.jpg

1. Go north, around Andorhal and then east to Dalson’s Tears (45,52), it’s the field directly east of Felstone Field. Clear yourself a path to the Scourge Cauldron, when you get close Cauldron Lord Malvinious will spawn, kill it and loot his key, go to the Cauldron and click it, turn in the quest and get the follow up [55] Return to Chillwind Camp.

2. Go to the houses on the north side of Dalson’s Tears, enter the eastern one (47,51). Clear what’s inside and look on the floor for Mrs. Dalson’s Diary, click it and choose “complete quest”.

==Note== As of last patch, the outhouse (48,49) is sometimes bugged, it’s impossible to interract with it, making it impossible to kill Farmer Dalson and to get the cabinet key. If you can’t interract with the outhouse, just forget this quest and move on to step 3.

Get out of the barn and look around for a Wandering Skeleton, there is only one of this kind and he roams around the barn, so keep killing stuff around the barn until you find it, kill it and loot “Dalson Outhouse Key”. Go behind the barn, you’ll find an Outhouse (48,49). Open it, kill Farmer Dalson, loot Dalson Cabinet Key.

Go to the other house now (47,50), on the 2nd floor of it you’ll find a “Locked Cabinet”, click it and turn in the quest.

3. Go straight north to the Northridge Lumbermill, when you are next to the lumbermill, go northeast of it, follow a trail going down to a destroyed wagon. You’ll find Kirsta Deepshadow there (51,28), get the quest [56] Unfinished Business.

4. You can find the Scarlets Knights and Mages you need to kill for the quest just southeast of Kirsta, on the road to Hearthglen. For the Hunters and Medics go to the camp southeast (51,44).

5. When you completed the kill list, go back to Kirsta and turn in [56] Unfinished Business, get the follow up.
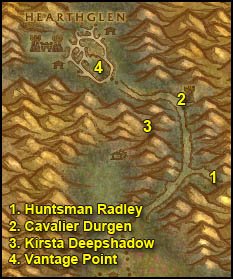
a56circuit8.jpg

1. Go back on the road just east of Kirsta. And head north, at (54,34) the road forks off to the left and right. Go right and up the slope you will find Hunstman Radley (57,35). She can be pulled solo if you wait for the right moment: when the mage close to her goes far enough.

2. Get back on the main road and this time at the fork go left, keep going north until you hit the watch tower (53,24). Kill the 2 guards infront of it, clear the 1st floor of the tower carefully, then wait for Cavalier Durgen to show up. He goes to the top of the tower then walks back to the entrance. Wait for him to come down, you can’t kill him when he’s on top, he has 3 guards with him there.

After killing Durgen, clear the way to the top of the tower, there are 2 scarlet mages on top of the tower, you can actually pull just 1 if you take your time and body pull carefully. After you have cleared the top of the tower, you should find a Holy Coffer, right-click it and loot the Mark of the Lightbringer.

==Warning== Sometimes there is a high-level rare elite on top of the tower in addition to the above mentioned mobs.

3. After this, go back to Kirsta Deepshadow by going southwest and jumping down in the crater where she is. Turn in the quest [57] Unfinished Business, get the follow up.

4. Mount up and ride to Hearthglen (46,18).
Clear the way to the tower (45,18). Go to the top of the tower and you’ll get a quest complete message.

5. Exit the tower, mount up and get back to Kirsta. Turn in [58] Unfinished Business.

Hearthstone to Stormwind, go to the Cathedral Square and inside the City Hall (48,32) on the 2nd floor. Turn in [52] Better Late than Never.

Now try to find Ol’Emma, she wanders in between the Cathedral Square and the Trade district. Shouldn’t be hard to find because you’ll see the yellow “?” on the minimap. She makes a stop in a house bordering the canals close to the Cathedral district too (52,41).

When you find her turn in [52] Good Natured Emma. Get the follow up [52] Good Luck Charm.

==Note== You should have a few Bone Fragments in your inventory, don’t sell them, we’ll need them for a quest later on.

Sell junk, repair, re-stock consumables.

Get the following items from your mailbox/bank/AH, (see shopping list):

Death Gate back to Acherus.

Fly to Chillwind Camp.

In Chillwind Camp, turn in [55] Return to Chillwind Camp, get the follow up [55] Target: Writhing Haunt.

Now get ready for an escort quest, it’s rather easy. When you’re ready, turn in [58] The Mark of the Lightbringer, get the follow up [58] Tomb of the Lightbringer. Do the escort until you get the complete message.
a56circuit9.jpg

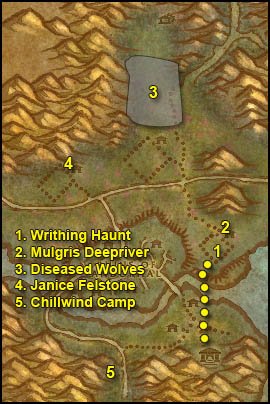
1. Go north/northeast, swim across the river and go to the Writhing Haunt (52,66). Clear a path to the scourge cauldron, when you get close to it, Cauldron Lord Razarch will spawn, kill it and loot the key. Clear what’s around the Cauldron and go click it, turn in the quest and get the follow up [55] Return to Chillwind Camp.

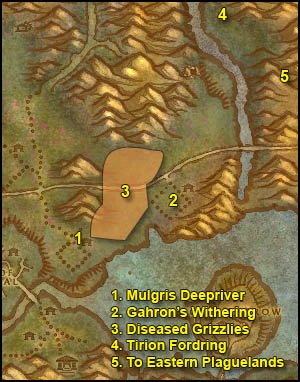
2. Directly north of the cauldron in a small house you should find a tauren lying down on the floor, Mulgris Deepriver. Get his quest [54] The Wildlife Suffers Too.

**From now on kill any Diseased Wolf you find on your way until you have completed [54]The Wildlife Suffers too**

3. Go north/northwest to an area just north of Dalson’s Tears (45,40), where you will find plenty of wolves to complete the quest. Kill everything in this area until you have 8 Diseased Wolf Kills. Also note that the spiders in this area are placeholders for wolves, so you have to kill spiders too if you need more wolves.

4. Go southwest to the Felstone Field, go into the left house (38,54) on the 2nd Floor. Turn in the quest [52] Good Luck Charm at Janice Felstone and get the follow up [54] Two Halves Become One.

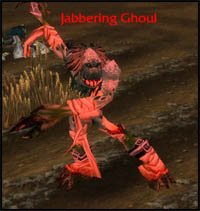
Get out of the house and look for a Jabbering Ghoul.
a50img7.jpg

This ghoul patrols all over the field. So just keep the area clean until it spawns, especially the Scarlet Patrol, as they might kill the Jabbering Ghoul before you even see it.

Once you find the Jabbering ghoul, kill it and it will drop a “Good Luck Other-Half-Charm”.

Once you have the other half charm, go back to Janice Felstone, right click on the other-half-charm in your inventory. Turn in the quest.

You should be level 59 by now.

Level 59

Death Gate
 to Acherus. Visit the trainer, buy Blood Strike (Rank 2) and Strangulate.


Blood Strike (Rank 2): More damage, cheers.
Strangulate: A 5 second silence, can be cast from 30 yard range. Great against casters.

Spend your talent point:


5. Fly back to Chillwind Camp.

Turn in:

  • [55] Return to Chillwind Camp and get the follow up [58] Target: Gahron’s Withering.
  • [58] Tomb of the Lightbringer
a58circuit1.jpg

1. Ride east through Sorrow hill, then northeast, across the river and to the Writhing Haunt. Clear the way to the house with the tauren lying down on the floor, turn in [54]The Wildlife Suffers too, get the follow up [56]The Wildlife Suffers Too.

**From now on kill any Diseased Grizzly you see until you have killed 8**

2. Go east to Gahron’s Withering (62,57). Clear a path to the Scourge Cauldron, when you get close Cauldron Lord Soulwrath will, appear, kill it. He’s harder than the other cauldron lords, he knockbacks and silences, so be careful where you fight him. Loot his key then go to the Cauldron, turn in the quest and get the follow up [58] Return to Chillwind Camp.

3. Go to the area which is in between Garon’s Withering and the Writhing Haunt. There should be plenty of grizzlies there. If not, kill spiders, they are placeholders for grizzlies. Kill everything in this area until you have 8 Diseased Grizzly Kills.

Go turn in [56] The Wildlife Suffers Too at the Writhing Haunt, get [56] Glyphed Oaken Branch.

4. Ride northeast until you hit Thondroril River, go north along the river bank, then cross the river so you are on the eastern bank and ride north until you find a house. In front of it you’ll see Tirion Fordring, get his 3 quests:

  • [56] Demon Dogs
  • [56] Blood Tinged Skies
  • [56] Carrion Grubbage

From now on, kill on sight the following:

  • Plaguehound Runt
  • Carrion Worm
  • Plaguebat

5. Go south along the river and then east into Eastern Plaguelands.
a59sk1.jpg

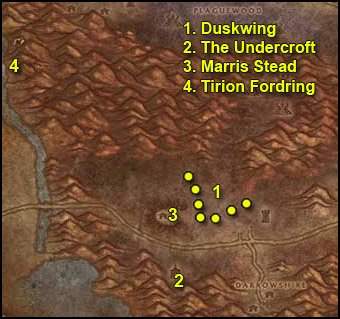
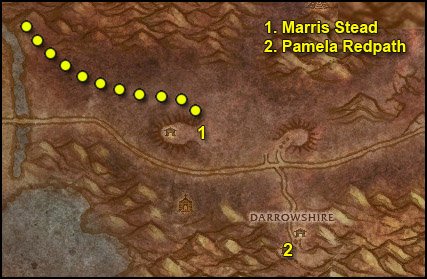
1. Go southeast while killing everything on the way. Find the Marris Stead but don’t get close to it! There’s a lvl 62 Elite NPC there, hits like a truck. Go around the Marris Stead so that you are east of it (29,74).

Just a bit closer to Nathanos Blightcaller you’ll find “Mangled Human Remains” (25,68). Loot the SI:7 Insignia (Turyen) from it.

Go a bit closer to Nathanos, on a small mound right infront of him you should find other human remains (23,68). Loot Fredo’s Insignia from it.

This is as close as you can get to Nathanos without aggroing it, and you should get the “Blightcaller Uncovered” (Complete) message.

Go backwards a bit and then south, you should find the last human remains close to the road (23,73). Loot Rutger’s Insignia.

2. Go southeast while killing everything on the way. Stay away from the Marris Stead though. Keep going southeast till Darrowshire.

Inside Darrowshire, find a small destroyed house on the western side of Darrowshire. You should find Pamela Redpath there, turn in the quest [55] Little Pamela and get the follow up [55] Pamela’s Doll.

Now you must find the 3 parts of Pamela’s Doll, they can be in any of the other houses in Darrowshire. Look on the floor for some brown objet. Everytime you get close to one of the doll parts, a level 55 ghost spawns and attack you.

Once you have Pamela’s Doll’s Left Side, Right Side and Head. Right click them in your inventory to combine them. Go to Pamela and turn in the quest. Get the two follow up quests:

  • [56] Uncle Carlin
  • [56] Auntie Marlene
a58circuit3.jpg

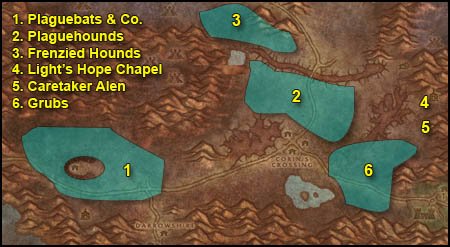
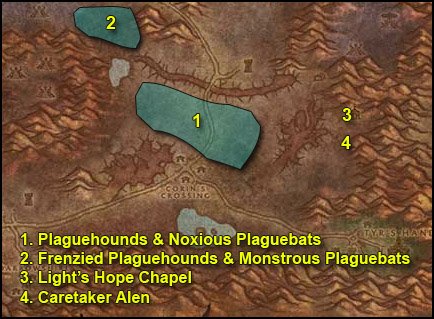
1. Go back towards the area around the Marris Stead and keep doing wide circles around it killing everything until you got 30 Plaguebat and 20 Plaguehound Runts slain. Also focus on Carrion Grubs until you finish [56] Carrion Grubbage. This is the best area to find these mobs.


==Tip== To avoid getting feared by the Plaguebats, use strangulate.
Icy Touch –> Plague Strike –> Scourge Strike –> Strangulate –> Blood Strike –> Death Coil.

You’ll get feared very seldomly this way.


2. Go east to the area north of the infectis scar and Corin’s Crossing. Kill everything around until you have 5 Plaguehound Kills.

3. Once you got 5 Plaguehound kills, go to the area which is north of Blackwood Lake (51,41). You should find Frenzied Plaguehounds around this area.

4. Once you have 5 Frenzied Plaguehound kills. Death Gate back to Acherus, sell junk quickly (careful, don’t sell Bone Fragments).

Fly to Light’s Hope Chapel, Eastern Plaguelands

Get the following quests and turn them in immediately:

  • [60] Savage Flora at Rayne
  • [60] Cryptstalker Armor Doesn’t Make Itself… at Huntsman Leopold
  • [60] The Elemental Equation at Archmage Angela Dosantos
  • [60] Binding The Dreadnaught at Korfax, Champion of the Light

Also get [60] Bonescythe Digs from Rohan the Assassin, we’ll finish that one later.

Turn in [56] Uncle Carlin, get the follow up [55] Defenders of Darrowshire

5. Just a bit south of Light’s Hope Chapel find Caretaker Alen (73,57). Get the quests [55] Zaeldarr the Outcast and [60] The Restless Souls from him.

6. Step removed, ignore it.

Go back to Light’s Hope Chapel, fly to Chillwind Camp.

Turn in [58] Return to Chillwind Camp, go to Commander Ashlam Valorfirst and complete the quest “Mission Accomplished!”

Turn in [62] The Eastern Plagues at Flint Shadowmore, get the follow up [62] The Blightcaller Cometh.

Get the quest [55] A Plague Upon Thee from Nathaniel Dumah.
a59sk2.jpg

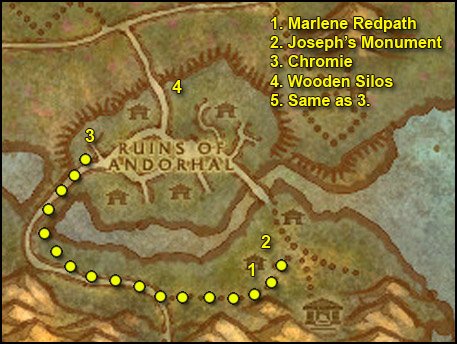
1. Ride east to Sorrow hill and find Marlene Redpath in the house (49,78).

Turn in [56] Auntie Marlene and get the follow up [56] A Strange Historian (Elite).

2. Search the graveyard just north of the house where Marlene Redpath is, look for “Joseph Redpath’s Monument” among the graves (49,76). Click the grave and get Joesph’s Wedding Ring.

3. Go back towards Chillwind Camp and take the other path to Andorhal, go inside the Ruins of Andorhal by the western entrance.

Inside Andorhal go to the house to the north, it’s the only house around with a floor and not totally destroyed (39,68). Inside the house go to the 2nd floor, in one of the rooms you’ll find Chromie. Turn in [b][56] A Strange historian, get the follow up [56] The Annals of Darrowshire. Also ge the other quest [56] A Matter of Time.

4. Go to the northern gate of Andorhal, and east of the first watch tower you’ll find two wooden silos (45,62) which look like this:
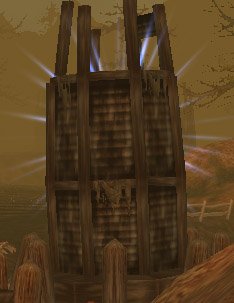
woodensilo.jpg

Get close to a silo and click your Temporal Displacer (the icon is actually a horn).

1 to 3 lvl 57 worms will spawn and attack you. Kill them. Move on to the next silo and repeat. Keep doing that until you have 10 Temporal Parasites slain. The worms only appear when the silo is sparkling blue. They take a while to sparkle again after you use them. However there’s 3 more silos just a bit more to the east in case you need.

5. Go back to Chromie, turn in [56] A Matter of Time and get the follow up [56] Counting Out time.

Now what you have to do is check destroyed houses in Andorhal and look for Small Lockboxes like this:

smalllockbox.jpg

Loot the Andorhal Watch from it. Keep doing this until you have 5 Andorhal Watches.
a59sk3.jpg

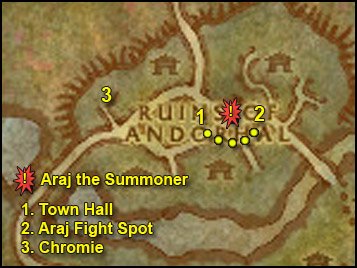
1. Go to the town hall (with a tower clock) which is in the middle of Andorhal, close to where Araj the Summoner is, you can sneak in the town hall without having to fight any of the bunch of mobs around it, just hug the walls.

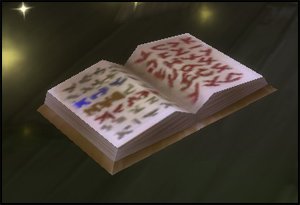
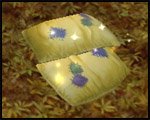
Inside the town hall you’ll find several “Musty Tome” lying on the floor. When you click one, there is a chance you will find the Annals of Darrowshire, but there is a higher chance that you will get a “Ruined Tome” and 1 or 2 level 57 mobs will attack you. They give no loot and no exp. Hoewever there is a trick to know which tome is the right one. There is a slight graphical difference. The pages of the fake tomes have two-tone colored pages, lightbrown and white, like this one:
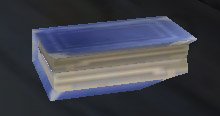
wrongtome.jpg

The good tome looks “newer”, and its pages only have one color tone, like this one:
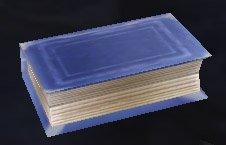
goodtome.jpg

You can easily see the difference if you zoom in 1st person view and put your mouse pointer over the books to highlight them. Loot the Annals of Darrowshire.

2. Time for a little challenge. Let’s solo Araj the Summoner. Here’s how:

Fight your way around Araj, so that you end up on the east side of him, like on the screenshot below.
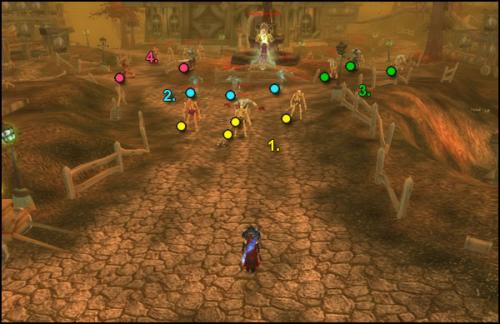
59sk0.jpg

We’ll pull from here, and you have to pull all the stuff I marked with a dot, because if you don’t, they’ll add when you attack Araj, and we want him solo.

  • 1. The first pull will be 4 mobs at least, some of them are Skeletal Acolytes, you need to kill those first because they heal. Pull one with Death Grip, use Strangulate on another so that he comes in your melee range. Icy Touch –> Plague Strike –> Pestilence –> Blood Boil –> Death Strike. Etc.
  • 2. Next, pull the 3 Spectral Attendants. This should be easy.
  • 3. North of Araj there should be a Skeletal Warlord and two ghouls. Pull those carefully, it should be an easy fight too.
  • 4. South of Araj should be 1 Skeletal Warlod and 1 Ghoul. Pull those and then you’ll only have Araj the Summoner left to kill.

Pull Araj from this spot, to make sure you don’t get jumped by respawns or by a patrol while fighting him:
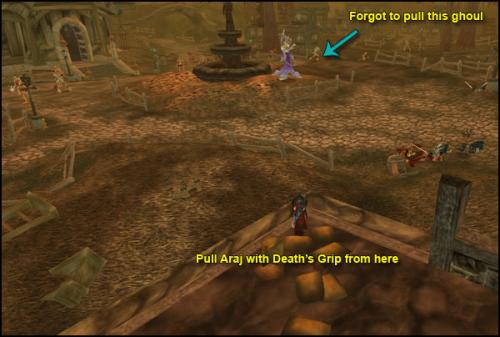
59sk1.jpg

As you can see on the screenshot, I forgot to pull one ghoul, it will add when I pull Araj. However, I managed because Death Knights are imba. Don’t do this at home though!

When you’re ready, pull Araj with Death Grip, then Strangulate him and pull him backwards a little more (to where I stand on the screenshot below), to be 100% safe from the respawns/patrols. Then just fight him normally, interrupt his spells with Mind Freeze and use Summon Gargoyle as soon as you have 100 Runic Power. You also have potions if things go wrong.
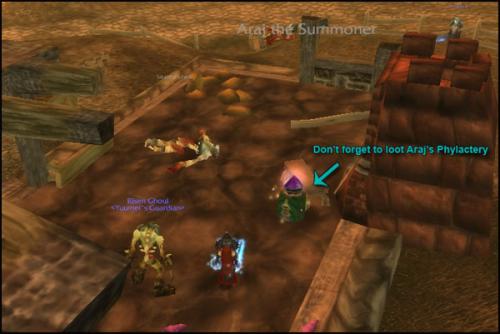
59sk2.jpg

Loot Araj’s Phylactery.

3. Go back to Chromie, turn in [56] Counting Out time. The Attuned Dampener you get as a reward is only useable on Araj the Summoner, so you don’t care about that, destroy it. Yes I’m evil and made you kill Araj without using this on him, but it really wasn’t necessary, was it? 😛

Turn in [56] The Annals of Darrowshire, get the follow up [56] Brother Carlin.

Now you should also have finished [57] Skeletal Fragments and be close to finish [60] Bonescythe Digs. Kill some more skeletons in Andorhal until you have 30 Bone Fragments.

Get out of Andorhal by the north gate, then go east till Thondroril River and ride north to Tirion Fordring (7,43).

Turn in:

  • [56] Demon Dogs
  • [56] Blood Tinged Skies
  • [56] Carion Grubbage

Get the follow up [56] Redemption.

Right-click Tirion and go through his text.
Turn in the quest and get the follow up [57] Of Forgotten Memories.

You should be level 60 by now.


Put your talent point in Unholy Blight.

Unholy Blight: Our ultimate. It’s basically extra AoE power, great for taking on multiple enemies. However, 60 Runic Power is a bit pricy, so it’s not worth casting Unholy Blight on easy fights (single target or two monsters only), simply because by the time you build up 60 Runic Power, one of your target will already be dead and the other one will follow quickly, and the majority of your Unholy Blight will be wasted while you run to the next monster. Use it only on big fights, 3+ mobs, preferably more. You can chain kill packs of 5,6 or 7 mobs now.

If you want to know how, check out my AoE tutorial videos:

How to AoE with a Death Knight


Mount up and go to the Eastern Plaguelands.
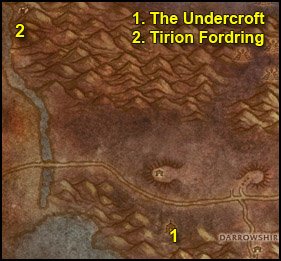
a59sk4.jpg

1. Go southeast to the Undercroft, which is directly south of the Marris Stead.

Behind the crypt in the Undercroft you’ll find Tiron Fordring’s Grave (28,86). Next to it should be a “Loose Dirt Mound”.

Click the dirt mount, Mercutio Filthgorger and 3 Dwarf Graverobbers will spawn. Kill them and loot Taelan’s Hammer.

Go inside the crypt (27,85), clear the way down, kill Zaeldarr the Outcast and loot his head.

In the same room look for a “Torn Scroll” on the floor, click it and get the quest [60] Hameya’s Plea.

2. Go back to Tiron Fordring, turn in [56] Of Forgotten Memories, get the follow up [58] Of Lost Honor.

Death Gate to Acherus. Visit your trainer, train Rune of LichbaneDeath and Decay and Plague Strike (Rank 2).


Rune of Lichbane: This will be great for our final circuits in the plaguelands, as there are plenty of undeads just waiting to be whacked. Go engrave it on your weapon (unless you bought a better enchant like Executioner). Also buy some Corpse Dust and sell junk while you’re up there.

Death and Decay: It’s an AoE skill, but it’s not as efficient as the Pestilence/Blood Boil/Death Strike combo. It’s main use is to build a lot of threat when you’re tanking several mobs.


Fly to Light’s Hope Chapel. Turn in:

  • [60] Bonescythe Digs
  • [56] Brother Carlin, get [57] Villains of Darrowshire and [56] Heroes of Darrowshire

Go south to Caretaker Alen and turn in [55] Zaeldarr the Outcast.

You should have the following quests at the moment:

  • [55] Defenders of Darrowshire
  • [56] Glyphed Oaken Branch
  • [56] Heroes of Darrowshire
  • [57] Villains of Darrowshire
  • [58] Of Lost Honor
  • [60] Hameya’s Plea
  • [60] The Restless Souls
  • [55] A Plague Upon Thee
  • [57] Skeletal Fragments
  • [60] Alas, Andorhal
  • [62] The Blightcaller Cometh
a59sk5.jpg

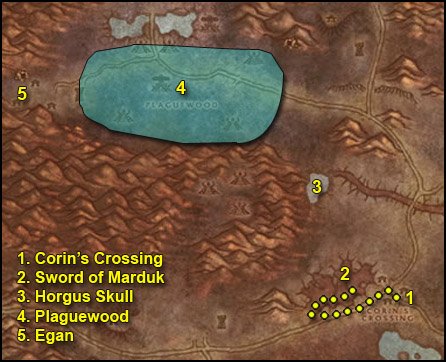
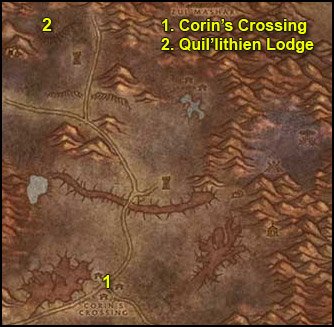
1. Ride west to Corin’s Crossing (57,60), kill all the Gibbering Ghouls you can find while going west through the town. Anytime you kill one of these ghouls, a Spirit of Darrowshire will appear, right-click it to free it. We’ll finish this quest later, so don’t wait on respawns, just clear through the town.

2. Go west to the Infectis scar by passing Corin’s crossing by the south side. Go down the Infectis Scar at (44,68), then go to (49,59) where you’ll find the “Shattered Sword of Marduk”, as marked on the map. It looks like this:

swordofmarduk.jpg

Loot it.

Get out of the Infectis scar the same way you came in.

3. Go north to Blackwood Lake (49,51). Take a dive, in the middle of the pool at the bottom you’ll see Ghosts of Darrowshire fighting each other, amongst them you should see a glowing violet skull named “Horgus Skull” (51,50), it looks like this:

horgusskull.jpg

Loot it.

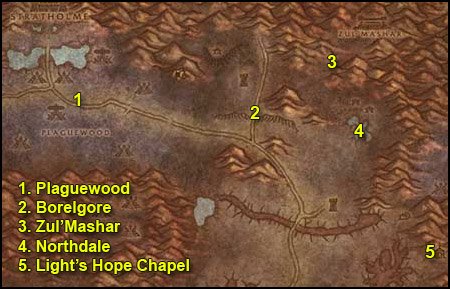
4. Go west to the Plaguewoods. In the plaguewoods look around for Large Termite Mounds and loot them.
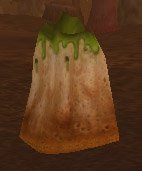
termitemound.jpg

While looking for those termite mounds, hunt for Cannibal Ghouls. Anytime you kill one of these, a Spirit of Darrowshire will appear, right-click it to free it. The Cannibal Ghouls are not so numerous though, so don’t stay here trying to finish the quest, we’ll kill more later.

Keep killing stuff in this area until you are done with [55] A Plague Upon Thee. If you have more than 100 Termites, destroy the extras.

5. Go west to Egan (11,29).

Turn in [60] The Restless Souls, don’t get the follow up.
Get the quest [55] Augustus’ Receipt Book from the other npc.

The book is very easy to find, just go a little east and enter the inn type building.
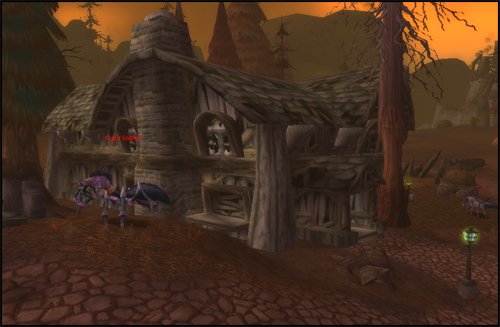
60sk0.jpg

The book is on the 2nd floor.

60sk1.jpg

Make sure you kill all the Cannibal Ghouls you find in the house and to free their spirit. You should also check the other house on the opposite side of the street, it probably has a couple of ghouls inside.

Once you got Augustus’s Receipt Book, go back to Augustus and turn in the quest.
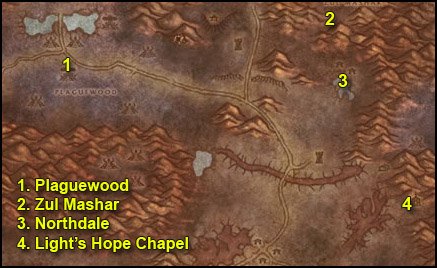
a59sk6.jpg

1. Go back to the Plaguewoods, kill Cannibal Ghouls until you finish [55] Defenders of Darrowshire while going east.

2. Go further east to Zul’Mashar (64,24).

Clear the way up the slope.

==Tip== Death Grip the scouts and Chains of Ice them, it prevents them from getting help, making this step much less annoying.

Keep clearing the way and you’ll soon face a big pyramid. At it’s base you should see some tombs with some trolls roaming about them. One of them is Infiltrator Hameya.

Pull him and kill him, then loot Hameya’s Key.

3. Clear your way out of Zul’Mashar then go southeast to Northdale, take a dive in the pool which is just south of Northdale. Clear the elementals in the way. At (71,33) underwater, next to a cage you should see a white flag with a blue runed on it named Symbol of Lost Honor:
losthonorsymbol.jpg

Loot it.

4. Ride southeast back to Light’s Hope Chapel.

Turn in:

  • [55] Defenders of Darrowshire
  • [57] Villains of Darrowshire

Ride west/southwest to the Undercroft. Right behind the crypt in the Undercroft you should find a “Mound of Dirt”. Not the one next to Tiron’s grave, the other one close to a charriot at (28,86).

Click it, turn in [60] Hameya’s Plea.

Ride northwest to Tirion Fordring, turn in [58] Of Lost Honor and get the follow up [58] Of Love and Family.

Go south and then west back into the Western Plaguelands.
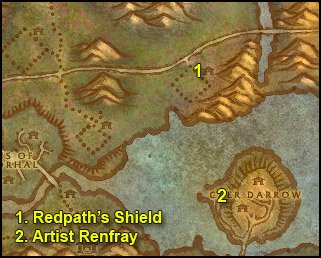
a59sk7.jpg

1. First make a stop at Gahrron’s Withering. There in front of the first building when you arrive from the north you’ll see a glowing shield looking like this:

Clear the mobs around it then loot the Redpath’s Shield.

2. Go south and swim to Caer Darrow Isle. On the western side of Caer Darrow, find Artist Renfray in a wooden house (65,75). Turn in [58] Of Love and Family, don’t get the follow up.

Swim west until you reach Sorrow Hill, then ride west to Chillwind Camp.

Turn in:

  • [57] Skeletal Fragments
  • [60] Alas, Andorhal
  • [55] A Plague Upon Thee, take the follow up [55] A Plague Upon Thee
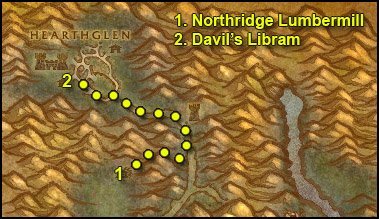
a59sk8.jpg

1. Ride north around Andorhal and then northeast to Northridge Lumber Camp.

Go straight to the lumber mill which is at the northeastern tip of the lumber camp.

Inside the lumber mill you should find a big crate named “Northridge Lumber Mill Crate”.

Click it and place the Termite Barrel on it. A barrel with green smoke should appear, click it and get the follow up [55] A Plague Upon Thee.

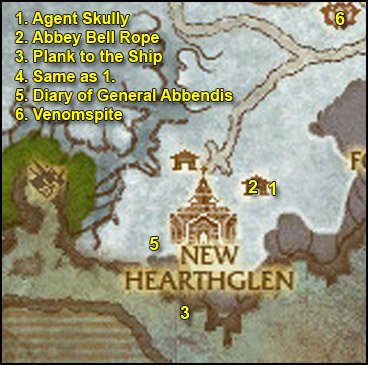
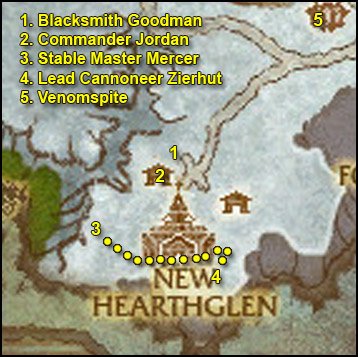
2. Mount up and ride to Hearthglen. Clear your way into the village until you see the townhall:

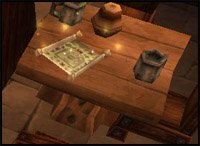
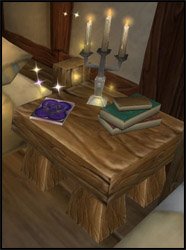
Clear your way inside and loot the Davil’s Libram from the table.

Death Gate back to Acherus.

Go to the top floor and engrave a Rune of Cinderglacier to your weapon.

Fly down to Light’s Hope Chapel. Turn in [56] Heroes of Darrowshire, don’t get the follow up.

Fly to Chillwind Camp, turn in [55] A Plague Upon Thee.

Hearthstone to Stormwind.

Go to Stormwind Keep and turn in [62] The Blightcaller Cometh at King Varian Wrynn, don’t take the follow up.

Ride to the Stormwind Harbor, go to the southern docks and take the boat to Auberdine in Darkshore.

Once in Auberdine, fly Rut’theran Village and then ride to Darnassus.

In Darnassus, find Mathrengyl Bearwalker in the Cenarion Enclave (35,8.5).

Turn in [56] Glyphed Oaken Branch.

You should be close to level 61 now.
WoW WotLK Classic Horde Death Knight 55-61 Leveling Guide

Get the quest [55] In Service Of The Lich King. I suggest to zoom out your minimap to the maximum, that way you’ll see the yellow “?” from far away on your minimap.

Go northwest to Instructor Razuvious, turn in the quest and get the follow up [55] The Emblazoned Runeblade.

Now look for glowing weapon rack like the one in the picture below:

55sk1.jpg

Right-click it to loot a Battle-worn Sword. Open your inventory and right-click the sword while standing next to a runeforge:

55sk2.jpg

Go back to Instructor Razuvious, turn in the quest and get the follow up [55] Runeforging: Preparation For Battle.

Go to the nearest runeforge, open your spellbook and click on runeforging:

55sk3.jpg

Engrave your weapon with a Rune of Cinderglacier.

Go back to Instructor Razuvious, turn in the quest and get the follow up [55] The Endless Hunger.

Now time for our first fight. It’s pretty straight forward, use your attacks in this order:


Icy Touch –> Plague Strike –> Blood Strike –> Blood Strike –> Icy Touch –> Plague Strike –> Death Coil –> Restart the cycle

If one of your abilities get dodged or misses, keep re-casting it until it works. Your target must always have both the Icy Touch and the Plague Strike disease on before you use Blood Strike on them, that way you get the maximum damage out of Blood Strike.


Go down in the pit, right-click an Acherus Soul Prison, wait for the Unworthy Initiate to become attackable and kill it.

Go back to Razuvious, turn in and get the follow up [55] The Eye Of Acherus.

Go to The Lich King, turn in and get the follow up [55] Death Comes From On High.

To the left and right of The Lich King you should find an Eye of Acherus Control Mechanism. Right-click it.

Your ability bar will be replaced by a new bar with the eye’s abilities.

After a short trip down, you’ll get control on the Eye of Acherus. First, rise higher in the air to be out of firing range of any scarlet mob and then use Ability #3 to become invisible.

After that, find the first location we’re going to analyze: the New Avalon Forge.

55sk4.jpg

Very easy to spot thanks to the red arrow floating over it.

Use Ability #2 and try to target as many scarlet npcs as you can. This will summon ghouls on each of them to distract them while you use Ability #1 to analyze the building.

When done, rise up in the air and go invisible again. If the Eye of Acherus is low on health, you can wait a little for his HPs to regen.

On to the next building, just south of the forge, you’ll find The Scarlet Hold. Apply the same strategy.

Directly west you’ll find the New Avalon Town Hall, analyze it:

55sk5.jpg

Finally go directly south and you’ll find the Chapel of the Crimson Flame:

55sk6.jpg

Analyze it and the quest should be complete.

Use Ability #5 and you’ll be back to your character. Turn in the quest, get the follow up [55] The Might of the Scourge.

A few paces behind The Lich King you’ll find a glowing pink teleporter. Step on it and you’ll be teleported to another floor.

Go northwest to Highlord Darion Mograine, turn in the quest and get the follow up [55] Report To Scourge Commander Thalanor.

Equip your new necklaceBladed Ebon Amulet

Further northwest is another quest called [55] The Power of Blood, Frost and Unholy, complete it immediately.

Go back to the balcony (not the teleporter) and turn in the quest at Scourge Commander Thalanor. Get the follow up [55] The Scarlet Harvest.

Right-click one of the Scourge Gryphons and fly down to Death’s Breach.

Go a few paces south and turn in the quest at Prince Valanar, get the follow up [55] If Chaos Drives, Let Suffering Hold The Reins.

3 other quests should have appeared on your minimap now, get them all.

First thing, we’re gonna look around the camp for Death Knight Initiates:

55sk7.jpg

Right-click them, challenge them to a duel and defeat them. You can also challenge other players, but that’s more difficult. Repeat this 5 times. Use the food you have in your inventory if you’re low HP after a duel.

When done, go turn in [55] Death’s Challenge. You’ll get one talent point to spend as a reward. We’ll only put our points in the Unholy tree for now.


Spend your first talent point in Morbidity.


Time to kill stuff, finally!

sk55circuit1.jpg

1. Go south down the path and then southeast towards the yellow “!” on your minimap while killing everything on the way and also picking up Saronite Arrows.

55sk8.jpg

When you get to the yellow “!“, you’ll be infront of a mailbox with a scroll on top.

55sk9.jpg

Right-click the scroll and complete the quest. You can then open the mailbox and get a book from it. It’s just lore though, you can read it if you want. I personally read it quickly and destroyed it, it can’t be sold.

After that go back to killing stuff and looting Sardonite Arrows until you finish both quests.

2. Once done, go to the stables, which are located on the northeastern part of the field.

Go to the nearest horse you can find and right-click it to mount it, then go back to Death’s Breach, you can use the horse’s Ability #2 to gallop.

3. Go to Salanar the Horseman, he stands right in the middle of Death’s Breach, then use the horse’s Ability #1 to deliver it to Salanar.

Turn in [55] Grand Theft Palomino and get the follow up [55] Into the Realm of Shadows.


Put your new talent point in Morbidity.


You’ll be in the shadow world after accepting this quest. Go down back in the fields and look for a Dark Rider of Acherus, kill it and then right-click his horse.

Ride back to Death’s Breach and once there, use Ability #1, Horseman’s Call. A few seconds later you’ll be back in the normal world.

unmounticon.jpg Click on the “Leave Vehicle” button, go to Salanar the Horseman and turn in the quest.

You can now summon your own Deathcharger. To do that, open the character window (“c” key), go to the Pets tab, drag the Acherus Deathcharger icon on a free action bar slot. Click it and voila!

Turn in:

  • [55] If Chaos Drives, Let Suffering Hold The Reins
  • [55] Tonight We Dine in Havenshire

It doesn’t matter which cloak you pick, I personally like the one with frost resistance, because it fits the rest of the equipment better.

Get the quest [55] Gothik the Harvester from Prince Valanar. Go to Gothik the Harvester and turn in the quest, get the follow up [55] The Gift That Keeps On Giving.

You should be level 56. Equip your newly acquired items:

CloakShroud of the North Wind
RelicSigil of the Dark Rider
RingValanar’s Signet Ring


Spend your talent points as follows:


Level 56

sk55circuit2.jpg

1. This time go down the path north then east and enter the Havenshire Mine (58,31).

56sk0.jpg Search your inventory for the Gift of the Havester and put it on a hotbar.

Use the Gift of the Harvester on Scarlet Miners. Repeat this step until you have 5 ghouls under your control.

Go back to Gothik the Harvester, turn in the quest and get the follow up [55] An Attack Of Opportunity.

Equip your new trinketSoul Harvester’s Charm


Put your talent point in Ravenous Dead.


2. Go to Prince Valanar, turn in the quest and get the follow up [55] Massacre at Light’s Point. Now comes a fun quest, I suggest reading the rest of point 2. before proceeding.

Outside of Havenshire Mine you’ll find an Inconspicuous Mine Car.

56sk1.jpg

When you right-click it, you’ll be taken to a ship and will be facing 3 Scarlet Cannons.

56sk2.jpg

If you right-click one of them, you’ll take control of it and will this window will appear instead of your hotbars:

56sk3.jpg

Ability #1 is your main ability, chain use it to kill as many Scarlet NPCs as you can. To aim, hold your mouse right-click button and move your mouse.

Ability #2 is to protect you. Whenever a few Scarlet NPCs make it close to you, use ability #2 to repell them.

Ability #5 is to escape. Use it once you’ve killed 100 Scarlet Defenders.

==TIP== Aim for the bridge leading to the ship every 2 or 3 shot to prevent them to get to you. If they do, there’s still Ability #2 anyway.

3. You should be more than ready now, go right-click the Inconspicuous Mine Car and have fun!

4. Go back to Prince Valanar, turn in [55] Massacre at Light’s Point, get the follow up [55] Victory At Death’s Breach!

Right-click on a Scourge Gryphon to fly back to Acherus.

Go to Highlord Darion Mograine, turn in and get the follow up [55] The Will Of The Lich King.

Equip your new items:


Spend talent points as follows:


Go to Lord Thorval (in the room just northwest of Mograine) and train your new skills:

Pestilence, Death Strike and Raise Dead.


Now things are starting to get interesting.

Raise Dead: Not much to explain, it summons a ghoul who fights for you. It’s great, the ghoul can take quite a lot of pain and deals a decent amount too.

Pestilence: this skill is very useful when fighting multiple enemies. Whenever you fight several enemies at the same time, choose a target and do this:

Icy Touch –> Plague Strike –> Pestilence

This will spread all the diseases to other nearby enemies, as long as they are close enough (about 20 yards).

Death Strike: Incredibly good skill. You’re gonna be much harder to kill from now on. The damage you do with it heals you once for each disease on your target. Needless to say, it’s better to use it after having diseased your target with Icy Touch and Plague Strike.

So from now on your attack cycle should look like this:

Icy Touch –> Plague Strike –> Death Strike –> Blood Strike –> Blood Strike –> Death Coil –> Death Strike –> Death Strike –> Blood Strike –> Blood Strike –> Death Coil –> Restart cycle

It might seem complicated, but it’s actually not. You’ll see that this rotation makes perfect sense as it uses all your cooldowns whenever they are up. You can try it on the practice dummies in Death’s Breach, close to the gryphon landing site. Of course, your enemies will die before you finish the full cycle most of the time, but that’s ok. Just try to get used to this, because dps cycles are a big part of the Death Knight class, and being able to perform them well will determine if you’re a good DK or a mediocre DK.


Go back to the Balcony and take a Gryphon ride down. Go to Prince Valanar, he’s at a new location closer to the cliff.

Turn in and get the follow up [55] The Crypt of Remembrance.

Go sell and repair at Hargus the Gimp (53,35), a few steps infront of Prince Valanar . Also buy some Corpse Dust from him (about 5), this will allow you to summon a ghoul even when there’s no corpse available.

sk55circuit3.jpg

1. Mount up, ride south/southeast to Noth the Plaguebringer (56,52). Take his quest [55] The Plaguebringer’s Request.

2. You should see a yellow “?” on your minimap southwest of where you are. Go there, enter the Crypt of Rememberance (54,58) and turn in the quest.

Get [55] Nowhere To Run And Nowhere To Hide and [55] Lambs To The Slaughter.

3. Get out of the crypt and go southeast to New Avalon.

Kill everything on your way from now on. On your left-hand side after entering you should see a big building, the New Avalon Inn (58,65).

Go inside and go down to the basement cellar where you’ll find an Empty Cauldron, loot it.

56sk4.jpg

4. Northeast of the inn you’ll find the New Avalon Forge (61,61).

Enter the building and loot an Iron Chain.

56sk5.jpg

5. Mount up and ride southwest to the New Avalon Town Hall, a big building with a clock tower (53,71).

Go inside the Town Hall, kill Mayor Quimby and loot the New Avalon Registry.

56sk6.jpg

Now just go out and kill stuff until you finish [55] Lambs To The Slaughter. You’ll find all the Citizens you need right outside the town hall (have some fun with pestilence).

Mount up and ride out of New Avalon.

First stop by Noth the Plaguebringer, turn in and get the follow up [55] Noth’s Special Brew.

Go to the cauldron next to him and turn in the quest to get 5 of those cool potions. Feel free to overuse them, we’ll get a lot more later on. You should put them on a hotbar, ready for use, just in case (but to tell you the truth, you won’t be needing them much unless you’re suicidal :P).

Go to the Crypt of Rememberance and turn in both quests, get the follow up [55] How To Win Friends And Influence Enemies

Equip your new items:


Spend your talent points as follows:

==Note== On a Pale Horse is a great talent. You have to realize that until level 77 in Northrend, you won’t be able to use a flying mount while leveling, so you will stick to ground mounts for 21 more levels starting from now. Now imagine how much time you’re going to save with this 20% extra mount speed. A very significant amount, trust me 😛 The fear and stun 20% reduction is also a nice bonus.


sk55circuit4.jpg

1. Go back in New Avalon, to the Scarlet Hold, it’s that big casern on the east side of New Avalon. When there, open the Ornately Jeweled Box in your inventory and equip the two One-Handed Swords. Then just start attacking people in there until one of them tells you what you want to know.

2. Go back to the Crypt of Rememberance, turn in and get the follow up [55] Behind Scarlet Lines.

Equip your new ring (instead of the green one of course): Keleseth’s Signet Ring


Spend your talent points as follows:


3. Get out, mount up and ride a long way south to the Scarlet Tavern (56,80). Go to the upper floor and turn in, get the follow up [55] The Path Of The Righteous Crusader. Also get the other quest [55] Brothers in Death and get out of this building.

4. Ride northeast to the Scarlet Hold. Clear the way up to the upper floor and go to the central main room.

On a table there you’ll find the New Avalon Patrol Schedule.

56sk7.jpg

Loot it.

After that, go down all the way to the cellar basement, where you will find Koltira Deathweaver. Turn in your quest, but before you get the follow up, read the next few lines.

Koltira will create an anti-magic barrier, you must fight inside it as much as possible to reduce the damage you’ll take from the acolytes. You can pull them inside with Death Grip as well. After about 2 minutes, High Inquisitor Valroth will come. Pull him inside the barrier with Death Grip and kill him. Mission accomplished. Don’t forget you have potions if things go wrong.

You’re more than ready now, so get the follow up [55] Bloody Breakout and protect Koltira. It doesn’t matter if you die, you’ll get resurected, but Koltira must survive.

Once Valroth is dead, his remains will appear on the floor:

56sk8.jpg

Right-click them to loot Valroth’s Head.

5. Go back to the Scarlet Tavern. Turn in both quests, get the follow up [55] A Cry For Vengeance!

Equip your new items:

You should be level 57 by now.

Level 57


Spend your talent points as follows:

==Note== You just became godlike. The biggest upgrade here is Master of Ghouls. Now you’ll always have a ghoul fighting for you, until it dies. And if it dies, just re-summon it. You’ll also be able to control your ghoul from now on and will get a pet bar:

ghoulpetbar.jpg

Controlling your ghoul properly will be a nice advantage for you in the future. Here are a few tips to get the most out of your ghoul.

Ghoul Control Tips:

  1. Use Key bindings. The default keybindings are CTRL-1, CTRL-2, etc. I personally prefer to change them to SHIFT-1, SHIFT-2, etc, because I find reaching for CTRL plus a number is uncomfortable. That’s up to you, you can bind any key you like for your pet bar. If you want to change your pet bar key bindings, go to options > key bindings and change your Secondary Action Button 1, 2, 3, etc.Only 4 buttons are very important to bind anyway: Attack, Follow, Gnaw and Huddle.Gnaw is your pet’s stun, it’s great to interrupt spells and also to stop things from running. Use it smartly.
    Huddle is a defensive boost for 10 seconds, use it to preserve your ghoul’s health when he’s taking a lot of damage.
  2. Level your First Aid skill. It might not be very useful for now, but you’ll see in the future, when you solo difficult elites for certain quests, your ghoul will need healing after the fights, and trust me, Death Coil isn’t always enough. So instead, bandage your ghoul! Anyway, leveling first aid also gives you achievement points, so might as well get it done

Summon Gargoyle:

An amazing skill. It’s a big dps burst, which can last a total of 1 minute if you provide enough runic power. Here are a few tips:

  1. Build up 100 Runic power before activating this skill
  2. Don’t even think about using Death Coil while your gargoyle is up. If your runic power goes down to zero, your gargoyle despawns
  3. Use it at the right time, like when about to fight an elite, it’s kind of a waste in most other cases

Dirge:

Thanks to dirge, you’ll get more runic power now, that means you’ll have to try to squish in some extra death coils in your attack cycles. If you pay attention to your cooldowns, you’ll see there’s often room for an extra death coil here and there during your cycles.


sk55circuit5.jpg

1. Go southwest to the Chapel of the Crimson Flame (53,81). Find Knight Commander Plaguefist, turn in and get the follow up [55] A Cry For Vengeance!

Go inside the long house and find the NPC corresponding to your race. (If you’re orc, find the orc called Kug Ironjaw. If you are Troll, find the troll called Iggy Darktusk, etc.)

Watch that NPC make his speech and you’ll have to kill it at the end. Put your ghoul on passive mode, because you won’t get the kill credit if the ghoul does more damage than you.

Go back to Knight Commander Plaguefist, turn in and get the follow up [55] A Sort of Homecoming.

2. Go back to the Scarlet Tavern, turn in [55] A Sort of Homecoming and get [55] Ambush at the Overlook.

Equip your new trinket (instead of the Insignia of the Scourge): Signet of the Dark Brotherhood


Spend your talent points as follows:

Reaping: This converts your blood runes into death runes when you use Blood Strike or Blood Boil (which we’ll get soon). A Death Rune is a universal rune, it counts as any type of rune. Why is that good? For many reasons. It allows you to have more flexibility in your cycles. It allows you for example to re-cast your Bone Shield in fight without messing up your Death Strike cycles. Or better, if you convert both your blood runes into death runes, you’ll then be able to use Death Strike 3 times in a row, and that’s great when you’re having a tough fight and need a lot of lifedrain. Later on, you’ll be using Scourge Strike instead of Death Strike most of the time, and you’ll understand how valuable reaping is, because Scourge Strike is the kind of ability you want to spam as often as possible 😉


3. Mount up and ride east to the Scarlet Overlook (62,77).

Find a clear spot near the path.

56sk9.jpg Look for a Makeshift Cover in your inventory

Right-click it, the Scarlet Courrier will appear, kill it and loot everything he has.

Go back to the Scarlet Tavern, turn in and get [55] A Meeting With Fate.

4. You should now be disguised as a Scarlet Courrier. Get out, mount up and ride to the Scarlet Overlook.

This time take the path south leading down to King’s Harbor, where you will find High General Abbendis (65,84).

Turn in and get [55] The Scarlet Onslaught Emerges.

5. Go back to the Scarlet Tavern, turn in the quest, but before your get the follow up, read the following paragraph.


You should have 4 talent points now, spend them as follows:


==Optional== Before going back to turn in this quest, I recommend killing some more Scarlet NPCs to get Crusader Skulls, which we you can turn in at the cauldron for extra health potions. 20 Crusader Skulls = 5 Potions, and you can carry a maximum of 20 potions. I personally farm 60 Skulls, and then I get out of this place with 20 Potions (including the 5 we got from quest earlier). The fastest way to get skulls is to kill the citizens outside of the town hall, it’s even easier if you put your ghoul on aggressive mode. However those don’t give exp, so you might want to kill other things, it will just take longer. After you have 60 skulls be sure to go back to the cauldron to turn in and get your 20 Potions *BEFORE* going back to the Scarlet Tavern. If you return to Acherus without turning the skulls in there is no way to turn them in later.

Got your 20 potions? Let’s move on then, go back to the Scarlet Tavern.

Get the follow up [55] Scarlet Armies Approach… Orbaz Bloodbane will then open a portal for you, take it and you’ll be back in Acherus.

Go to Highlord Darion Mograine, turn in and get [55] The Scarlet Apocalypse.

Equip your new pauldronsBlood-soaked Saronite Plated Spaulders

Don’t worry about talents for now, we are not gonna fight for a while.

Go see your trainer, buy Frost Presence and Mind Freeze. Don’t waste money on the rest, Rune of Spellbreaking/Shattering is not useful to us at this point. Of course, if you’re rich, feel free to buy those skills anyway.


Frost Presence: That’s the tanking stance, pretty much like the defensive stance of warriors. We won’t use it much in this guide, it’s mostly for tanking in instances. However, it’s also useful when you’re running away from something, as it increases your armor and spell mitigation, making you much much more survivable. Other than that, stay in blood stance.

Mind Freeze: Our first spell interruption (well argueably the second, because you can interrupt spells with Death Grip too, but that’s not its main purpose). It doesn’t trigger the global cooldown, which is great, because that means you can cast it at any moment without disrupting your attack rotations.

Anyway, enough talking, let’s get back to business.


Take a gryphon ride back to Death’s Breach. Go talk to The Lich King, get the follow up [55] An End to All Things.

57sk0.jpg Look in your inventory for a Horn of the Frostbrood.

Right-click it. You’ll climb on a Frostwyrm and your action bars will be replaced by this:

57sk1.jpg
  • Ability #1 is your attack. It’s just like with the canon we used before, aim by holding your mouse right-click button.
  • Ability #2 is to refill the Wyrm’s mana. Should you need to do that, go find a lone Scarlet Defender and use it on him (have to be within 15 yards range).

You need to kill 150 Scarlet Soldiers (a piece of cake) and to destroy 10 Ballistas. The ballistas are a little more tricky, because their javelins kinda hurt so you must dodge them.

It’s quite straight forward though, you simply have to strafe to the left or to the right every time after you shoot, and the javelin will miss you. Like on the screenshot below:

57sk2.jpg

Basically it goes like this: Shoot –> Strafe left –> Shoot –> Strafe Right –> Repeat till ballista is destroyed.

For the 150 Scarlet Soldiers, go behind the walls of New Avalon, you’ll find big packs of them.

When done with that, fly back to The Lich King.

unmounticon.jpg Click on the “Leave Vehicle” button and turn in the quest, get the follow up [55] The Lich King’s Command.

Equip your new helmGreathelm of the Scourge Champion


Spend your talent points as follows:

You are now officially unkillable.

Bone Shield: A great ability for just 1 Unholy Rune. Re-cast it after every fight if possible. Not only will you take less damage, but you’ll also do more while having this shield on.

Desecration: +5% damage and slows down enemies around you, which is great to escape if things go wrong. We mostly take it for the 5% damage boost.

Scourge Strike: Rejoice. Expect a big improvement in your damage output. This replaces Death Strike in your usual rotation. Only use Death Strike when you need healing.


sk55circuit6.jpg

1. Mount up, go northwest through a tunnel, you’ll then be in the Noxious Glade (Eastern Plaguelands).

2. Go west and take the path going down at (40,20), all the way to Browman Mill, where you’ll find Scourge Commander Thalanor (34,30). Turn in and get the follow up [55] The Light of Dawn.

Now all you have to do is take part in a cool event, follow Highlord Darion Mograine and fight with him. You don’t actually have to fight, but I recommend doing it for fun, because you get a buff which makes you almost invincible and also makes you hit like a truck. Don’t be too reckless though, only attack the Defenders of the Light there, avoid the named NPCs such as Korfax, Duke Zverenhoff, etc.

At the end of the script, you can turn in your quest at Highlord Darion Mograine. Choose Sword or Axe, it doesn’t matter (pick axe if your race is Orc though).

Get the follow up [55] Taking Back Acherus.

Open your spell book and cast Death Gate (Unholy). Click the gate to be teleported back to Acherus. I suggest not lingering here too long, because the script will reset soon and all those imba argent dawn NPCs will soon be back to agressive mode and make quick work of you 😛

After teleporting, turn in your quest and get the follow up [55] The Battle For The Ebon Hold.

Equip your new weapon if you haven’t done that already.


Spend your new talent points as follows:


Take the pink teleporter up, kill 10 Scourge and help killing Patchwerk.

Take the teleporter back, turn in the quest at Mograine and get the follow up [55] Warchief’s Blessing.

Behind Mograine to the left you should see a portal to Orgrimmar, take it.

In Orgrimmar, run (yes, you can’t use your mount here for now) to Thrall in the Valley of Wisdom.

Turn in the quest [55] Warchief’s Blessing. Now you can mount and people will stop throwing bananas at you.

1. Visit the auction house, make space in your bags. Also get some better bags, because the 12-slot bags are gonna be a bother in the long run. However, if you’re low on cash, you must at least keep 3gold 50silver to buy your new skills.

You should be level 58 by now.

Level 58

Death Gate back to Acherus. Visit one of the trainers, get Blood Boil and Chains of Ice.


Chains of Ice: A very useful skill to prevent enemies from running away. Can also be used to kite or to escape.

Blood Boil: This will basically replace blood strike when taking on multiple targets.

So from now on, against multiple enemies, your dps cycle will be:

Icy Touch –> Plague Strike –> Pestilence –> Blood Boil –> Death Strike –> Death Coil –> Death Strike –> Blood Boil –> Blood Boil –> Death Strike –> Death Coil –> Death Strike –> Blood Boil –> Blood Boil –> Stuff should be dead.

Spend you talent point as follows:


Take the pink teleporter up. Go to a runeforge and engrave a Rune of Cinderglacier to your weapon. Also buy some Corpse Dust while you’re here.

Take the teleporter back down.

Fly to The Undercity.

Go to the Apothecarium and pay a visit to Lady Sylvanas. get the quest [56]The Champion of the Banshee Queen.

hs.jpg Go to the innkeeper and make The Undercity your home location.

Ride out of the Undercity, follow the road east until you find the Bulwark (83,68).

Get the quest Argent Dawn Commission and turn it in instantly. You’ll get an Argent Dawn Commission. When you kill undeads while having this trinket equiped, you can collect Scourgestones from their bodies. This helps you to gain reputation with the Argent Dawn.

This faction is really old though so there’s no interesting reward for you. I suggest destroying the trinket (you can get another one at any time in the future anyway).

Get [53]Scarlet Diversions from High Executor Derrington.

Right-click the Box of Incendiaries next to him and loot the Flame in a Bottle.

Get [58]The So-Called Mark of the Lightbringer from Mehlar Dawnblade. Don’t get the other quests.

1. Ride east along the road and then north to the Scarlet Campment – northeast of Felstone Field – at (41,54). Clear the camp and then right-click on the Command Tent and once it is destroyed right-click the Scourge Banner from your inventory.

2. Ride back to the Bulwark, turn in the quest [53]Scarlet Diversions, get the two follow up [53] The Scourge Cauldrons and [56] All Along the Watchtowers.
Turn it in at Shadow Priestess Vandis and get the follow up [53]Target: Felstone Field.

3. Go east to Felstone Field (37,58). Clear yourself a path to the Cauldron in the middle of the field, when you get close, Cauldron Lord Bilemaw will spawn, kill it and loot the Felstone Field Cauldron Key from him, then go to the cauldron and click it, turn in the quest and get the follow up [53]Return to the Bulwark.

In the Felstone Field, go to the houses on the north side of the field, enter the one which is the most to the west (37,54).

On the 2nd floor of the house you’ll find Janice Felstone, get the quest [52]Better Late than Never. (It’s marked as low level so no exclamation mark)

Go to the next house which (38,55) and find Janice’s Parcel inside it. Click it, turn in the quest, then click it again and get the follow up [52]Better Late than Never. (As the quest is marked as low level, you’ll have to click the box twice.)

4. Ride back to the Bulwark, turn in [53]Return to the Bulwark and get the follow up [55]Target: Dalson’s Tears.

5. Ride east to Dalson’Tears (45,52), it’s the field directly east of Felstone Field. Clear yourself a path to the Scourge Cauldron, when you get close Cauldron Lord Malvinious will spawn, kill it and loot his key, go to the Cauldron and click it, turn in the quest and get the follow up [55] Return to the Bulwark.

Go to the houses on the north side of Dalson’s Tears, enter the right one (47,51). Clear what’s inside and look on the floor for Mrs. Dalson’s Diary, get the quest and complete it.

Get out of the barn and look around for a Wandering Skeleton, there is only one of this kind and he roams around the barn, so keep killing stuff around the barn until you find it, kill it and loot “Dalson Outhouse Key“. Go behind the barn, you’ll find an Outhouse (48,49). Open it, kill Farmer Dalson, loot Dalson Cabinet Key.

Go to the other house now (47,50), on the 2nd floor of it you’ll find a “Locked Cabinet“, click it and turn in the quest.

6. Get out of Dalson’s Tears and go southwest to the Ruins of Andorhal. In Andorhal try to avoid the roads as much as possible, as level 56 elite abominations roam them. So just clear yourself a path through the destroyed houses. Also avoid the center of the town of course, there’s a huge bunch of mobs there and Araj the Summoner (lvl 61 elite).

7. Clear yourself a path to the first tower you see on your right-hand side (42,66). Look for the “beacon torch” in your inventory and click it while standing next to the tower’s door. You should get the message “Tower Two Marked“.

8. Go southwest to the next tower (40,71). Place the beacon and you should get the message “Tower One Marked

9. Go southeast and then east – avoid the center of the town – till you find the next tower (47,71). Place the beacon torch and you should get the message “Tower Four Marked“.

10. Go north and then northwest to the last tower (45,64), place the beacon torch and you should get the quest message “Tower Three Marked“.

11. Get out of Andorhal and ride back to the Bulwark.

  • Turn in [56]All Along the Watchtowers, get the follow ups [55]Scholomance and [60] Alas, Andorhal.
  • Turn in [55]Scholomance at Apothecary Dithers and get the follow up [57]Skeletal Fragments.
  • Turn in [55]Return to the Bulwark and get the follow up [55]Target: Writhing Haunt.

1. Ride east and then south to the Writhing Haunt (52,66). Clear a path to the Scourge Cauldron, when you get close to it, Cauldron Lord Razarch will spawn, kill it and loot the key. Clear what’s around the Cauldron and go click it, turn in the quest and get the follow up [55]Return to the Bulwark.

Directly north of the cauldron in a small house you should find a tauren lying down on the floor, Mulgris Deepriver. Get his quest [54]The Wildlife Suffers Too.

**From now on kill any diseased wolf you find on your way until you have completed [54]The Wildlife Suffers Too**

2. Go north/northwest to an area just north of Dalson’s Tears (45,40), where you will find plenty of wolves to complete the quest. Kill everything in this area until you have 8 Diseased Wolf Kills. Also note that the spiders in this area are placeholders for wolves, so you have to kill spiders too if you need more wolves. If needed, you can go grind on the Scarlet Lumberjacks just north of this spot while waiting for the wolves to respawn.

3. Go north to the Northridge Lumbermill, when you are next to the lumbermill, go northeast of it, follow a trail going down to a destroyed wagon. You’ll find Kirsta Deepshadow there (51,28), get the quest [56] Unfinished Business.

4. You can find the Scarlet Knights and Mages you need to kill for the quest just southeast of Kirsta, on the road to Hearthglen.

5. For the Hunters and Medics go to the camp further south(51,44).

6. When you completed the kill list, go back to Kirsta and turn in [56] Unfinished Business, get the follow up.

7. Go back on the road just east of Kirsta.
At (54,34) the road forks off to the left and right. Go right and up the slope you will find Huntsman Radley (57,35). She can be pulled solo if you do it at the right moment, just wait for the mage next to her to move far enough.

8. Get back on the main road and this time at the fork go north, keep going north until you hit the watch tower (53,24). Kill the 2 guards infront of it, clear the 1st floor of the tower carefully, then wait for Cavalier Durgen to show up. He goes to the top of the tower then walks back to the entrance. Wait for him to come down, you can’t kill him when he’s on top, he has 3 guards with him there.

After killing Durgen, clear the way to the top of the tower and prepare for a tough fight: there are 3 scarlet mages on top of the tower, you can actually pull just 1 or 2 if you take your time and body pull carefully. Anyway, make sure you got all your cooldowns ready for this fight. After you have cleared the top of the tower, you should find a Holy Coffer, right-click it and loot the Mark of the Lightbringer.

CAREFUL: Sometimes there is a high-level rare elite on top of the tower in addition to the above mentioned mobs.

9. Go directly back to where Kirsta is by going southwest and jumping down in the crater where she is. Turn in the quest [57] Unfinished Business, get the follow up.

10. Mount up and ride to Hearthglen (46,18).
Clear the way to the tower (45,18). Go to the top of the tower and you’ll get a quest complete message.

Ride back to Kirsta Deepshadow, turn in [58] Unfinished Business.

Hearthstone to the Undercity.
Right after warping to the Undercity you should see a yellow question mark on your minimap labelled as “Royal Overseer Bauhaus”.

Go to him and turn in the quest [52]Better Late than Never, get the follow up [52]The Jeremiah Blues. You can turn this quest just a few steps away, under the stairs leading to the bank. Get the follow up get the follow up [52]Good Luck Charm.

==Note== You should have a few Bone Fragments in your inventory, don’t sell them, we’ll need them for a quest later on.

Sell junk and repair.

Ride out of the Undercity and back to the Bulwark.

  • Turn in [55]Return to the Bulwark, get the follow up [58]Target: Gahron’s Withering.
  • Turn in [58]The So-Called Mark of the Lightbringer, get the follow up [58]Defiling Uther’s Tomb.

1. Ride to Uther’s Tomb (52,81). Uther’s Tomb is guarded by a level 58 elf npc, pvp flagged. If you attack it you’ll be pvp flagged, if you don’t want that you can just wait for him to do his patrol behind the statue. Equip the Corrupted Mark of the Lightbringer in your off-hand slot and wait for the 30 second cooldown, get close to the statue and right-click the Corrupted Mark of the Lightbringer directly from your off-hand slot.

2. Go back the way you came from to the Bulwark. Turn in [58]Defiling Uther’s Tomb.

3. Go east to the Felstone Field, go into the left house (38,54) on the 2nd Floor. Turn in the quest [52] Good Luck Charm at Janice Felstone and get the follow up [54] Two Halves Become One.

Get out of the house and look for a Jabbering Ghoul.

a50img7.jpg

This ghoul patrols all over the field. So just keep the area clean until it spawns, especially the Scarlet Patrol, as they might kill the Jabbering Ghoul before you even see it.

Once you find the Jabbering ghoul, kill it and it will drop a “Good Luck Other-Half-Charm”.

Once you have the other half charm, go back to Janice Felstone, right click on the other-half-charm in your inventory. Turn in the quest.

4. Get back on the road and ride east, then go southeast to the Writhing Haunt. Clear the way to the house with the tauren lying down on the floor, turn in [54]The Wildlife Suffers Too, get the follow up [56]The Wildlife Suffers Too.

**From now on kill any Diseased Grizzly you see until you have killed 8 (at 54,48 you’ll find a lot of them)**

5. Go northeast to Gahron’s Withering (62,57). Clear a path to the Scourge Cauldron, when you get close Cauldron Lord Soulwrath will, appear, kill it. He’s harder than the other cauldron lords, he knockbacks and silences, so be careful where you fight him. Loot his key then go to the Cauldron, turn in the quest and get the follow up [58] Return to the Bulwark.

6. Go to the area which is in between Garon’s Withering and the Writhing Haunt. There should be plenty of bears there. Kill everything in this area until you have 8 Diseased Grizzly Kills, then go turn in [56]The Wildlife Suffers Too at the Writhing Haunt. Get the follow up [56]Glyphed Oaken Branch.

7. Ride east until you hit Thondroril River, go north along the river bank, then cross the river so you are on the eastern bank and ride north until you find a house. In front of it you’ll see Tirion Fordring, get his 3 quests:

  • [56] Demon Dogs
  • [56] Blood Tinged Skies
  • [56] Carrion Grubbage

**From now on, kill on sight the following mobs**

  • Plaguehound Runt
  • Plaguebat
  • Carrion Worm – loot Slabs of Carrion Meat from them

8. Go south along the river and then east into Eastern Plaguelands.

hdk58img2.jpg

1. Go southeast while killing everything on the way. Find the Marry’s Stead. You should find Nathanos Blightcaller there (27,75). Turn in [56]The Champion of the Banshee Queen. Get the follow ups:

  • [58]To Kill With Purpose
  • [58]Un-Life’s Little Annoyances
  • [60]The Ranger Lord’s Behest

**Add the following two mobs to your kill-on-sight list**

  • Noxious Plaguebat
  • Monstrous Plaguebat

2. Go southeast to Darrowshire, keep killing everything on sight that you need for quests, there should be plenty.

Inside Darrowshire, find a small destroyed house on the western side of Darrowshire. You should find Pamela Redpath there.

Get the quest [55] Pamela’s Doll.

Now you must find the 3 parts of pamela’s doll, they can be in any of the other houses in Darrowshire, mostly on the 2nd floor of it. Look on the floor for some brown object. Everytime you get close to one of the doll parts, a level 55 ghost spawns and attack you.

Once you have Pamela’s Doll’s Left Side, Right Side and Head. Right click them in your inventory to combine them. Go to Pamela and turn in the quest. Get the two follow up quests:

  • [56] Uncle Carlin
  • [56] Auntie Marlene

3. Go back towards the Marry’s Stead and keep doing circles around it killing everything until you got 30 Plaguebat and 20 Plaguehound Runts slain and have looted 15 Slabs of Carrion Worm Meat. This is the best area to find them.

hdk58img2b.jpg

1. Go east to the area north of the Infectis Scar and Corin’s Crossing. Kill everything around until you have 5 Plaguehound Kills and 20 Noxious Plaguebat Kills.

2. Once you’re done with the above, go to the area which is north of Blackwood Lake (51,41). You should find Frenzied Plaguehounds and Monstrous Plaguebats around this area, kill 5 Frenzied Plaguehounds and 10 Monstrous Plaguebats.

3. Ride to Light’s Hope Chapel (81,59).

Turn in [56] Uncle Carlin, get the follow up [55] Defenders of Darrowshire.

Get the following items from the mailbox (see shopping list):

Get the following quests and turn them in immediately:

  • [60] Savage Flora at Rayne
  • [60] Cryptstalker Armor Doesn’t Make Itself… at Huntsman Leopold
  • [60] The Elemental Equation at Archmage Angela Dosantos
  • [60] Binding The Dreadnaught at Korfax, Champion of the Light

Also get [60] Bonescythe Digs from Rohan the Assassin, we’ll finish that one later.

4. Just a bit south of Light’s Hope Chapel find Caretaker Alen (79,63). Get the two quests from him:

  • [55] Zaeldarr the Outcast
  • [60] The Restless Souls

You should be level 59 by now.

Level 59

Death Gate
 to Acherus. Visit the trainer, buy Blood Strike (Rank 2) and Strangulate.


Blood Strike (Rank 2): More damage, cheers.
Strangulate: A 5 second silence, can be cast from 30 yard range. Great against casters.

Spend your talent point:


hdk58img3.jpg

1. Ride west/southwest to Corin’s Crossing (57,60).

Whenever you kill a Gibbering Ghoul, a Spirit of Darrowshire will appear, right-click it to free it. We’ll finish this quest later though so don’t wait on respawns.

Kill every undead you find there until you have 7 Living Rot. You must be quick because the living rot only lasts 10 minutes.

hdk58img6.jpg As soon as you have 7, right-click the Mortar and Pestle from your inventory, you should receive some Coagulated Rot.

2. Ride north to the Quel’Lithien Lodge (51,22). Clear yourself a path to the main building, and clear towards the right-hand wing. You should find two level 60 Quel’Lithien Protectors, kill them and then loot the Quel’Thalas Registry, which should be lying on a bench.

Kill as many elves as needed to complete the quest [60]The Ranger Lord’s Behest.

Hearthstone to the Undercity and ride back to the Bulwark.

Turn in [58]Return to the Bulwark. Get the quest [55]A Plague Upon Thee from Mickey Levine. Go to High Executor Derrington and turn in the quest “Mission Accomplished!“.

a59sk2.jpg

1. Ride southeast to Sorrow Hill and find Marlene Redpath in the house (49,78).

Turn in [56] Auntie Marlene and get the follow up [56] A Strange Historian.

2. Search the graveyard just north of the house where Marlene Redpath is, look for “Joseph Redpath’s Monument” among the graves (49,76). Click the grave and get Joseph’s Wedding Ring.

3. Go back towards Chillwind Camp and take the other path to Andorhal, go inside the Ruins of Andorhal by the western entrance.

Inside Andorhal go to the house to the north, it’s the only house around with a floor and not totally destroyed (39,68). Inside the house go to the 2nd floor, in one of the rooms you’ll find Chromie. Turn in [56] A Strange Historian, get the follow up [56] The Annals of Darrowshire. Also ge the other quest [56] A Matter of Time.

4. Go to the northern gate of Andorhal, and east of the first watch tower you’ll find two wooden silos (45,62) which look like this:

woodensilo.jpg

Get close to a silo and click your Temporal Displacer (the icon is actually a horn).

1 to 3 lvl 57 worms will spawn and attack you. Kill them. Move on to the next silo and repeat. Keep doing that until you have 10 Temporal Parasites slain. The worms only appear when the silo is sparkling blue. They take a while to sparkle again after you use them. However there’s 3 more silos just a bit more to the east in case you need.

5. Go back to Chromie, turn in [56] A Matter of Time and get the follow up [56] Counting Out time.

Now what you have to do is check destroyed houses in Andorhal and look for Small Lockboxes like this:

smalllockbox.jpg

Loot the Andorhal Watch from it. Keep doing this until you have 5 Andorhal Watches.

a59sk3.jpg

1. Go to the town hall (with a tower clock) which is in the middle of Andorhal, close to where Araj the Summoner is, you can sneak in the town hall without having to fight any of the bunch of mobs around it, just hug the walls.

Inside the town hall you’ll find several “Musty Tome” lying on the floor. When you click one, there is a chance you will find the Annals of Darrowshire, but there is a higher chance that you will get a “Ruined Tome” and 1 or 2 level 57 mobs will attack you. They give no loot and no exp. Hoewever there is a trick to know which tome is the right one. There is a slight graphical difference. The pages of the fake tomes have two-tone colored pages, lightbrown and white, like this one:

wrongtome.jpg

The good tome looks “newer”, and its pages only have one color tone, like this one:

goodtome.jpg

You can easily see the difference if you zoom in 1st person view and put your mouse pointer over the books to highlight them. Loot the Annals of Darrowshire.

2. Time for a little challenge. Let’s solo Araj the Summoner. Here’s how:

Fight your way around Araj, so that you end up on the east side of him, like on the screenshot below.

59sk0.jpg

We’ll pull from here, and you have to pull all the stuff I marked with a dot, because if you don’t, they’ll add when you attack Araj, and we want him solo.

  • 1. The first pull will be 4 mobs at least, some of them are Skeletal Acolytes, you need to kill those first because they heal. Pull one with Death Grip, use Strangulate on another so that he comes in your melee range. Icy Touch –> Plague Strike –> Pestilence –> Blood Boil –> Death Strike. Etc.
  • 2. Next, pull the 3 Spectral Attendants. This should be easy.
  • 3. North of Araj there should be a Skeletal Warlord and two ghouls. Pull those carefully, it should be an easy fight too.
  • 4. South of Araj should be 1 Skeletal Warlod and 1 Ghoul. Pull those and then you’ll only have Araj the Summoner left to kill.

Pull Araj from this spot, to make sure you don’t get jumped by respawns or by a patrol while fighting him:

59sk1.jpg

As you can see on the screenshot, I forgot to pull one ghoul, it will add when I pull Araj. However, I managed because Death Knights are imba. Don’t do this at home though!

When you’re ready, pull Araj with Death Grip, then Strangulate him and pull him backwards a little more (to where I stand on the screenshot below), to be 100% safe from the respawns/patrols. Then just fight him normally, interrupt his spells with Mind Freeze and use Summon Gargoyle as soon as you have 100 Runic Power. You also have potions if things go wrong.

59sk2.jpg

Loot Araj’s Phylactery.

3. Go back to Chromie, turn in [56] Counting Out time. The Attuned Dampener you get as a reward is only useable on Araj the Summoner, so you don’t care about that, destroy it. Yes I’m evil and made you kill Araj without using this on him, but it really wasn’t necessary, was it? 😛

Turn in [56] The Annals of Darrowshire, get the follow up [56] Brother Carlin.

Now you should also have finished [57] Skeletal Fragments and be close to finish [60] Bonescythe Digs. Kill some more skeletons in Andorhal until you have 30 Bone Fragments.

Get out of Andorhal by the north gate, then go east till Thondroril River and ride north to Tirion Fordring (7,43).

Turn in:

  • [56] Demon Dogs
  • [56] Blood Tinged Skies
  • [56] Carion Grubbage

Get the follow up [56] Redemption.

Right-click Tirion and go through his text.
Turn in the quest and get the follow up [57] Of Forgotten Memories.

You should be level 60 by now.


Put your talent point in Unholy Blight.

Unholy Blight: Our ultimate. It’s basically extra AoE power, great for taking on multiple enemies. However, 60 Runic Power is a bit pricy, so it’s not worth casting Unholy Blight on easy fights (single target or two monsters only), simply because by the time you build up 60 Runic Power, one of your target will already be dead and the other one will follow quickly, and the majority of your Unholy Blight will be wasted while you run to the next monster. Use it only on big fights, 3+ mobs, preferably more. You can chain kill packs of 5,6 or 7 mobs now.

If you want to know how, check out my AoE tutorial videos:

How to AoE with a Death Knight


Mount up and go to the Eastern Plaguelands.

Ride southeast to the Marris Stead. Turn in:

  • [58]To Kill With Purpose
  • [58]Un-Life’s Little Annoyances
  • [60]The Ranger Lord’s Behest

Get:

  • [60] Duskwing, Oh How I Hate Thee…
  • [60] The Corpulent One
a59sk4.jpg

1. Go southeast to the Undercroft, which is directly south of the Marris Stead.

Behind the crypt in the Undercroft you’ll find Tiron Fordring’s Grave (28,86). Next to it should be a “Loose Dirt Mound”.

Click the dirt mount, Mercutio Filthgorger and 3 Dwarf Graverobbers will spawn. Kill them and loot Taelan’s Hammer.

Go inside the crypt (22,78), clear the way down, kill Zaeldarr the Outcast and loot his head.

In the same room look for a “Torn Scroll” on the floor, click it and get the quest [60] Hameya’s Plea.

2. Go back to Tiron Fordring, turn in [56] Of Forgotten Memories, get the follow up [58] Of Lost Honor.

Death Gate to Acherus. Visit your trainer, train Rune of LichbaneDeath and Decay and Plague Strike (Rank 2).


Rune of Lichbane: This will be great for our final circuits in the plaguelands, as there are plenty of undeads just waiting to be whacked. Go engrave it on your weapon (unless you bought a better enchant like Executioner). Also buy some Corpse Dust and sell junk while you’re up there.

Death and Decay: It’s an AoE skill, but it’s not as efficient as the Pestilence/Blood Boil/Death Strike combo. It’s main use is to build a lot of threat when you’re tanking several mobs.


Fly to Light’s hope Chapel. Turn in:

  • [60] Bonescythe Digs
  • [56] Brother Carlin, get [57] Villains of Darrowshire and [56] Heroes of Darrowshire

Go south to Caretaker Alen and turn in [55] Zaeldarr the Outcast.

You should have the following quests at the moment:

  • [55] Defenders of Darrowshire
  • [56] Glyphed Oaken Branch
  • [56] Heroes of Darrowshire
  • [57] Villains of Darrowshire
  • [58] Of Lost Honor
  • [60] Hameya’s Plea
  • [60] The Restless Souls
  • [55] A Plague Upon Thee
  • [57] Skeletal Fragments
  • [60] Alas, Andorhal
  • [60] Duskwing, Oh How I Hate Thee…
  • [60] The Corpulent One
a59sk5.jpg

1. Ride west to Corin’s Crossing (57,60), kill all the Gibbering Ghouls you can find while going east through the town. Right-click the Spirits of Darrowshire that appear.

2. Go west to the Infectis scar by passing Corin’s crossing by the south side. Go down the Infectis Scar at (44,69), then go to (49,59) where you’ll find the “Shattered Sword of Marduk”, as marked on the map. It looks like this:

swordofmarduk.jpg

Loot it.

Get out of the Infectis scar the same way you came in.

3. Go north to Blackwood Lake (46,44). Take a dive, in the middle of the pool at the bottom you’ll see Ghosts of Darrowshire fighting each other, amongst them you should see a glowing violet skull named “Horgus Skull” (46,44), it looks like this:

horgusskull.jpg

Loot it.

4. Go west to the Plaguewoods. In the plaguewoods look around for Large Termite Mounds and loot them.

termitemound.jpg

While looking for those termite mounds, hunt for Cannibal Ghouls. Anytime you kill one of these, a Spirit of Darrowshire will appear, right-click it to free it. The Cannibal Ghouls are not so numerous though, so don’t stay here trying to finish the quest, we’ll kill more later.

Keep killing stuff in this area until you are done with [55] A Plague Upon Thee. If you have more than 100 Termites, destroy the extras.

5. Go west to Egan (11,29).

Turn in [60] The Restless Souls, don’t get the follow up.
Get the quest [55] Augustus’ Receipt Book from the other npc.

The book is very easy to find, just go a little east and enter the inn type building.

60sk0.jpg

The book is on the 2nd floor.

60sk1.jpg

Make sure you kill all the Cannibal Ghouls you find in the house and to free their spirit. You should also check the other house on the opposite side of the street, it probably has a couple of ghouls inside.

Once you got Augustus’ Receipt Book, go back to Augustus and turn in the quest.

hdk58img4.jpg

1. Go back to the Plaguewoods, kill Cannibal Ghouls until you finish [55] Defenders of Darrowshire while going east.

2. Go east and look for Borelgore. He can be found patrolling in this area:

Kill him.

3. Go northeast to Zul’Mashar (64,24).

Clear the way up the slope.

==Tip== Death Grip the scouts and Chains of Ice them, it prevents them from getting help, making this step much less annoying.

Keep clearing the way and you’ll soon face a big pyramid. At it’s base you should see some tombs with some trolls roaming about them. One of them is Infiltrator Hameya.

Pull him and kill him, then loot Hameya’s Key.

4. Clear your way out of Zul’Mashar then go southeast to Northdale, take a dive in the pool which is just south of Northdale. Clear the elementals in the way. At (66,29) underwater, next to a cage you should see a white flag with a blue runed on it named Symbol of Lost Honor:

losthonorsymbol.jpg

Loot it.

5. Ride southeast back to Light’s hope Chapel.

Turn in:

  • [55] Defenders of Darrowshire
  • [57] Villains of Darrowshire

Get [56] Heroes of Darrowshire if you forgot to take it earlier.

hdk58img5.jpg

1. Ride west/southwest and find Duskwing. He patrols in the area east of the Marris Stead, as shown on the map.

Kill Duskwing.

2. Ride southwest to the Undercroft. Right behind the crypt in the Undercroft you should find a “Mound of Dirt”. Not the one next to Tiron’s grave, the other one close to a charriot at (28,86).

Click it, turn in [60] Hameya’s Plea.

3. Ride north to the Marris Stead, turn in:

  • [60] Duskwing, Oh How I Hate Thee…
  • [60] The Corpulent One

Don’t get any follow up.

4. Ride northwest to Tirion Fordring, turn in [58] Of Lost Honor and get the follow up [58] Of Love and Family.

Go south and then west back into the Western Plaguelands.

a59sk7.jpg

1. First make a stop at Gahrron’s Withering. There in front of the first building when you arrive from the north you’ll see a glowing shield looking like this:

Clear the mobs around it then loot the Redpath’s Shield.

2. Go south and swim to Caer Darrow Isle. On the western side of Caer Darrow, find Artist Renfray in a wooden house (65,75). Turn in [58] Of Love and Family, don’t get the follow up.

Go back to the Bulwark, turn in:

  • [57] Skeletal Fragments
  • [60] Alas, Andorhal
  • [55] A Plague Upon Thee, take the follow up [55] A Plague Upon Thee
a59sk8.jpg

1. Ride east and then north to Northridge Lumber Camp.

Go straight to the lumber mill which is at the northeastern tip of the lumber camp.

Inside the lumber mill you should find a big crate named “Northridge Lumber Mill Crate”.

Click it and place the Termite Barrel on it. A barrel with green smoke should appear, click it and get the follow up [55] A Plague Upon Thee.

2. Mount up and ride to Hearthglen. Clear your way into the village until you see the townhall:

Clear your way inside and loot the Davil’s Libram from the table.

Ride back to The Bulwark. Turn in [55] A Plague Upon Thee.

Death Gate back to Acherus.

Fly down to Light’s hope Chapel. Turn in [56] Heroes of Darrowshire, don’t get the follow up.

Hearthstone to Undercity.

Take the zeppelin to Orgrimmar.

Fly to Thunder Bluff.

In Thunder Bluff, go to the Elder Rise and find Nara Wildmane (75,31).

Turn in [56] Glyphed Oaken Branch.

You should be close to level 61 now.
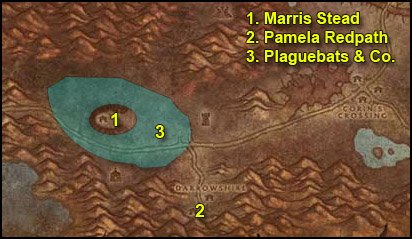
WoW WotLK Classic Alliance 70-80 Leveling Guide: 79-80 Storm Peaks

  1. Fly north out of Dalaran into K3. Get the quests:
    • Clean Up
    • Expression of Gratitude
    • Reclaimed Rations
    • Equipment Recovery
    • They Took Our Men!
  2. Pick up 10 Charred Wreckage just west of K3.
  3. Then, return to K3 and turn in Clean Up. Get the follow-up Just Around the Corner.
  4. Ride west into the Minefield and pick up Sparksocket’s Tools in the center of the minefield. This is a no-fly zone so navigate your way through the maze or just simply let yourself get bumped through the mines towards the center.
  5. Fly west to the western area of the gnoll camp and kill Gnarlhide. Pick up 16 Dried Gnoll Rations from the crates around camp.
  6. Then, fly back to K3(avoid the Minefield area)
  1. At K3, turn in:
    • Expression of Gratitude
    • Just Around the Corner and get the follow-up Slightly Unstable. Turn that in and get the follow-up A Delicate Touch
    • Reclaimed Rations and get the follow-up Ample Inspiration
  2. Fly east to Garm’s Bane. The mobs won’t attack you, so you can just dismount and lay Improved Land Mines at your leisure. Lay them in a line, and stack each spot with two mines for quickest killing results.
  3. Fly northwest to Tore Rumblewrench and get her quests:
    • Moving In
    • Ore RepossessionHead into Crystalweb Cavern.
    • Clear your way through and get the quest Only Partly Forgotten from An Injured Goblin Miner.
    • Head deep into the cavern all the way east and kill Crystalweb Weaver for an Icetip Venom Sac.
    • In the opening right before the long tunnel to the weaver, kill Snowbolds for 5 Impure Saronite Ore.
    • Go back to an Injured Goblin Miner and complete Only Partly Forgotten. Get the escort quest Bitter Departure. Talk to the goblin again to start the escort. Finish killing 12 Crystalweb Spiders on the way out.
    • Turn in Moving In and Ore Repossession to Tore Rumblewrench.
    • Pick up an U.D.E.D. from the dispenser next to Tore Rumblewrench. Mount and quickly search for an Ironwool Mammoth (They wander around – ride southwest along the yellow line and look for one) then throw the U.D.E.D at it and gather 8 Hearty Mammoth Meat.
  4. Fly back to K3.
  1. At K3, turn in your quests:
    • Ample Inspiration
    • A Delicate Touch
    • Bitter DepartureGet the new quest, Opening the Backdoor.
  2. Fly east and pick up the Transporter Power Cell right at where the waves start spawning at Garm’s Bane.
  3. Fly east up the ramp to the Teleportation Pad. Use the Transporter Power Cell while standing on it. You will warp back to K3.
    • Turn in Opening the Backdoor. Get the follow-up Know No Fear then warp back by stepping onto the teleportation pad in K3.
    • Talk to Gino and get A Flawless Plan.
    • Head into the cave and clear to the very end of it, killing 6 Garm Watcher and 8 Snowblind Devotee on the way. Place the Explosive Bundle, and kill Tormar Frostgut. Then, get out of the cave. Turn in A Flawless Plan and get the follow-up Demolitionist Extraordinaire.
  4. Take the teleporter back to K3. Turn in Know No Fear and Demolitionist Extraordinaire.
    Get the follow-up quests Overstock and When All Else Fails.
  5. Fly northwest to Sifreldar Village Kill Sifreldar Storm Maidens for Cold Iron Keys and Free 5 Goblin Prisoners and collect 8 K3 Equipment.
  6. Fly back to K3 and turn in Equipment Recovery and They Took Our Men!
    Get the follow-up Leave No Goblin Behind.

    Finally, Talk to Ricket and take the flight further into the Storm Peaks, to Frosthold.
  1. You will arrive in FrostholdGet the Flight Path. Turn in When All Else Fails and get the quests:
    • Ancient Relics
    • Loyal Companions
    • Offering Thanks
    • On Brann’s TrailTurn in Offering Thanks and get the follow-up Missing Scouts.Fly up slightly southeast and get Royal Companions.
  2. Fly east to Bor’s Fall and talk to the Frostborn Scout.
  3. Fly up northeast to the Abandoned Camp. Search the Disturbed Snow for the Burlap-Wrapped Note.
  4. Fly further northeast to The Foot Steppes. Kill Ice Steppe Rhinos for 8 Fresh Ice Rhino Meat.
  5. Fly up over the mountain south into The Forlorn Mine. Talk to Lok’lira the Crone and turn in Leave No Goblin Behind. Get the follow-up The Crone’s Bargain.
    • Kill Overseer Syra, just east in the next big room (She also patrols into the tunnels to the north and south), for the Runes of the Yrkvinn, then return to Lok’lira the Crone and turn in The Crone’s Bargain and get the follow-up Mildred the Cruel.
    • Head east and talk to Mildred the Cruel. Turn in Mildred the Cruel and get the follow-up Discipline. Head into the north and south tunnels in the room and use your Disciplining Rod on 6 Exhausted Vrykul. Then, return to Mildred the Cruel and turn in Discipline and get the follow-up Examples to be Made.
    • Head east to Garhal just in the next room and kill him. Then, return to Mildred the Cruel and turn in Examples to be Made and get the follow-up A Certain Prisoner.
    • Return west to Lok’lira the Crone and turn in A Certain Prisoner. Get the follow-up A Change in Scenery.
  1. Head into the Forlorn Mine.
  2. Talk to Lok’lira the Crone and turn in Leave No Goblin Behind. Get the follow-up The Crone’s Bargain.
    • Kill Overseer Syra, just east in the next big room (She also patrols into the tunnels to the north and south), for the Runes of the Yrkvinn, then return to Lok’lira the Crone and turn in The Crone’s Bargain and get the follow-up Mildred the Cruel.
    • Head east and talk to Mildred the Cruel. Turn in Mildred the Cruel and get the follow-up Discipline. Head into the north and south tunnels in the room and use your Disciplining Rod on 6 Exhausted Vrykul. Then, return to Mildred the Cruel and turn in Discipline and get the follow-up Examples to be Made.
    • Head east to Garhal just in the next room and kill him. Then, return to Mildred the Cruel and turn in Examples to be Made and get the follow-up A Certain Prisoner.
    • Return west to Lok’lira the Crone and turn in A Certain Prisoner. Get the follow-up A Change in Scenery.
  3. Head east out of the mine to Brunnhildar Village. Turn in A Change in Scenery and get the follow-up Is That Your Goblin?
    • Head just southeast and talk to Agnetta Tyrsdottar and challenge and kill her.
    • Return to Lok’lira the Crone and turn in Is That Your Goblin? and get the follow-up The Hyldsmeet. Talk to Lok’lira again and go through her dialogue Turn in the quest and get the follow-up Taking On All Challengers.
    • Look around camp for 6 Victorious Challengers and challenge and kill them. Then, return to Lok’lira the Crone and turn in Taking on All Challengers and get the follow-up You’ll Need a Bear.
  4. Head east to Brijana and turn in You’ll Need a Bear and get the follow-up Going Bearback. You’ll enter into an automated ride. Keep using your Flaming Arrow (Ability 1) on cooldown and don’t Sprint until you’re done and just want to get back faster.
  1. Once you return to Brijana and complete the quest, turn in Going Bearback and get the follow-up Cold Hearted.
  2. Fly east to Dun Niffelem and mount directly onto a Captive Proto-Drake. Once on, use Ice Shard on Brunnhildar Prisoners and make sure you stay in range as they get grabbed by your drake. Free 3 since you can only carry that many, then fly back west. You need to rescue 9, so make two more trips. When done, turn in Cold Hearted. Get the follow-up Deemed Worthy.
  3. Talk to Astrid Bjonrittar in the southern area of Brunnhildar Village. Turn in Deemed Worthy and get the follow-up Making a Harness. Also, get the following quests in the next house to the west:
    • Aberrations
    • Off With Their Wings
    • Yuda’s Folly
  4. Fly southwest and kill Icemane Yetis for 3 Icemane Yeti Hides.
  5. Fly further southwest to Garm’s Bane and lay out the Improved Land Mines and kill 12 Garm Invaders with them.
  6. Return to Astrid Bjonrittar and turn in Making a Harness. Get the follow-ups The Last of Her Kind and The Slithering Darkness.
  7. Fly east and enter the cave. First, kill 8 Ravenous Jormungars as you clear to the back of the cave. When done, mount the Injured Icemaw Matriarch and take the ride out of the cave.
  8. Return to Astrid Bjonrittar.
  1. At Astrid Bjonrittar, turn in The Last of Her Kind and The Slithering Darkness. Get the follow-up The Warm-Up.
    • Head northeast to Kirgaraak. Spam Maul (Ability 4) as your main damage dealer. You can also do a combo attack by using Smash (Ability 5) to knock your opponent away then using Charge (Ability 6) right after. Do that attack on cooldown as well.
    • Turn in The Warm-Up and get the follow-up Into the Pit. Enter the pit and get on the bear. Kill 6 Hyldsmeet Warbears. Make sure to keep an eye on your own health too! Then, turn in Into the Pit and get the follow-up Prepare for Glory.
    • Head northwest to Lok’lira the Crone and turn in Prepare for Glory. Get the follow-up Lok’lira’s Parting Gift.
    • Speak to Gretta the Arbiter at the northeastern area of the village and turn in Lok’lira’s Parting Gift. Get the follow-up The Drakkensryd. You’ll be flown to the Temple of Storms. Use your Hyldnir Harpoon to jump onto a targeted drake and enter hand to hand combat with an Hyldsmeet Drakerider. You can use your normal abilities to kill it, and can eat and drink on the drake if need be. Kill 10 Hyldsmeet Drakeriders. Finish by using your Hyldnir Harpoon on a Column Ornament at the temple. Turn in The Drakkensryd to Thorim. Get the follow-up Sibling Rivalry. Talk to him and go through the dialogue to complete the quest and get the follow-up Mending Fences.
  2. Fly west to Valkyrion. In the area, complete the following objectives while killing 12 Nascent Val’kyr and killing Valkyrion Aspirants for about 6 Vials of Frost Oil.
    • Kill Yulda the Stormspeaker. Get Valkyrion Must Burn from the Harpoon Crate next to her.
    • Use a Valkyrion Harpoon Gun and aim the Flaming Harpoon on the stacks of hay to start 6 Fires. You may want to use the other set of harpoon guns as well to get different angles for aiming.
    • Throw the Vials of Frost Oil onto the eggs and freeze 30 Proto-Drake Eggs. The eggs are mostly in groups of 6.
  3. Fly southeast atop the mountain and use your Fresh Ice Rhino Meat to Feed 8 Stormcrest Eagles.
  4. Fly southwest to Frosthold and turn in your quests:
    • Ancient Relics
    • Loyal Companions and get the follow-up Baby Stealers
    • Missing Scouts and get the follow-up Stemming the Aggressors
    • On Brann’s Trail and get the follow-up Sniffing Out the Perpetrator
  1. Fly east and kill 8 Frostfeather Screechers and 8 Frostfeather Witches and pick up 15 Stormcrest Eagle Egg along the frozen river.
  2. Fly north and use the Frosthound Collar at the Abandoned Camp. Use abilities on cooldown: Net (Ability 1) to net Pursuers and use Ice Slick (Ability 2) on the ground behind you to slow them down.

    When you reach the cave, kill Tracker Thulin. Get Brann’s Communicator and use it and turn in Sniffing Out the Perpetrator. Get the follow-up Pieces to the Puzzle.
  3. Fly southeast to Brunnhildar Village. Turn in your quests:
    • Aberrations
    • Off With Their Black Wings
    • Valkyrion Must Burn
    • Yulda’s Folly
  4. Fly east to Fjorn’s Anvil. Pick up a Granite Boulder off the ground then target a Stormforged Iron Giant and use Thorim’s Charm of Earth. You can only hold one boulder at a time. You will also get a Slag Covered Metal – start the quest The Refiner’s Fire from it.
    • Kill Seething Revenants for 10 Furious Sparks.
    • Head further east to the actual Anvil in Fjorn’s Anvil. Kill Fjorn (by picking up a Granite Boulder and using Thorim’s Charm of Earth as usual). Then, use the Anvil to complete The Refiner’s Fire. Also, finish killing 5 Stormforged Iron Giants.
  5. Fly to Thorim and turn in Mending Fences and The Refiner’s Fire and get the follow-up Forging an Alliance.
  6. Fly northwest to The Inventor’s Library.
    • Kill Library Guardians for 6 Investor’s Disk Fragments, then combine it into the Investor’s Disk.
      Then, use Brann’s Communicator to summon Brann Bronzebeard. Turn in Pieces of the Puzzle and get the follow-up Data Mining.
    • Use the Investor’s Disk on 7 Databanks to gather 7 Hidden Data.
      Then, use Brann’s Communicator to summon Brann Bronzebeard. Turn in Data Mining. Get the follow-up The Library Console.
  7. Go southwest into the actual library building. Click the Library Console and turn in The Library Console. Get the follow-up Norgannon’s Shell. Use the Charged Disk to summon Archivist Mechaton. Kill it for Norgannon’s Shell
    Then, use Brann’s Communicator to summon Brann Bronzebeard. Turn in Norgannon’s Shell. Get the follow-ups Aid from the Explorers’ League and The Exiles of Ulduar.
  8. Fly northwest to Bouldercrag’s Refuge.
  1. At Bouldercrag’s RefugeGet the Flight Path. Turn in The Earthen of Ulduar and get the follow-up Rare Earth. Also, Set your Hearthstone to Bouldercrag’s Refuge.
  2. Fly northwest down the cliff face. Mine 7 Enchanted Earth.
    • Then, Hearth back to Bouldercrag’s Refuge and turn in Rare Earth. Get follow-ups Fighting Back and Relief for the Fallen.
  3. Fly northeast down to the Snowdrift Plains. Kill 10 Stormforged Attackers and use your Telluric Poultice to heal 8 Fallen Earth Defenders.
    • Then, return to Bouldecrag’s Refuge. Turn in Fighting Back and Relief for the Fallen. Get the follow-ups Slaves of the Stormforged and The Dark Ore.
  4. Fly southwest to The Frozen Mine. Collect 5 Dark Ore Samples, Kill 3 Stormforged Taskmasters, and talk to 8 Captive Mechagnomes and attempt to free them.
    • Then, return to Bouldercrag’s Refuge. Turn in Slaves of the Stormforged and The Dark Ore. Get the follow-ups The Gifts of Loken and Facing the Storm.
  5. Fly southwest to Nidavelir.

In Nidavelir, kill a Stormforged War Golem for a Dark Armor Plate. This starts the quest Armor of Darkness. While flying in the next three steps to destroy Loken’s items, kill 10 Nidavelir Stormforged and get 4 Dark Armor Samples from the Stormforged War Golems.

All of the items to destroy are inside small buildings.

  1. Destroy Loken’s Power.
  2. Destroy Loken’s Favor.
  3. Destroy Loken’s Fury.
  4. Then, return to Bouldercrag’s Refuge.
  1. At Bouldercrag’s Refuge, turn in:
    • Armor of Darkness and get the follow-up The Armor’s Secrets
    • Facing the Storm
    • The Gifts of Loken
  2. Fly southeast to the other side of the mountain to Mimir’s Workshop. Talk to Attendant Tock and wait for him to finish investigating the Armor Plate.
    • Then, return to Bouldercrag’s Refuge. Turn in The Armor’s Secret. Get the follow-up Valduran the Stormborn.
  3. Fly southwest to Valduran the Stormborn. Use Bouldercrag’s War Horn to summon Bruor and Bouldercrag to help you. Kill Valduran.
    • Then, return to Bouldercrag’s Refuge. Turn in Valduran the Stormborn. Get the follow-ups Destroy the Forges! and Hit Them Where it Hurts.
  4. Fly to the Forges and use Bouldercrag’s Bomb to destroy the North, Central, and South Lightning Forge. They are all very close to each other. Kill 10 Stormforged Artificer as well.
    • Then, return to Bouldercrag’s Refuge.
  1. At Bouldercrag’s Refuge, turn in Destroy the Forges! and Hit Them Where it Hurts. Get the follow-up A Colossal Threat.
  2. Fly back to the forge area. Get the Colossal Attack Specs.
  3. Get the Colossal Defense Specs.
    • Then, return to Bouldercrag’s Refuge. Turn in A Colossal Threat and get the follow-up The Heart of the Storm.
  4. Fly in from a small hole on the south side of the Temple of Storms (fly north, facing the S in the Temple of Storms on the map) and fly in all the way to the Heart of the Storm. “Attempt” to loot the Heart of the Storm.
    • Then, Hearth back to Bouldercrag’s Refuge. Turn in Heart of the Storm and get the follow-up The Iron Colossus.
  5. Fly northwest and use a Jormungar Control Orb to take control of a Tamed Jormungar. Its abilities are:
    • Ability 1: Submerge – you can only move while submerged. When you submerge, you gain the ability to Emerge – you can only attack while emerged.
    • Ability 2: Jormungar Strike – powerful melee strike. Use this attack on cooldown.
    • Ability 3: Acid Breath – powerful stacking dot. Use this attack on cooldown as well.
    Before you fight the Iron Colossus, read the entire secstion on the strategy so you can avoid dying the first time against it.
  6. Head west to The Iron Colossus(Submerge first to move).

    Emerge next to him and then start spamming your two attack abilities, Jormungar Strike and Acid Breath. The big gimmick to the fight is that when The Iron Colossus emotes: “The Iron Colossus prepares to slam the ground in front of him!” you must immediately Submerge and run BEHIND him (you can and should start moving even before the animation for being underground shows up – you can move right after submerging)Emerge behind him, then continue attacking. Rinse and repeat each time he emotes. You cannot get hit by his ground slam attack – if you manage to dodge it each time, you’ll kill him hanildy.
    • Finally, return to Bouldecrag’s Refuge to turn in the final part of this long quest chain.

To conclude with this area, turn in your remaining quests:

  1. Fly to Frosthold and turn in:
    • Baby Stealers
    • Stemming the Aggressors and get the follow-up Sirana Iceshriek (Group)
  2. Fly to K3 and turn in Overstock.

Congratulations! You should have hit level 80 by now, and have turned in all the most convenient quests.

WoW WotLK Classic Horde 70-80 Leveling Guide: 79-80 Storm Peaks

  1. Fly north out of Dalaran into K3. Get the quests:
    • Clean Up
    • Expression of Gratitude
    • Reclaimed Rations
    • Equipment Recovery
    • They Took Our Men!
  2. Pick up 10 Charred Wreckage just west of K3.
  3. Then, return to K3 and turn in Clean Up. Get the follow-up Just Around the Corner.
  4. Ride west into the Minefield and pick up Sparksocket’s Tools in the center of the minefield. This is a no-fly zone so navigate your way through the maze or just simply let yourself get bumped through the mines towards the center.
  5. Fly west to the western area of the gnoll camp and kill Gnarlhide. Pick up 16 Dried Gnoll Rations from the crates around camp.
  6. Then, fly back to K3(avoid the Minefield area)
  1. At K3, turn in:
    • Expression of Gratitude
    • Just Around the Corner and get the follow-up Slightly Unstable. Turn that in and get the follow-up A Delicate Touch
    • Reclaimed Rations and get the follow-up Ample Inspiration
  2. Fly east to Garm’s Bane. The mobs won’t attack you, so you can just dismount and lay Improved Land Mines at your leisure. Lay them in a line, and stack each spot with two mines for quickest killing results.
  3. Fly northwest to Tore Rumblewrench and get her quests:
    • Moving In
    • Ore RepossessionHead into Crystalweb Cavern.
    • Clear your way through and get the quest Only Partly Forgotten from An Injured Goblin Miner.
    • Head deep into the cavern all the way east and kill Crystalweb Weaver for an Icetip Venom Sac.
    • In the opening right before the long tunnel to the weaver, kill Snowbolds for 5 Impure Saronite Ore.
    • Go back to an Injured Goblin Miner and complete Only Partly Forgotten. Get the escort quest Bitter Departure. Talk to the goblin again to start the escort. Finish killing 12 Crystalweb Spiders on the way out.
    • Turn in Moving In and Ore Repossession to Tore Rumblewrench.
    • Pick up an U.D.E.D. from the dispenser next to Tore Rumblewrench. Mount and quickly search for an Ironwool Mammoth (They wander around – ride southwest along the yellow line and look for one) then throw the U.D.E.D at it and gather 8 Hearty Mammoth Meat.
  4. Fly back to K3.
  1. At K3, turn in your quests:
    • Ample Inspiration
    • A Delicate Touch
    • Bitter DepartureGet the new quest, Opening the Backdoor.
  2. Fly east and pick up the Transporter Power Cell right at where the waves start spawning at Garm’s Bane.
  3. Fly east up the ramp to the Teleportation Pad. Use the Transporter Power Cell while standing on it. You will warp back to K3.
    • Turn in Opening the Backdoor. Get the follow-up Know No Fear then warp back by stepping onto the teleportation pad in K3.
    • Talk to Gino and get A Flawless Plan.
    • Head into the cave and clear to the very end of it, killing 6 Garm Watcher and 8 Snowblind Devotee on the way. Place the Explosive Bundle, and kill Tormar Frostgut. Then, get out of the cave. Turn in A Flawless Plan and get the follow-up Demolitionist Extraordinaire.
  4. Take the teleporter back to K3. Turn in Know No Fear and Demolitionist Extraordinaire.
    Get the follow-up quests Overstock and When All Else Fails.
  5. Fly northwest to Sifreldar Village Kill Sifreldar Storm Maidens for Cold Iron Keys and Free 5 Goblin Prisoners and collect 8 K3 Equipment.
  6. Fly back to K3 and turn in Equipment Recovery and They Took Our Men!
    Get the follow-up Leave No Goblin Behind.

    Finally, Talk to Ricket and take the flight further into the Storm Peaks, to Grom’arsh Crash-Site.
  1. You will arrive at the Grom’arsh Crash-SiteGet the Flight Path. Turn in When All Else Fails and get the quests:
    • Ancient Relics
    • Emergency Measures
    • The Missing Bronzebeard
    • The Missing Tracker
  2. Fly up south to the Abandoned Camp. Search the Disturbed Snow for the Burlap-Wrapped Note.
  3. Return to Grom’arsh Crash-Site. Turn in The Missing Bronzebeard and get the follow-up The Nose Knows.
  4. Fly east to Khaliisi. Turn in The Nose Knows and get the follow-up Sniffing Out the Perpetrator.
    Mount Frostbite. Use the abilities on cooldown: Net (Ability 1) to net Pursuers and use Ice Slick (Ability 2) on the ground behind you to slow them down.
  5. When you reach the cave, kill Tracker Thulin. Get Brann’s Communicator and use it and turn in Sniffing Out the Perpetrator. Get the follow-up Speak Orcish, Man!
  6. Fly north to Gimorak’s Den. Head in and talk to Tracker Val’zij and turn in The Missing Tracker. Get the follow-up Cave Medicine.
    • Head around the cave area.
      • Gather 8 Cave Mushrooms
      • Kill Worgs for 6 Worg Fur
      • Kill Infesting Jormungar for 1 Toxic Gland
    • Then, return to Tracker Val’zij. Turn in Cave Medicine and get the follow-up There’s Always Time for Revenge.
    • Head into the cave and look for Gimorak, a bigger wolf who runs around the entire cave – he’s usually at the end of it.
    • Finally, return to Tracker Val’zij and turn in There’s Always Time for Revenge.
  7. Fly up over the mountain south into The Forlorn Mine.
  1. Head into the Forlorn Mine.
  2. Talk to Lok’lira the Crone and turn in Leave No Goblin Behind. Get the follow-up The Crone’s Bargain.
    • Kill Overseer Syra, just east in the next big room (She also patrols into the tunnels to the north and south), for the Runes of the Yrkvinn, then return to Lok’lira the Crone and turn in The Crone’s Bargain and get the follow-up Mildred the Cruel.
    • Head east and talk to Mildred the Cruel. Turn in Mildred the Cruel and get the follow-up Discipline. Head into the north and south tunnels in the room and use your Disciplining Rod on 6 Exhausted Vrykul. Then, return to Mildred the Cruel and turn in Discipline and get the follow-up Examples to be Made.
    • Head east to Garhal just in the next room and kill him. Then, return to Mildred the Cruel and turn in Examples to be Made and get the follow-up A Certain Prisoner.
    • Return west to Lok’lira the Crone and turn in A Certain Prisoner. Get the follow-up A Change in Scenery.
  3. Head east out of the mine to Brunnhildar Village. Turn in A Change in Scenery and get the follow-up Is That Your Goblin?
    • Head just southeast and talk to Agnetta Tyrsdottar and challenge and kill her.
    • Return to Lok’lira the Crone and turn in Is That Your Goblin? and get the follow-up The Hyldsmeet. Talk to Lok’lira again and go through her dialogue Turn in the quest and get the follow-up Taking On All Challengers.
    • Look around camp for 6 Victorious Challengers and challenge and kill them. Then, return to Lok’lira the Crone and turn in Taking on All Challengers and get the follow-up You’ll Need a Bear.
  4. Head east to Brijana and turn in You’ll Need a Bear and get the follow-up Going Bearback. You’ll enter into an automated ride. Keep using your Flaming Arrow (Ability 1) on cooldown and don’t Sprint until you’re done and just want to get back faster.
  1. Once you return to Brijana and complete the quest, turn in Going Bearback and get the follow-up Cold Hearted.
  2. Fly east to Dun Niffelem and mount directly onto a Captive Proto-Drake. Once on, use Ice Shard on Brunnhildar Prisoners and make sure you stay in range as they get grabbed by your drake. Free 3 since you can only carry that many, then fly back west. You need to rescue 9, so make two more trips. When done, turn in Cold Hearted. Get the follow-up Deemed Worthy.
  3. Talk to Astrid Bjonrittar in the southern area of Brunnhildar Village. Turn in Deemed Worthy and get the follow-up Making a Harness. Also, get the following quests in the next house to the west:
    • Aberrations
    • Off With Their Wings
    • Yuda’s Folly
  4. Fly southwest and kill Icemane Yetis for 3 Icemane Yeti Hides.
  5. Fly further southwest to Garm’s Bane and lay out the Improved Land Mines and kill 12 Garm Invaders with them.
  6. Return to Astrid Bjonrittar and turn in Making a Harness. Get the follow-ups The Last of Her Kind and The Slithering Darkness.
  7. Fly east and enter the cave. First, kill 8 Ravenous Jormungars as you clear to the back of the cave. When done, mount the Injured Icemaw Matriarch and take the ride out of the cave.
  8. Return to Astrid Bjonrittar.
  1. At Astrid Bjonrittar, turn in The Last of Her Kind and The Slithering Darkness. Get the follow-up The Warm-Up.
    • Head northeast to Kirgaraak. Spam Maul (Ability 4) as your main damage dealer. You can also do a combo attack by using Smash (Ability 5) to knock your opponent away then using Charge (Ability 6) right after. Do that attack on cooldown as well.
    • Turn in The Warm-Up and get the follow-up Into the Pit. Enter the pit and get on the bear. Kill 6 Hyldsmeet Warbears. Make sure to keep an eye on your own health too! Then, turn in Into the Pit and get the follow-up Prepare for Glory.
    • Head northwest to Lok’lira the Crone and turn in Prepare for Glory. Get the follow-up Lok’lira’s Parting Gift.
    • Speak to Gretta the Arbiter at the northeastern area of the village and turn in Lok’lira’s Parting Gift. Get the follow-up The Drakkensryd. You’ll be flown to the Temple of Storms. Use your Hyldnir Harpoon to jump onto a targeted drake and enter hand to hand combat with an Hyldsmeet Drakerider. You can use your normal abilities to kill it, and can eat and drink on the drake if need be. Kill 10 Hyldsmeet Drakeriders. Finish by using your Hyldnir Harpoon on a Column Ornament at the temple. Turn in The Drakkensryd to Thorim. Get the follow-up Sibling Rivalry. Talk to him and go through the dialogue to complete the quest and get the follow-up Mending Fences.
  2. Fly west to Valkyrion. In the area, complete the following objectives while killing 12 Nascent Val’kyr and killing Valkyrion Aspirants for about 6 Vials of Frost Oil.
    • Kill Yulda the Stormspeaker. Get Valkyrion Must Burn from the Harpoon Crate next to her.
    • Use a Valkyrion Harpoon Gun and aim the Flaming Harpoon on the stacks of hay to start 6 Fires. You may want to use the other set of harpoon guns as well to get different angles for aiming.
    • Throw the Vials of Frost Oil onto the eggs and freeze 30 Proto-Drake Eggs. The eggs are mostly in groups of 6.
  3. Fly northeast back to the Grom’arsh Crash Site.
  1. At the Grom’arsh Crash Site, turn in your quests:
    • Ancient Relics
    • Emergency Measures
    • Speak Orcish, Man! and get the follow-up Speaking with the Wind’s Voice
    • Yuda’s Folly
  2. Fly northwest and kill Stormriders for 5 Voice of the Wind.
  3. Return to Grom’arsh Crash Site and turn in Speaking with the Wind’s Voice. Get the follow-up Catching up with Brann.
    Use Brann’s Communicator and talk to Brann. Turn in the quest and get the follow-up Pieces of the Puzzle.
  4. Fly northeast to The Inventor’s Library.
    • Kill Library Guardians for 6 Investor’s Disk Fragments, then combine it into the Investor’s Disk.
      Then, use Brann’s Communicator to summon Brann Bronzebeard. Turn in Pieces of the Puzzle and get the follow-up Data Mining.
    • Use the Investor’s Disk on 7 Databanks to gather 7 Hidden Data.
      Then, use Brann’s Communicator to summon Brann Bronzebeard. Turn in Data Mining. Get the follow-up The Library Console.
  5. Go southwest into the actual library building. Click the Library Console and turn in The Library Console. Get the follow-up Norgannon’s Shell. Use the Charged Disk to summon Archivist Mechaton. Kill it for Norgannon’s Shell
    Then, use Brann’s Communicator to summon Brann Bronzebeard. Turn in Norgannon’s Shell. Get the follow-ups Going After the Core and The Earthen of Ulduar.
  6. Fly northwest to Bouldercrag’s Refuge.
  1. At Bouldercrag’s RefugeGet the Flight Path. Turn in The Earthen of Ulduar and get the follow-up Rare Earth. Also, Set your Hearthstone to Bouldercrag’s Refuge.
  2. Fly northwest down the cliff face. Mine 7 Enchanted Earth.
    • Then, Hearth back to Bouldercrag’s Refuge and turn in Rare Earth. Get follow-ups Fighting Back and Relief for the Fallen.
  3. Fly northeast down to the Snowdrift Plains. Kill 10 Stormforged Attackers and use your Telluric Poultice to heal 8 Fallen Earth Defenders.
    • Then, return to Bouldecrag’s Refuge. Turn in Fighting Back and Relief for the Fallen. Get the follow-ups Slaves of the Stormforged and The Dark Ore.
  4. Fly southwest to The Frozen Mine. Collect 5 Dark Ore Samples, Kill 3 Stormforged Taskmasters, and talk to 8 Captive Mechagnomes and attempt to free them.
    • Then, return to Bouldercrag’s Refuge. Turn in Slaves of the Stormforged and The Dark Ore. Get the follow-ups The Gifts of Loken and Facing the Storm.
  5. Fly southwest to Nidavelir.

In Nidavelir, kill a Stormforged War Golem for a Dark Armor Plate. This starts the quest Armor of Darkness. While flying in the next three steps to destroy Loken’s items, kill 10 Nidavelir Stormforged and get 4 Dark Armor Samples from the Stormforged War Golems.

All of the items to destroy are inside small buildings.

  1. Destroy Loken’s Power.
  2. Destroy Loken’s Favor.
  3. Destroy Loken’s Fury.
  4. Then, return to Bouldercrag’s Refuge.
  1. At Bouldercrag’s Refuge, turn in:
    • Armor of Darkness and get the follow-up The Armor’s Secrets
    • Facing the Storm
    • The Gifts of Loken
  2. Fly southeast to the other side of the mountain to Mimir’s Workshop. Talk to Attendant Tock and wait for him to finish investigating the Armor Plate.
    • Then, return to Bouldercrag’s Refuge. Turn in The Armor’s Secret. Get the follow-up Valduran the Stormborn.
  3. Fly southwest to Valduran the Stormborn. Use Bouldercrag’s War Horn to summon Bruor and Bouldercrag to help you. Kill Valduran.
    • Then, return to Bouldercrag’s Refuge. Turn in Valduran the Stormborn. Get the follow-ups Destroy the Forges! and Hit Them Where it Hurts.
  4. Fly to the Forges and use Bouldercrag’s Bomb to destroy the North, Central, and South Lightning Forge. They are all very close to each other. Kill 10 Stormforged Artificer as well.
    • Then, return to Bouldercrag’s Refuge.
  1. At Bouldercrag’s Refuge, turn in Destroy the Forges! and Hit Them Where it Hurts. Get the follow-up A Colossal Threat.
  2. Fly back to the forge area. Get the Colossal Attack Specs.
  3. Get the Colossal Defense Specs.
    • Then, return to Bouldercrag’s Refuge. Turn in A Colossal Threat and get the follow-up The Heart of the Storm.
  4. Fly in from a small hole on the south side of the Temple of Storms (fly north, facing the S in the Temple of Storms on the map) and fly in all the way to the Heart of the Storm. “Attempt” to loot the Heart of the Storm.
    • Then, Hearth back to Bouldercrag’s Refuge. Turn in Heart of the Storm and get the follow-up The Iron Colossus.
  5. Fly northwest and use a Jormungar Control Orb to take control of a Tamed Jormungar. Its abilities are:
    • Ability 1: Submerge – you can only move while submerged. When you submerge, you gain the ability to Emerge – you can only attack while emerged.
    • Ability 2: Jormungar Strike – powerful melee strike. Use this attack on cooldown.
    • Ability 3: Acid Breath – powerful stacking dot. Use this attack on cooldown as well.Before you fight the Iron Colossus, read the entire secstion on the strategy so you can avoid dying the first time against it.
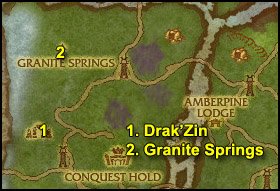
  6. Head west to The Iron Colossus(Submerge first to move).

    Emerge next to him and then start spamming your two attack abilities, Jormungar Strike and Acid Breath. The big gimmick to the fight is that when The Iron Colossus emotes: “The Iron Colossus prepares to slam the ground in front of him!” you must immediately Submerge and run BEHIND him (you can and should start moving even before the animation for being underground shows up – you can move right after submerging)Emerge behind him, then continue attacking. Rinse and repeat each time he emotes. You cannot get hit by his ground slam attack – if you manage to dodge it each time, you’ll kill him hanildy.
    • Finally, return to Bouldecrag’s Refuge to turn in the final part of this long quest chain.
  1. At Bouldercrag’s Refuge, turn in The Iron Colossus.
  2. Fly to K3 (using the flight path). Turn in Overstock.
  3. Fly northeast to Brunnhildar Village. Turn in your quests:
    • Aberrations
    • Off With Their Black Wings
    • Valkyrion Must Burn
    • Yulda’s Folly
  4. Fly east to Fjorn’s Anvil. Pick up a Granite Boulder off the ground then target a Stormforged Iron Giant and use Thorim’s Charm of Earth. You can only hold one boulder at a time. You will also get a Slag Covered Metal – start the quest The Refiner’s Fire from it. Kill Seething Revenants for 10 Furious Sparks.
  5. Head further east to the actual Anvil in Fjorn’s Anvil. Kill Fjorn (by picking up a Granite Boulder and using Thorim’s Charm of Earth as usual). Then, use the Anvil to complete The Refiner’s Fire. Also, finish killing 5 Stormforged Iron Giants.
  6. Fly all the way back to Thorim. Turn in Mending Fences and The Refiner’s Fire. Get the follow-up Forging an Alliance.

Congratulations! You should have hit level 80 by now, and have turned in all the most convenient quests.

WoW WotLK Classic Alliance 70-80 Leveling Guide: 78-79 Sholazar Basin

  1. Talk to Monte Muzzleshot and turn in Where in the World is Hemet Nesingwary? and get the follow-up Welcome to Sholazar Basin.
  2. Fly west to the Nesingwary Base Camp. Turn in Welcome to Sholazar Basin and get the quests:
    • It Could Be Anywhere! (Note: it really could be anywhere. Don’t specifically look for the Golden Engagement Ring anywhere – it is a zone wide drop from most anything. Turn it in when you find it.)
    • Need an Engine, Take an Engine
    • Venture Co. Misadventure
  3. Fly east back to the crash location and pick up the Flying Machine Engine.
  4. Ride northwest to Swindlegrin’s Dig. Talk to Engineer Helice and get the escort quest Engineering a Disaster. Kill 15 Venture Company Members while escorting her out.
  5. Return to Nesingwary Base Camp and turn in:
    • Engineering a Disaster
    • Need an Engine, Take an Engine and get the follow-up Have a Part, Give a Part
    • Venture Co. Misadventure and get the follow-up Wipe That Grin Off His Face
  6. Fly northeast back to Swindlegrin’s Dig.
    • Kill Foreman Swindlegrin and Meatpie on top of the platform
    • Gather 7 Venture Co. Spare Parts
  7. Return to Nesingwary Base Camp and turn in:
    • Have a Part, Give a Part
    • Wipe That Grin Off His FaceGet the Flight Path now that the flying machine is fixed. Get the new quests:
    • Dreadsaber Mastery: Becoming a Predator
    • Kick, What Kick? – Equip the RJR rifle and select Lucky Wilhelm and keep using the rifle until you hit the apple. There are no tricks, just keep using the rifle on cooldown until you hit.
    • Rhino Mastery: The Test
    • Aerial Surveillance
  1. Fly north and kill 15 Dreadsabers and 15 Shardhorn Rhino.
  2. Fly back to the Nesingwary Base Camp and turn in:
    • Dreadsaber Mastery: Becoming a Predator and get the follow-up Dreadsaber Mastery: Stalking the Prey
    • Rhino Mastery: The Test and get the follow-up Rhino Mastery: The ChaseGet all the new quests as well:
    • A Steak Fit for a Hunter
    • Crocolisk Mastery: The Trial
    • Some Make Lemonade, Some Make Liquor
  3. Fly south to Oracle Soo-rahm and turn in Rhino Mastery: The Chase and get the follow-up An Offering for Soo-rahm.

    Kill Longneck Grazers for 5 Longneck Grazer Steak.
  4. Fly northeast to Wildgrowth Mangal.
    • Look around trees for Sturdy Vines (Hanging from the trees in the air).Pull them for fruit. Collect 1 Orange, 2 Banana Bunch, and 1 Papaya.
    • Kill 15 Mangal Crocolisks.
    • Kill Emperor Cobras for 5 Intact Cobra Fang.
    • Finish killing 60 Game Animals as well.
  5. Fly northwest and examine Dreadsaber Tracks until you identify 3 Shango Tracks.
  6. Fly southwest to Oracle Soo-rahm and turn in An Offering for Soo-rahm and get the follow-up The Bones of Nozronn. Use Soo-rahm’s Incense at the Offering Bowl.
  7. Return to the Nesingwary Base Camp and turn in all your quests:
    • A Steak Fit for a Hunter
    • Crocolisk Mastery: The Trial and get the follow-up Crocolisk Mastery: The Plan
    • Dreadsaber Mastery: Stalking the Prey and get the follow-up Dreadsaber Mastery: Ready to Pounce
    • Some Make Lemonade, Some Make Liquor and get the follow-up Still At It
    • The Bones of Nozronn and get the follow-up Rhino Mastery: The Kill
    • The Great Hunter’s ChallengeSpeak to “Tipsy” McManus to begin distillation. Follow his instructions quickly by clicking the object he tells you to. Complete it and turn in Still At It.

      At camp, offer the Jungle Punch Sample to Hemet Nesingwary and Hadrius Harlowe.
  1. Fly south and look along the lake and along the river to the east for 5 Sandfern.
  2. Return to Nesingwary Base Camp and turn in Crocolisk Mastery: The Plan and get the follow-up Crocolisk Mastery: The Ambush. Also get the new quest Lakeside Landing.
  3. Fly northwest and kill Shango, near the waterfall.
  4. Fly northeast and kill Farunn. It wanders between the northeastern area of the lake and The Glimmering Pillar.
  5. Fly south to Lakeside LandingGet the Flight Path. Turn in Aerial Surveillance and Lakeside Landing.
    Offer Tamara Wobblesprocket a taste test with your Jungle Punch Sample. Get the quests:
    • The Part-time Hunter
    • An Embarrassing Incident
    • Force of Nature
  6. Dive into the lake and get Vic’s Keys in a Raised Mud. It may take several tries before you find them.
  7. Get out on the west side of the lake and stand on the log. Use the Sandfern Disguise and kill Bushwhacker.
  8. Fly south to Pitch, being cornered in by three trackers. Kill it. Get the quest from Tracker GekgekPlaying Along.
  9. Fly northwest back to Lakeside Landing. Turn in:
    • The Part-time Hunter
    • An Embarrassing Incident and get the follow-up Reconnaissance Flight.

      Take the flight. Shoot missiles at the gargoyles that attack you, then fly back to Lakeside Landing and land the plane in the circle of blue markers. Turn in Reconnaissance Flight.
  10. Take the flight back to Nesingwary Base Camp. Turn in
  • A Taste Test
  • Crocolisk Mastery: The Ambush
  • Dreadsaber Mastery: Ready to Pounce
  • Rhino Mastery: The Kill

    Get the new quest, In Search of Bigger Game.
  1. Fly northeast to Dorian’s Camp. Turn in In Search of Bigger Game and get the quests:
    • Burning to Help
    • Securing the Bait
    • Sharpening Your Talons
  2. Fly southwest and dive into Bittertide Lake. Kill 5 Bittertide Hydra. After each kill, use the Sample Container to take a sample of Bittertide Hydra Sputum, a debuff they put on you when fighting. Collect 5 samples.
  3. Fly northeast to The Savage Thicket. Kill 6 Primordial Drake and “kill” the Primordial Drake Eggs and pick up 6 Primordial Hatchling.
  4. Fly west to Dorian’s Camp and turn in your quests:
    • Burning to Help
    • Securing the Bait
    • Sharpening Your TalonsGet the new quests:
    • A Mammoth Undertaking
    • My Pet Roc
    • Reagent AgentLook around camp for a Shattertusk Mammoth and use the Mammoth Harness on it, then hand it over using ability 1. Turn in A Mammoth Undertaking and get the follow-up Post-partum Aggression.
  5. Ride the mammoth northeast to Broodmother Slivina. Use Signal Hemet to Attack (Ability 4) to mark it and have Hemet attack it. Keep spamming Gore (Ability 6), and pulling Slivina into the trap whenever Hemet drops one.
  6. Head further east into The Bonefields. Gather 7 Roc Eggs and kill Goretalon Rocs for 5 Twisted Roc Talons.
  7. Then, fly back to Dorian’s Camp and turn in your quests:
    • A Mammoth Undertaking
    • My Pet Roc
    • Reagent Agent
  1. Fly southeast to the Avatar of Freya. Turn in Force of Nature and get the follow-up An Issue of Trust.
  2. Head east and kill 6 Blighted Corpse and 10 Bonescythe Ravager.
    • Then, return to Freya and turn in An Issue of Trust. Get the follow-up Returned Sevenfold.
  3. Fly north and aggro Thalgran Blightbringer. Be ready to use Freya’s Ward – when Thalgran’s hands start glowing black, quickly use it and stand still since it channels. It will reflect the Deathbolts back to him. You can choose not to go into melee range at all and just kite him in circles and kill him with his own bolts.
    • Then, return to Freya and turn in Returned Sevenfold. Get the two follow-up quests, The Fallen Pillar and Salvaging Life’s Strength.
  4. Fly south and up to The Lifeblood Pillar.
    • Turn in The Fallen Pillar at the Cultist Corpse. Get the follow-up Cultist Incursion.
    • Kill 8 Lifeblood Elementals and use the Lifeblood Gem on their corpses.
    • Then, fly back to Freya and turn in Cultist Incursion and Salvaging Life’s Strength. Get the follow-up quests, Exterminate the Intruders and Weapons of Destruction.
  5. Fly northwest to Death’s Hand Encampment
    • Kill 8 Cultist Infiltrators
    • Destroy 4 Unstable Explosives
    • Then, fly back to Freya and turn in Exterminate the Intruders and Weapons of Destruction. Get the follow-up The Lifewarden’s Wrath.
  6. Fly northwest to the top of The Glimmering Pillar. Use Freya’s Horn under the structure, where the explosives are.
    • Then, fly back to Freya and turn in The Lifewarden’s Wrath. Get the follow-up Freya’s Pact. Talk to her and go through the dialogue to complete the quest and get the follow-up Powering the Waygate – The Maker’s Perch.
  7. Fly far northwest to The Maker’s Perch. Enter the building, and use Activation Switch Gamma.
    • Then, fly back to Freya and turn in Powering the Waygate – The Maker’s Perch. Get the follow-up Powering the Waygate – The Maker’s Overlook.
  8. Fly east to The Maker’s Overlook. Outside the building, get the quest A Timeworn Coffer. Enter the building, killing Sholazar Guardians for a Huge Stone Key throughout, and head down the corridor east all the way to the end (avoiding the elite Overlook Sentry), and use Activation Switch Theta. Return to the Timeworn Coffer and complete A Timeworn Coffer.
    • Then, fly back to Freya and turn in Powering the Waygate – The Maker’s Overlook. Get the follow-up The Etymidian.
  9. Fly southwest into the Waygate. Head up the stairs and turn in The Etymidian and get the follow-up The Activation Rune.
    • Enter the hall and kill High Cultust Herenn at the end of it for the Omega Rune.
    • Return to The Etymidian and turn in The Activation Rune and get the follow-up Back Through the Waygate.
    • Don’t start flying back to Freya yet! Fly to Frenzyheart Hill.
  1. Fly northeast to Frenzyheart Hill and turn in Playing Along. Get the follow-up The Ape Hunter’s Slave. Also, get Tormenting the Softknuckles from Goregek (you can use Goregek’s Shackles to summon him).
  2. Fly southeast and kill 8 Hardknuckle Forager and 6 Hardknuckle Charger. Use your Softknuckle Poker to poke Softknuckles until the Hardknuckle Matriarch comes. Kill her.
    • Then, return to Frenzyheart Hill and turn in The Ape Hunter’s Slave and Tormenting the Softknuckles. Get the follow-ups The Wasp Hunter’s Apprentice and The Sapphire Queen.
  3. Fly southeast into the Sapphire Hive. Kill 6 Sapphire Hive Wasp and 9 Sapphire Hive Drone. Fight your way to the end of the tunnel and kill the Sapphire Hive Queen for the Stinger of the Sapphire Queen.
    • Then, return to Frenzyheart Hill and turn in The Wasp Hunter’s Apprentice and The Sapphire Queen. Get the follow-up Flown the Coop! Capture 12 Chickens around camp, then turn in the quest and get the follow-ups The Underground Menace and Mischief in the Making.
  4. Fly south and gather 8 Skyreach Crystal Cluster along the river. Also, search for Serfex – he’s underneath the ground, walk over his dirt mound to make him come up – and kill him for the Claw of Serfex – he spawns in two places on the river.
    • Then, return to Frenzyheart Hill and turn in The Underground Menace and Mischief in the Making. Get the follow-up Rough Ride. Get on the Captive Crocolisk at the northeastern area of camp.
  5. Ride the crocolisk at the west side of camp to Mistwhisper Refuge. You’ll arrive just southeast of the camp. Use Zepik’s Hunting Horn to call Zepik and turn in A Rough Ride. Get the follow-ups Lightning Definitely Strikes Twice and The Mist Isn’t Listening.
    • Kill 12 Mistwhisper Gorlocs
    • Use the Skyreach Crystal Clusters at the base of the weather shrine, then shatter the crystals by interacting with them when they appear next to the shrine.
    • Turn in Lightning Definitely Strikes Twice and The Mist Isn’t Listening to Zepik(Use Zepik’s Hunting Horn to summon him if he’s not with you). Get the follow-up Hoofing It.
    • Then, return to Frenzyheart Hill and turn in Hoofing It. Get the follow-up Just Following Orders.
  6. Fly north to an Injured Rainspeaker Oracle. Talk to it, then complete Just Following Orders. Get the follow-up Fortunate Misunderstandings.
  7. Talk to the oracle again and escort it to Rainspeaker Canopy. Turn in Fortunate Misunderstandings and get the follow-ups Make the Bad Snake Go Away and Gods Like Shiny Things.
  1. Head north and kill 10 Emperor Cobras and Venomtip. Keep a careful lookout at the ground – some places sparkle just slightly. Stand on them and let Lafoo dig them up. Collect 6 Shiny Treasures.
  2. Then, return to Rainspeaker Canopy and turn in Gods like Shiny Things and Make the Bad Snake Go Away. Get the follow-up Making Peace.
  3. Fly southwest to Shaman Vekjik and talk to him.
  4. Then, return to Rainspeaker Canopy and turn in Making Peace. Get the follow-up Back So Soon?
  5. Fly northwest to Mistwhisper Refuge and turn in Back So Soon? and get the follow-ups The Lost Mistwhisper Treasure and Forced Hand.
  6. Fly northwest to the Mistwhisper TreasureWarlord Tartek will come – kill him. Head down and kill 8 Frenzyheart Spearbearer and 6 Frenzyheart Scavenger.
    Then, return to Mistwhisper Refuge and turn in The Lost Mistwhisper Treasure and Forced Hand. Get the follow-up Home Time!
  7. Fly to Rainspeaker Canopy and turn in Home Time! Get the follow-up The Angry Gorloc.
  1. Fly northeast to Avatar of Freya and turn in Back Through the Waygate. Get the follow-up Reclamation.
  2. Fly east to Mosswalker Village. Turn in The Angry Gorloc to your summon, Moodle. Get the follow-up quests The Mosswalker Savior and Lifeblood of the Mosswalker Shrine.
    • Rescue 6 Mosswalker Victims in the village by killing the undead standing over them.
  3. Fly southwest and pick up 10 Lifeblood Shard scattered on the ground near the red crystals.
    • Summon Moodle using Moodle’s Stress Ball and turn in The Mosswalker Savior and Lifeblood of the Mosswalker Shrine. Get the follow-up A Hero’s Burden (Group).

      Look for somebody to group with to do the group quest while you proceed to The Avalanche. He’s inside the bottom of the Lifeblood Pillar.
      Fly northeast to The Avalanche. Use the Omega Rune to take control of The Etymidian. Start heading up the slope. All the abilities are very relevant, so read up on them first and try them out while killing the lesser undead..

      Ability 1: Colossal Strike – A frontal cleaving attack which should be constantly spammed.
      Ability 2: Cataclysm – 
      A large AoE around you which does a lot of damage and instantly kills the lesser undead.
      Ability 3: Reconstruction – 
      A self-heal to full.
      Ability 4: Titanic Surge – 
      Evocation — regains all your mana as its charging, but you take extra damage while “Evocating.”
      Ability 5: Maker’s Sanctuary
       – A self-divine intervention. Takes you out of combat and makes you immune. This is the ability to use when you’re about to die and have no outs.
  4. Kill Bythius the Flesh-Shaper. This one is fairly simple, just spam Colossal Strike and Cataclysm. Use Reconstruction when you’re low on health.
  5. Kill Urgreth of the Thousand Tombs – Keep a lookout for Urgeth’s emote, Urgeth begins to emanate a powerful dark energy! When he does, run away since you will instantly die if you’re near him. Take the opportunity to Reconstruction and Titanic Surge while he’s running back to you. As usual, spam Colossal Strike and Cataclysm.
  6. Kill Hailscorn – Just spam Colossal Strike, and save Cataclysm for when Hailscorn emotes: Hailscorn calls forth an army of frozen corpses. Cataclysm to kill all the adds he spawns. Rinse and repeat.
  7. Once you’ve finished killing 200 Lesser Undead, fly southwest to Freya and turn in Reclamation.

If you can find a partner to go kill Artruis, then go for it – otherwise, Hearth to Dalaran.

  1. (Group) A Hero’s Burden Quest: Fly to The Lifeblood Pillar and enter the lower entrance. Kill Artruis the Heartless – at 30%, he becomes immune to attack and you then must kill either the Gorloc or Wolvar. Whoever you don’t kill you become friendly with their faction, and whoever you kill you become enemies of that faction. Don’t worry too much about this decision, since you can change factions at any time from the same daily.

    Complete the quest at Artruis’s Phylactery as well as the follow-up quest to either the Gorloc or Wolvar.

    Then, Hearth to Dalaran.

WoW WotLK Classic Horde 70-80 Leveling Guide: 78-79 Sholazar Basin

  1. Talk to Monte Muzzleshot and turn in Where in the World is Hemet Nesingwary? and get the follow-up Welcome to Sholazar Basin.
  2. Fly west to the Nesingwary Base Camp. Turn in Welcome to Sholazar Basin and get the quests:
    • It Could Be Anywhere! (Note: it really could be anywhere. Don’t specifically look for the Golden Engagement Ring anywhere – it is a zone wide drop from most anything. Turn it in when you find it.)
    • Need an Engine, Take an Engine
    • Venture Co. Misadventure
  3. Fly east back to the crash location and pick up the Flying Machine Engine.
  4. Ride northwest to Swindlegrin’s Dig. Talk to Engineer Helice and get the escort quest Engineering a Disaster. Kill 15 Venture Company Members while escorting her out.
  5. Return to Nesingwary Base Camp and turn in:
    • Engineering a Disaster
    • Need an Engine, Take an Engine and get the follow-up Have a Part, Give a Part
    • Venture Co. Misadventure and get the follow-up Wipe That Grin Off His Face
  6. Fly northeast back to Swindlegrin’s Dig.
    • Kill Foreman Swindlegrin and Meatpie on top of the platform
    • Gather 7 Venture Co. Spare Parts
  7. Return to Nesingwary Base Camp and turn in:
    • Have a Part, Give a Part
    • Wipe That Grin Off His FaceGet the Flight Path now that the flying machine is fixed. Get the new quests:
    • Dreadsaber Mastery: Becoming a Predator
    • Kick, What Kick? – Equip the RJR rifle and select Lucky Wilhelm and keep using the rifle until you hit the apple. There are no tricks, just keep using the rifle on cooldown until you hit.
    • Rhino Mastery: The Test
    • Aerial Surveillance
  1. Fly north and kill 15 Dreadsabers and 15 Shardhorn Rhino.
  2. Fly back to the Nesingwary Base Camp and turn in:
    • Dreadsaber Mastery: Becoming a Predator and get the follow-up Dreadsaber Mastery: Stalking the Prey
    • Rhino Mastery: The Test and get the follow-up Rhino Mastery: The ChaseGet all the new quests as well:
    • A Steak Fit for a Hunter
    • Crocolisk Mastery: The Trial
    • Some Make Lemonade, Some Make Liquor
  3. Fly south to Oracle Soo-rahm and turn in Rhino Mastery: The Chase and get the follow-up An Offering for Soo-rahm.

    Kill Longneck Grazers for 5 Longneck Grazer Steak.
  4. Fly northeast to Wildgrowth Mangal.
    • Look around trees for Sturdy Vines (Hanging from the trees in the air).Pull them for fruit. Collect 1 Orange, 2 Banana Bunch, and 1 Papaya.
    • Kill 15 Mangal Crocolisks.
    • Kill Emperor Cobras for 5 Intact Cobra Fang.
    • Finish killing 60 Game Animals as well.
  5. Fly northwest and examine Dreadsaber Tracks until you identify 3 Shango Tracks.
  6. Fly southwest to Oracle Soo-rahm and turn in An Offering for Soo-rahm and get the follow-up The Bones of Nozronn. Use Soo-rahm’s Incense at the Offering Bowl.
  7. Return to the Nesingwary Base Camp and turn in all your quests:
    • A Steak Fit for a Hunter
    • Crocolisk Mastery: The Trial and get the follow-up Crocolisk Mastery: The Plan
    • Dreadsaber Mastery: Stalking the Prey and get the follow-up Dreadsaber Mastery: Ready to Pounce
    • Some Make Lemonade, Some Make Liquor and get the follow-up Still At It
    • The Bones of Nozronn and get the follow-up Rhino Mastery: The Kill
    • The Great Hunter’s ChallengeSpeak to “Tipsy” McManus to begin distillation. Follow his instructions quickly by clicking the object he tells you to. Complete it and turn in Still At It.

      At camp, offer the Jungle Punch Sample to Hemet Nesingwary and Hadrius Harlowe.
  1. Fly south and look along the lake and along the river to the east for 5 Sandfern.
  2. Return to Nesingwary Base Camp and turn in Crocolisk Mastery: The Plan and get the follow-up Crocolisk Mastery: The Ambush. Also get the new quest Lakeside Landing.
  3. Fly northwest and kill Shango, near the waterfall.
  4. Fly northeast and kill Farunn. It wanders between the northeastern area of the lake and The Glimmering Pillar.
  5. Fly south to Lakeside LandingGet the Flight Path. Turn in Aerial Surveillance and Lakeside Landing.
    Offer Tamara Wobblesprocket a taste test with your Jungle Punch Sample. Get the quests:
    • The Part-time Hunter
    • An Embarrassing Incident
    • Force of Nature
  6. Dive into the lake and get Vic’s Keys in a Raised Mud. It may take several tries before you find them.
  7. Get out on the west side of the lake and stand on the log. Use the Sandfern Disguise and kill Bushwhacker.
  8. Fly south to Pitch, being cornered in by three trackers. Kill it. Get the quest from Tracker GekgekPlaying Along.
  9. Fly northwest back to Lakeside Landing. Turn in:
    • The Part-time Hunter
    • An Embarrassing Incident and get the follow-up Reconnaissance Flight.
    Take the flight. Shoot missiles at the gargoyles that attack you, then fly back to Lakeside Landing and land the plane in the circle of blue markers. Turn in Reconnaissance Flight.
  10. Take the flight back to Nesingwary Base Camp. Turn in
  • A Taste Test
  • Crocolisk Mastery: The Ambush
  • Dreadsaber Mastery: Ready to Pounce
  • Rhino Mastery: The Kill

    Get the new quest, In Search of Bigger Game.
  1. Fly northeast to Dorian’s Camp. Turn in In Search of Bigger Game and get the quests:
    • Burning to Help
    • Securing the Bait
    • Sharpening Your Talons
  2. Fly southwest and dive into Bittertide Lake. Kill 5 Bittertide Hydra. After each kill, use the Sample Container to take a sample of Bittertide Hydra Sputum, a debuff they put on you when fighting. Collect 5 samples.
  3. Fly northeast to The Savage Thicket. Kill 6 Primordial Drake and “kill” the Primordial Drake Eggs and pick up 6 Primordial Hatchling.
  4. Fly west to Dorian’s Camp and turn in your quests:
    • Burning to Help
    • Securing the Bait
    • Sharpening Your TalonsGet the new quests:
    • A Mammoth Undertaking
    • My Pet Roc
    • Reagent AgentLook around camp for a Shattertusk Mammoth and use the Mammoth Harness on it, then hand it over using ability 1. Turn in A Mammoth Undertaking and get the follow-up Post-partum Aggression.
  5. Ride the mammoth northeast to Broodmother Slivina. Use Signal Hemet to Attack (Ability 4) to mark it and have Hemet attack it. Keep spamming Gore (Ability 6), and pulling Slivina into the trap whenever Hemet drops one.
  6. Head further east into The Bonefields. Gather 7 Roc Eggs and kill Goretalon Rocs for 5 Twisted Roc Talons.
  7. Then, fly back to Dorian’s Camp and turn in your quests:
    • A Mammoth Undertaking
    • My Pet Roc
    • Reagent Agent
  1. Fly southeast to the Avatar of Freya. Turn in Force of Nature and get the follow-up An Issue of Trust.
  2. Head east and kill 6 Blighted Corpse and 10 Bonescythe Ravager.
    • Then, return to Freya and turn in An Issue of Trust. Get the follow-up Returned Sevenfold.
  3. Fly north and aggro Thalgran Blightbringer. Be ready to use Freya’s Ward – when Thalgran’s hands start glowing black, quickly use it and stand still since it channels. It will reflect the Deathbolts back to him. You can choose not to go into melee range at all and just kite him in circles and kill him with his own bolts.
    • Then, return to Freya and turn in Returned Sevenfold. Get the two follow-up quests, The Fallen Pillar and Salvaging Life’s Strength.
  4. Fly south and up to The Lifeblood Pillar.
    • Turn in The Fallen Pillar at the Cultist Corpse. Get the follow-up Cultist Incursion.
    • Kill 8 Lifeblood Elementals and use the Lifeblood Gem on their corpses.
    • Then, fly back to Freya and turn in Cultist Incursion and Salvaging Life’s Strength. Get the follow-up quests, Exterminate the Intruders and Weapons of Destruction.
  5. Fly northwest to Death’s Hand Encampment
    • Kill 8 Cultist Infiltrators
    • Destroy 4 Unstable Explosives
    • Then, fly back to Freya and turn in Exterminate the Intruders and Weapons of Destruction. Get the follow-up The Lifewarden’s Wrath.
  6. Fly northwest to the top of The Glimmering Pillar. Use Freya’s Horn under the structure, where the explosives are.
    • Then, fly back to Freya and turn in The Lifewarden’s Wrath. Get the follow-up Freya’s Pact. Talk to her and go through the dialogue to complete the quest and get the follow-up Powering the Waygate – The Maker’s Perch.
  7. Fly far northwest to The Maker’s Perch. Enter the building, and use Activation Switch Gamma.
    • Then, fly back to Freya and turn in Powering the Waygate – The Maker’s Perch. Get the follow-up Powering the Waygate – The Maker’s Overlook.
  8. Fly east to The Maker’s Overlook. Outside the building, get the quest A Timeworn Coffer. Enter the building, killing Sholazar Guardians for a Huge Stone Key throughout, and head down the corridor east all the way to the end (avoiding the elite Overlook Sentry), and use Activation Switch Theta. Return to the Timeworn Coffer and complete A Timeworn Coffer.
    • Then, fly back to Freya and turn in Powering the Waygate – The Maker’s Overlook. Get the follow-up The Etymidian.
  9. Fly southwest into the Waygate. Head up the stairs and turn in The Etymidian and get the follow-up The Activation Rune.
    • Enter the hall and kill High Cultust Herenn at the end of it for the Omega Rune.
    • Return to The Etymidian and turn in The Activation Rune and get the follow-up Back Through the Waygate.
    • Don’t start flying back to Freya yet! Fly to Frenzyheart Hill.
  1. Fly northeast to Frenzyheart Hill and turn in Playing Along. Get the follow-up The Ape Hunter’s Slave. Also, get Tormenting the Softknuckles from Goregek (you can use Goregek’s Shackles to summon him).
  2. Fly southeast and kill 8 Hardknuckle Forager and 6 Hardknuckle Charger. Use your Softknuckle Poker to poke Softknuckles until the Hardknuckle Matriarch comes. Kill her.
    • Then, return to Frenzyheart Hill and turn in The Ape Hunter’s Slave and Tormenting the Softknuckles. Get the follow-ups The Wasp Hunter’s Apprentice and The Sapphire Queen.
  3. Fly southeast into the Sapphire Hive. Kill 6 Sapphire Hive Wasp and 9 Sapphire Hive Drone. Fight your way to the end of the tunnel and kill the Sapphire Hive Queen for the Stinger of the Sapphire Queen.
    • Then, return to Frenzyheart Hill and turn in The Wasp Hunter’s Apprentice and The Sapphire Queen. Get the follow-up Flown the Coop! Capture 12 Chickens around camp, then turn in the quest and get the follow-ups The Underground Menace and Mischief in the Making.
  4. Fly south and gather 8 Skyreach Crystal Cluster along the river. Also, search for Serfex – he’s underneath the ground, walk over his dirt mound to make him come up – and kill him for the Claw of Serfex – he spawns in two places on the river.
    • Then, return to Frenzyheart Hill and turn in The Underground Menace and Mischief in the Making. Get the follow-up Rough Ride. Get on the Captive Crocolisk at the northeastern area of camp.
  5. Ride the crocolisk at the west side of camp to Mistwhisper Refuge. You’ll arrive just southeast of the camp. Use Zepik’s Hunting Horn to call Zepik and turn in A Rough Ride. Get the follow-ups Lightning Definitely Strikes Twice and The Mist Isn’t Listening.
    • Kill 12 Mistwhisper Gorlocs
    • Use the Skyreach Crystal Clusters at the base of the weather shrine, then shatter the crystals by interacting with them when they appear next to the shrine.
    • Turn in Lightning Definitely Strikes Twice and The Mist Isn’t Listening to Zepik(Use Zepik’s Hunting Horn to summon him if he’s not with you). Get the follow-up Hoofing It.
    • Then, return to Frenzyheart Hill and turn in Hoofing It. Get the follow-up Just Following Orders.
  6. Fly north to an Injured Rainspeaker Oracle. Talk to it, then complete Just Following Orders. Get the follow-up Fortunate Misunderstandings.
  7. Talk to the oracle again and escort it to Rainspeaker Canopy. Turn in Fortunate Misunderstandings and get the follow-ups Make the Bad Snake Go Away and Gods Like Shiny Things.
  1. Head north and kill 10 Emperor Cobras and Venomtip. Keep a careful lookout at the ground – some places sparkle just slightly. Stand on them and let Lafoo dig them up. Collect 6 Shiny Treasures.
  2. Then, return to Rainspeaker Canopy and turn in Gods like Shiny Things and Make the Bad Snake Go Away. Get the follow-up Making Peace.
  3. Fly southwest to Shaman Vekjik and talk to him.
  4. Then, return to Rainspeaker Canopy and turn in Making Peace. Get the follow-up Back So Soon?
  5. Fly northwest to Mistwhisper Refuge and turn in Back So Soon? and get the follow-ups The Lost Mistwhisper Treasure and Forced Hand.
  6. Fly northwest to the Mistwhisper TreasureWarlord Tartek will come – kill him. Head down and kill 8 Frenzyheart Spearbearer and 6 Frenzyheart Scavenger.
    • Then, return to Mistwhisper Refuge and turn in The Lost Mistwhisper Treasure and Forced Hand. Get the follow-up Home Time!
  7. Fly to Rainspeaker Canopy and turn in Home Time! Get the follow-up The Angry Gorloc.
  1. Fly northeast to Avatar of Freya and turn in Back Through the Waygate. Get the follow-up Reclamation.
  2. Fly east to Mosswalker Village. Turn in The Angry Gorloc to your summon, Moodle. Get the follow-up quests The Mosswalker Savior and Lifeblood of the Mosswalker Shrine.
    • Rescue 6 Mosswalker Victims in the village by killing the undead standing over them.
  3. Fly southwest and pick up 10 Lifeblood Shard scattered on the ground near the red crystals.
    • Summon Moodle using Moodle’s Stress Ball and turn in The Mosswalker Savior and Lifeblood of the Mosswalker Shrine. Get the follow-up A Hero’s Burden (Group).

      Look for somebody to group with to do the group quest while you proceed to The Avalanche. He’s inside the bottom of the Lifeblood Pillar.
      Fly northeast to The Avalanche. Use the Omega Rune to take control of The Etymidian. Start heading up the slope. All the abilities are very relevant, so read up on them first and try them out while killing the lesser undead..

      Ability 1: Colossal Strike – A frontal cleaving attack which should be constantly spammed.
      Ability 2: Cataclysm – 
      A large AoE around you which does a lot of damage and instantly kills the lesser undead.
      Ability 3: Reconstruction – 
      A self-heal to full.
      Ability 4: Titanic Surge – 
      Evocation — regains all your mana as its charging, but you take extra damage while “Evocating.”
      Ability 5: Maker’s Sanctuary
       – A self-divine intervention. Takes you out of combat and makes you immune. This is the ability to use when you’re about to die and have no outs.
  4. Kill Bythius the Flesh-Shaper. This one is fairly simple, just spam Colossal Strike and Cataclysm. Use Reconstruction when you’re low on health.
  5. Kill Urgreth of the Thousand Tombs – Keep a lookout for Urgeth’s emote, Urgeth begins to emanate a powerful dark energy! When he does, run away since you will instantly die if you’re near him. Take the opportunity to Reconstruction and Titanic Surge while he’s running back to you. As usual, spam Colossal Strike and Cataclysm.
  6. Kill Hailscorn – Just spam Colossal Strike, and save Cataclysm for when Hailscorn emotes: Hailscorn calls forth an army of frozen corpses. Cataclysm to kill all the adds he spawns. Rinse and repeat.
  7. Once you’ve finished killing 200 Lesser Undead, fly southwest to Freya and turn in Reclamation.

If you can find a partner to go kill Artruis, then go for it – otherwise, Hearth to Dalaran.

  1. (Group) A Hero’s Burden Quest: Fly to The Lifeblood Pillar and enter the lower entrance. Kill Artruis the Heartless – at 30%, he becomes immune to attack and you then must kill either the Gorloc or Wolvar. Whoever you don’t kill you become friendly with their faction, and whoever you kill you become enemies of that faction. Don’t worry too much about this decision, since you can change factions at any time from the same daily.

    Complete the quest at Artruis’s Phylactery as well as the follow-up quest to either the Gorloc or Wolvar.

    Then, Hearth to Dalaran.

WoW WotLK Classic Alliance 70-80 Leveling Guide: 77-78 Zul’Drak

You should be level 77 by now, in which case before you enter Zul’Drak, you should learn Cold Weather Flying, and purchase your epic flying mount if you have enough gold for it, cost: 5,000g training + 1,000g Cold Weather training + 100g for the mount.

(Optional but Highly Recommended – Group) A note as you enter Zul’Drak – you may remember the Ring of Blood quest series from Nagrand. In Zul’Drak, there’s once again a series of arena fights which is just like the Ring of Blood – its a series called The Amphitheater of Anguish. As soon as you enter the zone, look out for people looking for more for the “Ring of Blood” or “Amphitheater” or “Arena” quests. Find a group of five people with a tank and healer.

The process of making sure the entire group starts and completes the quest together is having one person be the designated quest starter. Have everybody gather around the quest giver, then one person starts the quest, which will allow everyone to start the quest. Then, after making sure everybody’s turned in the quest, the quest starter starts the next quest, and so on and so on.

With a group of five with a tank and a healer, it will be the fastest burst of experience that is in the game, 192,900 XP in just minutes, along with an extremely good weapon, and about 120 Gold! Keep an eye out for groups throughout your entire time in Zul’Drak because there are no pre-requisites. If you find a group, go there and then continue questing where you left off.

  1. Fly to Wintergarde Keep, Dragonblight. Ride northeast into Zul’Drak.
  2. Ride to Light’s Breach. Turn in Into the Breach! and get the quests:
    • In Search of Answers
    • This Just In: Fire Still Hot!
    • Trolls Is Gone Crazy!
    • Wanted: Ragemane’s Flipper (Group)Look around to see if anybody wants to do Wanted: Ragemane’s Flipper. Any team of two people should be able to do him. If you don’t find anyone, get around to it later.
  3. Ride southeast to Rageclaw Den. Complete all of the following objectives simultaneously:
    • Clear your way to the Orders From Drakuru, turn in In Search of Answers, and get the follow-up Orders From Drakuru.
    • Kill Drakuru Blood Drinkers for Drakuru “Lock Openers”.
    • Free 8 Captured Rageclaw by using the Drakuru “Lock Openers” on them.
    • Use the Rageclaw Fire Extinguisher to Douse 15 Huts. You’ll have to use them multiple times to put out the fires. You can just spam the item to douse fires very quickly.
    • If you have a partner, ride southeast to Rageclaw Lake and kill Ragemane.
  4. Return to Light’s Breach. Turn in your quests:
    • Orders From Drakuru and get the follow-ups The Ebon Watch and Crusader Forward Camp
    • This Just In: Fire Still Hot!
    • Trolls Is Gone Crazy!
    • Wanted: Ragemane’s Flipper (if you did it)
  1. Ride northwest to the Crusader Forward Camp and turn in Crusader Forward Camp. Get the follow-up quests:
    • That’s What Friends Are For…
    • Making Something Out Of Nothing
  2. Ride north to Crusader Dargath.
  3. Ride southwest to Thrym’s End. Talk to Gymer and get his quest, A Great Storm Approaches.
  4. Ride west to Gerk and get Light Won’t Grant Me Vengeance.
  5. Ride west to find Burr.
    • Finish killing 15 Vargul and gathering 10 Scourge Scrap Metal then go back to Gerk and turn in Light Won’t Grant Me Vengeance.
  6. Return to the Crusader Forward Camp. Turn in:
  • A Great Storm Approaches and get the follow-up Gymer’s Salvation.
  • Making Something Out Of Nothing
  • That’s What Friends Are For…
  1. Ride north and kill Banshee Soulclaimers for 6 Banshee Essence.
  2. Ride southwest to Ebon Watch. Turn in The Ebon Watch and get the follow-up Kickin’ Nass and Takin’ Manes.
  3. Ride around the camp to the south and the west and kill Icetouched Earthragers for 6 Diatomaceous Earth.
  4. Ride around the camp to the north and the east and kill 10 Withered Trolls and use Stefan’s Steel Toed Boot after each kill to collect 10 Hair Samples. You should also get an Unliving Choker which starts the quest An Invitation, of Sorts…
  5. Ride back to Ebon Watch and turn in:
    • Kickin’ Nass and Takin’ Manes and get the follow-up Taking a Stand
    • An Invitation, of Sorts… and get the follow-up Near Miss. Talk to Bloodrose Datura nearby to complete it and get the follow-up You Can Run, But You Can’t Hide.
  6. Ride east to the Reliquary of Agony and collect 5 Gooey Ghoul Drool (scattered around on the ground) and kill Putrid Abominations for 5 Putrid Abomination Guts.
    • Then, return to Ebon Watch and turn in You Can Run, But You Can’t Hide and get the follow-up Dressing Down.
    • Then, ride back to the Reliquary of Agony and use the Ensorcelled Choker to disguise yourself as a ghoul. Talk to Gristlegut and buy a Bitter Plasma. Also, accept his quest Feedin’ Da Goolz.
    • Circle around the area and use the Bowels and Brains Bowl near Decaying Ghouls and Feed 10 of them.
    • Return to Gristlegut and turn in Feedin’ Da Goolz.
    • Finally, ride back to Ebon Watch and turn in Dressing Down. Get the follow-up Infiltrating Voltarus.
  1. Ride to the Crusader Forward Camp and turn in Ormer’s Salvation. Get the follow-up Our Only Hope.
  2. Ride northwest to Gymer. Blow up the cage and turn in Our Only Hope and get the follow-up The Storm King’s Vengeance. Now you get to ride an incredibly destructive Storm Giant!

    The abilities are:
    • Ability 1: Gymer’s Smash – Spam this to do big AoE damage to all nearby enemies. You have to have an enemy targeted.
    • Ability 2: Gymer’s Roar – fairly useless – knocks people back.
    • Ability 3: Gymer’s Grab – use this on bosses, followed up with Ability 4 to do a lot of damage. You can also pick up Storm Cloud to heal and become more powerful.
    • Ability 4: Gymer’s Throw – throw the Vargul in Gymer’s hand to do a lot of explosion damage.
  3. Ride northeast to Algar the Chosen and kill him by spamming Gymer’s Smash, and using Gymer’s Grab and Gymer’s Throw whenever up as well.
  4. Ride southeast to Prince Navarius and kill him by spamming Gymer’s Smash, and using Gymer’s Grab and Gymer’s Throw whenever up as well. This spawns Thrym who is bigger than you! Run and grab a Storm Cloud, then turn and face him using the usual attack pattern.
  5. Ride back to the Crusader Forward Camp and dismount. Turn in The Storm King’s Vengeance.
  1. Ride north to Voltarus. This is a quest-filled area where you will have to keep reporting back to Drakuru on top of the necropolis, then go just a short distance to complete the objective, before warping back to Drakuru and using Stefan’s Horn to turn in quests to Stefan as well. Due to the small running distance, the experience comes quick here!
    • Use your Ensorcelled Choker to put on the disguise and get atop the platform to warp to Voltarus. Get Dark Horizon from Drakuru.
    • Head to the southeast area of the flying necropolis and talk to Gorebag. Take the tour of Zul’Drak, then turn in Dark Horizon to Drakuru.
      • Head out of the necropolis by running into the green area to go down. Use Stefan’s Horn to summon Stefan and turn in Infiltrating Voltarus. Get the follow-up, So Far, So Bad.
      • Enter the necropolis again with the disguise on and get It Rolls Downhill from Drakuru.
    • Exit the necropolis, and use the Scepter of Suggestion on Blight Geists, then command them to gather Blight Crystals. Wait for the blight geist to walk onto the teleporter and getting credit for collecting a crystal before controlling a new one. Collect 7 Crystals.
    • At the same time, wander around the edge of the Reliquary of Pain and use the Diluting Additive into 5 Blight Cauldrons. Use it quickly then run away to avoid the mob that spawns.
      • Warp back up to Drakuru and turn in So Far, So Bad.
      • Warp down and use Stefean’s Horn to summon Stefan. Turn in So Far, So Bad and get the follow-up Hazardous Materials.
      • Warp back up to Drakuru and get Zero Tolerance. While on top of the necropolis, walk around and open crates for 5 Harvested Blight Crystals. Note that each time you pick up a crate, there’s a chance your disguise will soon fail.
  2. Warp down. Head southeast and use the Scepter of Empowerment on a Servant of Drakuru. Send it to fight Darmuk, who is further south on the platform. You will need to remain in ghoul form this entire time, so solely use your pet to fight. First, send in the servant and use the Ferocious Enrage ability. Then, use Gut Rip and Stunning Force on cooldown. If you use those abilities on cooldown you should win handily.
    • Warp back up to Drakuru and turn in Zero Tolerance.
    • Warp back down. Use the horn to summon Stefan and turn in Hazardous Materials. Get the follow-up Sabotage.
      • Warp back up to Drakuru and get Fuel for the Fire.
    • Warp down and head northeast. Use the Explosive Charges next to 5 Scourgewagons to blow them up.
  3. Use the Scepter of Command on a Bloated Abomination. Run it through the trolls by ordering your pet to attack in sequence the trolls in a camp, and keep using the Flatulate ability in order to stay ahead of them and “kite” them. Gather as many as you can before it dies, then Explode it. Repeat this until you kill 60 Drakkari Skullcrushers. Note: You will not get credit if you explode the abomination while the trolls are knocked down with Flatulate. When you’ve finished gathering as many as you can up, explode without using Flatulate. A good safe number to gather and kill each run is 10.
    • Warp back up to Drakuru and turn in Fuel for the Fire. Get the follow-up Disclosure.
    • Take the portal upwards (step into the upper blue circle in the middle of the room). Open the Musty Coffin and follow Malmortis.
    • Take the green circle portal back to Drakuru and turn in Disclosure.
      • Warp back to the ground and use the horn to summon Stefan. Turn in Sabotage. Get the follow-up Betrayal.
    • NOTE: The following fight is challenging solo! Make sure you have your Scepter of Domination hotkeyed or dragged to a very easy-to-use place first before starting, you will need to use it immediately. Read the entire section before talking to Drakuru.

      Warp back up and talk to Drakuru and tell him you’re ready to join him. When you’re on the upper level, your disguise will start fading. Quickly use the Scepter of Domination on a Brightblood Troll. Send it to attack Drakuru and use its first two damage dealing abilities on cooldown (Concussion Blow and Powerful Strike). In the meantime, you have to run (try strafing in a circle) and avoid the crystals Drakuru throws at you. If you’re low in health, you can use the third ability (Brightblood Infusion) to have your pet heal you. You can and should attack Drakuru as well during the entire fight.

      Your pet does not have enough health to take down Drakuru – you will have to take control of another one right after it dies, then send it to fight Drakuru again. During this time Drakuru will throw shadowbolts at you – use the heal ability of the new troll the moment you get it.

      When Drakuru dies, loot the Drakuru’s Skull and Drakuru’s Last Wish. Use the last wish to leave the necropolis.

      Summon Stefan with the horn and turn in Betrayal.
  1. Ride southeast to The Argent StandGet the Flight Path. Turn in Taking a Stand. Get the quests there:
    • Defend the Stand
    • Parachutes for the Argent Crusade
    • The Blessing of Zim’Abwa
  2. Head a short distance west and kill 10 Scourge (Tip to do this faster – all you have to do is tap them even with just a little damage, and if the NPC finishes it off, you’ll get credit), and select the soldiers and then use your Crusader Parachute on 10 Argent Forces.
  3. Ride south to Zim’Abwa and complete the quest The Blessing of Zim’Abwa.
  4. Return to The Argent Stand and turn in:
    • Defend the Stand
    • Parachutes for the Argent CrusadeGet the new quests:
    • New Orders for Sergeant Stackhammer
    • Pa’Troll
    • Trouble at the Altar of Sseratus
  1. Head southeast to Captain Brandon and get Something for the Pain.
  2. Head northeast to Captain Rupert and get the quests:
    • Leave No One Behind
    • Throwing Down
  3. Head west. Look for Nerubian Tunnels in the area with nerubians around. Stand near them and use the High Impact Grenades to Seal 5 Nerubian Tunnels.
  4. All the Crusaders are in buildings, look in the buildings at the map markings. First, go to Crusader Jonathan and use the Crusader’s Bandage on him.
    • Then return to Dr. Rogers. Note that you can ride far ahead of the NPCs – The crusaders will follow you and will not aggro anything and will not even make you lose credit if you get far ahead of it – it will continue following you all the way back to the building. So, just ride directly back to Dr. Rogers.
  5. Use the Crusader’s Bandage on Crusader Josephine.
    • Then, return to Dr. Rogers.
  6. Use the Crusader’s Bandage on Crusader Lamoof.
    • Then, return to Dr. Rogers. Turn in your quests:
      • Leave No One Behind
      • Throwing DownGet the new quests:
      • Cocooned!
      • Death to the Necromagi
      • Skimmer Spinnerets
  1. Ride west and destroy Nerubian Cocoons until you Free 3 Captain Footmen.
  2. Ride southeast and kill Hath’ar Skimmers for 5 Intact Skimmer Spinneret and 8 Hath’ar Necromagus. There are more Necromagi in the Kolramas building northeast if you need more.
  3. Return to Captain Rupert and turn in your quests:
    • Cocooned!
    • Death to the Necromagi
    • Skimmer SpinneretsGet the new quests:
    • Crashed Sprayer
    • Malas the Corrupter (Group)
    • Pure EvilLook for a partner for Malas the Corrupter.
  4. Ride southwest and pick up the Plague Sprayer Parts from the Crashed Plague Sprayer.
  5. Return to Captain Rupert and turn in Crashed Sprayer and get the follow-up Tangled Skein.
  6. Head east and look in the sky for Plague Sprayers – use your Tangled Skein Thrower on 5 of them to destroy them.
  7. Head into Kolramas. Pick up 10 Chunk of Saronite inside the necropolis. On the top of the necropolis is Malas the Corrupter – try to find a partner to kill him. You can do it if you’re a strong class for a tough 1 v 1 fight as well.
  8. Return to Captain Rupert and turn in your quests:
    • A Tangled Skein
    • Malas the Corrupter (Group) if done
  1. Ride west to Captain Grondel and get Creature Comforts.
  2. Head northwest to Captain Arnath and get the quests:
    • Siphoning the Spirits
    • Lab Work
      • First, head to the north area of the lab. You can find the Muddy Mire Maggot, Withered Batwing, and Amberseed here.
      • Then, head to the south area of the lab. You can find the Chilled Serpent Mucus there. Turn in Lab Work.
  3. Head south to the pools and kill Lost Drakkari Spirits (the neutral ones) for 5 Ancient Ectoplasm. The aggressive ghosts don’t drop them.
  4. Return to Captain Arnath and turn in Siphoning the Spirits. Get the follow-ups:
    • Clipping Their Wings
    • Stocking the Shelves
    • The area around the building is full of Trapdoor Crawlers and Zul’Drak Bats. Kill them for 7 Fresh Spider Ichor and 7 Unblemished Bat Wings.
    • Then, return to Captain Arnath and turn in Clipping Their Wings and Stocking the Shelves.
  1. Ride northeast to Sergeant Stackhammer and turn in New Orders for Sergeant Stackhammer. Get the follow-up quests:
    • Argent Crusade, We Are Leaving!
    • Mopping Up
  2. Head north and kill 10 Sseratus Trolls and talk to 10 Argent Soldiers. You will get a Strange Mojo from the trolls which will start the quest Strange Mojo.
  3. Ride to the top of the temple and get credit for investigating the Altar of Sseratus.
  4. Return to Sergeant Stackhammer and turn in:
    • Argent Crusade, We Are Leaving!
    • Mopping Up
  5. Ride south to the Argent Stand and turn in:
    • Pure Evil
    • Strange Mojo
    • Trouble at the Altar of SseratusGet the new quests:
    • Precious Elemental Fluids
    • The Drakkari Do Not Need Water Elementals!
  6. Ride south to the Drak’Sotra Fields. Here, complete the following objectives:
    • Gather 5 Mature Water-Poppy
    • Kill Crazed Water Spirits for 3 Water Elemental Links. Once you get 3 (you cannot get more than 3), use them to create a Tether to the Plane of Water. Use the tether to summon a Watery Lord and kill it for Precious Elemental Fluids. Repeat this step for a total of 3 Precious Elemental Fluids.
    • Kill 10 Drakkari Water Binders.
  7. Ride east to Captain Brandon. Turn in Something for the Pain.
  8. Ride northwest to The Argent Stand. Turn in:
    • Precious Elemental Fluids
    • The Drakkari Do Not Need Water ElementalsGet the new quests:
    • Gluttonous Lurkers
    • Mushroom Mixer
  1. Ride northeast to the water area. Complete all these objectives at the same time:
    • Collect 10 Muddlecap Fungus
    • Collect 20 Dead Thornwood
    • Collect Zul’drak Rats. When you get 5, target a Luring Basilisk and throw all 5 at it. Then, collect the Basilisk Crystal. Collect a total of 5 crystals.
  2. Then, return to Captain Grondel and turn in Creature Comforts.
  3. Return to The Argent Stand and turn in Gluttonous Lurkers and Pa’Troll and get the follow-up Too Much of a Good Thing.
  4. Ride northwest to Alchemist Finkelstein and turn in Gluttonous Lurkers.
  5. Ride northeast to the Prophet of Sseratus and throw the Modified Mojo at him, then kill him.
  6. Return to The Argent Stand and turn in Too Much of a Good Thing and get the follow-up The Witch Doctor.
  1. Ride northeast to Zim’TorgaGet the Flight Path. Turn in To the Witch Doctor. Get the quests:
    • Breaking Through Jin’Alai
    • The Blessing of Zim’Torga
    • The Leaders at Jin’Alai
    • Just Checkin’Turn in The Blessings of Zim’Torga at the center statue.
  2. Head southwest to Jin’Alai. Near the rectangular “plaza”, you can find the four cauldrons on each corner of the rectangle. Click on all four of them. Also, kill a lot of trolls. Once you’ve killed enough, a Troll Chieftain will spawn – kill it and gather its treasure that spawns at its corpse. When you’re done killing all 3 Chieftains, return to Zim’Torga. Turn in:
    • Breaking Through Jin’Alai
    • The Leaders at Jin’Alai

      Get the new quests:
    • Relics of the Snow Leopard Goddess
    • Sealing the Rifts
    • The Frozen Earth
    • To Speak With Har’koa
  3. Ride southeast to Har’koa. Turn in To Speak With Har’koa and get the follow-up But First My Offspring.
  4. Ride west. Kill 7 Cursed Offspring of Har’koa and use Whisker of Har’koa on their corpses. Also, gather 10 Har’koan Relics.
    • Then, return to Har’koa and turn in But First My Offspring. Get the follow-up Spirit of Rhunok.
  5. Ride northwest back to Zim’Torga. Turn in Relics of the Snow Leopard Goddess and get the follow-ups:
    • Plundering Their Own
    • The Blessing of Zim’Rhuk
    • Tails Up
  1. Ride northwest. Kill 7 Elemental Rifts and kill Frozen Earth for 7 Essence of the Frozen Earth.
  2. Ride northeast to Zim’Rhuk and turn in The Blessing of Zim’Rhuk.
  3. Ride northwest to the Spirit of Rhunok and turn in Spirit of Rhunok. Get the follow-up My Prophet, My Enemy.
  4. Ride south to the lake. Kill the Prophet of Rhunok for the Arctic Bear God Mojo, and kill the Priests of Rhunok around the area for 7 Rhunokian Artifacts.
    • Return tothe Spirit of Rhunok and turn in My Prophet, My Enemy and get the follow-up An End to the Suffering.
  5. Head into the temple and use the Torment’s Incense on Rhunok, then kill it.
    • Return to the Spirit of Rhunok and turn in An End to the Suffering. Get the follow-up Back to Har’koa.
  6. Ride southeast to Zim’Torga.
  1. At Zim’Torga, get turn in all your quests:
    • Plundering Their Own
    • Sealing the Rifts
    • The Frozen EarthGet the new quests:
    • Bringing Down Heb’Jin
    • Scalps!
  2. Ride southeast to Har’koa and turn in Back to Har’koa. Get the follow-up I Sense a Disturbance. Talk to her again and tell her to call for a ride. Once you’re done, turn in the quest and get the follow-up Preparations for the Underworld.
    • Kill the trolls around the area for 8 Sacred Adornments, then turn in Preparations for the Underworld and get the follow-up Seek the Wind Serpent Goddess.
  3. Ride east to an area with Frost Leopards and Icepaw Bears. Use your To’kini’s Blowgun on them then approach them while they’re sleeping and check them. Find 3 Female Frost Leopards and 3 Female Icepaw Bears.
  4. Ride northeast to Quetz’lun.
  1. At Quetz’lun, turn in Seek the Wind Serpent Goddess. Get the follow-up Setting the Stage.
    • Then, head west downstairs and collect 10 Underworld Power Fragment.
    • Then, return to Quetz’lun and turn in Setting the Stage and get the follow-up Foundation for Revenge.
    • Then, head west downstairs again and kill 12 Trolls while they’re near a Soul Font.
    • Then, return to Quetz’lun and turn in Foundation for Revenge. and get the follow-up Hell Hath a Fury.
  2. Hex High Priest Hawinni.
  3. Hex High Priest Mu’funu.
  4. Hex High Priestess Tua-Tua.
  5. Then, return to Quetz’lun and turn in Hell Hath a Fury. Get the follow-up One Last Thing.
    • Once done, ride southwest back to Har’koa.
  1. At Har’koa, turn in One Last Thing and get the follow-up Blood of a Dead God.
  2. Ride to Heb’Drakkar. Kill and scalp 10 Heb’Drakkar Trolls using Ahunae’s Knife, and use the drum to bring Heb’Jin down. Use the Bat Net on his bat, then kill Heb’jin.
  3. Ride northeast to the lower part of the Altar of Mam’toth. Kill Blood of Mam’toth for 7 Blood of Mam’toth.
  4. Return to Har’koa.
  1. At Har’koa, turn in Blood of a Dead God. Get the follow-up You Reap What You Sow.
  2. Ride northeast to the Altar of Quetz’lun and use the Quetz’lun Ritual on the Prophet of Quetz’lun, then kill him.
  3. Ride west to Zim’Torga and turn in your quests:
    • Bringing Down Heb’Jin
    • Scalps!
    • You Reap What You Sow
    • Tails UpThis will open up four quests:
    • Enchanted Tiki Warriors
    • Hexed Caches
    • The Key of Warlord Zol’Maz
    • Wooly Justice
  4. Ride northeast up the steps and to the upper level of the Altar of Mam’toth. Use your Medallion of Mam’toth on an Enraged Mammoth, then mount it.
    Use Rushing Charge (Ability 1) to charge Mam’toth Disciples, then spam Trample (Ability 2) to kill them. Kill 12 Mam’toth Disciples. (Tip: just run through the altar and keep pulling and spamming Trample to kill many quickly. If your Mammoth dies, just get a new one.)
  5. Ride northwest to Zol’Maz Stronghold.
    • Kill Yara for Yara’s Sword (downstairs, southwest area)
    • Kill Drek’Maz for Drek’Maz’s Tiki (downstairs, southeast area)
    • Kill Tiri for Tiri’s Magical Incantation (upstairs, northeast area)
    • Use any of the items to combine them into the Tiki Dervish Ceremony. Go up to the top of the stronghold and use it to get Warlord Zol’Maz to open the gate and attack you. Make sure to let your Tiki Dervish tank, then attack once it has enough aggro.
    • Collect 12 Zol’Maz Stronghold Caches
    • Kill 12 Enchanted Tiki Warriors
  6. Return to Zim’Torga.
  1. At Zim’Torga,turn in your quests:
    • Enchanted Tiki Warriors
    • Hexed Caches
    • The Key of Warlord Zol’Maz
    • Wooly JusticeGet the follow-up, Rampage.
  2. Ride northeast to Akali. Unlock all four Akali Chain Anchors.
  3. Ride west to Dubra’JinGet the Flight Path. Turn in Just Checkin’ and get the follow-ups:
    • For Posterity (Dungeon – Gundrak)
    • One of a Kind (Dungeon – Gundrak)Also, get Eggs for Dubra’Jin.
  4. Look around the bunches of trees to the northeast and southeast to collect 12 Gundrak Raptor Eggs. Also, kill Gundrak Raptors – they have a chance to drop them.
  5. Return to Dubra’jin and turn in Eggs for Dubra’Jin.
  6. Take the flight back to Zim’Torga and turn in Rampage. Get the follow-up The Gods Have Spoken (Group)
  1. The final parts of this zone are all group quests. If you can find someone to do them with you then great, if not, move on to the next zone.

    First, ride northwest to Zim’Rhuk and kill the Guardians of Zim’Rhuk until you get an Unblemished Heart of the Guardian.
  2. Ride southeast to the Altar of Quetz’lun and kill Altar Wardens until you get a Gusty Essence of the Warden.
  3. Return to Zim’Torga and turn in The Gods Have Spoken and get the follow-up Convocation at Zol’Heb.
  4. Ride northeast to Zol’Heb and use the Prophet of Akali Convocation at the circle of power to summon the Prophet of Akali. Kill him. Turn in Convocation at Zol’Heb and get the follow-up Unfinished Business.
  5. Ride west to Dubra’Jin and turn in Unfinished Business and get the follow-up Gal’darah Must Pay (Dungeon – Gundrak).

    If you’d like to do the Gundrak dungeon, you now have all the quests for it.

WoW WotLK Classic Horde 70-80 Leveling Guide: 77-78 Zul’Drak

You should be level 77 by now, in which case before you enter Zul’Drak, you should learn Cold Weather Flying, and purchase your epic flying mount if you have enough gold for it, cost: 5,000g training + 1,000g Cold Weather training + 100g for the mount.

(Optional but Highly Recommended – Group) A note as you enter Zul’Drak – you may remember the Ring of Blood quest series from Nagrand. In Zul’Drak, there’s once again a series of arena fights which is just like the Ring of Blood – its a series called The Amphitheater of Anguish. As soon as you enter the zone, look out for people looking for more for the “Ring of Blood” or “Amphitheater” or “Arena” quests. Find a group of five people with a tank and healer.

The process of making sure the entire group starts and completes the quest together is having one person be the designated quest starter. Have everybody gather around the quest giver, then one person starts the quest, which will allow everyone to start the quest. Then, after making sure everybody’s turned in the quest, the quest starter starts the next quest, and so on and so on.

With a group of five with a tank and a healer, it will be the fastest burst of experience that is in the game, 192,900 XP in just minutes, along with an extremely good weapon, and about 120 Gold! Keep an eye out for groups throughout your entire time in Zul’Drak because there are no pre-requisites. If you find a group, go there and then continue questing where you left off.

  1. Fly to Venomspite, Dragonblight. Ride northeast into Zul’Drak.
  2. Ride to Light’s Breach. Turn in Into the Breach! and get the quests:
    • In Search of Answers
    • This Just In: Fire Still Hot!
    • Trolls Is Gone Crazy!
    • Wanted: Ragemane’s Flipper (Group)Look around to see if anybody wants to do Wanted: Ragemane’s Flipper. Any team of two people should be able to do him. If you don’t find anyone, get around to it later.
  3. Ride southeast to Rageclaw Den. Complete all of the following objectives simultaneously:
    • Clear your way to the Orders From Drakuru, turn in In Search of Answers, and get the follow-up Orders From Drakuru.
    • Kill Drakuru Blood Drinkers for Drakuru “Lock Openers”.
    • Free 8 Captured Rageclaw by using the Drakuru “Lock Openers” on them.
    • Use the Rageclaw Fire Extinguisher to Douse 15 Huts. You’ll have to use them multiple times to put out the fires. You can just spam the item to douse fires very quickly.
    • If you have a partner, ride southeast to Rageclaw Lake and kill Ragemane.
  4. Return to Light’s Breach. Turn in your quests:
    • Orders From Drakuru and get the follow-ups The Ebon Watch and Crusader Forward Camp
    • This Just In: Fire Still Hot!
    • Trolls Is Gone Crazy!
    • Wanted: Ragemane’s Flipper (if you did it)
  1. Ride northwest to the Crusader Forward Camp and turn in Crusader Forward Camp. Get the follow-up quests:
    • That’s What Friends Are For…
    • Making Something Out Of Nothing
  2. Ride north to Crusader Dargath.
  3. Ride southwest to Thrym’s End. Talk to Gymer and get his quest, A Great Storm Approaches.
  4. Ride west to Gerk and get Light Won’t Grant Me Vengeance.
  5. Ride west to find Burr.
    • Finish killing 15 Vargul and gathering 10 Scourge Scrap Metal then go back to Gerk and turn in Light Won’t Grant Me Vengeance.
  6. Return to the Crusader Forward Camp. Turn in:
  • A Great Storm Approaches and get the follow-up Gymer’s Salvation.
  • Making Something Out Of Nothing
  • That’s What Friends Are For…
  1. Ride north and kill Banshee Soulclaimers for 6 Banshee Essence.
  2. Ride southwest to Ebon Watch. Turn in The Ebon Watch and get the follow-up Kickin’ Nass and Takin’ Manes.
  3. Ride around the camp to the south and the west and kill Icetouched Earthragers for 6 Diatomaceous Earth.
  4. Ride around the camp to the north and the east and kill 10 Withered Trolls and use Stefan’s Steel Toed Boot after each kill to collect 10 Hair Samples. You should also get an Unliving Choker which starts the quest An Invitation, of Sorts…
  5. Ride back to Ebon Watch and turn in:
    • Kickin’ Nass and Takin’ Manes and get the follow-up Taking a Stand
    • An Invitation, of Sorts… and get the follow-up Near Miss. Talk to Bloodrose Datura nearby to complete it and get the follow-up You Can Run, But You Can’t Hide.
  6. Ride east to the Reliquary of Agony and collect 5 Gooey Ghoul Drool (scattered around on the ground) and kill Putrid Abominations for 5 Putrid Abomination Guts.
    • Then, return to Ebon Watch and turn in You Can Run, But You Can’t Hide and get the follow-up Dressing Down.
    • Then, ride back to the Reliquary of Agony and use the Ensorcelled Choker to disguise yourself as a ghoul. Talk to Gristlegut and buy a Bitter Plasma. Also, accept his quest Feedin’ Da Goolz.
    • Circle around the area and use the Bowels and Brains Bowl near Decaying Ghouls and Feed 10 of them.
    • Return to Gristlegut and turn in Feedin’ Da Goolz.
    • Finally, ride back to Ebon Watch and turn in Dressing Down. Get the follow-up Infiltrating Voltarus.
  1. Ride to the Crusader Forward Camp and turn in Ormer’s Salvation. Get the follow-up Our Only Hope.
  2. Ride northwest to Gymer. Blow up the cage and turn in Our Only Hope and get the follow-up The Storm King’s Vengeance. Now you get to ride an incredibly destructive Storm Giant!

    The abilities are:
    • Ability 1: Gymer’s Smash – Spam this to do big AoE damage to all nearby enemies. You have to have an enemy targeted.
    • Ability 2: Gymer’s Roar – fairly useless – knocks people back.
    • Ability 3: Gymer’s Grab – use this on bosses, followed up with Ability 4 to do a lot of damage. You can also pick up Storm Cloud to heal and become more powerful.
    • Ability 4: Gymer’s Throw – throw the Vargul in Gymer’s hand to do a lot of explosion damage.
  3. Ride northeast to Algar the Chosen and kill him by spamming Gymer’s Smash, and using Gymer’s Grab and Gymer’s Throw whenever up as well.
  4. Ride southeast to Prince Navarius and kill him by spamming Gymer’s Smash, and using Gymer’s Grab and Gymer’s Throw whenever up as well. This spawns Thrym who is bigger than you! Run and grab a Storm Cloud, then turn and face him using the usual attack pattern.
  5. Ride back to the Crusader Forward Camp and dismount. Turn in The Storm King’s Vengeance.
  1. Ride north to Voltarus. This is a quest-filled area where you will have to keep reporting back to Drakuru on top of the necropolis, then go just a short distance to complete the objective, before warping back to Drakuru and using Stefan’s Horn to turn in quests to Stefan as well. Due to the small running distance, the experience comes quick here!
    • Use your Ensorcelled Choker to put on the disguise and get atop the platform to warp to Voltarus. Get Dark Horizon from Drakuru.
    • Head to the southeast area of the flying necropolis and talk to Gorebag. Take the tour of Zul’Drak, then turn in Dark Horizon to Drakuru.
      • Head out of the necropolis by running into the green area to go down. Use Stefan’s Horn to summon Stefan and turn in Infiltrating Voltarus. Get the follow-up, So Far, So Bad.
      • Enter the necropolis again with the disguise on and get It Rolls Downhill from Drakuru.
    • Exit the necropolis, and use the Scepter of Suggestion on Blight Geists, then command them to gather Blight Crystals. Wait for the blight geist to walk onto the teleporter and getting credit for collecting a crystal before controlling a new one. Collect 7 Crystals.
    • At the same time, wander around the edge of the Reliquary of Pain and use the Diluting Additive into 5 Blight Cauldrons. Use it quickly then run away to avoid the mob that spawns.
      • Warp back up to Drakuru and turn in So Far, So Bad.
      • Warp down and use Stefean’s Horn to summon Stefan. Turn in So Far, So Bad and get the follow-up Hazardous Materials.
      • Warp back up to Drakuru and get Zero Tolerance. While on top of the necropolis, walk around and open crates for 5 Harvested Blight Crystals. Note that each time you pick up a crate, there’s a chance your disguise will soon fail.
  2. Warp down. Head southeast and use the Scepter of Empowerment on a Servant of Drakuru. Send it to fight Darmuk, who is further south on the platform. You will need to remain in ghoul form this entire time, so solely use your pet to fight. First, send in the servant and use the Ferocious Enrage ability. Then, use Gut Rip and Stunning Force on cooldown. If you use those abilities on cooldown you should win handily.
    • Warp back up to Drakuru and turn in Zero Tolerance.
    • Warp back down. Use the horn to summon Stefan and turn in Hazardous Materials. Get the follow-up Sabotage.
      • Warp back up to Drakuru and get Fuel for the Fire.
    • Warp down and head northeast. Use the Explosive Charges next to 5 Scourgewagons to blow them up.
  3. Use the Scepter of Command on a Bloated Abomination. Run it through the trolls by ordering your pet to attack in sequence the trolls in a camp, and keep using the Flatulate ability in order to stay ahead of them and “kite” them. Gather as many as you can before it dies, then Explode it. Repeat this until you kill 60 Drakkari Skullcrushers. Note: You will not get credit if you explode the abomination while the trolls are knocked down with Flatulate. When you’ve finished gathering as many as you can up, explode without using Flatulate. A good safe number to gather and kill each run is 10.
    • Warp back up to Drakuru and turn in Fuel for the Fire. Get the follow-up Disclosure.
    • Take the portal upwards (step into the upper blue circle in the middle of the room). Open the Musty Coffin and follow Malmortis.
    • Take the green circle portal back to Drakuru and turn in Disclosure.
      • Warp back to the ground and use the horn to summon Stefan. Turn in Sabotage. Get the follow-up Betrayal.
    • NOTE: The following fight is challenging solo! Make sure you have your Scepter of Domination hotkeyed or dragged to a very easy-to-use place first before starting, you will need to use it immediately. Read the entire section before talking to Drakuru.

      Warp back up and talk to Drakuru and tell him you’re ready to join him. When you’re on the upper level, your disguise will start fading. Quickly use the Scepter of Domination on a Brightblood Troll. Send it to attack Drakuru and use its first two damage dealing abilities on cooldown (Concussion Blow and Powerful Strike). In the meantime, you have to run (try strafing in a circle) and avoid the crystals Drakuru throws at you. If you’re low in health, you can use the third ability (Brightblood Infusion) to have your pet heal you. You can and should attack Drakuru as well during the entire fight.

      Your pet does not have enough health to take down Drakuru – you will have to take control of another one right after it dies, then send it to fight Drakuru again. During this time Drakuru will throw shadowbolts at you – use the heal ability of the new troll the moment you get it.

      When Drakuru dies, loot the Drakuru’s Skull and Drakuru’s Last Wish. Use the last wish to leave the necropolis.

      Summon Stefan with the horn and turn in Betrayal.
  1. Ride southeast to The Argent StandGet the Flight Path. Turn in Taking a Stand. Get the quests there:
    • Defend the Stand
    • Parachutes for the Argent Crusade
    • The Blessing of Zim’Abwa
  2. Head a short distance west and kill 10 Scourge (Tip to do this faster – all you have to do is tap them even with just a little damage, and if the NPC finishes it off, you’ll get credit), and select the soldiers and then use your Crusader Parachute on 10 Argent Forces.
  3. Ride south to Zim’Abwa and complete the quest The Blessing of Zim’Abwa.
  4. Return to The Argent Stand and turn in:
    • Defend the Stand
    • Parachutes for the Argent CrusadeGet the new quests:
    • New Orders for Sergeant Stackhammer
    • Pa’Troll
    • Trouble at the Altar of Sseratus
  1. Head southeast to Captain Brandon and get Something for the Pain.
  2. Head northeast to Captain Rupert and get the quests:
    • Leave No One Behind
    • Throwing Down
  3. Head west. Look for Nerubian Tunnels in the area with nerubians around. Stand near them and use the High Impact Grenades to Seal 5 Nerubian Tunnels.
  4. All the Crusaders are in buildings, look in the buildings at the map markings. First, go to Crusader Jonathan and use the Crusader’s Bandage on him.
    • Then return to Dr. Rogers. Note that you can ride far ahead of the NPCs – The crusaders will follow you and will not aggro anything and will not even make you lose credit if you get far ahead of it – it will continue following you all the way back to the building. So, just ride directly back to Dr. Rogers.
  5. Use the Crusader’s Bandage on Crusader Josephine.
    • Then, return to Dr. Rogers.
  6. Use the Crusader’s Bandage on Crusader Lamoof.
    • Then, return to Dr. Rogers. Turn in your quests:
      • Leave No One Behind
      • Throwing Down
      Get the new quests:
      • Cocooned!
      • Death to the Necromagi
      • Skimmer Spinnerets
  1. Ride west and destroy Nerubian Cocoons until you Free 3 Captain Footmen.
  2. Ride southeast and kill Hath’ar Skimmers for 5 Intact Skimmer Spinneret and 8 Hath’ar Necromagus. There are more Necromagi in the Kolramas building northeast if you need more.
  3. Return to Captain Rupert and turn in your quests:
    • Cocooned!
    • Death to the Necromagi
    • Skimmer SpinneretsGet the new quests:
    • Crashed Sprayer
    • Malas the Corrupter (Group)
    • Pure EvilLook for a partner for Malas the Corrupter.
  4. Ride southwest and pick up the Plague Sprayer Parts from the Crashed Plague Sprayer.
  5. Return to Captain Rupert and turn in Crashed Sprayer and get the follow-up Tangled Skein.
  6. Head east and look in the sky for Plague Sprayers – use your Tangled Skein Thrower on 5 of them to destroy them.
  7. Head into Kolramas. Pick up 10 Chunk of Saronite inside the necropolis. On the top of the necropolis is Malas the Corrupter – try to find a partner to kill him. You can do it if you’re a strong class for a tough 1 v 1 fight as well.
  8. Return to Captain Rupert and turn in your quests:
    • A Tangled Skein
    • Malas the Corrupter (Group) if done
  1. Ride west to Captain Grondel and get Creature Comforts.
  2. Head northwest to Captain Arnath and get the quests:
    • Siphoning the Spirits
    • Lab Work
      • First, head to the north area of the lab. You can find the Muddy Mire Maggot, Withered Batwing, and Amberseed here.
      • Then, head to the south area of the lab. You can find the Chilled Serpent Mucus there. Turn in Lab Work.
  3. Head south to the pools and kill Lost Drakkari Spirits (the neutral ones) for 5 Ancient Ectoplasm. The aggressive ghosts don’t drop them.
  4. Return to Captain Arnath and turn in Siphoning the Spirits. Get the follow-ups:
    • Clipping Their Wings
    • Stocking the Shelves
    • The area around the building is full of Trapdoor Crawlers and Zul’Drak Bats. Kill them for 7 Fresh Spider Ichor and 7 Unblemished Bat Wings.
    • Then, return to Captain Arnath and turn in Clipping Their Wings and Stocking the Shelves.
  1. Ride northeast to Sergeant Stackhammer and turn in New Orders for Sergeant Stackhammer. Get the follow-up quests:
    • Argent Crusade, We Are Leaving!
    • Mopping Up
  2. Head north and kill 10 Sseratus Trolls and talk to 10 Argent Soldiers. You will get a Strange Mojo from the trolls which will start the quest Strange Mojo.
  3. Ride to the top of the temple and get credit for investigating the Altar of Sseratus.
  4. Return to Sergeant Stackhammer and turn in:
    • Argent Crusade, We Are Leaving!
    • Mopping Up
  5. Ride south to the Argent Stand and turn in:
    • Pure Evil
    • Strange Mojo
    • Trouble at the Altar of Sseratus
    Get the new quests:
    • Precious Elemental Fluids
    • The Drakkari Do Not Need Water Elementals!
  6. Ride south to the Drak’Sotra Fields. Here, complete the following objectives:
    • Gather 5 Mature Water-Poppy
    • Kill Crazed Water Spirits for 3 Water Elemental Links. Once you get 3 (you cannot get more than 3), use them to create a Tether to the Plane of Water. Use the tether to summon a Watery Lord and kill it for Precious Elemental Fluids. Repeat this step for a total of 3 Precious Elemental Fluids.
    • Kill 10 Drakkari Water Binders.
  7. Ride east to Captain Brandon. Turn in Something for the Pain.
  8. Ride northwest to The Argent Stand. Turn in:
    • Precious Elemental Fluids
    • The Drakkari Do Not Need Water Elementals
    Get the new quests:
    • Gluttonous Lurkers
    • Mushroom Mixer
  1. Ride northeast to the water area. Complete all these objectives at the same time:
    • Collect 10 Muddlecap Fungus
    • Collect 20 Dead Thornwood
    • Collect Zul’drak Rats. When you get 5, target a Luring Basilisk and throw all 5 at it. Then, collect the Basilisk Crystal. Collect a total of 5 crystals.
  2. Then, return to Captain Grondel and turn in Creature Comforts.
  3. Return to The Argent Stand and turn in Gluttonous Lurkers and Pa’Troll and get the follow-up Too Much of a Good Thing.
  4. Ride northwest to Alchemist Finkelstein and turn in Gluttonous Lurkers.
  5. Ride northeast to the Prophet of Sseratus and throw the Modified Mojo at him, then kill him.
  6. Return to The Argent Stand and turn in Too Much of a Good Thing and get the follow-up The Witch Doctor.
  1. Ride northeast to Zim’TorgaGet the Flight Path. Turn in To the Witch Doctor. Get the quests:
    • Breaking Through Jin’Alai
    • The Blessing of Zim’Torga
    • The Leaders at Jin’Alai
    • Just Checkin’Turn in The Blessings of Zim’Torga at the center statue.
  2. Head southwest to Jin’Alai. Near the rectangular “plaza”, you can find the four cauldrons on each corner of the rectangle. Click on all four of them. Also, kill a lot of trolls. Once you’ve killed enough, a Troll Chieftain will spawn – kill it and gather its treasure that spawns at its corpse. When you’re done killing all 3 Chieftains, return to Zim’Torga. Turn in:
    • Breaking Through Jin’Alai
    • The Leaders at Jin’Alai
    • Relics of the Snow Leopard Goddess

      Get the new quests:
    • Sealing the Rifts
    • The Frozen Earth
    • To Speak With Har’koa
  3. Ride southeast to Har’koa. Turn in To Speak With Har’koa and get the follow-up But First My Offspring.
  4. Ride west. Kill 7 Cursed Offspring of Har’koa and use Whisker of Har’koa on their corpses. Also, gather 10 Har’koan Relics.
    • Then, return to Har’koa and turn in But First My Offspring. Get the follow-up Spirit of Rhunok.
  5. Ride northwest back to Zim’Torga. Turn in Relics of the Snow Leopard Goddess and get the follow-ups:
    • Plundering Their Own
    • The Blessing of Zim’Rhuk
    • Tails Up
  1. Ride northwest. Kill 7 Elemental Rifts and kill Frozen Earth for 7 Essence of the Frozen Earth.
  2. Ride northeast to Zim’Rhuk and turn in The Blessing of Zim’Rhuk.
  3. Ride northwest to the Spirit of Rhunok and turn in Spirit of Rhunok. Get the follow-up My Prophet, My Enemy.
  4. Ride south to the lake. Kill the Prophet of Rhunok for the Arctic Bear God Mojo, and kill the Priests of Rhunok around the area for 7 Rhunokian Artifacts.
    • Return tothe Spirit of Rhunok and turn in My Prophet, My Enemy and get the follow-up An End to the Suffering.
  5. Head into the temple and use the Torment’s Incense on Rhunok, then kill it.
    • Return to the Spirit of Rhunok and turn in An End to the Suffering. Get the follow-up Back to Har’koa.
  6. Ride southeast to Zim’Torga.
  1. At Zim’Torga, get turn in all your quests:
    • Plundering Their Own
    • Sealing the Rifts
    • The Frozen Earth
    Get the new quests:
    • Bringing Down Heb’Jin
    • Scalps!
  2. Ride southeast to Har’koa and turn in Back to Har’koa. Get the follow-up I Sense a Disturbance. Talk to her again and tell her to call for a ride. Once you’re done, turn in the quest and get the follow-up Preparations for the Underworld.
    • Kill the trolls around the area for 8 Sacred Adornments, then turn in Preparations for the Underworld and get the follow-up Seek the Wind Serpent Goddess.
  3. Ride east to an area with Frost Leopards and Icepaw Bears. Use your To’kini’s Blowgun on them then approach them while they’re sleeping and check them. Find 3 Female Frost Leopards and 3 Female Icepaw Bears.
  4. Ride northeast to Quetz’lun.
  1. At Quetz’lun, turn in Seek the Wind Serpent Goddess. Get the follow-up Setting the Stage.
    • Then, head west downstairs and collect 10 Underworld Power Fragment.
    • Then, return to Quetz’lun and turn in Setting the Stage and get the follow-up Foundation for Revenge.
    • Then, head west downstairs again and kill 12 Trolls while they’re near a Soul Font.
    • Then, return to Quetz’lun and turn in Foundation for Revenge. and get the follow-up Hell Hath a Fury.
  2. Hex High Priest Hawinni.
  3. Hex High Priest Mu’funu.
  4. Hex High Priestess Tua-Tua.
  5. Then, return to Quetz’lun and turn in Hell Hath a Fury. Get the follow-up One Last Thing.
    • Once done, ride southwest back to Har’koa.
  1. At Har’koa, turn in One Last Thing and get the follow-up Blood of a Dead God.
  2. Ride to Heb’Drakkar. Kill and scalp 10 Heb’Drakkar Trolls using Ahunae’s Knife, and use the drum to bring Heb’Jin down. Use the Bat Net on his bat, then kill Heb’jin.
  3. Ride northeast to the lower part of the Altar of Mam’toth. Kill Blood of Mam’toth for 7 Blood of Mam’toth.
  4. Return to Har’koa.
  1. At Har’koa, turn in Blood of a Dead God. Get the follow-up You Reap What You Sow.
  2. Ride northeast to the Altar of Quetz’lun and use the Quetz’lun Ritual on the Prophet of Quetz’lun, then kill him.
  3. Ride west to Zim’Torga and turn in your quests:
    • Bringing Down Heb’Jin
    • Scalps!
    • You Reap What You Sow
    • Tails Up
    This will open up four quests:
    • Enchanted Tiki Warriors
    • Hexed Caches
    • The Key of Warlord Zol’Maz
    • Wooly Justice
  4. Ride northeast up the steps and to the upper level of the Altar of Mam’toth. Use your Medallion of Mam’toth on an Enraged Mammoth, then mount it.
    Use Rushing Charge (Ability 1) to charge Mam’toth Disciples, then spam Trample (Ability 2) to kill them. Kill 12 Mam’toth Disciples. (Tip: just run through the altar and keep pulling and spamming Trample to kill many quickly. If your Mammoth dies, just get a new one.)
  5. Ride northwest to Zol’Maz Stronghold.
    • Kill Yara for Yara’s Sword (downstairs, southwest area)
    • Kill Drek’Maz for Drek’Maz’s Tiki (downstairs, southeast area)
    • Kill Tiri for Tiri’s Magical Incantation (upstairs, northeast area)
    • Use any of the items to combine them into the Tiki Dervish Ceremony. Go up to the top of the stronghold and use it to get Warlord Zol’Maz to open the gate and attack you. Make sure to let your Tiki Dervish tank, then attack once it has enough aggro.
    • Collect 12 Zol’Maz Stronghold Caches
    • Kill 12 Enchanted Tiki Warriors
  6. Return to Zim’Torga.
  1. At Zim’Torga,turn in your quests:
    • Enchanted Tiki Warriors
    • Hexed Caches
    • The Key of Warlord Zol’Maz
    • Wooly JusticeGet the follow-up, Rampage.
  2. Ride northeast to Akali. Unlock all four Akali Chain Anchors.
  3. Ride west to Dubra’JinGet the Flight Path. Turn in Just Checkin’ and get the follow-ups:
    • For Posterity (Dungeon – Gundrak)
    • One of a Kind (Dungeon – Gundrak)Also, get Eggs for Dubra’Jin.
  4. Look around the bunches of trees to the northeast and southeast to collect 12 Gundrak Raptor Eggs. Also, kill Gundrak Raptors – they have a chance to drop them.
  5. Return to Dubra’jin and turn in Eggs for Dubra’Jin.
  6. Take the flight back to Zim’Torga and turn in Rampage. Get the follow-up The Gods Have Spoken (Group)
  1. The final parts of this zone are all group quests. If you can find someone to do them with you then great, if not, move on to the next zone.

    First, ride northwest to Zim’Rhuk and kill the Guardians of Zim’Rhuk until you get an Unblemished Heart of the Guardian.
  2. Ride southeast to the Altar of Quetz’lun and kill Altar Wardens until you get a Gusty Essence of the Warden.
  3. Return to Zim’Torga and turn in The Gods Have Spoken and get the follow-up Convocation at Zol’Heb.
  4. Ride northeast to Zol’Heb and use the Prophet of Akali Convocation at the circle of power to summon the Prophet of Akali. Kill him. Turn in Convocation at Zol’Heb and get the follow-up Unfinished Business.
  5. Ride west to Dubra’Jin and turn in Unfinished Business and get the follow-up Gal’darah Must Pay (Dungeon – Gundrak).

    If you’d like to do the Gundrak dungeon, you now have all the quests for it.

WoW WotLK Classic Alliance 70-80 Leveling Guide: 75-77 Grizzly Hills

You should be in Amberpine Lodge, Grizzly Hills.

FPicon.jpg Get the new flight path.

hs.jpg Go to the inn and make it your home location.

Turn in [73] The Hills Have Us.

Get all the quests from here BESIDES [74] The Magical Kingdom of Dalaran:

  • [74] Local Support
  • [74] Them or Us!
  • [74] Replenishing the Storehouse
  • [73] Mmm… Amberseeds!

Turn in [73] Mmm… Amberseeds! at Master Woodsman Anderhol, get [73] Just Passing Through.

==Note== Loot Blackroot on your way while following the next steps:

a76img1.jpg
a76circuit1.jpg

1. Go to the area north of Amberpine Lodge, kill Tallhorn Stags until you’ve looted 8 Succulent Venison.

Go back to Amberpine Lodge, turn in [74] Replenishing the Storehouse, get:

  • [74] Take Their Rear!
  • [73] Troll Season!

2. Go northwest to the river (29,56).

Gather 5 Blackroots Stalks and kill all the Grizzly Bears you see in the area.

3. Go west to the grey area in the woods (25,56).

Kill all the Graymist Hunters you see here.

4. Go further west to another grey area with Graymist Hunters (22,57).

Kill them and you should be done with [74] Them or Us!

5. Ride southwest to the Evergreen Trading Post (16,65).

Go inside the tower and loot the Cedar Chest:

a76img2.jpg

Hearthstone back to Amberpine Lodge. (Or just ride back there if your HS is on cooldown).

Turn in:

  • [74] Local Support, get [74] Close the Deal
  • [74] Them or Us!, get [74] Eagle Eyes
  • [73] Just Passing Through, get [73] Doing Your Duty

Get out and go few steps north to the Amberpine Outhouse:

a76img3.jpg

Right-click it and click on “Use the outhouse”.

Go back to the inn, turn in [73] Doing Your Duty.

==Note== From now on, kill Imperial Eagles on your way:

a76img4.jpg
a76circuit2.jpg

1. Go northeast to Aspen Grove Post (35,55).

Turn in [74] Close the Deal, get [74] A Tentative Pact.

2. Go northeast to a spot where you’ll find several Imperial Eagles (38,53).

Finish [74] Eagle Eyes.

3. Go back to Amberpine Lodge.

Turn in:

  • [74] Eagle Eyes
  • [74] A Tentative Pact, get [74] An Exercise in Diplomacy.

Go to Woodsman Drake outside the inn and get his 2 quests:

  • [74] Secrets of the Flamebinders
  • [74] Thinning the Ranks

4. Go northwest to the river (29,56).

Kill all Grizzly Bears on your way while going north, until you hit a wooden bridge.

5. Ride west/slightly northwest to Granite Springs (16,47.5).

Turn in [73] Troll Season! and get [74] Filling the Cages.

a76circuit3.jpg

1. Talk to Budd, a human with a troll mask sitting in one of huts. Click on the text.

Mount up, ride southwest to Drak’Zin (14,58).

Find a SOLO troll.

a76img5.jpg Use Budd’s Ability #4. This will put the troll to sleep for 15 seconds.

a76img6.jpg Right-click the Bounty Hunter’s Cage on the troll (must be in melee range).
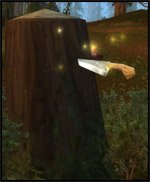
If you fail, you’ll have to go back to Granite Springs and talk to Budd again.

2. Go back to Granite Springs.

Turn in [74] Filling the Cages, get [73] Truce?? from Drakuru.

Next to the cage you should find a Dull Carving Knife planted in a tree stump:

a76img7.jpg

Loot it.

a76img8.jpg Right-click the Dull Carving Knife from your inventory.
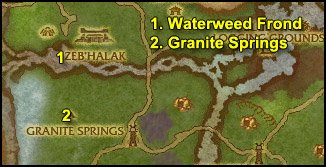
Talk to Drakuru and click on the text.

Turn in [73] Truce?? and get [74] Vial of Visions.

Go to Ameenah, a troll female NPC selling , buy a stack of 5 Imbued Vials from her.

a76circuit4.jpg

==Note== From now on, look for Hazelwood Bushes on the way and loot 3 Haze Leafs:

a76img9.jpg

1. Go north to the lake at (15,39).

Dive in and loot a Waterweed Frond.

a76img10.jpg

2. Go back to Granite Springs, turn in [74] Vial of Visions, get [74] Subject to Interpretation.

Get [74] Scourgekabob from Prigmon just a few steps northwest.

Loot a Scourged Troll Mummy.

a76img11.jpg

Go southeast to Mack Fearsen, who stands in front of a bonfire with mummies burning.

a76img12.jpg Right-click the Scourged Troll Mummy from you inventory.

Turn in [74] Scourgekabob, get [74] Seared Scourge.

Go back to Prigmon and get [75] Shimmercap Stew.

a76circuit5.jpg

1. Ride southwest to Drak’Zin. Complete the following 2 objectives:

Kill Trolls until you’ve looted 5 Frozen Mojo
Kill Ice Serpents until you’ve looted 5 Ice Serpent Eyes

Go to Drakuru’s Brazier, which is up some ruined stairs in the middle of Dark’Zin (13,61).

a76img13.jpg Right-click Drakuru’s Elixir.

Turn in [74] Subject to Interpretation, get [74] Sacrifices Must be Made.

2. Now go west towards the river, look for Shimmering Snowcaps, they can be found close to trees along the river bank:

a76img14.jpg

Go north along the river bank and loot 5 Shimmering Snowcaps.

3. Ride further north to Zimb’bo’s Hideout (15,37). It’s the biggest hut on the western side of the Zeb’Halak.

Kill Warlord Zimb’bo and loot Zimb’bo’s Mojo.

==Note== From now on, loot Sweetroot on the way:

a76img15.jpg

4. Clear the way to the top of the temple east (18,36).

Right-click the Seer of Zeb’Halak, click on the text. You’ll receive the Eye of the Prophets.

Go to Drakuru’s Brazier, which is a few steps west of the Seer of Zeb’Halak.

a76img13.jpg Right-click Drakuru’s Elixir.

Turn in [74] Sacrifices Must be Made, get [74] Heart of the Ancients.

Go back down and gather Sweetroots until you have 5.

a76circuit6.jpg

1. Go north to Drak’Tharon Keep.

Go to the area west of the stairs and you’ll see many trolls running around (16,30):

a76img16.jpg

a76img17.jpg Throw Mack’s Dark Grog at them. It has a huge range, so you’ll probably need to back off a little.

Repeat until you finish [74] Seared Scourge.

2. Ride east/southeast to Silverbrook (26,35).

Turn in [74] An Exercise in Diplomacy, get:

  • [74] Northern Hospitality
  • [74] Wolfsbane Root

==Note== If you can’t find [74] Wolfsbane Root, it means that the quest giver (Katja) was killed by horde players recently, so you’ll have to wait a couple of minutes for her to respawn.

3. Go to the area east and south of Silverbrook and destroy 8 Wolfsbane Roots:

a76img18.jpg

4. Go to the area west of Silverbrook and kill 8 Conquest Hold Marauders.

Go back to Silverbrook, turn in:

  • [74] Wolfsbane Root
  • [74] Northern Hospitality, get [74] Test of Mettle
a76circuit7.jpg

1. Ride northwest to Bonesnap’s Camp (22,30).

Kill Sergeant Bonesnap.

Turn in [74] Test of Mettle at the Captured Trapper, get [74] Words of Warning.

2. Ride east, go to the tower on the northwestern corner of Silverbrook, where you’ll find a Caged Prisoner (26,32).

Before you turn in the quest, I suggest watching the tutorial video I made about the next quest, I recommend watching it in High Quality.

Video[74] Escape from Silverbrook
==Note== If the video was useful to you, please don’t forget to rate it! 😉

Now that you’re ready, turn in [74] Words of Warning, get [74] Escape from Silverbrook.

Once you’ve completed it sucessfully, you should be in Amberpine Lodge.

Turn in [74] Escape from Silverbrook, get [74] A Swift Response.

Sell junk, repair and re-stock food/drink.

a76circuit8.jpg

1. Ride southeast to Forest’s Edge Post (36,67).

  • Kill Vladek, he’s in the tower
  • Kill 7 Silverbrook Hunters
  • Keep on killing them until you loot Mikhail’s Journal

a76img19.jpg Right-click it to start [74] Descent Into Darkness.

2. All around the eastern side of Forest’s Edge Post you should find a lot of Grizzly Bears, as shown on my map.

Kill Grizzly Bears until you finish [74] Take Their Rear!

3. Ride southwest to Voldrune (31,75). Two objectives here:

  • Kill 12 Dragonflayer Huscarls
  • Kill Dragonflayer Flamebinders until you’ve looted 3 Flame-Imbued Talismans

4. Ride back to Amberpine Lodge. Turn in:

  • [74] Secrets of the Flamebinders
  • [74] Thinning the Ranks, get [74] The Thane of Voldrune
  • [74] Take Their Rear!
  • [74] A Swift Response
  • [74] Descent Into Darkness, get [74] Report to Gryan Stoutmantle… Again

Hieorphant Thayreen should have two new quests for you now, get them both:

  • [74] A Dark Influence
  • [74] The Failed World Tree
a76circuit9.jpg

1. Ride northwest to Granite Springs (16,47.5). Turn in:

  • [74] Seared Scourge, get [74] Search and Rescue, don’t get the daily quest
  • [75] Shimmercap Stew, get [74] Say Hello to my Little Friend

2. Ride east/northeast to Vordrassil’s Tears, you’ll find a cave entrance at (28,45).

Kill Entropic Oozes on the way and loot Slime Samples off them.

Clear the way to the bottom of the cave until you find an area with black smoke.

a76img20.jpg Right-click the Geomancer’s Orb from your inventory.

Get out of the cave.

3. Cross the river north and then ride northeast to the pumping station at (37,32).

Clear the way to the top, go inside the cabin, turn in [74] Heart of the Ancients, get [74] My Heart is in Your Hands.

a76circuit10.jpg

1. Go to the eastern point of the lake, and from there ride northeast to Drak’atal Passage (44,30).

Kill Drakkari Defenders and Injured Drakkari Refugees until you’ve looted 5 Desperate Mojo.

Go to Drakuru’s Brazier, found at the bottom of the big stairs.

a76img13.jpg Right-click Drakuru’s Elixir.

Turn in [74] My Heart is in Your Hands, get [75] Voices From the Dust.

2. Ride southwest to the Blue Sky Logging Grounds (40,43).

==Warning== There might be some PvP action involved in the following section. So if you want to avoid PvP at all costs, skip it. They don’t count for the zone quest achievement, but they do give nice XP and are quickly done.

Get all the quests from here:

  • [74] Kick ‘Em While They’re Down
  • [74] Life or Death
  • [74] Pieces Parts
  • [74] Shredder Repair

3. Go west to the central isle of Blue Sky Logging Grounds. Our main objective is to deliver 3 Shredders while completing as much as the other quests on the way:

  • Kill 15 Horde Units (NPCs and players both count)
  • a76img21.jpg Use the Renewing Bandage on 10 Wounded Westfall Infantry
  • Gather the following parts until you finish [74] Pieces Parts:
a76img22.jpg
a76img23.jpg
a76img24.jpg

Do that on the way while looking for a Broken-down Shredder:

a76img25.jpg

Jump into one, face toward the bridge east and use ability #3 to sprint.

If you get attacked:

Use Ability#1 to pushback your enemy.
Use Ability#2 to blind nearby enemies (must be in melee range)

Go back to the quest giver and use ability #5 to deliver the shredder.

Finish all 4 quests, go turn them in.

a76circuit11.jpg

1. Ride southwest to Vordrassil’s Limb (33,49).

Clear the way to the bottom of the cave.

a76img20.jpg Right-click the Geomancer’s Orb from your inventory.

2. Ride east/southeast to Vordrassil’s Heart

Clear the way to the bottom of the cave.

a76img20.jpg Right-click the Geomancer’s Orb from your inventory.

Now kill Entropic Oozes until you’ve looted 6 Slime Samples.

3. Ride back to Amberpine Lodge. Turn in:

  • [74] A Dark Influence
  • [74] The Failed World Tree

Get the 2 follow ups:

  • [74] A Possible Link
  • [75] Children of Ursoc

Sell junk, repair and re-stock food/drink.

a76circuit12.jpg

1. Ride southeast until you hit the road.

Follow the road south until you reach the ledge south of Voldrune (33,82).

Ride west to a path leading you up to Flamebringer (26,80).

Now check out my video on how to do this quest, as it’s kinda buggy and tricky at the moment. I recommend watching it in High Quality.

Video[74] The Thane of Voldrune
==Note== If the video was useful to you, please don’t forget to rate it! 😉

After having watched the video you should be more than ready.

Kill the thane and then fly to Venture Bay, as shown in the video.

2. You should be in Venture Bay now.

==Warning== We’re about to do 4 daily pvp quests. If you want to avoid PvP at all costs, skip this part. However please note that [74] Seeking Solvent counts for the zone quest achievement. Those quests are really quickly done and give 20K XP each, so I recommend doing them, even if you dislike pvp.

Get the 4 daily pvp quests:

  • [74] Seeking Solvent
  • [74] Keep Them at Bay!
  • [74] Smoke ‘Em Out
  • [74] Down with Captain Zorma!
a76circuit13.jpg

1. Go west to the area north of the docks in venture bay.

Go to the stables, it’s the first building you’ll encounter (18,79).

Inside the building you should see Venture Co. Stragglers.

a76img26.jpg Use the Smoke Bomb on them.

Tip: Just run in the building, gather them all in one bunch and then use the Smoke Bomb on them.

2. Go to the next two buildings to the west and do the same thing.

==Note== Kill Horde Units on the way

You should be done with [74] Smoke ‘Em Out very quickly if you bomb the 3 buildings.

3. Go southwest and kill Captain Zorna (13.5,80). She stands under a canopy, on the docks next to the westernmost ship.

She’s elite but she’s quite easy for any class.

HP30,000
Avg. Hit on Cloth800
Can be slowed and stunned (haven’t checked fear)

Now Finish [74] Keep Them at Bay! before going to the next step.

4. Go to the middle ship (16,80). It’s the same model as the boat from Booty Bay to Ratchet.

Go inside the cabin and clear the way to the last room.

==Warning== I really mean CLEAR the way. Kill all the Venture Co. in your way, even if you are a stealth class.

Once the way is clear, go to the last room where you should see the Element 115.

a76img27.jpg

Loot it. You’ll get the following debuff:

a76img28.jpg

That means it’s useless to mount or to sprint or anything like that. Just run straight back to the quest NPCs. You have only 3 Minutes to get there.

Go as fast as you can, avoid fights, and turn in [74] Seeking Solvent first.

Then turn in the other 3 quests:

  • [74] Keep Them at Bay!
  • [74] Smoke ‘Em Out
  • [74] Down with Captain Zorma!

Hearthstone back to Amberpine Lodge.

Turn in [74] The Thane of Voldrune.

You should be level 76 or somewhere around it. If you are ahead, that’s great, keep following the guide normally, don’t skip anything. If you are behind, that’s not a problem either, just keep following the guide normally. You’ll catch up eventually and there will be a lot of extra circuits at the end anyway 😉


Level 76


a76circuit14.jpg

1. While we’re still in PvP Mode, let’s quickly get a last Daily PvP quest done.

Ride down to the river and go south to Scout Captain Carter (30,60).

Get [74] Blackriver Skirmish.

2. Kill 10 Horde Units at the Blackriver Logging Camp, a few steps southwest of here.

Go back to Scout Captain Carter, turn in [74] Blackriver Skirmish.

Go back to Amberpine Lodge.

Sell junk, repair and re-stock food/drink.

a76circuit15.jpg

1. Ride a long way northeast to Heartwood Trading Post (49,34).

Get the quest [74] Mr. Floppy’s Perilous Adventure.

Do the escort quest. It’s pretty simple, just make sure you dispatch the wolves quickly.

2. After the escort is done, mount up and right northeast to Westfall Brigade Encampment (59,28).

Turn in:

  • [74] Mr. Floppy’s Perilous Adventure
  • [74] Report to Gryan Stoutmantle… Again

Get all the available quests from here:

  • [75] Hollowstone Mine
  • [75] Mounting Up
  • [75] Softening the Blow

FPicon.jpg Get the new flight path.

a76circuit16.jpg

1. Go to the fields south of the camp, loot 5 Wild Carrots.

a76img29.jpg

2. Go west and look for Highland Mustangs.

a76img30.jpg Right-click the Stick from your inventory, this will equip it in your main weapon slot.

Target a Highland Mustang and right-click the Stick again from your main weapon slot.

This will lure the Mustang to you and make you mount it.

Ride back to Westfall Encampment, go next to Squire Percy (he stands next to the white horse, Old Blanchy).

Use Ablity #1 to deliver the horse.

Repeat this 5 times.

Turn in [75] Mounting Up.

Re-equip your main hand weapon.

a76circuit17.jpg

1. Ride northwest to the Hollowstone Mine (55,23), where you will find Petrov.

Turn in [75] Hollowstone Mine, get [75] Souls at Unrest.

a76img31.jpg Kill Undead Miners and use the Miner’s Lantern on their corpses.

Repeat 8 times.

Go back to Petrov, turn in [75] Souls at Unrest, get [75] A Name From the Past.

2. Ride back to Westfall Encampment.

Turn in [75] A Name From the Past.

Get [75] Ruuna the Blind from Private Arun.

3. Ride southeast to Redwood Trading Post (69,40).

Talk to Hugh Glass. Buy a Howlin’ Good Moonshine from him.

Get his quest [75] A Bear of an Appetite.

4. Ride northeast to Harkor’s Camp (74,34).

Turn in [74] Say Hello to my Little Friend, get all the available quests from here:

  • [75] Nice to Meat You
  • [75] Therapy
  • [75] It Takes Guts…
a76circuit18.jpg

1. Kill every Duskhowl Prowler and Longhoof Grazer you see while going west/northwest, towards Westfall Encampment.

You are not supposed to finish [75] Nice to Meat You right now, so just keep going northwest.

2. When you don’t see any Duskhowl Prowler anymore, mount up and ride northwest to Westall Encampment.

Turn in [75] Softening the Blow, get [75] Brothers in Battle.

a76circuit19.jpg

1. Ride northeast and you’ll find a Fallen Earth Warrior (63,23).

Get the quest [75] Find Kurun!

==Note== Kill Runic Battle Golems on your way.

2. Go a little northeast and you’ll find another quest given by a Battered Journal on the floor (64,20).

Get the quest [75] The Damaged Journal.

==Note== From now on gather Missing Journal Pages off the ground:

a76img32.jpg

Now complete the following 2 objectives in this area:

  • Kill 10 Runic Battle Golems
  • Gather 8 Missing Journal Pages

a76img33.jpg Right-click the Incomplete Journal.

3. Ride back to Westfall Camp.

Turn in:

  • [75] The Damaged Journal, get [75] The Runic Keystone
  • [75] Brothers in Battle, get [75] Uncovering the Tunnels
a76circuit20.jpg

1. Ride east to the southern building of Thor Modan (64,27).

  • Go inside the building until you get the “Investigate South Building message
  • Kill all the dwarves in the building

2. Go northeast to the eastern building of Thor Modan (66,24).

  • Go inside the building until you get the “Investigate East Building message
  • Kill all the dwarves in the building

3. Go west/northwest to the northern building of Thor Modan (63,21).

  • Go inside the building until you get the “Investigate North Building message
  • Kill all the dwarves in the building

4. Go northeast to the biggest building of Thor Modan (65,19).

Kill all the dwarves there until you finish [75] The Runic Keystone.

Ride back to Westfall Camp, turn in:

  • [75] The Runic Keystone, get [75] The Runic Prophecies
  • [75] Uncovering the Tunnels, get [75] The Fate of Orlond
a76circuit21.jpg

1. Go north, follow the dots on my map and you’ll find Kurun, who stands at the very top of the hill above Thor Modan (65.5,18).

Turn in [75] Find Kurun! and get [75] Raining Down Destruction.

2. Northeast of Kurun you should see Giants throwing boulders down in the trench below.

Look for a Boulder:

a76img34.jpg

Right-click it and loot it.

Go to the edge of the trench.

a76img35.jpg Right-click the Boulder from your inventory and aim for a dwarf down in the trench.

Repeat 5 times.

==Note== You can only carry one Boulder at a time.

3. Go back to Kurun. Check this very short video to see how to get back up to Kurun:

VideoWay Back Up to Kurun

Turn in [75] Raining Down Destruction, get [75] Rallying the Troops.

a76circuit22.jpg

1. Go to the area north of the trench (68,11).

Target a Grizzly Hill Giant (it doesn’t work on the giants throwing boulders from the side, you have to find a giant fighting in the middle of the field)

a76img36.jpg Right-click the Shard of the Earth on the Grizzly Hill Giant.

An Iron Rune Avenger will come out of the ground and attack you. Kill it.

Repeat 5 times.

2. Go back to Kurun, turn in [75] Rallying the Troops, get [75] Into the Breach.

3. Now check out this very short video to see how to jump down in the trench without taking falling damage:

VideoInto the Breach Shortcut

No map needed for the following circuit.

1. Get out of the water.

Check your minimap, you should see a yellow “?” labelled as Surveyor Orlond (67.5,15).

Go there, turn in [75] The Fate of Orlond, get [75] Steady as a Rock?

2. Jump down in the water. Kill a Subterranean Thresher.

Loot a Portable Seismograph.

3. Get out of the water.

Cross the small bridge east and you should find the Third Rune Plate (68.5,16).

a76img37.jpg

Righ-click it.

4. Go a few paces northeast to the other side of the bridge, you’ll find the First Rune Plate (69,14.5).

Right-click it.

5. Go a few paces east and cross a bridge again, you’ll find the Second Rune Plate (70,14.5).

Right-click it.

6. Go to the very end of the trench and you should find Iron Thane Argrum (70,13).

Kill him.

7. Cross the small bridge.

a76img38.jpg Right-click the Portable Seismograph from your inventory.

A machine will appear:

a76img39.jpg

Right-click it and loot the Thor Modan Stability Profile.

==Note== If you already got a flying mount, fly out of the trench, fly to Kurun and turn in [75] Into the Breach, get [75] Gavrock.

If you don’t have a flying mount, clear the way out (or ride out if you feel like taking a risk).

Go back to Westfall Camp, turn in:

  • [75] Steady as a Rock?, get [75] Check Up on Raegar
  • [75] The Runic Prophecies

Sell junk, repair and re-stock food/drink.

a76circuit23.jpg

1. Ride to Kurun.

Turn in [75] Into the Breach, get [75] Gavrock.

2. Ride a long way southwest to Ruuna the Blind (44,48).

Turn in [75] Ruuna the Blind, get [75] Ruuna’s Request.

3. Go to the area north/northeast I colored on the map.

Kill Fern Feeder Moths until you’ve looted 4 Gossamer Dusts.

Go back to Ruuna the Blind.

Turn in [75] Ruuna’s Request, get [75] Out of Body Experience.

a76img40.jpg Right-click the Gossamer Potion.

Watch the scene until you get a complete message, then cancel the “Out of Body Experience” buff.

Turn in [75] Out of Body Experience, get [75] Fate and Coincidence.

a76circuit24.jpg

1. Go southeast to Rage Fang Shrine (52,54).

==Note== Kill Frostpaw Warriors on the way and loot Crazed Furbolg Blood off them.

2. Clear the way southwest to the cave where you will find Orsonn (48,59).

Go through his text and you’ll get the quest update “Orsonn’s Story“.

Now finish killing Frostpaw Warriors until you’ve looted 8 Crazed Furbolg Blood.

3. Ride east and then southeast to a cave at (67,62).

Talk to Kodian, go through his text and you’ll get the quest update “Kodian’s Story“.

4. Hearthstone back to Amberpine Lodge.

Go to Hierophant Thayreen, turn in:

  • [74] A Possible Link
  • [75] Children of Ursoc

Get the two follow ups:

  • [75] Vordrassil’s Seeds
  • [75] Vordrassil’s Sapling
a76circuit25.jpg

1. Follow the road a long way east until until (51,51).

Look north and you should see a big opening inside this huge tree called Vordrassil.

Once inside the tree, you should see a small tree down below:

a76img41.jpg

Jump down. Go next to this tree.

a76img42.jpg Right-click the Verdant Torch from your inventory.

2. Now mount up and follow the slope, all the way up to the highest floor of the tree. There you should find Vordrassil’s Seeds:

a76img43.jpg

Loot them up. You should find about 4 seeds up here.

Once you’ve looted all the seeds on this floor, mount up, take the northwestern exit.

Follow the slope down to the base of the tree and look for the seeds you still need there.

You can find seeds everywhere in the furbolg camps around the base of the tree.

3. Once you’re done with [75] Vordrassil’s Seeds, ride southeast to White Pine Trading Post (57.5,41).

Turn in [75] Fate and Coincidence, get the 2 follow ups:

  • [75] Sasha’s Hunt
  • [75] Anatoly Will Talk
a76circuit26.jpg

1. Go east to Solstice Village (60,40).

Kill Solstice Hunters and Duskhowl Prowlers on sight.

2. Once you’ve killed 12 Solstice Hunters, go to the center of the village.

A few paces south of the bonfire you should see Tatjana on her horse:

a76img44.jpg

a76img45.jpg Target Tatjana and right-click the Tranquilizer Dart.

Right-click the horse and you’ll be taken back to Sasha.

Turn in:

  • [75] Sasha’s Hunt
  • [75] Anatoly Will Talk, get [75] A Sister’s Pledge
a76circuit27.jpg

1. Go back to the center of the village with the bonfire.

Northeast of the bonfire you’ll find a path going down (64,40).

2. Follow that path and you’ll find a cave (65,43).

Go inside and you’ll find Anya.

Turn in [75] A Sister’s Pledge.

Sasha will come, get her quest [75] Hour of the Worg.

a76circuit28.jpg

==Note== Don’t forget to kill Longhoof Grazers and Duskhowl Prowlers on the way if you still need either of their drops for [75] Nice to Meat You.

1. Go northeast to the isles called the Ruins of Tethys (78,37).

Once you’re on the isles, look around for a School of Northern Salmon:

a76img46.jpg

a76img47.jpg Get very close to it and right-click the Fishing Net.

Repeat this until you have 6 Northern Salmon. You can find more Schools of Northern Salmon all around those isles.

Tip: The water is shallow here, so you can mount up while looking for schools.

2. Go further northeast to Gavrock (80,34).

Turn in [75] Gavrock, get [75] Runes of Compulsion.

We are really close to Bloodmoon Isle here, so we have the option to do the group quest [75] Hour of the Worg.


Optional[75] Hour of the Worg

This group quest is supposedly soloable by certain classes (Death Knights, Paladins, Hunters, Warlocks, Druids, etc). But it’s of course much easier to get a 2 or 3-man team for it.

So look for a group while following the rest of my guide, and when you find a group, come back to this section.

a76circuit29.jpg

1. Swim northeast to Bloodmoon Isle (83,28).

2. Follow the path up and there will be a camp to your right, where you should find a big worgen called Selas (85.5,27.5). Kill it.

3. Get back on the path and further up to your left you’ll find another camp, where you will find Varlam (85,24). Kill him.

4. Once you reach the top of the hill, go around to the tower towards the southern side and you’ll find a big worg called Goremaw. Kill it.

5. Enter the tower, fight your way to the top. There you will find the Shade of Arugal.

Shade of Arugal Strategy

HP: 107,000

Phase 1: Shadowbolts for ~1500 dmg. Goes to Phase 2 at 75-70% HP.

Phase 2: Becomes invulnerable and summons 3 adds. Kill the adds to go back to Phase 1. When he hits 50% HP, he goes to Phase 3.

Phase 3: Becomes invulnerable again. Mind controls a party member which you’ll have to bring down to 35% health.
Once you break the Mind Control, Arugal goes back to Phase 1.

Bring him down to 25% HP and he’ll go to Phase 4.

Phase 4: It’s just like Phase 2, but with 9 adds instead of 3.
Kill the adds, then kill Arugal.

Sasha will show up and help you finish him off during the last phase. After the fight is over, turn in [75] Hour of the Worg.


a76circuit30.jpg

1. Go south to a summoning circle with 4 dwarves Iron Rune-Weavers channeling (79,44):

a76img48.jpg

Kill the 4 Dwarves, Overseer Brunon will spawn. Kill him.

2. Go northwest to another summoning circle (75,37).

Kill the 4 Dwarves, Overseer Lochli will spawn. Kill him.

3. Go northwest to another summoning circle (72,34).

Kill the 4 Dwarves, Overseer Korgan will spawn. Kill him.

4. Go northwest to another summoning circle (68,30).

Kill the 4 Dwarves, Overseer Druval will spawn. Kill him.

a76circuit31.jpg

1. Go northeast to Drakil’jin Ruins (71,27).

==Note== Kill Drakkari Protectors and Drakkari Oracles on the way while going north.

2. Further north you’ll find an entrance to the catacombs at (71.5,23).

Look for Drakkari Canopic Jars:

a76img49.jpg

Loot 5 of them.

3. Go deeper in the catacombs until you see a yellow “!” on your minimap (69.5,17.5). If there’s no “!” on the minimap, it means someone else is doint the escort quest, so you’ll have to wait a little.

Go to that room and you’ll find Drakkari Tablets in a corner:

a76img50.jpg

Loot the Drakkari Tablets.

Now talk to Harrison Jones and start the escort quest [75] Dun-da-Dun-tah!
It’s an easy escort quest as long as you let Harrison Jones tank the elite snake for you.

a76circuit32.jpg

1. After the escort. Kill trolls in the ruins until you’ve looted 5 Sacred Mojo.

Then go to the middle of the Drakil’jin Ruins and find Drakuru’s Brazier, up some broken stairs (71.5,26).

a76img13.jpg Right-click Drakuru’s Elixir.

Turn in [75] Voices From the Dust, get [75] Cleansing Drak’Tharon.

Now kill trolls around Drakil’jin Ruins until you finished [75] Therapy.


Optional – Instance: Drak’Tharon Keep.

Now we’ve got all the quests for Drak’Tharon Keep:

  • [74] Search and Rescue
  • [75] Cleansing Drak’Tharon

So from now on, if you feel like it, you should look for a group for Drak’Tharon Keep. It’s a very nice instance for level 74-76 players, I recommend it.

If you don’t feel like it or if you don’t find a group, you can abandon [74] Search and Rescue, it can easily be picked up in the future at the Granite Springs, if you change your mind. However, do not abandon [75] Cleansing Drak’Tharon, as it’s rather annoying to get that quest again if you abandon it.


2. Ride southeast back to Harkor’s Camp. Turn in:

  • [75] Therapy
  • [75] Dun-da-Dun-tah!
  • [75] It Takes Guts…, get [75] Drak’aguul’s Mallet
a76circuit33.jpg

1. Now look for Drak’aguul. A big troll who spawns at (74,30) and patrols on the path towards Drakil’jin Ruins.

Kill him, loot the Drakil’jin Mallet.

Go back to Harkor’s Camp, turn in [75] Drak’aguul’s Mallet, get [75] See You on the Other Side.

2. Ride to Drakil’jin Ruins, go to the gongs infront of the catacombs entrance (71.5,25):

a76img51.jpg

a76img52.jpg Right-click the Drakil’jin Mallet while being very close to the one of the gongs.

You’ll die shortly after, it’s normal.

3. Go inside the catacombs and go deeper until you find Gan’jo.

Turn in [75] See You on the Other Side, get [75] Chill Out, Mon.

Right next to Gan’jo you should see Gan’jo’s Chest:

a76img53.jpg

Right-click it and loot the Snow of Eternal Slumber.

Talk to Gan’jo and ask him to return you to the living.

Go back to the previous room.

a76img54.jpg Target an Ancient Drakkari Warmonger or Soothsayer and right-click the Snow of Eternal Slumber.

Follow the Ancient Drakkari when it starts to run and then loot the Drakkari Spirit Particles after its mummy burns.

Repeat this 5 times.

4. Get out of the ruins, mount up and ride back to Harkor’s Camp.

Turn in [75] Chill Out, Mon, get [75] Jin’arrak’s End.

a76circuit34.jpg

1. Ride to the Drakil’jin Ruins again.

Go inside the catacombs and look for a Sacred Drakkari Offering in the first room:

a76img55.jpg

Loot it.

a76img56.jpg Right-click the Drakkari Spirit Dust from your inventory.

2. Get out and go to the gongs just ouside the catacombs.

a76img57.jpg Right-click the Infused Drakkari Offering from your inventory.

3. Go back to Harkor’s Camp. Turn in [75] Jin’arrak’s End.

Sell junk at the merchant here.

4. Go east to Gavrok, turn in [75] Runes of Compulsion, get [75] Latent Power.

a76circuit35.jpg

1. Go south/slightly southwest to an isle with a stone surrounded by a blue glow (79,40).

a76img58.jpg

a76img59.jpg Right-click the Shard of Gavrock.

==Note== Don’t forget to kill Longhoof Grazers on sight if you still need them for [75] Nice to Meat You.

2. Go west to another of those blue glow stones (71,39.5).

a76img59.jpg Right-click the Shard of Gavrock.

3. Go further west to Redwood Trading Post, turn in [75] A Bear of an Appetite.

4. Go southeast to another of those blue glow stones (74,44).

a76img59.jpg Right-click the Shard of Gavrock.

a76circuit36.jpg

1. Go further southeast to Prospector’s Point (77,48.5).

Turn in [75] Check Up on Raegar, get the two quests from here:

  • [75] The Captive Prospectors
  • [75] The Perfect Plan

2. Go south/slightly southwest to a dwarven building at (76.5,55).

Kill dwarves and golems until one drops a Dun Argol Cage Key.

Once you have one, go inside the building and free Prospector Gann from his cage:

a76img60.jpg

==Note== Kill every Iron Rune-Smith on the way until you’ve looted the Golem Blueprint Section 1, 2 and 3.

3. A few steps west you should find a path going up to the upper tier.

Once you’re up on the upper tier, go straight south and you should find Prospector Torgan in a cage, just outside of a dwarven building (76,58).

Free him.

4. Follow the stairs southwest and go all the way to the top until you find another dwarven building (76,62).

Outside the building you should see two cages. Prospector Varana is in one of those cages. Free her.

Now go inside the building and kill Iron Rune-Smiths until you’ve looted the Golem Blueprint Section 1, 2 and 3.

a76img61.jpg Once you have them, right-click one of the Golem Blueprint Sections and you’ll obtain the War Golem Blueprint.

Go back to Prospector’s Point, turn in:

  • [75] The Captive Prospectors, get [75] Why Fabricate When You Can Appropriate?
  • [75] The Perfect Plan, get [75] Looking the Part
a76circuit37.jpg

==Note== From now on, loot War Golem Parts on your way:

a76img62.jpg

1. Go to the first dwarven building in Dun’Argol.

Kill an Iron Rune Overseer, loot an Overseer’s Uniform.

Go back to Prospector’s Point, turn in [75] Looking the Part, get [75] Cultivating an Image.

2. Go back to Dun’Argol.

a76img63.jpg Kill a dwarf, loot it, target the corpse and use Kilian’s Camera from your inventory.

Repeat 8 times.

Finish gathering War Golem Parts for [75] Why Fabricate When You Can Appropriate? while doing this.

3. Go back to Prospector’s Point. Turn in:

  • [75] Why Fabricate When You Can Appropriate?, get [75] We Have the Power
  • [75] Cultivating an Image, get [75] Put on Your Best Face for Loken
a76circuit38.jpg

1. Mount up.

Ride back to Dun’Argol.

a76img64.jpg Once in Dun’Argol, right-click the Overseer Disguise Kit. Yes, it works while mounted, and only if you are already mounted!

2. Ride up to the next tier with the two dwarven buildings.

First, go to the building on your right-hand side. You should find Rune-Smith Durar inside (75,57).

Cancel the Iron Rune Overseer Disguise buff. Kill Rune-Smith Durar, loot Durar’s Power Cell.

3. a76img64.jpg Use the Overseer Disguise Kit again.

Get out of the building and go straight ahead, towards the next building (77,59).

Kill Rune-Smith Kathorn, loot Kathorn’s Power Cell.

4. Get out of the building.

Mount up.

a76img64.jpg Use the Overseer Disguise Kit again.

Go about 20 yards north and you should see a path going east.

Follow this path until you reach the easternmost dwarven building (81,60).

Inside the building, right-click Loken’s Pedestal, listen to Loken’s speech and you’ll get a quest udpate.

Get out of the building.

Mount up.

Use the Overseer Disguise Kit.

Ride back to Prospector’s Point.

==WARNING== Do NOT turn in [75] Put on Your Best Face for Loken. The disguise will be very useful for the rest of the quests.

ONLY turn in [75] We Have the Power, get [75] … Or Maybe We Don’t.

a76circuit39.jpg

1. a76img65.jpg Right-click the Golem Control Unit from your inventory.

Ride to the snowy hills which are located just below Dun’Argol.

Kill 10 Lightning Sentries, your golem should reach Charge level 10.

Go back to Prospector’s Point.

Turn in [75] … Or Maybe We Don’t, get the, get the two follow ups:

  • [75] Blackout
  • [75] The Iron Thane and His Anvil

2. Ride back to Dun’Argol.

a76img64.jpg Use the Overseer Disguise Kit again.

Ride to the very top of Dun’Argol and go inside the big dwarven building.

Take one of the elevators going down, you should be in a room with the Dun Argol Power Core.

a76img66.jpg

a76img66b.jpg Target it and right-click Raegar’s Explosives from your inventory.

a76img65.jpg Now right-click the Golem Control Unit.

Go next to Iron Thane Furyhammer and The Anvil, which should be in the same room.

Now do this:

1. Use Ability #2
2. Cancel the Overseer Disguise buff.
3. Target Iron Thane Furyhammer and use Ability #1 whenever it’s up. Also use Ability#2 again whenever The Anvil recovers from the EMP.
4. Once Iron Thane Furyhammer is dead, stay in the Golem Suit and run away until they give up on following you. Don’t bother killing The Anvil. (Please note that you take no falling damage in the suit, so you can jump off high cliffs too to escape).

Once they’ve given up on you, mount up, use the Overseer Disguise Kit and ride back to Prospector’s Point.

Turn in all 3 quests:

  • [75] Blackout
  • [75] The Iron Thane and His Anvil
  • [75] Put on Your Best Face for Loken
a76circuit40.jpg

1. Ride northeast to Gavrock, turn in [75] Latent Power, get [75] Free at Last.

2. Ride southwest to a plains area at (72,37).

a76img67.jpg Look for Runed Giants and use Gavrock’s Runebreaker on them.

  • If it works, the giant will become friendly and you’ll get a quest update
  • If it doesn’t work, the giant will attack you but will be in a much weaker state. So you’ll just have to re-use Gavrock’s Runebreaker until it works. Meanwhile, try to stun or to kite the giant until the item cools down.

Keep doing this until you’ve 4 Runed Giants Freed.

While you’re here, also kill Longhoof Grazers and Duskhowl Prowlers until you finish [75] Nice to Meat You!

No map needed for this part.

1. Ride to Harkor’s Camp. Turn in [75] Nice to Meat You!

2. Ride to Gavrock. Turn in [75] Free at Last.

3. Hearthstone back to Amberpine Lodge.

Go to Hierophant Thayrenn, turn in:

  • [75] Vordrassil’s Seeds
  • [75] Vordrassil’s Sapling

Get the follow up [75] Ursoc, the Bear God.

You should be level 77 or somewhere around it. If you are ahead, that’s great, keep following the guide normally, don’t skip anything. If you are behind, that’s not a problem either, just keep following the guide normally. You’ll catch up eventually and there will be a lot of extra circuits at the end anyway 😉


Level 77


Optional[75] Ursoc, the Bear God.

Fly to Westfall Brigade Encampment.

a76circuit41.jpg

1. Ride west until a narrow path going up at (51.5,27).

2. Follow this path up and you’ll find Tur Ragepaw (52,24).

Now before you talk to him, read the following paragraph.

Despite being a 3-man group quest, [75] Ursoc, the Bear God is soloable for tank and healer classes if you use the help of Tur Ragepaw correctly.

  • If you are a tank or pet class (Protection Warrior, Paladin, Feral Druid, Death Knight, Hunter, Warlock). Tell Tur Ragepaw “We could use a healer“. He will heal your tank or your pet through the fight.
  • If you are a healer class, tell Tur Ragepaw “Assume your druidic bear form, Tur.” And he will tank for you as long as you keep him alive with your heals.
  • For other classes/specs it might be too difficult to solo the quest. With my mage in quest greens I couldn’t do it. It might be possible for rogues and dps warriors if they ask Tur Ragepaw to assume the role of a healer, depending on gear.

If you can’t solo it, try to look for a group. Duo’ing this quest should be easy.

==WARNING== During the fight, Ursoc will release a small black sludge called Blood of the Old God. Kill it ASAP, it only has 2K HPs, but it’s very annoying (does 1K damage + stun every 5 seconds or so).

a76img68.jpg After the fight is over, target Ursoc’s corpse and use the Purified Ashes of Vordrassil.

==Note== You can also use the Purified Ashes of Vordrassil on the corpse even if someone else killed Ursoc.

If you can’t find a group, just save this quest for when you reach level 80.

WoW WotLK Classic Horde 70-80 Leveling Guide: 75-77 Grizzly Hills

You should have the following two quests:

  • [75] Into the Breach!
  • [74] To Conquest Hold, But Be Careful!

If you don’t have them, it’s not a big deal, but they’re easily attainable. Just go to my Dragonblight guide and search for them with your browser’s search function (CTRL + F).

Time to go to Grizzly Hills.

Fly to Venomspite.

Ride east until you enter Grizzly Hills.

In Grizzly Hills, ride east to Conquest Hold (21,63).

Turn in [74] To Conquest Hold, But Be Careful, get [74] The Conqueror’s Task.

hs.jpg Go to the inn and make it your home location.

Turn in [74] The Conqueror’s Task.

Get all the available quests from Conquest Hold BESIDES [75] The Magical Kingdom of Dalaran:

  • [74] A Show of Strength
  • [74] The Flamebinders’ Secret
  • [74] Gray Worg Hides
  • [74] Supplemental Income

FPicon.jpg Get the new flight path.

h76circuit1.jpg

==Note== Kill Graymist Hunters on the way.

1. Get out of Conquest Hold by the southern gate.

Ride east to to Raider Captain Kronn (26.5,67).

==Warning== This is a PvP Daily Quest. It’s very quick, easy and rewarding, and there most likely won’t even be any PvP involved. So I suggest doing it. However, if you don’t want to have anything to do with PvP, you can skip this and go to the next circuit. This quest doesn’t count towards the zone quest achievement, but it does count for the Daily PvP Quest Achievement: Grizzled Veteran. So it’s up to you!

Get the quest [74] Blackriver Brawl.

2. Go to the isle northeast and kill 10 Alliance Units or Players.

Go back to Raider Captain Kronn, turn in [74] Blackriver Brawl.

h76circuit2.jpg

1. Southeast you should see a bridge.

Cross it and then go northeast to an area with a lot of Tallhorn Stags (34,65).

Stay there and kill Tallhorn Stags until you finish [74] Supplemental Income.

2. Ride southwest to Voldrune (31,75). Two objectives here:

  • Kill 12 Dragonflayer Huscarls
  • Kill Dragonflayer Flamebinders until you’ve looted 3 Flame-Imbued Talismans

3. Go northwest and cross the same bridge again.

Kill Graymist Hunters until you finish [74] Gray Worg Hides on your way back to Conquest Hold.

In Conquest Hold, turn in:

  • [74] Supplemental Income
  • [74] Gray Worg Hides, get [74] A Minor Substitution
  • [74] A Show of Strength
  • [74] The Flamebinders’ Secret, get [74] The Thane of Voldrune
h76circuit3.jpg

==Warning== PvP Daily Quest Circuit. Skip this circuit and the next one if you don’t want any PvP. However please note that [74] Seeking Solvent counts for the zone quest achievement. Those quests are really quickly done and give 20K XP each, so I recommend doing them, even if you dislike pvp.

1. Ride southwest to Venture Bay. The horde quest hub is on the western side of Venture Bay (11,77).

Get the 4 daily pvp quests:

  • [74] Seeking Solvent
  • [74] Keep Them at Bay!
  • [74] Smoke ‘Em Out
  • [74] Crush Captain Brightwater!
h76circuit4.jpg

1. Go east to the area north of the docks in venture bay.

Enter the first building you encounter at (14,77).

Inside the building you should see Venture Co. Stragglers.

a76img26.jpg Use the Smoke Bomb on them.

Tip: Just run in the building, gather them all in one bunch and then use the Smoke Bomb on them.

2. Go to the next two buildings to the east and do the same thing.

==Note== Kill Alliance Units & Players on the way

You should be done with [74] Smoke ‘Em Out very quickly if you bomb the 3 buildings.

3. Go to the easternmost ship. On the main deck you’ll find Captain Brightwater (17,81.5). He’s elite but should be easily soloable for any class. Just make sure you pull him solo.

HP30,000
Avg. Hit on Cloth800
Can be slowed, stunned, feared.

Now Finish [74] Keep Them at Bay! before going to the next step.

4. Go to the middle ship (16,80). It’s the same model as the boat from Booty Bay to Ratchet.

Go inside the cabin and clear the way to the last room.

==Warning== I really mean CLEAR the way. Kill all the Venture Co. in your way, even if you are a stealth class.

Once the way is clear, go to the last room where you should see the Element 115.

a76img27.jpg

Loot it. You’ll get the following debuff:

a76img28.jpg

That means it’s useless to mount or to sprint or anything like that. Just run straight back to the quest NPCs. You have only 3 Minutes to get there.

Go as fast as you can, avoid fights, and turn in [74] Seeking Solvent first.

Then turn in the other 3 quests:

  • [74] Keep Them at Bay!
  • [74] Smoke ‘Em Out
  • [74] Crush Captain Brightwater!

Hearthstone back to Conquest Hold (or ride back if you’re HS is on cooldown).

h76circuit5.jpg

1. Ride southeast, cross the bridge and go to Voldrune.

This time clear the way towards the southwestern part of Voldrune, where you should find a chained proto-drake called Flamebringer (26,80).

Now check out my video on how to do this quest, it will make it much easier, as it’s kinda buggy and tricky at the moment. The only difference is that you should fly back to Conquest Hold at the end of the video, instead of towards Venture Bay.

I recommend watching the video in High Quality.

Video[74] The Thane of Voldrune
==Note== If the video was useful to you, please don’t forget to rate it! 😉

After having watched the video you should be more than ready.

Kill the thane and then fly to Conquest Hold.

Turn in [74] The Thane of Voldrune, get [74] Onward to Camp Oneqwah.

Also get [75] My Enemy’s Friend.

Sell junk, repair and re-stock food/drink.

h76circuit6.jpg

1. Ride southeast to the bridge and cross it again.

Then ride east to Forest’s Edge Post (36,67).

  • Kill Vladek, he’s in the tower
  • Kill 8 Silverbrook Hunters
  • Keep on killing them until you loot Mikhail’s Journal

a76img19.jpg Right-click it to start [74] Mikhail’s Journal.

2. All around the eastern and southern side of Forest’s Edge Post you should find a lot of Grizzly Bears, as shown on my map.

Kill Grizzly Bears until you finish [74] A Minor Substitution

3. Go back to Conquest Hold, turn in:

  • [75] My Enemy’s Friend, get [74] Attack on Silverbrook
  • [74] Mikhail’s Journal, get [74] Gorgonna
  • [74] Gorgonna, get [74] Tactical Clemency
  • [74] A Minor Substitution, get [74] Jun’ik’s Coverup

Mount up.

Go about 20 yards southeast to the merchant, buy a stack of 5 Simple Flour.

Go northeast across the conquest hold pit and buy 1 Coal from the NPC.

Get the following 2 quests:

  • [74] Eyes Above
  • [74] Good Troll Hunting

Turn in [74] Jun’ik’s Coverup, get [74] Delivery to Krenna.

Go inside the inn and turn in [74] Delivery to Krenna.

h76circuit7.jpg

Ride northwest to Granite Springs (16,47.5).

Turn in [73] Good Troll Hunting! and get [74] Filling the Cages.

a76circuit3.jpg

1. Talk to Budd, a human with a troll mask sitting in one of huts. Click on the text.

Mount up, ride southwest to Drak’Zin (14,58).

Find a SOLO troll.

a76img5.jpg Use Budd’s Ability #4. This will put the troll to sleep for 15 seconds.

a76img6.jpg Right-click the Bounty Hunter’s Cage on the troll (must be in melee range).

If you fail, you’ll have to go back to Granite Springs and talk to Budd again.

2. Go back to Granite Springs.

Turn in [74] Filling the Cages, get [73] Truce? from Drakuru.

Next to the cage you should find a Dull Carving Knife planted in a tree stump:

a76img7.jpg

Loot it.

a76img8.jpg Right-click the Dull Carving Knife from your inventory.
Talk to Drakuru and click on the text.

Turn in [73] Truce? and get [74] Vial of Visions.

Go to Ameenah, a troll female NPC selling , buy a stack of 5 Imbued Vials from her.

a76circuit4.jpg

==Note== From now on, look for Hazelwood Bushes on the way and loot 3 Haze Leafs:

a76img9.jpg

1. Go north/northwest to the lake at (15,39).

Dive in and loot a Waterweed Frond.

a76img10.jpg

2. Go back to Granite Springs, turn in [74] Vial of Visions, get [74] Subject to Interpretation.

Get [74] Scourgekabob from Prigmon just a few steps northwest.

Loot a Scourged Troll Mummy.

a76img11.jpg

Go southeast to Mack Fearsen, who stands in front of a bonfire with mummies burning.

a76img12.jpg Right-click the Scourged Troll Mummy from you inventory.
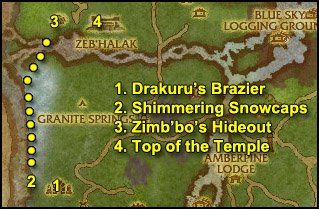
Turn in [74] Scourgekabob, get [74] Seared Scourge.

Go back to Prigmon and get [75] Shimmercap Stew.

a76circuit5.jpg

1. Ride southwest to Drak’Zin. Complete the following 2 objectives:

Kill Trolls until you’ve looted 5 Frozen Mojo
Kill Ice Serpents until you’ve looted 5 Ice Serpent Eyes

Go to Drakuru’s Brazier, which is up some ruined stairs in the middle of Drak’Zin (13,61).

a76img13.jpg Right-click Drakuru’s Elixir.

Turn in [74] Subject to Interpretation, get [74] Sacrifices Must be Made.

2. Now go west towards the river, look for Shimmering Snowcaps, they can be found close to trees along the river bank:

a76img14.jpg

Go north along the river bank and loot 5 Shimmering Snowcaps.

3. Ride further north to Zimb’bo’s Hideout (15,37). It’s the biggest hut on the western side of the Zeb’Halak.

Kill Warlord Zimb’bo and loot Zimb’bo’s Mojo.

==Note== From now on, loot Sweetroot on the way:

a76img15.jpg

4. Clear the way to the top of the temple east (18,36).

Right-click the Seer of Zeb’Halak, click on the text. You’ll receive the Eye of the Prophets.

Go to Drakuru’s Brazier, which is a few steps west of the Seer of Zeb’Halak.

a76img13.jpg Right-click Drakuru’s Elixir.

Turn in [74] Sacrifices Must be Made, get [74] Heart of the Ancients.

Go back down and gather Sweetroots until you have 5.

h76circuit8.jpg

1. Go north to Drak’Tharon Keep.

Go to the area west of the stairs and you’ll see many trolls running around (16,30):

a76img16.jpg

a76img17.jpg Throw Mack’s Dark Grog at them. It has a huge range, so you’ll probably need to back off a little.
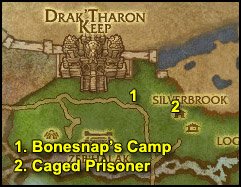
Repeat until you finish [74] Seared Scourge.

2. Go east to Bonesnap’s Camp. Turn in [74] Tactical Clemency.

h76circuit9.jpg

1. Ride east to Silverbrook Hills (26,31).

Kill 8 Silverbrook Defenders.

2. Ride east/northeast to the Horde Quest Hub at the Blue Sky Logging Grounds (34,33).

==Warning== There might be some PvP action involved in the following circuit. So if you want to avoid PvP at all costs, skip it. They don’t count for the zone quest achievement, but they do give nice XP and are quickly done.

Get all the quests from here:

  • [74] Keep ‘Em On Their Heels
  • [74] Overwhelmed
  • [74] Making Repairs
  • [74] Shred the Alliance

3. Go east to the central isle of Blue Sky Logging Grounds. Our main objective is to deliver 3 Shredders while completing as much as the other quests on the way:

  • Kill 15 Alliance Units (NPCs and players both count)
  • h76img1.jpg Use the Renewing Tourniquet on 10 Wounded Skirmishers
  • Gather the following parts until you finish [74] Making Repairs:
a76img22.jpg
a76img23.jpg
a76img24.jpg

Do that on the way while looking for a Broken-down Shredder:

a76img25.jpg

Jump into one, face toward the bridge west and use ability #3 to sprint.

If you get attacked:

Use Ability#1 to pushback your enemy.
Use Ability#2 to blind nearby enemies (must be in melee range)

Go back to the quest giver and use ability #5 to deliver the shredder.

Finish all 4 quests, go turn them in.

You should be level 76 or somewhere around it. If you are ahead, that’s great, keep following the guide normally, don’t skip anything. If you are behind, that’s not a problem either, just keep following the guide normally. You’ll catch up eventually and there will be a lot of extra circuits at the end anyway 😉


Level 76


h76circuit10.jpg

1. Go east to the pumping station at (37,32).

Clear the way to the top, go inside the cabin, turn in [74] Heart of the Ancients, get [74] My Heart is in Your Hands.

2. Go to the eastern point of the lake, and from there ride northeast to Drak’atal Passage (44,30).

Kill Drakkari Defenders and Injured Drakkari Refugees until you’ve looted 5 Desperate Mojo.

Go to Drakuru’s Brazier, found at the bottom of the big stairs.

a76img13.jpg Right-click Drakuru’s Elixir.

Turn in [74] My Heart is in Your Hands, get [75] Voices From the Dust.

Hearthstone back to Conquest Hold. (Or ride back there if your HS is on cooldown).

Turn in [74] Attack on Silverbrook, get [75] Ruuna The Blind from Gorgonna.

Also get the two quests from Windseer Grayhorn:

  • [74] The Darkness Beneath
  • [74] Vordrassil’s Fall

Outside of the Conquest Hold Pit, there should be a new quest available, but don’t take it yet.


Optional[74] The Conquest Pit

[74] The Conquest Pit: Bear Wrestling! is the first step of a chain similar to the Ring of Blood quest chain in Nagrand.

So you will need a group for it. You don’t need a full group though, 3 player is more than enough:

1 healer, 1 tank or pet class and 1 DPS class to make it faster.

==Note== Certain classes might be able to solo the first 3 bosses depending on their gear (Death Knights, Hunters, Warlocks with Voidwalker tanking, Feral Druids, Paladins, Shamans with Earth Elemental Totem up), but not the last 2 quests in the chain.

So I recommend finding a group for it, it’s really much easier and faster that way.

Proceed with the guide and keep on looking for a group for this quest chain.

Once you have a group, have your tank accept the quest first (that way, he’ll get the initial aggro), and check the info below about the bosses you’ll have to fight:

1st bossIronhide. Easy tank and spank battle.
2nd bossTorgg Thundertotem. Do NOT destroy the Fire Nova Totems. They do 8K damage if you destroy them, so leave them alone and MOVE AWAY from them before they explode. The Furbolg can be interrupted and stunned.
3rd bossRustblood. Simple tank and spank. Knockbacks and attacks the 2nd person highest on the threat list. So make sure your tank is awake.
4th bossHorgrenn Hellcleave. He charges people which are out of his melee range randomly. So have everyone stay close to him and he won’t charge anyone. However, he also does a Whirlwind, quickly move away from him when he does that. When he’s done with Whirlwind, go back in close melee range.
5th bossKrenna. This one is actually easier than the previous two bosses. It’s a simple tank and spank fight and you also get help from Gorgonna.


h76circuit11.jpg

1. Ride northwest to Granite Springs (16,47.5). Turn in:

  • [74] Seared Scourge, get [74] Search and Rescue, don’t get the daily quest
  • [75] Shimmercap Stew, get [74] Say Hello to my Little Friend

2. Ride east/northeast to Vordrassil’s Tears, you’ll find a cave entrance at (28,45).

Kill Entropic Oozes on the way and loot Slime Samples off them.

Clear the way to the bottom of the cave until you find an area with black smoke.

a76img20.jpg Right-click the Geomancer’s Orb from your inventory.
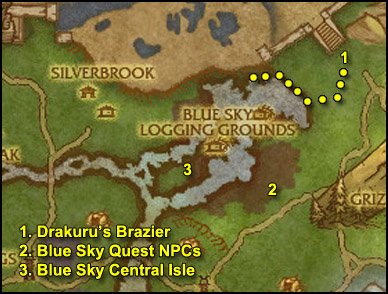
Get out of the cave.

h76circuit12.jpg

==Note== From now on, look for Imperial Eagles on your way:

a76img4.jpg

h76img2.jpg Target them and use the Silver Feather from your inventory.

We’re not in any hurry to finish that quest, so just do it on the way, don’t go looking for them.

1. Ride east to Vordrassil’s Limb (33,49).

Clear the way to the bottom of the cave.

a76img20.jpg Right-click the Geomancer’s Orb from your inventory.

2. Ride east/southeast to Vordrassil’s Heart

Clear the way to the bottom of the cave.

a76img20.jpg Right-click the Geomancer’s Orb from your inventory.

Now kill Entropic Oozes until you’ve looted 6 Slime Samples.

h76circuit13.jpg

1. Ride east to Ruuna the Blind (44,48).

Turn in [75] Ruuna The Blind, get [75] Ruuna’s Request.

2. Go to the area north/northeast I colored on the map.

Kill Fern Feeder Moths until you’ve looted 4 Gossamer Dusts.

3. Also finish [74] Eyes Above, there are a lot of Imperial Eagles just west of the area I colored.

Ride back to Ruuna the Blind.

Turn in [75] Ruuna’s Request, get [75] Out of Body Experience.

a76img40.jpg Right-click the Gossamer Potion.

Watch the scene until you get a complete message, then cancel the “Out of Body Experience” buff.

Turn in [75] Out of Body Experience, get [75] Fate and Coincidence.

h76circuit14.jpg

1. Follow the road east and then northeast to Camp Oneqwah (65,47).

Turn in [74] Onward to Camp Oneqwah. Gather all the available quests from here:

  • [75] An Expedient Ally
  • [75] The Horse Hollerer
  • [75] The Unexpected ‘Guest’

FPicon.jpg Get the new flight path.

h76circuit15.jpg

==Note== Kill Silvercoat Stags on the way from now on.

1. Go northeast to Redwood Trading Post (69,40).

Get [75] A Bear of an Appetite.

2. Go north until you hit the Path of Iron. Then go northwest to an area where you’ll find Highland Mustangs.

h76img3.jpg Use the Flashbang Grenade on them.

You’re not supposed to finish this quest now, just do this on the way.

3. Keep following the path of iron until you arrive in Thor Modan.

h76circuit16.jpg

1. Go a little northeast and you’ll find a Battered Journal on the floor (64,20).

Get the quest [75] The Damaged Journal.

Gather 8 Missing Journal Pages off the ground:

a76img32.jpg

a76img33.jpg Right-click the Incomplete Journal.

Hearthstone back to Conquest Hold. Turn in:

  • [74] The Darkness Beneath
  • [74] Vordrassil’s Fall
  • [74] Eyes Above

Get the 2 follow ups:

  • [74] A Possible Link
  • [75] The Bear God’s Offspring

Sell junk, repair and re-stock food/drink.

Fly back to Camp Oneqwah. Turn in [75] The Damaged Journal, get [75] Deciphering the Journal.

h76circuit17.jpg

1. Ride south to Heart’s Blood Shrine (64,55).

Kill Redfang Hunters on the way and loot Crazed Furbolg Blood.

2. Clear the way southeast and you’ll find Grumbald One-Eye (66,59).

Kill him, loot a Spiritsbreath.

3. Go a little further southeast to a cave at (67,62).

Talk to Kodian, go through his text and you’ll get the quest update “Kodian’s Story“.

h76circuit18.jpg

==Reminder== Kill Silvercoat Stags on the way.

1. Ride west/northwest to to Rage Fang Shrine (55,53).

==Note== Kill Frostpaw Warriors and Frostpaw Shamans on the way and loot Crazed Furbolg Blood off them.

2. Clear the way southwest to the cave where you will find Orsonn (48,59).

Go through his text and you’ll get the quest update “Orsonn’s Story“.

Now finish killing Frostpaw Warriors/Shamans until you’ve looted 8 Crazed Furbolg Blood.

3. Behind the cave where you found Orsonn, you should see a small snowy path going west. Take it and ride back to Conquest Hold.

Turn in:

  • [74] A Possible Link
  • [75] The Bear God’s Offspring

Get the two follow ups:

  • [74] Vordrassil’s Seeds
  • [75] Destroy the Sapling

Fly to Camp Oneqwah.

Turn in [75] Deciphering the Journal, get the two follow ups:

  • [75] Pounding the Iron
  • [75] The Runic Prophecies (becomes available 20 seconds later)
h76circuit19.jpg

1. From the northeastern exit of Camp Oneqwah, go straight north, kill Silvercoat Stags on the way.

Keep going north until you reach the Path of Iron.

2. Follow the Path of Iron until you reach the intersection.

==Reminder== Don’t forget to use the Flashbang Grenade on Highland Mustangs on the way.

From there follow the dots on my map and you’ll find Kurun, who stands at the very top of the hill above Thor Modan (65.5,18).

Turn in [75] An Expedient Ally and get [75] Raining Down Destruction.

h76circuit20.jpg

1. Northeast of Kurun you should see Giants throwing boulders down in the trench below.

Look for a Boulder:

a76img34.jpg

Loot 5 of them.

Go to the edge of the trench.

a76img35.jpg Right-click the Boulder from your inventory and aim for a dwarf down in the trench.
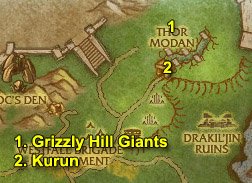
Repeat 5 times.

In this area you should also find plenty of Silvercoat Stags. Now is the time to finish [75] The Unexpected ‘Guest’.

2. Go back to Kurun. Check this very short video to see how to get back up to Kurun:

VideoWay Back Up to Kurun

Turn in [75] Raining Down Destruction, get [75] Rallying the Troops.

a76circuit22.jpg

1. Go to the area north of the trench (68,11).

Target a Grizzly Hill Giant (it doesn’t work on the giants throwing boulders from the side, you have to find a giant fighting in the middle of the field)

a76img36.jpg Right-click the Shard of the Earth on the Grizzly Hill Giant.

An Iron Rune Avenger will come out of the ground and attack you. Kill it.

Repeat 5 times.

After that, go finish [75] The Horse Hollerer. There are many Highland Mustangs just west of here.

2. Go back to Kurun, turn in [75] Rallying the Troops, get [75] Into the Breach.

Now we’re gonna jump down in the trench, check out this very short video to see exactly where I want you to jump down:

VideoInto the Breach Shortcut (horde)

No map needed for the following circuit.

1. You should find Iron Thane Argrum (70,13) right next to where we jumped down in the video.

Kill him.

2. Cross the small bridge, go a few paces south and you’ll find the Second Rune Plate (70,14.5).

a76img37.jpg

Righ-click it.

3. Go a few paces southwest to the other side of the bridge, you’ll find the First Rune Plate (69,14.5).

Right-click it.

4. Cross the small bridge south and you should find the Third Rune Plate (68.5,16).

Now clear the way out while finishing [75] Pounding the Iron.

==Note== If you already got a flying mount, fly out of the trench, fly to Kurun and turn in [75] Into the Breach, get [75] Gavrock.

If you don’t have a flying mount, clear the way out (or ride out if you feel like taking a risk).

Then go turn in [75] Into the Breach, get [75] Gavrock.

h76circuit21.jpg

1. Go southeast to Harkor’s Camp (74,34).

Turn in [74] Say Hello to my Little Friend, get all the available quests from here:

  • [75] Nice to Meat You
  • [75] Therapy
  • [75] It Takes Guts…

2. Go southeast to the isles called the Ruins of Tethys (78,37).

Once you’re on the isles, look around for a School of Northern Salmon:

a76img46.jpg

a76img47.jpg Get very close to it and right-click the Fishing Net.

Repeat this until you have 6 Northern Salmon. You can find more Schools of Northern Salmon all around those isles.

Tip: The water is shallow here, so you can mount up while looking for schools.

3. Go northeast to Gavrock (80,34).

Turn in [75] Gavrock, get [75] Runes of Compulsion.

h76circuit22.jpg

==Note== From now on, kill Duskhowl Prowlers and Longhoof Grazers on sight.

1. Go southwest, back to Camp Oneqwah. Turn in:

  • [75] The Unexpected ‘Guest’, get [75] An Intriguing Plan
  • [75] The Horse Hollerer
  • [75] Pounding the Iron
  • [75] The Runic Prophecies, get [75] In the Name of Loken

2. Go northwest to White Pine Trading Post (57.5,41).

Turn in [75] Fate and Coincidence, get the 2 follow ups:

  • [75] Sasha’s Hunt
  • [75] Anatoly Will Talk
a76circuit26.jpg

1. Go east to Solstice Village (60,40).

Kill Solstice Hunters and Duskhowl Prowlers on sight.

2. Once you’ve killed 12 Solstice Hunters, go to the center of the village.

A few paces south of the bonfire you should see Tatjana on her horse:

a76img44.jpg

a76img45.jpg Target Tatjana and right-click the Tranquilizer Dart.

Right-click the horse and you’ll be taken back to Sasha.

Turn in:

  • [75] Sasha’s Hunt
  • [75] Anatoly Will Talk, get [75] A Sister’s Pledge
h76circuit23.jpg

1. Go west to Grizzlemaw.

Look for Vordrassil’s Seeds:

a76img43.jpg

They can be found lying around in the furbolg camps all around the huge tree.

Gather 8 Vordrassil’s Seeds.

2. Find the slope taking you inside the tree and ride all the way down.

You should see a small tree down below:

a76img41.jpg

Go next to this tree.

a76img42.jpg Right-click the Verdant Torch from your inventory.
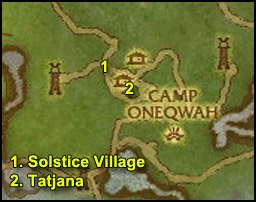
Hearthstone back to Conquest Hold. Turn in:

  • [74] Vordrassil’s Seeds
  • [75] Destroy the Sapling

Get the follow up [75] Ursoc, the Bear God.

Fly to Camp Oneqwah.


Optional[75] Ursoc, the Bear God.

a76circuit41.jpg

1. From Camp Oneqwah. Ride northwest until a narrow path going up at (51.5,27).

2. Follow this path up and you’ll find Tur Ragepaw (52,24).

Now before you talk to him, read the following paragraph.

Despite being a 3-man group quest, [75] Ursoc, the Bear God is soloable for tank and healer classes if you use the help of Tur Ragepaw correctly.

  • If you are a tank or pet class (Protection Warrior, Paladin, Feral Druid, Death Knight, Hunter, Warlock). Tell Tur Ragepaw “We could use a healer“. He will heal your tank or your pet through the fight.
  • If you are a healer class, tell Tur Ragepaw “Assume your druidic bear form, Tur.” And he will tank for you as long as you keep him alive with your heals.
  • For other classes/specs it might be too difficult to solo the quest. With my mage in quest greens I couldn’t do it. It might be possible for rogues and dps warriors if they ask Tur Ragepaw to assume the role of a healer, depending on gear.

If you can’t solo it, try to look for a group. Duo’ing this quest should be easy.

==WARNING== During the fight, Ursoc will release a small black sludge called Blood of the Old God. Kill it ASAP, it only has 2K HPs, but it’s very annoying (does 1K damage + stun every 5 seconds or so).

a76img68.jpg After the fight is over, target Ursoc’s corpse and use the Purified Ashes of Vordrassil.

==Note== You can also use the Purified Ashes of Vordrassil on the corpse even if someone else killed Ursoc.

If you can’t find a group, just save this quest for when you reach level 80.

Go turn in [75] Ursoc, the Bear God whenever you’re close to Conquest Hold or when your hearthstone is ready. I won’t tell you when to turn it in in the guide, so it’s up to you.


Go back to Camp Oneqwah.

h76circuit24.jpg

1. Go north of Camp Oneqwah and you’ll find a cave (65,43).

Go inside and you’ll find Anya.

Turn in [75] A Sister’s Pledge.

Sasha will come, get her quest [75] Hour of the Worg.

2. Go northeast to Redwood Trading Post, turn in [75] A Bear of an Appetite.

Talk to Hugh Glass, click on the text saying “Calm down, I want to ask you about the Iron Dwarves and Loken

Let him speak until you get a quest update.

==Reminder== Kill Duskhowl Prowlers and Longhoof Grazers on sight.

a76circuit30.jpg

1. Go east/southeast to a summoning circle with 4 dwarves Iron Rune-Weavers channeling (79,44):

a76img48.jpg

Kill the 4 Dwarves, Overseer Brunon will spawn. Kill him.

2. Go northwest to another summoning circle (75,37).

Kill the 4 Dwarves, Overseer Lochli will spawn. Kill him.

3. Go northwest to another summoning circle (72,34).

Kill the 4 Dwarves, Overseer Korgan will spawn. Kill him.

4. Go northwest to another summoning circle (68,30).

Kill the 4 Dwarves, Overseer Druval will spawn. Kill him.

a76circuit31.jpg

1. Go northeast to Drakil’jin Ruins (71,27).

==Note== Kill Drakkari Protectors and Drakkari Oracles on the way while going north.

2. Further north you’ll find an entrance to the catacombs at (71.5,23).

Look for Drakkari Canopic Jars:

a76img49.jpg

Loot 5 of them.

3. Go deeper in the catacombs until you see a yellow “!” on your minimap (69.5,17.5). If there’s no “!” on the minimap, it means someone else is doint the escort quest, so you’ll have to wait a little.

Go to that room and you’ll find Drakkari Tablets in a corner:

a76img50.jpg

Loot the Drakkari Tablets.

Now talk to Harrison Jones and start the escort quest [75] Dun-da-Dun-tah!
It’s an easy escort quest as long as you let Harrison Jones tank the elite snake for you.

a76circuit32.jpg

1. After the escort. Kill trolls in the ruins until you’ve looted 5 Sacred Mojo.

Then go to the middle of the Drakil’jin Ruins and find Drakuru’s Brazier, up some broken stairs (71.5,26).

a76img13.jpg Right-click Drakuru’s Elixir.

Turn in [75] Voices From the Dust, get [75] Cleansing Drak’Tharon.

Now kill trolls around Drakil’jin Ruins until you finished [75] Therapy.


Optional – Instance: Drak’Tharon Keep.

Now we’ve got all the quests for Drak’Tharon Keep:

  • [74] Search and Rescue
  • [75] Cleansing Drak’Tharon

So from now on, if you feel like it, you should look for a group for Drak’Tharon Keep. It’s a very nice instance for level 74-76 players, I recommend it.

If you don’t feel like it or if you don’t find a group, you can abandon [74] Search and Rescue, it can easily be picked up in the future at the Granite Springs, if you change your mind. However, do not abandon [75] Cleansing Drak’Tharon, as it’s rather annoying to get that quest again if you abandon it.


2. Ride southeast back to Harkor’s Camp. Turn in:

  • [75] Therapy
  • [75] Dun-da-Dun-tah!
  • [75] It Takes Guts…, get [75] Drak’aguul’s Mallet

Optional[75] Hour of the Worg

This group quest is supposedly soloable by certain classes (Death Knights, Paladins, Hunters, Warlocks, Druids, etc). But it’s of course much easier to get a 2 or 3-man team for it.

So look for a group while following the rest of my guide, and when you find a group, come back to this section.

a76circuit29.jpg

1. Swim northeast to Bloodmoon Isle (83,28).

2. Follow the path up and there will be a camp to your right, where you should find a big worgen called Selas (85.5,27.5). Kill it.

3. Get back on the path and further up to your left you’ll find another camp, where you will find Varlam (85,24). Kill him.

4. Once you reach the top of the hill, go around to the tower towards the southern side and you’ll find a big worg called Goremaw. Kill it.

5. Enter the tower, fight your way to the top. There you will find the Shade of Arugal.

Shade of Arugal Strategy

HP: 107,000

Phase 1: Shadowbolts for ~1500 dmg. Goes to Phase 2 at 75-70% HP.

Phase 2: Becomes invulnerable and summons 3 adds. Kill the adds to go back to Phase 1. When he hits 50% HP, he goes to Phase 3.

Phase 3: Becomes invulnerable again. Mind controls a party member which you’ll have to bring down to 35% health.
Once you break the Mind Control, Arugal goes back to Phase 1.

Bring him down to 25% HP and he’ll go to Phase 4.

Phase 4: It’s just like Phase 2, but with 9 adds instead of 3.
Kill the adds, then kill Arugal.

Sasha will show up and help you finish him off during the last phase. After the fight is over, turn in [75] Hour of the Worg.


a76circuit33.jpg

1. Now look for Drak’aguul. A big troll who spawns at (74,30) and patrols on the path towards Drakil’jin Ruins.

Kill him, loot the Drakil’jin Mallet.

Go back to Harkor’s Camp, turn in [75] Drak’aguul’s Mallet, get [75] See You on the Other Side.

2. Ride to Drakil’jin Ruins, go to the gongs infront of the catacombs entrance (71.5,25):

a76img51.jpg

a76img52.jpg Right-click the Drakil’jin Mallet while being very close to the one of the gongs.
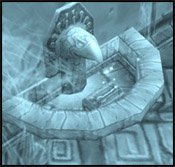
You’ll die shortly after, it’s normal.

3. Go inside the catacombs and go deeper until you find Gan’jo.

Turn in [75] See You on the Other Side, get [75] Chill Out, Mon.

Right next to Gan’jo you should see Gan’jo’s Chest:

a76img53.jpg

Right-click it and loot the Snow of Eternal Slumber.

Talk to Gan’jo and ask him to return you to the living.

Go back to the previous room.

a76img54.jpg Target an Ancient Drakkari Warmonger or Soothsayer and right-click the Snow of Eternal Slumber.
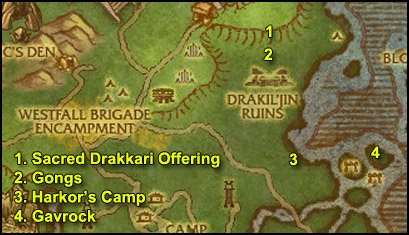
Follow the Ancient Drakkari when it starts to run and then loot the Drakkari Spirit Particles after its mummy burns.

Repeat this 5 times.

4. Get out of the ruins, mount up and ride back to Harkor’s Camp.

Turn in [75] Chill Out, Mon, get [75] Jin’arrak’s End.

a76circuit34.jpg

1. Ride to the Drakil’jin Ruins again.

Go inside the catacombs and look for a Sacred Drakkari Offering in the first room:

a76img55.jpg

Loot it.

a76img56.jpg Right-click the Drakkari Spirit Dust from your inventory.

2. Get out and go to the gongs just ouside the catacombs.

a76img57.jpg Right-click the Infused Drakkari Offering from your inventory.
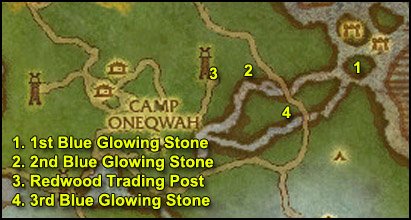
3. Go back to Harkor’s Camp. Turn in [75] Jin’arrak’s End.

Sell junk at the merchant here.

4. Go east to Gavrok, turn in [75] Runes of Compulsion, get [75] Latent Power.

Talk to Gavrock and click on the text saying “What can you tell me about Loken and the Iron Dwarves?”

Let him speak until you get a quest update.

h76circuit25.jpg

1. Go south/slightly southwest to an isle with a stone surrounded by a blue glow (79,40).

a76img58.jpg

a76img59.jpg Right-click the Shard of Gavrock.

==Note== Don’t forget to kill Longhoof Grazers on sight if you still need them for [75] Nice to Meat You.

2. Go southwest to another of those blue glow stones (74,44).

a76img59.jpg Right-click the Shard of Gavrock.

3. Go northwest to another of those blue glow stones (71,39.5).

a76img59.jpg Right-click the Shard of Gavrock.

4. Go southwest to Camp Oneqwah.

Turn in [75] In the Name of Loken, get [75] The Overseer’s Shadow.

h76circuit26.jpg

1. Go southeast to Dun Argol (75,55).

Complete the following 2 objectives:

  • Kill Iron Rune-Smiths until you’ve looted the Golem Blueprint Section 1, 2 and 3
  • Kill an Iron Rune Overseer, loot an Overseer’s Uniform

They’re mostly inside the buildings.

2. Go back to Camp Oneqwah, turn in:

  • [75] The Overseer’s Shadow, get [75] Cultivating an Image
  • [75] An Intriguing Plan, get [75] From the Ground Up

No map needed for this circuit.

1. Go back to Dun’Argol.

Two objectives again:

  • a76img63.jpg Kill a dwarf, loot it, target the corpse and use Rokar’s Camera from your inventory. Repeat 8 times
  • Gather 8 War Golem Parts
a76img62.jpg

2. Go back to Camp Oneqwah, turn in:

  • [75] Cultivating an Image, get [75] Loken’s Orders
  • [75] From the Ground Up, get [75] We Have the Power
a76circuit38.jpg

1. Mount up.

Ride back to Dun’Argol.

a76img64.jpg Once in Dun’Argol, right-click the Overseer Disguise Kit. Yes, it works while mounted, and only if you are already mounted!
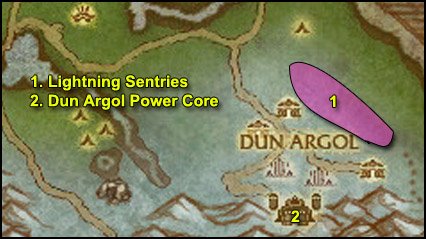
2. Ride up to the next tier with the two dwarven buildings.

First, go to the building on your right-hand side. You should find Rune-Smith Durar inside (75,57).

Cancel the Iron Rune Overseer Disguise buff. Kill Rune-Smith Durar, loot Durar’s Power Cell.

3. a76img64.jpg Use the Overseer Disguise Kit again.

Get out of the building and go straight ahead, towards the next building (77,59).

Kill Rune-Smith Kathorn, loot Kathorn’s Power Cell.

4. Get out of the building.

Mount up.

a76img64.jpg Use the Overseer Disguise Kit again.

Go about 20 yards north and you should see a path going east.

Follow this path until you reach the easternmost dwarven building (81,60).

Inside the building, right-click Loken’s Pedestal, listen to Loken’s speech and you’ll get a quest udpate.

Get out of the building.

Mount up.

Use the Overseer Disguise Kit.

Ride back to Camp Oneqwah.

==WARNING== Do NOT turn in [75] Loken’s Orders. The disguise will be very useful for the rest of the quests.

ONLY turn in [75] We Have the Power, get [75] … Or Maybe We Don’t.

h76circuit27.jpg

1. Ride to the snowy hills surrounding Dun’Argol (73,55)

a76img65.jpg Right-click the Golem Control Unit from your inventory.
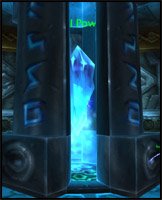
Kill 10 Lightning Sentries, your golem should reach Charge level 10.

Go back to Camp Oneqwah.

Turn in [75] … Or Maybe We Don’t, get [75] Bringing Down The Iron Thane

2. Ride back to Dun’Argol.

a76img64.jpg Use the Overseer Disguise Kit again.

Ride to the very top of Dun’Argol and go inside the big dwarven building.

Take one of the elevators going down, you should find Iron Thane Furyhammer and The Anvil in this room.

a76img65.jpg Now right-click the Golem Control Unit.

Go next to Iron Thane Furyhammer.

Now do this:

1. Use Ability #2
2. Cancel the Overseer Disguise buff.
3. Target Iron Thane Furyhammer and use Ability #1 whenever it’s up. Also use Ability#2 again whenever The Anvil recovers from the EMP.
4. Once Iron Thane Furyhammer is dead, stay in the Golem Suit and run away until they give up on following you. Don’t bother killing The Anvil. (Please note that you take no falling damage in the suit, so you can jump off high cliffs too to escape).

Once they’ve given up on you, mount up and ride back to Camp Oneqwah.

Turn in the 2 quests:

  • [75] Bringing Down The Iron Thane
  • [75] Loken’s Orders
a76circuit40.jpg

1. Ride northeast to Gavrock, turn in [75] Latent Power, get [75] Free at Last.

2. Ride southwest to a plains area at (72,37).

a76img67.jpg Look for Runed Giants and use Gavrock’s Runebreaker on them.
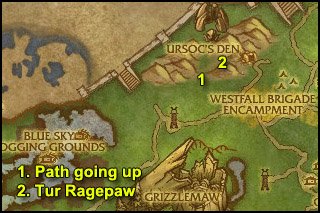
  • If it works, the giant will become friendly and you’ll get a quest update
  • If it doesn’t work, the giant will attack you but will be in a much weaker state. So you’ll just have to re-use Gavrock’s Runebreaker until it works. Meanwhile, try to stun or to kite the giant until the item cools down.

Keep doing this until you’ve 4 Runed Giants Freed.

While you’re here, also kill Longhoof Grazers and Duskhowl Prowlers until you finish [75] Nice to Meat You!

No map needed for this part.

1. Ride to Harkor’s Camp. Turn in [75] Nice to Meat You!

2. Ride to Gavrock. Turn in [75] Free at Last.

You should be level 77 or somewhere around it. If you are ahead, that’s great, keep following and don’t skip anything. If you are behind, that’s not a problem either, just keep following normally. You’ll catch up eventually and there will be a lot of extra circuits at the end anyway.

WoW WotLK Classic Alliance 70-80 Leveling Guide: 74-75 Dragonblight

You should be in Wintergarde Keep, Dragonblight and have the following quest:

  • [72] High Commander Halford Wyrmbane

If you don’t have it, just ignore this quest, it’s not a big deal, you can get the follow up anyway.

FPicon.jpg Get the new flight path.

==Warning== Throughout this whole chapter, do NOT get the quest [73] The Hills Have Us. If you take it, this will fly you to Grizzly Hills and will make you waste a lot of time.

Turn in [72] High Commander Halford Wyrmbane

Get [72] Naxxramas and the Fall of Wintergarde.

Go back towards the gryphon master, turn in [72] Naxxramas and the Fall of Wintergarde, get [72] Flight of the Wintergarde Defender.

a72image1.jpg Right-click the Wintergarde Gryphon Whistle.
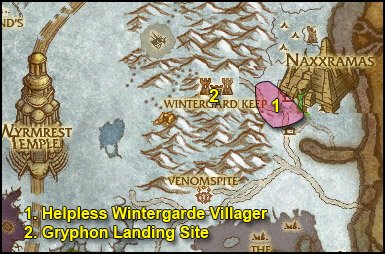
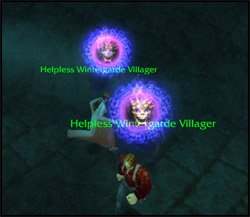
a74circuit1.jpg

1. While on the Gryphon, use Ability #3 whenever it’s up for extra speed.

Fly southeast to the Carrion Fields (85,50).

Look for a Helpless Wintergarde Villager (Must have a fear icon overhead).

a72image2.jpg

Land close to a villager and use Ability #1. You must stand still while you use it. If you succeed, you’ll carry the villager on your gryphon.

Ride northwest back to the gryphon master and use Ability #2.

Repeat 10 times.

2. Go back to the gryphon landing site.

unmounticon.jpg Click the Leave Vehicle button and turn in:

[72] Flight of the Wintergarde Defender, get [72] Return to the High Commander.

Go southeast and turn in [72] Return to the High Commander, get all the available quests from here BESIDES [73] The Hills Have Us, don’t get this one.

So you should have the following quests:

  • [72] Rescue from Town Square
  • [72] The Demo-gnome
  • [72] The Fate of the Dead
  • [72] Imprints on the Past

Go south to Siege Engineer Quarterflash, turn in [72] The Demo-gnome, get the two follows ups:

  • [72] The Search for Slinkin
  • [72] The Bleeding Ore

Also get [72] Not In Our Mine from Highlord Leoric Von Zeldig, who should have just appeared next to Quarterflash.

Finally, go inside the inn and get the 3 quests from the wanted poster:

  • [74] Wanted: Kreug Oathbreaker
  • [74] Wanted: High Shaman Bloodpaw
  • [74] Wanted: Onslaught Commander Iustus

hs.jpg Make this inn your home location.


Bofore we go on, here’s a map with the locations of all the group quest mobs you have to kill in Dragonblight.

dragonblightgrpquests.jpg

Please note that at this point you don’t have all the group quests, you only have the 3 wanted quests we just took. So ignore the rest for now, and check back on this map whenever you get a group for either of those group quests, you’ll find your targets very quickly that way.

Right now, the closest target is Kreug Oathbreaker, so if you see a group going for him while you’re still in the area, join them. But don’t waste your time trying to find a group, keep following the guide normally and just go for those group quests when the opportunity arises.


a74circuit2.jpg

1. Go back to the gate and take the path going down south. Go to the first building on your right-hand side. Go to the upper floor and find the Scrying Orb.

a72image3.jpg

Loot it.

Now just go from one building to another, killing Vengeful Geists to free the Trapped Wintergarde Villagers. Keep doing this until you finish [72] Rescue from Town Square and [72] The Fate of the Dead.

2. Go back to Wintergarde Keep. Turn in:

  • [72] Rescue from Town Square, get [72] Find Durkon!
  • [72] The Fate of the Dead
  • [72] Imprints on the Past, get [72] Orik Trueheart and the Forgotten Shore

3. Go up to Siege Engineer Quarterflash.

a72image3b.jpg Right-click Quarterflash’s Homing Bot and mount up.
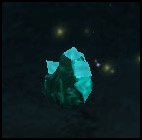
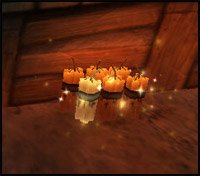
Follow the bot, it will take you to the Wintergarde Mine (80,45).

4. Go inside the mine and look for Strange Ore.

a72image4.jpg

Right-click them and loot Strange Ores.

Stick to the right and you’ll find Slinkin the Demo-Gnome (82,42). Turn in [72] The Search for Slinkin, get [72] Leave Nothing to Chance.

Turn around, take a right turn and in this room you should find Wintergarde Mine Bombs.

a72image5.jpg

Go back to the mine entrance and you should see a glimmer on the floor.

a72image6.jpg Right-click the Wintergarde Mine Bomb while standing there.
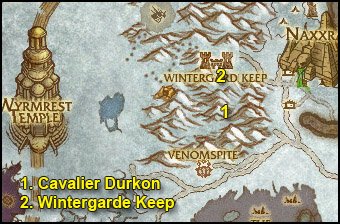
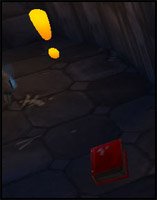
Go around the mine to the upper shaft. You’ll find another glimmering spot there. Use the Wintergarde Mine Bomb again.

Now just kill stuff and mine strange ore in the mine until you finish [72] The Bleeding Ore and [72] Not In Our Mine.

5. Hearthstone back to Wintergarde Keep (or just ride there if HS not up). Turn in:

  • [72] The Bleeding Ore
  • [72] Leave Nothing to Chance, get [72] Understanding the Scourge War Machine
  • [72] Not In Our Mine

Go to High Commander Halford Wyrmbane and turn in [72] Understanding the Scourge War Machine.

a74circuit3.jpg

1. From the gate, go down, take a right-turn, past the tall building we went in earlier for the Scrying Orb. A little further south you’ll find Cavalier Durkon (79,53).

Turn in [72] Find Durkon! and get [72] The Noble’s Crypt.

Enter the crypt, go to the bottom of it, kill Necrolord Amarion. Get back to full HP.

Right-click the Flesh Bound Tome which should be on the floor behind where you found Necrolord Amarion:

a72image7.jpg

Get the quest [73] Secrets of the Scourge and get out of the crypt as fast as you can to stop those annoying ghouls from spawning.

Turn in:

  • [72] The Noble’s Crypt
  • [73] Secrets of the Scourge, get [73] Mystery of the Tome

2. Ride back to Wintergarde Keep, turn in [73] Mystery of the Tome, get [73] Understanding the Language of Death.

Take the path up north and turn left to go to the Wintergarde Prison, where you’ll find Commander Eligor Dawnbringer (77,47). Get his quest [73] My Old Enemy.

Go downstairs and turn in [73] Understanding the Language of Death, get [73] A Righteous Sermon. Watch the script until you get the complete message.

Get out of this building. Go a little east to Vas the Unstable, get [72] A Disturbance In The West.

==Note== This quest won’t appear if you took [72] Your Presence Is Required at Star’s Rest, which you shouldn’t have taken by the way, because I never mentioned you should take it, but anyway. ABANDON [72] Your Presence Is Required at Star’s Rest and you’ll be able to get this quest.

Go back to High Commander Wyrmbane, turn in [73] A Righteous Sermon, get [73] Into Hostile Territory.

Go to the gryphon landing site, turn in [72] A Disturbance In The West, dismount and get the quest [72] To Stars’ Rest!

This will fly you to Stars’ Rest.

FPicon.jpg Get the new flight path.

Turn in [72] To Stars’ Rest! and get:

  • [72] Rifle the Bodies
  • [72] The Liquid Fire of Elune
a74circuit4.jpg

1. Go north to the area on the other side of the road (29,51).

Kill Rabid Grizzlies and Blighted Elks, loot them and:

a74img1b.jpg Right-click the Liquid Fire of Elune on their corpse.

Do this until you finish the quest [72] The Liquid Fire of Elune.

2. Go back to Stars’ Rest, turn in [72] The Liquid Fire of Elune, get [72] Kill the Cultists.

3. Go north back to the same area and find the path leading to Icemist Village (24,44).

Our aim is to kill Anub’ar Cultists. Clear the buildings on the south side of the village, then jump down to the pools below those buildings. There you should find a lot more Cultists.

Kill them until you get:

  • 5 Functional Cultist Suits
  • The Favor of Zangus

a74img2.jpg Right-click it to start the quest [72] The Favor of Zangus.
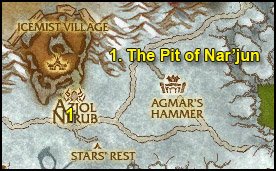
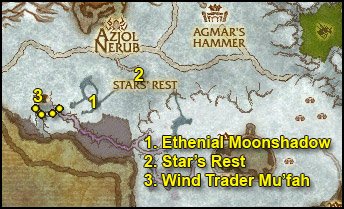
4. Go back to Stars’ Rest. Turn in:

  • [72] Kill the Cultists
  • [72] The Favor of Zangus, get [72] The High Cultist
a74circuit5.jpg

1. Go northwest to the Pit of Narjun (26,51). Let yourself fall down in one of the holes and go to Kilix the Unravaler. Get his 3 quests:

  • [74] Death to the Traitor King
  • [74] Don’t Forget the Eggs!
  • [76] The Faceless Ones

Instance: Azjol-Nerub

You have all the quests for the normal version of the instance Azjol-Nerub.

  • [74] Death to the Traitor King
  • [74] Don’t Forget the Eggs!

So from now on, if you feel like it, you should look for a group for Azjol-Nerub (Abbreviation: AZN). It’s a very quick instance for level 72-74 players, I recommend it.

If you don’t feel like it or if you don’t find a group, you can abandon the above quests. They can easily be picked up in the future anyway, if you change your mind.


Instance: Ahn’kahet: The Old Kingdom

You also have the quest for the normal version of the instance Ahn’kahet: The Old Kingdom.

  • [76] The Faceless Ones

So from now on, if you feel like it, you should look for a group for Ahn’kahet. It’s for level 73-75 players and I also recommend it.

If you don’t feel like it or if you don’t find a group, you can abandon the above quests. They can easily be picked up in the future anyway, if you change your mind.


2. From Kilix the Unraveler, take the middle tunnel going east, at the end of it you’ll find High Cultist Zangus. Kill him.

3. Go backwards, take the spiraling way out of the pit. Ride back to Stars’ Rest.

Turn in [72] The High Cultist.

a74circuit6.jpg

1. Ride southwest to Moonrest Gardens. You’ll find Ethenial Moonshadow at (24,60). Get his quest [72] Avenge this Atrocity!

Look for Dead Mage Hunters.

a74img3.jpg

Dismount and loot the corpse, you’ll receive a Mage Hunter’s Personal Effects.

a74img4.jpg Right-click them and loot the contents. Repeat this step until you find the Moonrest Gardens Plans.

2. Go back to Stars’ Rest, turn in [72] Rifle the Bodies, get [73] Prevent the Accord.

3. Ride to the western tip of Moonrest Gardens (22,59).

From this point on, kill every blue dragonflight NPC on your way.

Clear the way to the other side of the crater.

Find and kill Wind Trader Mu’fah (18,60). He’s standing infront of the door of that big stone building.

Loot Wind Trader Mu’fah’s Remains.

Go inside the building, take the slope going up left.

Kill Goramosh, loot The Scales of Goramosh.
Also loot Goramosh’s Strange Device.

a74img5.jpg Right-click it to start [72] A Strange Device.
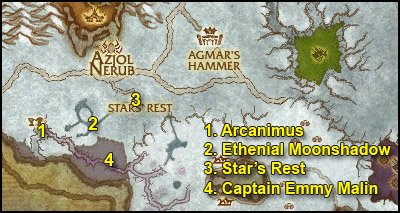
4. Go back to Ethenial Moonshadow at (24,60) while killing on the way until you finish [72] Avenge this Atrocity!

Turn in [72] Avenge this Atrocity! and get [73] End Arcanimus.

5. Ride back to Stars’ Rest. Turn in:

  • [73] Prevent the Accord
  • [72] A Strange Device, get [72] Projections and Plans
a74circuit7.jpg

1. Ride back to the western tip of Moonrest Gardens, you’ll find a crack going down to the crater on the southeastern tip (22,61).

Go down and kill Arcanimus (20,60).

a74img5.jpg Right-click the Surge Needle Teleporter.

This will teleport you to a platform. Go towards the middle of the platform until you get the quest complete message: “Object On the Surge Needle Observed“.

Right-click the Surge Needle Teleporter again.

2. Ride southeast to Ethenial Moonshadow. Turn in [73] End Arcanimus.

3. Ride back to Stars’ Rest. Turn in [72] Projections and Plans, get [72] The Focus on the Beach.

4. Ride southwest to the Glittering Strand.

Find Captain Emmily Malin (26,65). She’s channeling a spell close to the Ley Line Focus.

a74img7.jpg

Kill her, loot everything she has.

a74img8.jpg Get close to the Ley Line Focus and right-click the Ley Line Focus Control Ring.

a74img9.jpg Also Right-click Captain Malin’s Letter, accept the quest [72] A Letter for Home.

5. Go back to Stars’ Rest. Turn in:

  • [72] A Letter for Home
  • [72] The Focus on the Beach, get [72] Atop the Woodlands

Also get [72] Strengthen the Ancients from Sarendryana.

a74circuit8.jpg

1. Ride southeast to the Lothalor Woodlands (31,60).

Dismount. Look for Woodlands Walker, right-click them, click their text and they’ll either attack you or give you some Bark of the Walkers. Repeat until you got 3.

Once you got 3 Bark of the Walkers, look for Lothalor Ancients (not corrupted ones).

a74img10.jpg Get close to them and right-click the Bark of the Walkers.

Keep on doing this while following the next step.

2. Go further south until you find a Ley Line Focus (32,71).

Kill Lieutenant Ta’zinni. He’s a troll NPC and patrols around the Ley Line Focus. Loot the Ley Line Focus Control Amulet.

a74img11.jpg Right-click it while being close to the Ley Line Focus.

3. Finish the other quest with the Lothalor Ancients and then go back to Stars’ Rest.

Turn in:

  • [72] Strengthen the Ancients
  • [72] Atop the Woodlands, get [72] Search Indu’le Village
a74circuit9.jpg

1. Fly to Moa’ki Harbor. If you don’t have that flight path, just ride there.

Gather the quests:

  • [72] Let Nothing Go To Waste
  • [72] Planning for the Future

hs.jpg Make this inn your home location.

2. Go north and slightly northwest to Snowfall Glade (47,65). Complete the following 2 objectives:

  • Kill Wolvars and loot 6 Stolen Moa’ki Goods
  • Right-click 12 Snowfall Glade Pups

Go back to Moa’ki Harbor, turn in:

  • [72] Planning for the Future
  • [72] Let Nothing Go To Waste, get [73] Slay Loguhn

3. Go back to Snowfall Glade.

Go to the northernmost hut (46,60). Kill Loguhn.

a74img12.jpg Right-click the Blood of Loguhn.

Go back to Moa’ki Harbor, turn in [73] Slay Loguhn. Two new quests should be available in the village.

For now only get [72] Spirittual Insight from Toalu’u the Mystic.

a74circuit10.jpg

1. Outside Toalu’u the Mystic’s tent you should see Toalu’u’s Brazier.

a74img13.jpg Right-click Toalu’u’s Spiritual Incense.

You don’t have to do anything for this quest, just enjoy the flight until you get the complete message.

Turn in [72] Spirittual Insight, get [72] Elder Mana’loa.

2. Mount up, follow the road north and then west until you reach the northwestern tip of Indu’le Village (37,65). There you should see a statue (looks more like a rock actually) called Elder Mana’loa.

Turn in [72] Elder Mana’loa, get [72] Freedom for the Lingering.

3. Clear the way to the middle of Lake Indu’le where you should see the corpse of Mage-Commander Evenstar (40,67).

Turn in [72] Search Indu’le Village, get [72] The End of the Line.

a74img14.jpg Get close to the Ley Line Focus and right-click the Ley Line Focus Control Talisman.

Get out of the lake, kill Indu’le Fishermen/Warriors/Mystics until you finish [72] Freedom for the Lingering.

4. Go back to Elder Mana’loa, turn in [72] Freedom for the Lingering, get [72] Conversing With the Depths.

5. Mount up, ride east to the western ledge of the Azure Dragonshrine (53,65). You should get a “Azure Dragonshrine Observed” message. (Be careful to not confuse it with the area discovery message).

6. Go southwest back to Moa’ki Harbor. Get the quest [72] Tua’kea’s Crab Traps from Tua’kea.

a74circuit11.jpg

1. Go to the very end of the southwestern docks and you should see a yellow “!” on your minimap.

a74img15.jpg Right-click Tua’kea’s Breathing Bladder. It has 6 charges.

Dive down there and get the quest [72] Signs of Big Watery Trouble.

==Note== From now on look for for Tua’kea Crab Traps at the bottom of the sea while going through the next steps.

a74img16.jpg

2. Swim back to the village, turn in [72] Signs of Big Watery Trouble at Tua’kea, get the follow up [72] The Bait.

3. Swim southwest towards Kili’ua’s Atoll (44,82).

Gather 8 Tua’kea Crab Traps on the way.

Once you reach Kili’ua’s Atoll, kill Kili’ua and loot The Flesh of “Two Huge Pincers”.

4. Swim west to the Briny Pinnacle (no need to look for Crab Traps, there are none in this area).

Follow the path up until you find The Pearl of the Depth (34,83).

a74img16b.jpg

Right-click it and the sea-goddess Oacha’noa will come and talk to you. Jump in the water when she gives you the compulsion buff.

5. Hearthstone back to Moa’ki Harbor. Turn in:

  • [72] Tua’kea’s Crab Traps
  • [72] The Bait, get [72] Meat on the Hook

6. Follow the fishing line (which actually looks more like a big rope) southwest into the water, all the way to Tua’kea’s Fishing Hook (47,78):

a74img17.jpg

a74img6.jpg Right-click Tu’u’gwar’s Bait.

Kill Tu’u’gwar.

Swim back to Moa’ki Harbor, turn in:

  • [72] Meat on the Hook
  • [72] Conversing With the Depths

Sell junk, repair and re-stock food/drink.

You should be level 74 by now.


Level 74


Fly to Star’s Rest. Turn in [72] The End of the Line, get [72] Gaining an Audience.

a74circuit12.jpg

1. Mount up, follow the road east and keep going east until Wyrmrest Temple, you should find Tariolstrasz (58,54).

Turn in [72] Gaining an Audience, get [72] Speak with your Ambassador.

Ask him to send you to the top of the temple.

Up there get the following quests:

  • [74] Seeds of the Lashers
  • [75] Mystery of the Infinite
  • [74] The Obsidian Dragonshrine

Go to Torastrasza and ask him to send you to the ground level.

2. Ride south/southeast to the Emerald Dragonshrine (63,69). Find Nishera the Garden Keeper, she patrols around the lake. Get her quest [74] Cycle of Life.

You need to kill two types of mobs in this glade:

  • Emerald Lashers until you’ve looted 3 Lasher Seeds
  • Emerald Skytalons (look above, they’re flying all over the glade)

Once done with that, go back to Nishera and turn in [74] Cycle of Life, get [74] The Plume of Alystros.


3. (Optional) [74] The Plume of Alystros requires you to kill Alystros the Verdant Keeper:

  • Level 74 Elite Beast
  • Immune to movement impairing effects, fear, etc
  • HPs: 118,000
  • Hits for: ~2K on clothies

Most classes can’t solo it. So try to find help for this quest. To be safe you’ll need a tank and a healer.

When ready, go to the southeastern tip of the glade (65,78).

a72image7b.jpg Right-click Skytalon Molts and Alystros will attack you. Better have your tank use the Skytalon Molts, so he gets attacked first.

Loot the Plume of Alystros. Go back to Nishera the Garden Keeper and turn in [74] The Plume of Alystros.

If you can’t find help for this quest, just save it for later, it has no follow up so it doesn’t matter when you do it.

4. (Optional) [73] My Old Enemy is another optional elite quest nearby. This quest requires you to kill High General Abbendis:

  • Level 72 Elite Humanoid
  • Immune to movement impairing effects, fear, etc
  • HPs: 96,000
  • Hits for ~3k on clothies

You’ll most likely need a tank and a healer for this one.

She can be found in the big cathedral in New Hearthglen (70,76). There’s a level 80 elite next to her but he doesn’t add if you pull Abbendis, so don’t worry about it.

If you can’t do this quest, just proceed with the guide and keep on looking for help regularly for both [73] My Old Enemy and [74] The Plume of Alystros. These quests have no follow up, so it doesn’t matter if you do them now or later.


Go back to Wyrmrest Temple.

Ask Tariolastrasz to send you to the top floor.

Turn in [74] Seeds of the Lashers, get [74] That Which Creates Can Also Destroy.

Go back down to the ground floor of Wyrmrest Temple.

Find Lauriel Trueblade (60,55).

Turn in [72] Speak with your Ambassador, get [74] Report to the Ruby Dragonshrine.

Go to the northeastern tip of the temple and you’ll find Nethestrasz (60,52).

FPicon.jpg Get the new flight path.

Fly back to Wintergarde Keep.

At the Gryphon Landing Site, right-click one of the Winterguard Gryphons, this will take you to Thorson’s Post (90,46). After landing, turn in [73] Into Hostile Territory, get [73] Steamtank Surprise.

==Note== This area is very close to Kreug Oathbreaker. So if you see a group forming for him, join it.

a74circuit13.jpg

1. Now comes a fun quest. Read the whole paragraph before you jump in a tank.

You’ll get in one of those steam tanks and look around for Plague Wagons. Stand close to it and use Ability #3.
To defend yourself, use Ability #2 first and then Ability #1 on the frozen targets, this does triple damage.
Once you have destroyed 6 Plague Wagons, go west to the Wintergarde Mausoleum (86,50) and use Ability #4:

a72image8.jpg

You’re ready now, get in a tank and have fun!

Go down in the Wintergarde Mausoleum, turn in [73] Steamtank Surprise, get [73] Scattered To The Wind.

2. Get out of the Mausoleum and look for Wintergarde Munitions Crates. They are all around the Mausoleum.

a72image9.jpg

Gather 8 Wintergard Munitions.

3. Go to the keep in ruins just a few paces northwest of the mausoleum (86,47). Inside you’ll find Turgid the Vile.

a72image10.jpg Target him and right-click the Seeds of Nature Wrath.

Kill him.

4. Go back to the Wintergarde Mausoleum.
Turn in [73] Scattered To The Wind, get [73] The Chain Gun And You.

Face east and you should see two 7th Legion Chain Guns. Right-click one of them.

To make this quest easier I suggest zooming to 1st person view, it’s easier to aim that way (hold your mouse right-click and aim with the mouse).
It’s quite simple: Use Ability #2 and an Injured 7th Legion Soldier will appear in the ghoul pit and try to run to you. All you have to do is mash Ability #1 while aiming for the ground around the soldier, this will kill whatever comes near him and he’ll make it to you.

Rescue 8 Injured 7th Legion Soldiers that way.

Turn in [73] The Chain Gun And You, get [73] Plunderbeard Must Be Found!
Also get [73] Breaking Off A Piece from Yord “Calamity” Icebeard.

No map needed for the following steps.

1. Go down the stairs southwest. Take the first door to your right, clear to the back of this room and kill Necrolors X’avius.

2. Go back to the main hallway and go to the opposite room. Clear to Necrolord Horus and kill him.

3. Go back to the main hallway and bear left, to the southwestern room. Clear to the back of it and you’ll find Plunderbeard. Turn in [73] Plunderbeard Must Be Found! and get [73] Plunderbeard’s Journal.

4. Go further deep in that tunnel filled with vines and you’ll end up in another crypt with Dreadbone Constructs and Wailing Souls.

Kill those until you find all 4 Pages of Plunderbeard’s Journal.

5. Go back to the quest givers and turn in:

  • [73] Breaking Off A Piece
  • [73] Plunderbeard’s Journal, get [73] Chasing Icestorm: The 7th Legion Front

Go back to Wintergarde Keep.

Sell junk, repair and re-stock food/drink.

hs.jpg Go to the inn and make it your home location.

a74circuit14.jpg

1. Exit Wintergarde Keep by the northern gate, then ride northwest to the Bronze Dragonshrine (72,38). We’re about to trigger an event where you’ll help your “Future You” to defeat waves of dragons.

Just let your Future You tank, and kill things one at a time to be safe. If you die it doesn’t matter, just run back. Your “Future You” will finish the event, you’ll get the quest complete message.

a72image11.jpg Right-click the Hourglass of Eternity from your inventory to start the event.

2. Go northwest to the 7th Legion Front (65,28). Turn in [73] Chasing Icestorm: The 7th Legion Front, get [73] Chasing Icestorm: Thel’zan’s Phylactery.
Also get [73] Pest Control from Duane.

==Note== From now on kill any Magnataur or Snobold you see on your way.

3. Go southeast to the snobold camp at (70,31).

Kill all the Snobolds you can find here.

Also look in the skies for a Reanimated Frost Wyrm.

a72image10.jpg Target it and right-click the Seeds of Nature Wrath, then kill it.

If you don’t see any wyrm here, it means someone else killed it recently, don’t worry though, there are many others southwest of here, along the path of giants, make sure you kill one later when we go back to Wyrmrest Temple.

4. Go southwest to another snobold camp (65,44).

Finish [73] Pest Control here. There’s also a Reanimated Frost Wyrm flying over this area, in case you still need to kill one.

5. Go back to the 7th Legion Front. Turn in [73] Pest Control, get [73] Canyon Chase.

Now we’re going to kill Icestorm, a level 73 elite wyrm. Read the next paragraph before you talk to “Wyrmbait“.

Wyrmbait will fetch Icestorm for you. All you have to do is stand aside and let the NPCs tank for you and let them build some threat.

a72image12.jpg

Once Icestorm is down to 50% HP or so, start attacking it. Stay on its side to avoid the breath. If you do this properly, Icestorm should never attack you. If you got an ability to lower or reset your threat, use it, that way you can start attacking Icestorm earlier.

==Note== Icestorm is NOT immune to frost, surprisingly.

You should be ready now, talk to “Wyrmbait“, tell him to go fetch Icestorm.

Kill Icestorm and Thel’zan’s Phylactery should appear on the floor:

a72image13.jpg

Loot it.

a74circuit15.jpg

1. Go north to the canyon entrance at (67,24). Follow those running snobolds east and they’ll lead you to their boss, Chilltusk (72,28).

Kill him and loot the Emblazoned Battle Horn.

a72image14.jpg Right-click it to start [73] Disturbing Implications.

2. Hearthstone to Wintergarde Keep.

If your stone is not up, just go to the other end of the canyon and then ride south/southeast back to Wintergarde Keep.

Go to High Commander Halford Wyrmbane, turn in [73] Chasing Icestorm: Thel’zan’s Phylactery, get [73] Finality.

3. Go southeast to the Wintergarde Mausoleum at (82,51). Please note that this is not the same mausoleum as the one we went in earlier.

Go inside, turn in [73] Finality. Before you get the follow up, read the following lines.

The next quest will trigger an event. All you have to do is stay behind the guards when the fight begins, and then help them kill the minions of Thel’zan, and after that help them kill Thel’zan himself.

Once you’re ready, get [73] An End And A Beginning.

If you’re sucessful, go back to Wintergarde Keep, turn in [73] An End And A Beginning, get [73] To Fordragon Hold!

Fly to Wyrmrest Temple.

a74circuit16.jpg

1. Follow the dots on my map until (48,24). There you should find a Nozzlerust Supply Runner, get his quest [74] Return to Sender.

2. From there ride east to Nozzlerust Post (55,24). Turn in [74] Return to Sender, get [74] Stocking Up. Also get the two other quests:

  • [74] Shaved Ice
  • [74] Nozzlerust Defense

3. Ride west and then south to Fordragon Hold. There’s a narrow path leading up to it at (43,29).

FPicon.jpg Get the new flight path.

Follow the path west towards the highest tower, there you’ll find Highlord Bolvar Fordragon.

Turn in [73] To Fordragon Hold! and get the follow up [74] Audience With The Dragon Queen.

Go to the gryphon master, fly to Wyrmrest Temple.

Turn in [73] Disturbing Implications, get [73] One of a Kind from Aurastrasza, who resides at the bottom floor of Wyrmrest Temple.

Go to Tariolastrasz and ask him to fly you to the top floor. Turn in:

  • [75] Mystery of the Infinite
  • [74] Audience With The Dragon Queen, get [74] Galakrond and the Scourge

Turn in [74] Galakrond and the Scourge at Torastrasza and get [74] On Ruby Wings.

4. a72image15.jpg Right-click the Ruby Beacon of the Dragon Queen.

Wyrmrest Vanquisher will fly down to you. Right-click it to climb it.

Now things get fun. See, you can use this Wyrmrest Vanquisher everywhere in the Dragon Wastes, which means we basically have a flying mount for a big chunk of the map, and we’re going to make the most of it. Just remember to always fly low, so that you don’t die if the drake decides to drop you off without a warning and without a parachute (it can happen :p).

a74circuit17.jpg

1. Fly west to a canyon at (51,58). Look for Bonesunder, a magnataur who patrols the ledge above this canyon, going in between the above location and the azure dragonshrine.

He’s elite and immune to all forms of cc but he only has 25K HP and doesn’t hit too hard as long as you avoid his special ability: Bone Crack. So just burn him down quickly and you should be fine, use cooldowns and potions if needed. The only dangerous ability he has is Bone Crack. When he casts that, run away quickly and it won’t hit you.

Loot the Emblazoned Battle Horn.

2. Summon your drake again and fly back to Wyrmrest Temple, turn in [73] One of a Kind, get the follow up [73] Mighty Magnataur.

3. Summon your drake, fly northeast to (68,41), there you’ll find a named magnataur called Drakegore, he patrols up and down around this spot.

He’s elite but soloable, doesn’t hit too hard, can be snared, stunned, feared, rooted. He also has an aura which does 300 fire damage to enemies in his melee range, nothing too bad.

4. Ride south to (67,50). There you’ll find another named magnataur, Iceshatter. He roams around the frozen lake in this area.

He’s more tricky to kill than the previous one. He’s immune to movement impairing effects so clothies might have a little bit of trouble, however he doesn’t much hit points so you can burn him down before he kills you.

He periodically casts Pulsing Shards. This is very dangerous and can’t be interrupted. Either run away while he channels it or use something like cloak of shadows, divine shield, ice block.

I personally had no troubles soloing it with my frost mage wearing only quest greens. I sent my water elemental first and let him tank as much as possible, used icy veins and a trinket and burned him down as fast as possible.

5. Summon your drake and fly south to (67,70). There you should find another magnataur called Bloodfeast.

That one is also tricky, immune to all forms of cc. He summons maggots which heal him up. The maggots are immune to AoE abilities, so you’d have to target them and kill them one by one (they got 1000HP). By the time you’d be done with that, he’d summon another round of maggots. So here is the strategy: Ignore the maggots, burn him down as fast as you can.

Worked just fine for me even with characters wearing quest greens.

Summon the drake, fly back to Wyrmrest Temple. Turn in [73] Mighty Magnataur, get [74] Reclusive Runemaster.


Now we’re all set for most of the group quests of Dragonblight. These can’t be soloed by most classes, so look for a group for those quests while you keep on following the guide.

Here’s a list of the quests you need to find a group for:

  • [73] My Old Enemy
  • [74] The Plume of Alystros
  • [74] Wanted: High Shaman Bloodpaw
  • [74] Wanted: Kreug Oathbreaker
  • [74] Wanted: Onslaught Commander Iustus
  • [74] Reclusive Runemaster

Once you finish [74] Reclusive Runemaster (Defeat Dreg’mar), get the follow up [74] Wanton Warlord and also look for a group for it (Kill Grom’thar).

Here is the map of the group quests again, so that you don’t have to scroll up too much.

dragonblightgrpquests.jpg

You can get there quickly thanks to your Wyrmrest Vanquisher, so just keep on following the guide normally and whenever you find a group for one of the above quests, summomn your drake and fly there!


a74circuit18.jpg

1. Summon your Wyrmrest Vanquisher. Fly northwest to Ceristrasz (52,50).

Turn in [74] Report to the Ruby Dragonshrine, get [74] Heated Battle.

Very easy quest, you simply have to go down in the canyon and help the Alliance forces to kill what’s on the list for your quest. You just have to do a little bit of damage on every mob to get the kill credit. Just stay behind the NPCs and you’ll be fine.

Go back to Ceristrasz, turn in [74] Heated Battle, get [74] Return to the Earth.

2. Summon your drake. Fly to the southern canyon (47,53).

Look for a Ruby Acorn.

a74img19.jpg

Loot it.

Look for a Ruby Keeper (those dead dragons in flames).

a74img20.jpg Target it and right-click the Ruby Acorn.

Repeat this step 6 times.

Get out of the dragonshrine, summon your drake and fly back to Ceristrasz. Turn in [74] Return to the Earth, get [75] Through Fields of Flame.

3. Summon your drake, fly west towards the huge tree in the middle of the dragonshrine. The entrance is on the southeastern side of the tree at the bottom of it (48,50).

Inside you’ll find Daliah Suntouch. Kill her.

Loot the Ruby Brooch.

a74img21.jpg Right-click the Ruby Brooch, get the quest [75] The Fate of the Ruby Dragonshrine.

Now kill 6 Frigid Necromancers, they can be found all around the tree.

Get out the dragonshrine, summon your drake and fly back to Ceristrasz.

Turn in [75] Through Fields of Flame, get [75] The Steward of Wyrmrest Temple.

a74circuit19.jpg

1. Summon your Wyrmrest Vanquisher, fly north to Galakrond’s Rest (56,35). Go down in the pit and use Ability #1 and #2 to kill Wastes Scavengers (you can actually use both at the same time). Whenever your drake needs mana or healing, use Ability #3 while being close to a Wastes Scavenger.

Kill 30 Wastes Scavenger that way.

==Note== Before we go kill Grand Necrolord Antiok, equip your PvP trinket if you got one with you, because he casts a 10 second fear and a 10 second Death Coil, quite annoying and it can potentially get you killed.

Then go to the peak at the northwestern tip of Galakron’s Rest, kill the big giant called Thiassi and then land next to his corpse and dismount. Get ready to fight Grand Necrolord Antiok, a level 75 warlock.

After he dies, the Scythe of Antiok will appear on the floor.

a72image16.jpg

Loot it.

Summon your Wyrmrest Vanquisher again and fly away before the giant respawns.

2. Fly to a digsite just west of Galakron’s Rest (52,31).

unmounticon.jpg Click the Leave Vehicle Button

Kill everything in the camp and look for composite ore.

a72image17.jpg

3. Once you’ve looted all the composite ore from this spot, go northeast to the next digsite (57,28). Kill everything and loot all the ore there. You should normally be done with [74] Stocking Up and [74] Nozzlerust Defense.

If not, there’s another digsite just southeast of this one.

4. Summon the drake again, fly northwest to Coldwind Heights (54,20). Kill Crystalline Ice Elementals until you’ve looted 4 Iceshard Cluster.

5. Go south unil you’re back in the Dragon Wastes, summon the drake, fly east to Nozzlerust Post. Turn in:

  • [74] Stocking Up
  • [74] Nozzlerust Defense
  • [74] Shaved Ice, get [74] Soft Packaging

6. Go to the area southwest of Nozzlerust Post (53,25).
Kill Jormugar Tunnelers / Dragonbone Condors until you’ve looted 12 Thin Animal Hide.

Go back to Nozzlerust Post, turn in [74] Soft Packaging, get [74] Something That Doesn’t Melt.
Also get [74] Hard to Swallow from Xink.

a74circuit20.jpg

1. Go to the area east of Nozzlerust post and go to the dragon skull at (57,24).

Look for a Splintered Bone Chunk around this skull. They look like this:

a74img22.jpg

Right-click and loot them.

Also, while in this area, look for a Hulking Jormungar. Bring it down to 80% HP and a message will appear:

a74img23.jpg

a74img24.jpg Right-click the Potent Explosive Charges.

This will blow up the Hulking Jormungar and a lot of meat will fly all around its corpse. Loot 6 Seared Jormungar Meat.

2. Go the big dragon skeletons southeast of here (60,27). Loot all the bone chunks you can find around it.

3. Go to the next dragon skeleton further east (63,28). Loot all the bone chunks you can find around it.

4. Go northeast to the 7th Legion Front (64,28). Turn in [73] Canyon Chase.

5. Now just revisit the previous steps until you have 12 Splintered Bone Chunks.
Once you’re done, summon your drake and fly back to Nozzlerust Post, turn in:

  • [74] Something That Doesn’t Melt
  • [74] Hard to Swallow

Get:

  • [74] Harp on This!
  • [74] Lumber Hack
a74circuit21.jpg

1. Go northwest to Coldwind Heights again.

a74img25.jpg Right-click Xink’s Shredder Control Device.

Right-click the shredder to take control of it.

Go westwards while doing the following two things:

  • Kill harpies on your way (Use Ability #1 and #2 – Also use Ability #4 whenever your shredder lacks 5000 HP or more)
  • Look for trees with a cross:a74img26.jpg

Use Ability #6 while standing close to them.

Ability #3 is just a 10 sec run speed boost, use it at will.

2. Keep going west and then northwest and you’ll find the Mistress of the Coldwind (45,10).
She’s elite but it’s no problem for you and your shredder.

==Note== Should your shredder get destroyed, you can re-summon one again.

Once you’ve killed the Mistress of the Coldwind, finish gathering lumber and killing harpies until you finish both quests.

3. Ride back to Nozzlerust Post, turn in:

  • [74] Harp on This!
  • [74] Lumber Hack

Get [74] Stiff Negotiations.

4. Go east until you enter the Dragon Wastes, summon your Wyrmrest Vanquisher, fly northeast to Zort (59,18). Easy to spot thanks to the yellow “?” on your minimap. Don’t worry about the warning message you get when you get out of the Dragon Wastes, you should have more than enough time to land next to Zort before your drake drops you.

Turn in [74] Stiff Negotiations, get [74] Slim Pickings.

5. Follow the trail north while avoiding the elite giants and then go northwest to the Ice Heart Cavern, inside the cave you’ll find a Ravaged Crystalline Ice Giant (56,12) close to the entrance.

a74img27.jpg

Right-click it to get a Sample of Rock Flesh.

Get out of the cave, ride back to Zort.

Turn in [74] Slim Pickings, get [74] Messy Business.
Also get [74] Stomping Grounds from Ko’char the Unbreakable.

No map needed for this circuit.

1. Go back to the Ice Heart Cave.

a74img28.jpg Put Zort’s Scraper on an action bar.

Kill Ice Heart Jormungar Feeders and use Zort’s Scraper whenever they cast Corosive Spit on you, this will remove the dot and prevent a lot of damage, and it will also complete the other quest.

Kill 8 Ice Heart Jormungar Feeders and remove the Corosive Acid twice, then ride back to Zort.

Turn in:

  • [74] Messy Business, get [74] Apply This Twice A Day
  • [74] Stomping Grounds
  • [74] Apply This Twice A Day

Get:

  • [74] Really Big Worm
  • [74] Worm Wrangler

[74] Really Big Worm cannot be soloed by most classes. The mob you have to kill, Rattlebore, is at the very end of the Ice Heart Cave. So just add this to your list of group quests and shout for a group regularly.

Rattlebore stats:

  • 72,000 HP
  • Hits for 2K on clothies
  • Immune to all forms of cc

Don’t forget to drink Zort’s Protective Elixir before you fight him, it will make things easier.

I recommend going there with 3 players to make it easier, including a tank type and a healer type.

Anyway, just add this quest to your list of group quests to do in Dragonblight, keep looking for a group for it regularly and continue with the guide in the mean time.

When you find a group for it, don’t forget to do the other quest on the way while you’re in the caves. It’s quite easy, all you have to do is get close to a Jormungar Spawn and then:

a74img29.jpg Use the Sturdy Crates on it.

Then just right-click the crate on the floor. Repeat this 3 times. Can easily be done while clearing the way to Rattlebore.

Once you’ve finished those two quests, go back to Zort and turn in:

  • [74] Really Big Worm
  • [74] Worm Wrangler

a74circuit22.jpg

1. Follow the trail southwest until you’re back in the Dragon Wastes. Summon your Wyrmrest Vanquisher.

Fly to the Obsidian Dragonshrine towards the cave.

You’ll find Serinar inside the cave called the Maw of Neltharion (35,30).

Turn in [74] The Obsidian Dragonshrine, get:

  • [74] No One to Save You
  • [74] No Place to Run

2. Clear the way out of the Obsidian Dragonshrine, until the point where the path becomes snowy again (42,32).

Get back to full HP/mana.

a74img30.jpg Right-click the Destructive Wards.

Defend the ward until you get the complete message.

Kill what you still need for [74] No One to Save You and go back to Serinar. Turn in:

  • [74] No One to Save You
  • [74] No Place to Run, get [74] The Best of Intentions

3. Serinar will give you a disguise.

Go west through the cave until you find Rothin the Decaying. You’ll get the complete message, then go back to Serinar.

==Note== If you lose the disguise, go back to Serinar and talk to him for a new one.

Turn in [74] The Best of Intentions, get:

  • [74] Culling the Damned
  • [74] Defiling the Defilers

4. Clear the way west towards the end of the cave while looking for Necromantic Runes.

a74img31.jpg

Right-click them to destroy them.

Kill what you need for [74] Culling the Damned.

Go back to Serinar. Turn in:

  • [74] Culling the Damned
  • [74] Defiling the Defilers, get [75] Neltharion’s Flame

5. Go back to Rothin the Decayed at the end of the cave.

a74img32.jpg Right-click Neltharion’s Flame.

Kill Rothin the Decayed.

Go back to Serinar, turn in [75] Neltharion’s Flame, get [74] Tales of Destruction.

Hearthstone to Wintergarde Keep.

dragonblightcircuitfix1.jpg

1. Mount up, get out of Wintergarde Keep and ride southeast to Dawn’s Reach (87,57).

Turn in [72] Orik Trueheart and the Forgotten Shore, get [72] The Murkweed Elixir.
Also get [74] The Call Of The Crusade from Tilda Darathan.

2. Ride southeast to Eldritch Heights (90,68). Look for Murkweed.

a74img33.jpg

==Note== While you’re here, try to see if there’s any group up for killing High Shaman Bloodpaw for the quest [74] Wanted: High Shaman Bloodpaw. He’s really close so might as well kill two birds with one stone. Some classes reported being able to solo it, but I wouldn’t risk it, duo’ing is already much more realistic. 3+ is best.

Loot 5 Murkweed.

Go back to Dawn’s Reach.
Turn in [72] The Murkweed Elixir, get [72] The Forgotten Tale.

a74circuit24.jpg

1. Ride southwest to The Forgotten Shore (85,67)

a74img34.jpg Right-click the Murkweed Elixir.

Talk to a Forgotten Peasant, a Forgotten Rifleman, a Forgotten Footman and a Forgotten Kinight, in any order.

2. Cancel the Murkweed Elixir buff (it’s called “Binding Life” and looks like a black potion).
Ride back to Dawn’s Reach.
Turn in [72] The Forgotten Tale, get [72] The Truth Shall Set Us Free

3. Ride back to the Forgotten Shore. At (87,66) you should find a blue rune drawn on the floor, called “Forgotten Ruins”.

a74img35.jpg

a74img36.jpg Right-click Orik’s Crystalline Orb from your inventory.

Watch the cool script and you’ll complete the quest.

Go back to Dawn’s Reach, turn in [72] The Truth Shall Set Us Free, get the follow up [72] Parting Thoughts.

4. Ride to Wintergarde Keep. Go to Zelig the Visionary and turn in [72] Parting Thoughts, get [73] What Secrets Men Hide.

Two new quests should be available:

  • [73] The Return of the Crusade?
  • [73] The Path of Redemption

Get them both.

Sell junk, repair and re-stock food/drink.

You should be level 75 by now.


Level 75


a74circuit25.jpg

1. Get out of Wintergarde Keep by the eastern gate and ride northeast to Onslaught Base Camp (84,42). Kill Scarlet NPCs while going north through the camp.

Once you’re on the other side of the camp, go to the next step, even if you haven’t killed 20 Scarlet NPCs yet.

2. Ride north to Light’s Trust (84,26). Turn in [74] The Call Of The Crusade, get [74] The Cleansing Of Jintha’kalar.

3. Go northeast to Jintha’kalar (88,20). Kill every scourge on your way.

4. Find Overseer Deathgaze (90,19) at the very eastern tip of this camp.

a72image10.jpg Target him and right-click the Seeds of Nature Wrath.

Kill him.

Kill stuff in the area until you have 15 scourge kills.

Go back to Light’s Trust, turn in [74] The Cleansing Of Jintha’kalar, get [75] Into the Breach!

5. Ride south back to Onslaught Base Camp. This time clear to the tower in construction, on the eastern side of the camp (88,38).

Inside you’ll find the Onslaught Map.

a74img37.jpg

Loot it.

Kill Scarlet NPCs until you loot The Path of Redemption and have 20 kills.

6. Ride back to Wintergarde Keep. Turn in:

  • [73] The Return of the Crusade?
  • [73] The Path of Redemption
  • [73] What Secrets Men Hide, get [73] Frostmourne Cavern

1. Take the northern exit and go to the Dragon Wastes, summon your ruby drake and fly to Frostmourne Cavern, as shown in the video below (you don’t need to watch the whole video, only until the point where I’m in the cave about to start the script)

Video: [73] Frostmourne Cavern

At the end of the cavern you’ll find the Altar of Frostmourne.

a74img36.jpg Right-click Zelig’s Scrying Orb.

Enjoy the script, then you’ll get a quest complete message.

2. Get out of the cave, ride back to the dragon wastes, summon your ruby drake. Fly back to Wintergarde Keep.

Turn in [73] Frostmourne Cavern.

Fly to Wyrmrest Temple.

==Warning== We’re about to turn in the quest [74] On Ruby Wings. That means we won’t be able to summon the Wyrmrest Vanquisher to travel anymore. So if you still have some of the group quests unfinished, try to do them now!

Summon your drake. Go to Tariolstrasz on the western side of the temple. Turn in [75] The Steward of Wyrmrest Temple, get [75] Informing the Queen.

Summon your drake and fly to the top floor, where Alexstrasza is. Turn in:

  • [74] That Which Creates Can Also Destroy
  • [74] Tales of Destruction
  • [75] The Fate of the Ruby Dragonshrine
  • [75] Informing the Queen, get [74] Report to Lord Afrasastrasz
  • [74] On Ruby Wings, get [74] Return To Angrathar

Ask Torastrasza to fly you down to the middle floor.

Turn in [74] Report to Lord Afrasastrasz, get [74] Defending Wyrmrest Temple.

Go on the balcony and talk to a Wyrmrest Defender, click on the text and you’ll ride it.

  • Ability #1: Direct damage, use everytime it’s up.
  • Ability #2: DoT. Use it once at the start of a fight.
  • Ability #3: Self heal
  • Ability #4: Use it to escape when you get attacked by several dragons at the same time
  • Ability #5: Go inside the big beam in the Azure Dragonshrine (just southwest of Wyrmrest Temple) and use it once.
a74img38.jpg

Fun quest, kill dragons. Not much else to say, it’s rather easy, just escape and heal up if things get dangerous.

This is a daily quest by the way, and you get an achievement if you finish it in under 2 minutes.

When done, go back to Lord Afrasastrasz and turn in [74] Defending Wyrmrest Temple.

Ask him to fly you back to the ground level.

Go to the flightmaster and fly to Fordragon Hold.

Go to Highlord Bolvar Fordragon, turn in [74] Return To Angrathar.

Enjoy the super cool cinematic.

Mount up, ride to the Wrathgate (38,19). If you want to watch the cinematic again, you can talk to Alexstrasza and click on the text.

Get the quest [74] Reborn From The Ashes.

Look for Fordragon’s Shield, it’s on Alexstrasza’s left.

a74img39.jpg

Loot it.

Hearthstone back to a main city and go to Stormwind.

Go to King Varian Wrynn in Stormwind Keep. Turn in [74] Reborn From The Ashes, get [74] Fate, Up Against Your Will.

Talk to Lady Jaina Proudmoore, who stands next to the king. Tell her you’re ready to go to Orgrimmar.

In Orgrimmar, turn in [74] Fate, Up Against Your Will, get [74] A Royal Coup.

Take the portal back to Stormwind.

Turn in [74] A Royal Coup, get [74] The Killing Time.

Take the portal to the Undercity.

Turn in [74] The Killing Time, get [74] The Battle For The Undercity.

Speak to King Varian to activate the event, then wait until the timer starts. Now all you have to do is follow King Varian Wrynn through this amazing quest. You’re pretty much unkillable thanks to the auras you get from King Varian and Jaina, so have fun and help them fight till the end of the event.

Once back in Stormwind, turn in [74] The Battle For The Undercity.

While you’re here, go train your new skills, visit the AH, etc.

Once you’re ready to go again, go to Stormwind Harbor, take the boat to Borean Tundra (northernmost dock) and fly to Wintergarde Keep, Dragonblight.

Try a last time to get a group for the group quests of Dragonblight, if you don’t find one, just abandon those groups quests now, we are done with Dragonblight. You can come back here at level 80 to finish those group quests.

In Wintergarde Keep, go to the gryphon landing site, dismount.

Get [73] The Hills Have Us, it will send you to Grizzly Hills. Move on to Grizzly Hills.

WoW WotLK Classic Horde 70-80 Leveling Guide: 74-75 Dragonblight

You should be in Dragonblight and have the following quest:

  • [72] Emerald Dragon Tears

You should also have the flight path to Venomspite.

If you don’t have that, simply go to my Howling Fjord Guide and use your browser’s search function (CTRL + F) to find venomspite, follow the steps from there until you get the quest [72] Emerald Dragon Tears, then come back to this guide and follow it normally.

h74circuit1.jpg

1. Go to the Westwind Refugee Camp (13,49). Get the available quests:

  • [72] Into the Fold
  • [72] Pride of the Horde

2. Get out of the camp, kill Anub’ar Ambushers and look for Horde Armaments.

h74img1.jpg

Once you finish both quests, go back to Westwind Refugee Camp. Turn in:

  • [72] Into the Fold, get the follow up [72] Blood Oath of the Horde
  • [72] Pride of the Horde

Talk to a Taunka’le Refugee, go through the chat until he becomes a member of the horde. Repeat this step 5 times.

Turn in [72] Blood Oath of the Horde, get [72] Agmar’s Hammer.

3. Mount up and ride east to Agmar’s Hammer (37,48).

FPicon.jpg Get the new flight path.

Turn in [72] Agmar’s Hammer, get [72] Victory Nears…

Get [72] Rifle the Bodies.

Get out of the building and get the 3 wanted quests:

  • [74] Wanted: Dreadtalon
  • [74] Wanted: Gigantaur
  • [74] Wanted: Magister Keldonus

Get [72] Message from the West from Messenger Torvus who stands next to the mailbox.

h74img2.jpg Right-click the Letter from Saurfang and read it if you like lore, you don’t have to though.

Right-click the Burning Brazier next to the mailbox.

Turn in [72] Message from the West.

Turn in [72] Victory Nears… and get [72] From the Depths of Azjol-Nerub.

A bunch of quests should have appeared on your minimap, grab the following ones:

  • [72] Black Blood of Yogg-Saron
  • [72] Containing the Rot
  • [72] From the Depths of Azjol-Nerub
  • [72] Marked for Death: High Cultist Zangus
  • [74] The High Executor Needs You

Bofore we go on, here’s a map with the locations of all the group quest mobs you have to kill in Dragonblight. Some of them have been reported to be soloed by certain classes (and with very good gear), but for the average players and class, you really will want a group of 3 players to be safe.

hdragonblightgrpqs.jpg

Please note that at this point you don’t have all the group quests, you only have the 3 wanted quests we just took. So ignore the rest for now, and check back on this map whenever you get a group for either of those group quests, you’ll find your targets very quickly that way.

Keep following the guide normally and just go for those group quests when the opportunity arises.


h74circuit2.jpg

1. Ride west until you reach the the area just east of Azjol-Nerub (30,50).

Kill Rabbid Grizzlies and Blighted Elks until you have 15 Infected Wildlife kills and have looted a Rot Resistant Organ (random drop from those)

More Grizzlies and Elks can be found all around the Pit of Narjun.

2. Go inside the Pit of Narjun (27,50).

Look for Black Blood of Yogg-Saron.

h74img3.jpg

h74imgfix1.jpg Right-click Ironbender’s Mining Pick and then left-click the mining node.

Let yourself fall down in one of the holes and go to Kilix the Unravaler. Get his 4 quests:

  • [72] An Enemy in Arthas
  • [74] Death to the Traitor King
  • [74] Don’t Forget the Eggs!
  • [76] The Faceless Ones

From Kilix the Unraveler, take the middle tunnel going east, at the end of it you’ll find High Cultist Zangus. Kill him and loot the Head of High Cultist Zangus.

Now just kill 6 Abu’ar Underlords and mine 10 Black Blood of Yogg-Saron.

Go back to Kilix the Unraveler, turn in [72] An Enemy in Arthas, get [72] The Lost Empire.


Instance: Azjol-Nerub

You have all the quests for the normal version of the instance Azjol-Nerub.

  • [74] Death to the Traitor King
  • [74] Don’t Forget the Eggs!

So from now on, if you feel like it, you should look for a group for Azjol-Nerub (Abbreviation: AZN). It’s a very quick instance for level 72-74 players, I recommend it.

If you don’t feel like it or if you don’t find a group, you can abandon the above quests. They can easily be picked up in the future anyway, if you change your mind.


Instance: Ahn’kahet: The Old Kingdom

You also have the quest for the normal version of the instance Ahn’kahet: The Old Kingdom.

  • [76] The Faceless Ones

So from now on, if you feel like it, you should look for a group for Ahn’kahet. It’s for level 73-75 players and I also recommend it.

If you don’t feel like it or if you don’t find a group, you can abandon the above quests. They can easily be picked up in the future anyway, if you change your mind.


3. Get out of the pit.

Ride southwest to Moonrest Gardens.
You’ll find Ethenial Moonshadow at (24,60).
Get his quest [72] Avenge this Atrocity!

Look for Dead Mage Hunters.

a74img3.jpg

Dismount and loot the corpse, you’ll receive a Mage Hunter’s Personal Effects.

==Note== The corpses just disappear if you don’t dismount.

a74img4.jpg Right-click them and loot the contents. Repeat this step until you find the Moonrest Gardens Plans.

4. Ride back to Agmar’s Hammer. Turn in:

  • [72] Containing the Rot, get [72] The Good Doctor…
  • [72] The Good Doctor…, get [73] In Search of the Ruby Lilac
  • [72] Marked for Death: High Cultist Zangus
  • [72] Black Blood of Yogg-Saron, get [72] Scourge Armaments
  • [72] From the Depths of Azjol-Nerub, get [72] The Might of the Horde
  • [72] Rifle the Bodies, get [73] Prevent the Accord
  • [72] The Lost Empire

Also get [72] Strength of Icemist from Greatmother Icemist.

Sell junk, repair and re-stock food/drink.

h74circuit3.jpg

1. Ride west to Icemist Village (27,43).

2. Clear the way to the western end of the village and jump off the cliff, you’ll find Banthok Icemist down there (23,42).

Turn in [72] Strength of Icemist, get [72] Chains of the Anub’ar.

3. Turn around facing south and stick to the wall on your left-hand side until you find the entrance to a small hut where you’ll find Anok’ra the Manipulator (25,45).

Kill it. Loot Anok’ras Key Fragment.

4. Go back to the upper plateau of Icemist Village.

On the south side you should see a series of connected huts.

Check all those huts and you’ll find Sinok the Shadowrager (24,44).

Kill it and loot Sinok’s Key Fragment.

5. Go straight north to the opposite side of the village and you’ll find Tivax the Breaker in another hut (24,39).

==Note== He can also spawn in the northeastern hut (27,39).

Kill Tivax and loot Tivax’s Key Fragment.

If by now you haven’t got a Flesh-Bound Tome, go kill Anub’ar Cultists and the 3 key carriers until one drops for you. Once you get one:

h74img4.jpg Right-click the Flesh-Bound Tome, get [72] The Flesh-Bound Tome.

6. Go west, jump off the cliff and go back to Banthok Icemist.

Turn in [72] Chains of the Anub’ar, get [73] Return of the High Chief.

h74circuit4.jpg

1. Face north and stick to the wall on your right-hand side, until you find a path going back up to the upper floor (24,40).

2. Go to Roanauk Icemist, a taunka chained in the middle of the village (25,41).

Clear some space around him, get back to full HP/mana.

Right-click the Anub’ar Prison Mechanism.

h74img5.jpg

Help the taunka defeat Under-King Anub’et’kan (let them tank for you).

A big husk will appear on the floor upon Under-King Anub’et’kan’s death.

Right-click it and loot a Fragment of Anub’et’kan’s Husk.

h74img6.jpg Right-click the Warsong Battle Standard right away.

Defend it until you get a complete message.

Kill some more in the village until you finish [72] Scourge Armaments.

3. Get out of Icemist Village.

Ride to southwest to a big stone building (18,60).

Find and kill Wind Trader Mu’fah . He’s standing infront of the door of that big stone building.

Loot Wind Trader Mu’fah’s Remains.

Go inside that building, take the slope going up left.

Kill Goramosh, loot The Scales of Goramosh.
Also loot Goramosh’s Strange Device.

a74img5.jpg Right-click it to start [72] A Strange Device.

==Note== While you’re here, try to see if there’s any group up for killing Magister Keldonus for the quest [74] Wanted: Magister Keldonus. He’s really close so might as well kill two birds with one stone. Some classes reported being able to solo it, but I wouldn’t risk it, duo’ing is already much more realistic. 3+ is best.

4. From this point on, kill every Blue Dragonflight mob on your way.

Get out of the building and clear the way to the other side of the crater until you finish
[72] Avenge this Atrocity!

5. Go back to Ethenial Moonshadow at (24,60).

Turn in [72] Avenge this Atrocity! and get [73] End Arcanimus.

6. Ride back to Agmar’s Hammer. Turn in:

  • [72] The Flesh-Bound Tome, get [72] Koltira and the Language of Death
  • [72] Scourge Armaments
  • [72] The Might of the Horde, get [72] Attack by Air!
  • [72] Attack by Air!, get [72] Blightbeasts be Damned!
  • [73] Prevent the Accord
  • [72] A Strange Device, get [72] Projections and Plans
  • [73] Return of the High Chief, get [73] All Hail Roanauk!

Follow Overlord Agmar to Roanauk Icemist. Talk to Roanauk and go through the text. Watch the script until you get a complete message.

Turn in [73] All Hail Roanauk!

Finally, turn in [72] Koltira and the Language of Death and get the 3 follow ups:

  • [73] In Service of Blood
  • [73] In Service of Frost
  • [73] In Service of Unholy
h74circuit5.jpg

1. Ride to Icemist Village (yes, again).

h74img7.jpg Right-click Valnok’s Flare Gun.

Mount the Kor’kron War Rider.

It’s a simple air fight mission. You have to kill 25 Anub’ar Blightbeasts.

h74img8.jpg

Ignore Ability #1, it sucks.
Use Ability #2 every 10 seconds while trying to catch as many bats as you can in one shot.
Use Ability #3 when you’re very low on health, it’s almost a complete heal.

Always keep moving, you will dodge Blighted Shrieks that way.

2. Stay on your Kor’kron rider and fly southwest (while staying at low altitude) until you get auto-dismounted.

Ride further southwest to the western tip of Moonrest Gardens, you’ll find a crack going down to the crater on the southeastern tip.

Go down and kill Arcanimus (20,60).

a74img5.jpg Right-click the Surge Needle Teleporter.

This will teleport you to a platform. Go towards the middle of the platform until you get the quest complete message: “Object On the Surge Needle Observed“.

Right-click the Surge Needle Teleporter again.

3. Ride southeast to Ethenial Moonshadow. Turn in [73] End Arcanimus.

4. Ride back to Agmar’s Hammer. Turn in:

  • [72] Blightbeasts be Damned!
  • [72] Projections and Plans, get [72] The Focus on the Beach

5. Ride southwest to the Glittering Strand.

Find Captain Emmy Malin (26,65). She’s channeling a spell close to the Ley Line Focus.

a74img7.jpg

Kill her, loot everything she has.

a74img8.jpg Get close to the Ley Line Focus and right-click the Ley Line Focus Control Ring.

Go back to Agmar’s Hammer. Turn in [72] The Focus on the Beach, get [72] Atop the Woodlands.

Also get [72] Strengthen the Ancients from Earthwarden Grife.

h74circuit6.jpg

1. Ride southwest to the Lothalor Woodlands (31,60).

Dismount. Look for Woodlands Walkers, right-click them and they’ll either attack you or give you some Bark of the Walkers.

Once you got some bark, look for Lothalor Ancients (not corrupted ones).

a74img10.jpg Get close to them and right-click the Bark of the Walkers.

Keep on doing this while following the next step.

2. Go further south until you find a Ley Line Focus (32,71).

Kill Lieutenant Ta’zinni. He’s a troll NPC and patrols around the Ley Line Focus.

Loot Lieutenant Ta’zinni’s Letter and the Ley Line Focus Control Amulet.

a74img11.jpg Right-click it while being close to the Ley Line Focus.
h74img9.jpg Right-click Lieutenant Ta’zinni’s Letter, get [72] A Letter for Home.

3. Finish the other quest with the Lothalor Ancients and then go back to Agmar’s Hammer.

Turn in:

  • [72] Strengthen the Ancients
  • [72] Atop the Woodlands, get [72] Search Indu’le Village
  • [72] A Letter for Home

Sell junk, repair and re-stock food/drink.

a74circuit9.jpg

1. Fly to Moa’ki Harbor. If you don’t have that flight path, just ride there.

Gather the quests:

  • [72] Let Nothing Go To Waste
  • [72] Planning for the Future

2. Go north and slightly northwest to Snowfall Glade (47,65). Complete the following 2 objectives:

  • Kill Wolvars and loot 6 Stolen Moa’ki Goods
  • Right-click 12 Snowfall Glade Pups

==Note== While you’re here, try to see if there’s any group up for killing Gigantaur for the quest [74] Wanted: Gigantaur. He’s really close so might as well kill two birds with one stone. Some classes reported being able to solo it, but I wouldn’t risk it, duo’ing is already much more realistic. 3+ is best.

Go back to Moa’ki Harbor, turn in:

  • [72] Planning for the Future
  • [72] Let Nothing Go To Waste, get [73] Slay Loguhn

3. Go back to Snowfall Glade.

Go to the northernmost hut (46,60). Kill Loguhn.

a74img12.jpg Right-click the Blood of Loguhn.

Go back to Moa’ki Harbor, turn in [73] Slay Loguhn. Two new quests should be available in the village.

For now only get [72] Spiritual Insight from Toalu’u the Mystic.

a74circuit10.jpg

1. Outside Toalu’u the Mystic’s tent you should see Toalu’u’s Brazier.

a74img13.jpg Right-click Toalu’u’s Spiritual Incense.

You don’t have to do anything for this quest, just enjoy the flight until you get the complete message.

Turn in [72] Spiritual Insight, get [72] Elder Mana’loa.

2. Mount up, follow the road north and then west until you reach the northwestern tip of Indu’le Village (37,65). There you should see a statue (looks more like a rock actually) called Elder Mana’loa.

Turn in [72] Elder Mana’loa, get [72] Freedom for the Lingering.

3. Clear the way to the middle of Lake Indu’le where you should see the corpse of Mage-Commander Evenstar (40,67).

Turn in [72] Search Indu’le Village, get [72] The End of the Line.

a74img14.jpg Get close to the Ley Line Focus and right-click the Ley Line Focus Control Talisman.
Get out of the lake.

Complete the following 2 objectives:

  • Kill Indu’le Fishermen/Warriors/Mystics until you finish [72] Freedom for the Lingering
  • bloodgem.jpg Find a Deranged Indu’le Villager, beat him down to 35% HP use the Blood Gem on him.

4. Go back to Elder Mana’loa, turn in [72] Freedom for the Lingering, get [72] Conversing With the Depths.

5. Mount up, ride east to the western ledge of the Azure Dragonshrine (53,65). You should get a “Azure Dragonshrine Observed” message.

6. Go southwest back to Moa’ki Harbor. Get the quest [72] Tua’kea’s Crab Traps from Tua’kea.

a74circuit11.jpg

1. Go to the very end of the southwestern docks and you should see a yellow “!” on your minimap.

a74img15.jpg Right-click Tua’kea’s Breathing Bladder. It has 6 charges.
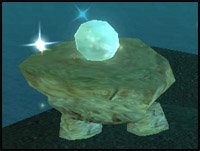
Dive down there and get the quest [72] Signs of Big Watery Trouble.

==Note== From now on look for for Tua’kea Crab Traps at the bottom of the sea while going through the next steps.

a74img16.jpg

2. Swim back to the village, turn in [72] Signs of Big Watery Trouble at Tua’kea, get the follow up [72] The Bait.

3. Swim southwest to Kili’ua’s Atoll (44,82).

Kill Kili’ua and loot The Flesh of “Two Huge Pincers”.

4. Swim west to the Briny Pinnacle (no need to look for Crab Traps, there are none in this area).

Follow the path up until you find The Pearl of the Depths (34,83).

a74img16b.jpg

Right-click it and the sea-goddess Oacha’noa will come and talk to you. Jump in the water when she gives you the compulsion buff.

5. Swim back to Moa’ki Harbor, get the last Crab Traps you need on the way. Turn in:

  • [72] Tua’kea’s Crab Traps
  • [72] The Bait, get [72] Meat on the Hook

6. Follow the fishing line (which actually looks more like a big rope) southwest into the water, all the way to Tua’kea’s Fishing Hook (47,78):

a74img17.jpg

tugwarsbait.jpg Right-click Tu’u’gwar’s Bait.

Kill Tu’u’gwar.

Swim back to Moa’ki Harbor, turn in:

  • [72] Meat on the Hook
  • [72] Conversing With the Depths

Sell junk, repair and re-stock food/drink.

Fly to Agmar’s Hammer. Turn in:

  • [72] In Service of Blood
  • [72] The End of the Line, get [72] Gaining an Audience
h74circuit7.jpg

1. Mount up, follow the road east and keep going east until Wyrmrest Temple, you should find Tariolstrasz (58,54).

Turn in [72] Gaining an Audience, get [72] Speak with your Ambassador.

Ask him to send you to the top of the temple.

Up there get the following quests:

  • [74] Seeds of the Lashers
  • [75] Mystery of the Infinite
  • [74] The Obsidian Dragonshrine

Go to Torastrasza and ask him to send you to the ground level.

2. Ride south/southeast to the Emerald Dragonshrine (63,69). Find Nishera the Garden Keeper, she patrols around the lake. Get her quest [74] Cycle of Life.

You need to do three things in this glade:

  • KillEmerald Lashers until you’ve looted 3 Lasher Seeds
  • Kill 5 Emerald Skytalons (look above, they’re flying all over the glade)
  • Look for Emerald Dragon Tears – Loot 8 of them:h74img10.jpg

Once done with that, go back to Nishera and turn in [74] Cycle of Life, get [74] The Plume of Alystros.


3. (Optional) [74] The Plume of Alystros requires you to kill Alystros the Verdant Keeper:

  • Level 74 Elite Beast
  • Immune to movement impairing effects, fear, etc
  • HPs: 118,000
  • Hits for: ~2K on clothies

Most classes can’t solo it. So try to find help for this quest. To be safe you’ll need a tank and a healer.

When ready, go to the southeastern tip of the glade (65,78).

a72image7b.jpg Right-click Skytalon Molts and Alystros will attack you. Better have your tank use the Skytalon Molts, so he gets attacked first.
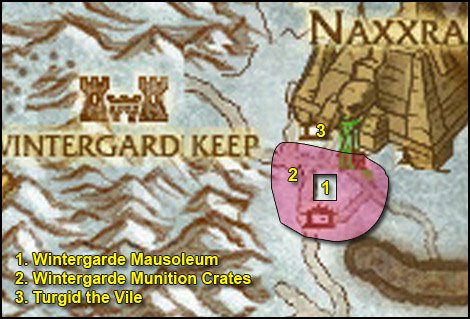
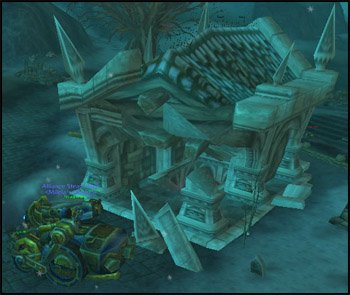
Loot the Plume of Alystros. Go back to Nishera the Garden Keeper and turn in [74] The Plume of Alystros.

If you can’t find help for this quest, just save it for later, it has no follow up so it doesn’t matter when you do it.


Go back to Wyrmrest Temple.

Ask Tariolastrasz to send you to the top floor.

Turn in [74] Seeds of the Lashers, get [74] That Which Creates Can Also Destroy.

Go back down to the ground floor of Wyrmrest Temple.

A little south of Tariolastrasz you’ll find Golluck Rockfist (59,56).

Turn in [72] Speak with your Ambassador, get [74] Report to the Ruby Dragonshrine.

Go to the northeastern tip of the temple and you’ll find Nethestrasz (60,52).

Fly to Venomspite.

In Venomspite, turn in:

  • [74] The High Executor Needs You, get [74] To Conquest Hold, But Be Careful!
  • [72] Emerald Dragon Tears, get [72] Spread the Good Word

Gather the following quests:

  • [72] Materiel Plunder from Quartermaster Bartlett on the west side of the town
  • [72] Wanted: The Scarlet Onslaught from the Wanted Poster
  • [72] Blighted Last Rites from Apothecary Vicky Levine, next to the poster

h74img11.jpg Right-click the Flask of Blight while being close to the Scarlet Onslaught Prisoner next to Apothecary Vicky Levine.

Turn in [72] Blighted Last Rites, get [72] Let Them Not Rise!

h74circuit8.jpg

1. Ride southwest to New Hearthglen.

Kill Scarlet Onslaught mobs, loot them and then:

h74img12.jpg Target their corpse use the Container of Rats.

Also look for Weapon Racks and Armor Racks.

h74img13.jpg
h74img14.jpg

2. Once you’re done with all 3 quests, ride back to Venomspite.

Turn in:

  • [72] Let Them Not Rise!
  • [72] Wanted: The Scarlet Onslaught
  • [72] Materiel Plunder

Get [72] Fresh Remounts from Hansel Bauer
Get [72] Stealing from the Siegesmiths from Deathguard Molder.

Go to the eastern gate and climb on a Forsaken Blight Spreader.

h74img15.jpg
h74circuit9.jpg

1. Follow the road east until you reach the crossing at (86,58). From there shoot the scourge north of you until you have 30 kills.

==Tip== Zoom out your camera view to the max, hold your mouse right-click and aim with the mouse.

2. unmounticon.jpg Leave the vehicle.

Just a few paces east of the crossing you should find Dawn’s Reach (87,57). Get [74] The Call Of The Crusade from Tilda Darathan.

3. Go north/slightly northwest to the keep in ruins in the middle of the Carion Fields (86,47). Inside you’ll find Turgid the Vile.

a72image10.jpg Target him and right-click the Seeds of Nature’s Wrath.

Kill him.

Now look for Siegesmith Bombs in this building.

h74img16.jpg

Loot 6 of them. There are more bombs in the other buildings across the Carrion Fields, but this is the best spot.

4. Ride back to Venomspite.

Turn in:

  • [72] Spread the Good Word, get [72] The Forsaken Blight
  • [72] Stealing from the Siegesmiths, get [72] Bombard the Ballistae

Get:

  • [72] A Means to an End from Apothecary Vicky Levine
  • [72] No Mercy for the Captured and [72] Need to Know from Spy Mistress Repine on the upper floor of this building

Fly to Agmar’s Hammer.

Go a little southwest in the village and turn in [72] The Forsaken Blight at Doctor Sintar Malefious.

Go to Overlord Agmar and get [73] The Kor’kron Vanguard!

h74circuit10.jpg

1. Mount up, follow the dots to Kor’kron Vanguard (44,20).

2. Go northwest to Saurfang the Younger (41,18).

Turn in [73] The Kor’kron Vanguard! and get [74] Audience With The Dragon Queen.

3. Go east to the flightmaster (44,17).

Fly to Wyrmrest Temple.

Ask Tariolastrasz to send you to the top floor.

[74] Audience With The Dragon Queen, get [74] Galakrond and the Scourge.

Turn in [74] Galakrond and the Scourge at Torastrasza and get [74] On Ruby Wings.

a72image15.jpg Right-click the Ruby Beacon of the Dragon Queen.

Wyrmrest Vanquisher will fly down to you. Right-click it to climb it.

Now things get fun. See, you can use this Wyrmrest Vanquisher everywhere in the Dragon Wastes, which means we basically have a flying mount for a big chunk of the map, and we’re going to make the most of it. Just remember to always fly low, so that you don’t die if the drake decides to drop you off without a warning and without a parachute (I learned the hard way :p).

==Warning== Don’t turn in the quest [74] On Ruby Wings until I tell you to, or you won’t be able to summon the drake anymore.

4. Summon your Wyrmrest Vanquisher, fly north to Galakrond’s Rest (56,35).

Go down in the pit and use Ability #1 and Ability #2 to kill Wastes Scavengers.
Whenever your drake needs mana or healing, use Ability #3 while being close to a Wastes Scavenger.

Kill 30 Wastes Scavenger that way.

==Note== Before we go kill Grand Necrolord Antiok, equip your PvP trinket if you got one with you, because he casts a 10 second fear, quite annoying and it can potentially get you killed.

Then go to the peak at the northwestern tip of Galakron’s Rest, kill the big giant called Thiassi and then land next to his corpse and dismount. Get ready to fight Grand Necrolord Antiok, a level 75 warlock.

After he dies, the Scythe of Antiok will appear on the floor.

a72image16.jpg

Loot it.

Summon your Wyrmrest Vanquisher again and fly away before the giant respawns.

h74circuit11.jpg

1. Fly west/southwest to Dragon’s Fall where you’ll find Kontokanis (47,33).

Dismount, get [73] Pest Control.

==Note== While you’re here, try to see if there’s any group up for killing Dreadtalon for the quest [74] Wanted: Dreadtalon. He’s really close so might as well kill two birds with one stone. Some classes reported being able to solo it, but I wouldn’t risk it, duo’ing is already much more realistic. 3+ is best.

2. Go east until you’re back in the Dragon Wastes. Summon your Wyrmrest Vanquisher.

Fly to the Snowbold Camp just south of Galakrond’s Rest (55,41).

Kill all the Snobolds and Magnataurs you can find here.

Also look in the skies for a Reanimated Frost Wyrm.

a72image10.jpg Target it and right-click the Seeds of Nature’s Wrath, then kill it.

3. Summon your drake. Fly south to another Snobold / Magnataur camp (56,52).

Kill them all and you should be done with [73] Pest Control. If you aren’t, just look for other snowbold camps, there are many around here and they are easy to spot.

Once you’re done, summon your drake and fly back to Dragon’s Fall.
Dismount the drake and get on your normal mount before you turn in the quest.

Turn in [73] Pest Control, get the follow up [73] Canyon Chase.

4. Chase the fleeing snowbolds into the canyon.

You’ll run into a magnataur called Icefist.

Kill him and loot the Emblazoned Battle Horn.

a72image14.jpg Right-click it to start [73] Disturbing Implications.

Go back to Dragon’s Fall, turn in [73] Canyon Chase.

Enter the Dragon Wastes, summon the drake, fly to Wyrmrest Temple‘s ground floor.

Turn in [73] Disturbing Implications, get [73] One of a Kind from Aurastrasza.

a74circuit17.jpg

1. Fly west to a canyon at (51,58). Look for Bonesunder, a magnataur who patrols the ledge above this canyon, going in between the above location and the azure dragonshrine.

He’s elite and immune to all forms of cc but he only has 21K HP and doesn’t hit too hard as long as you avoid his Bone Crack ability, so just burn him down quickly and you should be fine, use cooldowns and potions if needed.

The only dangerous ability he has is Bone Crack. When he casts that, run away quickly and it won’t hit you.

Loot the Emblazoned Battle Horn.

2. Summon your drake again and fly back to Wyrmrest Temple, turn in [73] One of a Kind, get the follow up [73] Mighty Magnataur.

3. Summon your drake, fly northeast to (68,41), there you’ll find a named magnataur called Drakegore, he patrols up and down around this spot.

He’s elite but soloable, doesn’t hit too hard, can be snared, stunned, feared, rooted. He also has an aura which does 300 fire damage to enemies in his melee range, nothing too bad.

4. Ride south to (67,50). There you’ll find another named magnataur, Iceshatter. He roams around the frozen lake in this area.

He’s more tricky to kill than the previous one. He’s immune to movement impairing effects so clothies might have a little bit of trouble, however he doesn’t much hit points so you can burn him down before he kills you.

He periodically casts Pulsing Shards. This is very dangerous and can’t be interrupted. Either run away while he channels it or use something like cloak of shadows, divine shield, ice block.

I personally had no troubles soloing it with my frost mage wearing only quest greens. I sent my water elemental first and let him tank as much as possible, used icy veins and a trinket and burned him down as fast as possible.

After you’ve killed Iceshatter, in the frozen lake just a few steps south you should find Ice Revenants.

frostgem.jpg Beat one down to 35% HP and then right-click the Frost Gem.

5. Go back to the Dragon Wastes, summon your drake and fly south to (67,70). There you should find another magnataur called Bloodfeast.

That one is also tricky, immune to all forms of cc. He summons maggots which heal him up. The maggots are immune to AoE abilities, so you’d have to target them and kill them one by one (they got 1000HP). By the time you’d be done with that, he’d summon another round of maggots. So here is the strategy: Ignore the maggots, burn him down as fast as you can.

Worked just fine for me even with characters wearing quest greens.

Summon the drake, fly back to Wyrmrest Temple. Turn in [73] Mighty Magnataur, get [74] Reclusive Runemaster.

Sell junk, repair and re-stock food/drink.


Now we’re all set for most of the group quests of Dragonblight. These can’t be soloed by most classes, so look for a group while you keep on following the guide.

Here’s a list of the quests you need to find a group for:

  • [74] The Plume of Alystros
  • [74] Wanted: Dreadtalon
  • [74] Wanted: Gigantaur
  • [74] Wanted: Magister Keldonus
  • [74] Reclusive Runemaster

Once you finish [74] Reclusive Runemaster (defeat Dreg’mar, get the follow up [74] Wanton Warlord (kill Grom’thar) and also look for a group for it.
Once you finish all 3 wanted quests, get the follow up [75] To Dragon’s Fall, also look for a group for it.

Here is a map showing the location of all those objectives.

hdragonblightgrpqs.jpg

You can get there quickly thanks to your Wyrmrest Vanquisher, so just keep on following the guide normally and whenever you find a group for one of the above quests, summon your drake and fly there!


h74circuit12.jpg

1. Summon your drake. Fly east to New Hearthglen. Dismount.

Clear the way to Deathguard Schneider, located behind the gallows in a cage at (71,72).

Talk to her, click the first text option and kill her.

2. Go west to the Barracks (70, 72). Enter then go right, left, left, and on the table to the right you’ll find the Scarlet Onslaught Daily Orders: Barracks.

h74img17.jpg

Loot them.

3. Get out. Go southeast to the Abbey (72,73). Go to the last room of the northeastern wing of the building and you’ll find the Scarlet Onslaught Daily Orders: Abbey.

4. Get out of the abbey, turn right and go a few steps northeast until you find Chancellor Amai (72,73). Talk to him, click the first text and kill him.

5. Go to the other side of the abbey and you’ll find Engineer Burke (73,74). Talk to him, 1st text option, kill him.

6. A few steps southeast of Engineer Burke you should find a Ballista (73,75).

h74img18.jpg Right-click the Siegesmith Bombs and aim for the Ballista to destroy it.

==Note== From now on, destroy any Ballista you see until you’ve destroyed 5.

h74circuit13.jpg

1. Follow the path down to the beach. You should see two tents on your right-hand side (72,80).

There you’ll find the Scarlet Onslaught Daily Orders: Beach.

2. Clear yourself a path west along the beach, destroy Ballistas on the way.

Take the path going back up on the other side of the beach at (69,78).

3. Once up there go northeast to the lumbermill (68,74). Go to the very center of the building.

h74img19.jpg Right-click the Levine Family Termites and left-click on the floor.

Kill Foreman Kaleiki.

4. A few steps northeast of the lumbermill you’ll find Senior Scrivener Barriga (69,74). Talk to him, 1st text option, kill him.

5. Go back to the entrance of New Hearthglen and destroy the Ballistas there. You should be done with the ballista quest. If not, go back inside and destroy some more.

6. Look for an Onslaught Knight, make sure you target the knight and not the horse.

Kill the knight and loot an Onslaught Riding Crop.

h74img20.jpg Target the horse and right-click the Onslaught Riding Crop.

Ride back to Hansel Bauer at Venomspite and use Ability #1 to deliver the horse.

==Note== We’ll deliver the other two horses in the next circuits, so don’t worry about it.

Turn in:

  • [72] Bombard the Ballistae
  • [72] A Means to an End, get [72] Fire Upon the Waters
  • [72] No Mercy for the Captured, get [72] Torture the Torturer
  • [72] Need to Know, get [72] The Spy in New Hearthglen
h74circuit14.jpg

1. Ride back to New Hearthglen, go to the barracks (70,72).

Go down to the basement, where you’ll find Torturer LeCraft.

h74img21.jpg Target him and right-click the High Execturor’s Branding Iron 5 times on him, then kill him.

Loot the Torturer’s Rod off him.

h74img22.jpg Right-click it to start [72] The Rod of Compulsion.

2. Get out. Go southeast to the graveyard behind the abbey, there you’ll find Agent Skully (74,73).

Turn in [72] The Spy in New Hearthglen, get [72] Without a Prayer.

3. Go southwest to the little chapel infront of the lumbermill (69,76).

Kill Bishop Street, loot Bishop Street’s Prayer Book.

Go back to Agent Skully, turn in [72] Without a Prayer, get [72] The Perfect Dissemblance.

Go look for an Onslaught Raven Priest.

h74img23.jpg Target him and right-click the Banshee’s Magic Mirror, then kill him.

h74circuit15.jpg

1. Go back to Agent Skully.

Dismount.

Turn in [72] The Perfect Dissemblance, get [73] A Fall From Grace.

2. Go to the abbey and enter it.

Turn right and go a few steps further to enter the main hall, locate the stairs on your left-hand side.

Take those spiraling stairs all the way up to the top.

You’ll find the Abbey Bell Rope.

h74img24.jpg

Right-click it.

Go down the stairs, turn left and go to the end of the southeastern wing. Talk to High Abbot Landgren (73,74). Go through his text.

Get out of the abbey and High Abbot Landgren will show up. Follow him until he jumps off a cliff.

3. Ride all the way down to the docks, you will lose the disguise there but it’s ok, just clear the way to the western docks.

Stand next to the plank leading to the boat (71,83).

h74img25.jpg Right-click the Apothecary’s Burning Water and aim for the ship’s sails. This will distract the deckhands 2 minutes.

Quickly go on the ship, go downstairs, turn right and right again then go to the captain’s cabin.

Kill Captain Shely and loot Captain Shely’s Rutters.

Get out quickly.

4. Go back to Agent Skully, turn in [73] A Fall From Grace, get [72] The Truth Will Out.

5. Go southwest to the house behind the chapel where we killed Bishop Street earlier (68,77).

Go to the upper floor and loot the Diary of High General Abbendis.

h74img26.jpg

6. Go kill a knight and steal a horse (like we did earlier).

Ride back to Hansel Bauer at Venomspite and use Ability #1 to deliver the horse.

Turn in:

  • [72] Fire Upon the Waters
  • [72] Torture the Torturer
  • [72] The Rod of Compulsion, get [72] The Denouncement
  • [72] The Truth Will Out, get [73] Do Unto Others

[73] Do Unto Others is another optional elite quest nearby. This quest requires you to kill High General Abbendis:

  • Level 72 Elite Humanoid
  • Immune to movement impairing effects, fear, etc
  • HPs: 96,000
  • Hits for ~3k on clothies

You’ll most likely need a tank and a healer for this one.

She can be found in the big cathedral in New Hearthglen (70,76). There’s a level 80 elite next to her but he doesn’t add if you pull Abbendis, so don’t worry about it.

If you can’t do this quest, just proceed with the guide and keep on looking for help regularly for both all those group quests, you can easily get there anyway with your Wyrmrest Vanquisher.
Please note that this quest has no follow up, so it doesn’t matter if you do it now or later.


Sell junk, repair and re-stock food/drink.

h74circuit16.jpg

1. Go back to New Hearthglen. Go to the forge, it’s the first building on the your right-hand side (71,70).

h74img22.jpg Attack Blacksmith Goodman and right-click the Rod of Compulsion before you kill him.

Once he has the “Compelled” debuff, finish him and he’ll shout something and you’ll get a quest update.

2. Go to the barracks. Go to the upper floor and find the main room.

Attack Commander Jordan and use the Rod of Compulsion before you kill him.

3. Go to the stables southwest (68,75).

Attack Stable Master Mercer and use the Rod of Compulsion before you kill him.

4. Go behind the big cathedral, there is a narrow path taking you to the other side (as shown on my map).

Take the path going down towards the beach and midway turn left at the cannon platform (73,78).

Attack Lead Cannoneer Zierhut and use the Rod of Compulsion before you kill him.

5. Go kill a knight and steal a horse (like we did earlier).

Ride back to Hansel Bauer at Venomspite and use Ability #1 to deliver the horse.

Turn in:

  • [72] Fresh Remounts
  • [72] The Denouncement
  • [73] Do Unto Others (if you did it)

Fly to Wyrmrest Temple.

h74circuit17.jpg

1. Summon your Wyrmrest Vanquisher. Fly northwest to Vargastrasz (43,51). Your drake should give you just enough time to reach him before you get dismounted.

Turn in [74] Report to the Ruby Dragonshrine, get [74] Heated Battle.

Very easy quest, you simply have to go down in the canyon and help the Horde forces to kill what’s on the list for your quest. You just have to do a little bit of damage on every mob to get the kill credit. Just stay behind the NPCs and you’ll be fine.

Go back to Vargastrasz, turn in [74] Heated Battle, get [74] Return to the Earth.

2. Ride around the crater and enter through the southern canyon (47,53). We’re gonna do 2 things at the same time here:

-Look for Duke Vallenhal.

h74img27.jpg

He patrols full circles around the tree, so he’ll stop by this area soon or later while you do the other thing.

h74img28.jpg Beat him down to 35% HP and right-click the Unholy Gem.

-Look for a Ruby Acorn.

a74img19.jpg

Loot it.

Look for a Ruby Keeper (those dead dragons in flames).

a74img20.jpg Target it and right-click the Ruby Acorn.

Repeat this step 6 times.

Go back up the southern canyon and ride back to Vargastrasz. Turn in [74] Return to the Earth, get [75] Through Fields of Flame.

3. Ride back to the southern canyon and go north towards the huge tree in the middle of the dragonshrine. The entrance is on the southeastern side of the tree at the bottom of it (48,50).

Inside you’ll find Daliah Suntouch. Kill her. Loot the Ruby Brooch.

a74img21.jpg Right-click the Ruby Brooch, get the quest [75] The Fate of the Ruby Dragonshrine.

In the same cave you should find the Ruby Lilac.

h74img29.jpg

Loot it.

Now kill 6 Frigid Necromancers, they can be found all around the tree.

Go back to Vargastrasz.

Turn in [75] Through Fields of Flame, get [75] The Steward of Wyrmrest Temple.

Mount up, ride northwest to Agmar’s Hammer.

Turn in:

  • [73] In Service of Frost
  • [73] In Service of Unholy, get [73] The Power to Destroy

Kill 6 Shadowy Tormentors.

When done, cancel the “World of Shadows” buff.

Turn in [73] The Power to Destroy, get [73] The Translated Tome.

Go to Captain Gort, turn in [73] The Translated Tome and any Wanted: Quests you might have completed.

Turn in [73] In Search of the Ruby Lilac, get [73] Return to Soar
Turn in [73] Return to Soar at Soar Hawkfury at the stables outside the gates.

Get the follow up [73] Where the Wild Things Roam.

Sell junk, repair and re-stock food/drink.

h74circuit18.jpg

1. Look for Snowfall Elks and Artic Grizzlies. They can be found in the area east and south of Agmar’s Hammer, as shown on my map.

h74img30.jpg Put the Pack of Vaccine on an action bar and throw it like a grenade at them.

Innoculate 5 Grizzlies and 5 Elks that way.

Go back to Agmar’s Hammer, turn in [73] Where the Wild Things Roam.

2. Fly to Kor’kron Vanguard.

3. Ride southeast until you’re in the Dragon Wastes. Summon your drake and fly east to (48,24).

There you should find a Nozzlerust Supply Runner, get his quest [74] Return to Sender.

4. Fly east to Nozzlerust Post (55,24). Turn in [74] Return to Sender, get [74] Stocking Up. Also get the two other quests:

  • [74] Shaved Ice
  • [74] Nozzlerust Defense
h74circuit19.jpg

1. Go south back to the Dragon Wastes, summon your drake.

Fly southwest to a digsite just west of Galakron’s Rest (52,31).

unmounticon.jpg Click the Leave Vehicle Button.

Kill everything in the camp and look for Composite Ore.

a72image17.jpg

2. Once you’ve looted all the composite ore from this spot, go northeast to the next digsite (57,28). Kill everything and loot all the ore there.

You should normally be done with [74] Stocking Up and [74] Nozzlerust Defense.

If not, there’s another digsite just southeast of this one.

3. Summon the Drake again, fly northwest to Coldwind Heights (54,20). Kill Crystalline Ice Elementals until you’ve looted 4 Iceshard Cluster.

4. Go south unil you’re back in the Dragon Wastes, summon the drake, fly east to Nozzlerust Post. Turn in:

  • [74] Stocking Up
  • [74] Nozzlerust Defense
  • [74] Shaved Ice, get [74] Soft Packaging

5. Go to the area southwest of Nozzlerust Post (53,25).
Kill Jormugar Tunnelers and Dragonbone Condors until you’ve looted 12 Thin Animal Hide.

Go back to Nozzlerust Post, turn in [74] Soft Packaging, get [74] Something That Doesn’t Melt.
Also get [74] Hard to Swallow from Xink.

h74circuit20.jpg

1. Go to the area east of Nozzlerust post and go to the dragon skull at (57,24).

Look for a Splintered Bone Chunk around this skull. They look like this:

a74img22.jpg

Right-click them and loot them.

Also, while in this area, look for a Hulking Jormungar. Bring it down to 80% HP and a message will appear:

a74img23.jpg

a74img24.jpg Right-click the Potent Explosive Charges.

This will blow up the Hulking Jormungar and a lot of meat will fly all around its corpse. Loot 6 Seared Jormungar Meat.

2. Go to the big dragon skeletons southeast of here (60,27). Loot all the Splintered Bone Chunks you can find around it.

3. Go to the next dragon skeleton further east (63,28). Loot all the Splintered Bone Chunks you can find around it.

4. Now just revisit the previous steps until you have 12 Splintered Bone Chunks.

Once you’re done, summon your drake and fly back to Nozzlerust Post, turn in:

  • [74] Something That Doesn’t Melt
  • [74] Hard to Swallow

Get:

  • [74] Harp on This!
  • [74] Lumber Hack
a74circuit21.jpg

1. Go northwest to Coldwind Heights again.

a74img25.jpg Right-click Xink’s Shredder Control Device.

Right-click the shredder to take control of it.

Go westwards while doing the following two things:

  • Kill harpies on your way (Use Ability #1 and #2 – Also use Ability #4 whenever your shredder lacks 5000 HP or more)
  • Look for trees with a cross:a74img26.jpg

Use Ability #6 while standing close to them.

Ability #3 is just a 10 sec run speed boost, use it at will.

2. Keep going west and then northwest and you’ll find the Mistress of the Coldwind (45,10).
She’s elite but it’s no problem for you and your shredder.

==Note== Should your shredder get destroyed, you can re-summon one again.

Once you’ve killed the Mistress of the Coldwind, finish gathering lumber and killing harpies until you finish both quests.

3. Ride back to Nozzlerust Post, turn in:

  • [74] Harp on This!
  • [74] Lumber Hack

Get [74] Stiff Negotiations.

4. Go east until you enter the Dragon Wastes, summon your Wyrmrest Vanquisher, fly northeast to Zort (59,18). Easy to spot thanks to the yellow “?” on your minimap. Don’t worry about the warning message you get when you get out of the Dragon Wastes, you should have more than enough time to land next to Zort before your drake drops you.

Turn in [74] Stiff Negotiations, get [74] Slim Pickings.

5. Follow the trail north while avoiding the elite giants and then go northwest to the Ice Heart Cavern, inside the cave you’ll find a Ravaged Crystalline Ice Giant (56,12) close to the entrance.

a74img27.jpg

Right-click it to get a Sample of Rock Flesh.

Get out of the cave, ride back to Zort.

Turn in [74] Slim Pickings, get [74] Messy Business.
Also get [74] Stomping Grounds from Ko’char the Unbreakable.

No map needed for this circuit.

1. Go back to the Ice Heart Cave.

a74img28.jpg Put Zort’s Scraper on an action bar.

Kill Ice Heart Jormungar Feeders and use Zort’s Scraper whenever they cast Corosive Spit on you, this will remove the dot and prevent a lot of damage, and it will also complete the other quest.

Kill 8 Ice Heart Jormungar Feeders and remove the Corosive Acid twice, then ride back to Zort.

Turn in:

  • [74] Messy Business, get [74] Apply This Twice A Day
  • [74] Stomping Grounds
  • [74] Apply This Twice A Day

Get:

  • [74] Really Big Worm
  • [74] Worm Wrangler

[74] Really Big Worm cannot be soloed by most classes. The mob you have to kill, Rattlebore, is at the very end of the Ice Heart Cave. So just add this to your list of group quests and shout for a group regularly.

Rattlebore stats:

  • 72,000 HP
  • Hits for 2K on clothies
  • Immune to all forms of cc

Don’t forget to drink Zort’s Protective Elixir before you fight him, it will make things easier.

I recommend going there with 3 players to make it easier, including a tank type and a healer type.

Anyway, just add this quest to your list of group quests to do in Dragonblight, keep looking for a group for it regularly and continue with the guide in the mean time.

When you find a group for it, don’t forget to do the other quest on the way while you’re in the caves. It’s quite easy, all you have to do is get close to a Jormungar Spawn and then:

a74img29.jpg Use the Sturdy Crates on it.

Then just right-click the crate on the floor. Repeat this 3 times. Can easily be done while clearing the way to Rattlebore.

Once you’ve finished those two quests, go back to Zort and turn in:

  • [74] Really Big Worm
  • [74] Worm Wrangler

a74circuit22.jpg

1. Follow the trail southwest until you’re back in the Dragon Wastes. Summon your Wyrmrest Vanquisher.

Fly to the Obsidian Dragonshrine towards the cave.

You’ll find Serinar inside the cave called the Maw of Neltharion (35,30).

Turn in [74] The Obsidian Dragonshrine, get:

  • [74] No One to Save You
  • [74] No Place to Run

2. Clear the way out of the Obsidian Dragonshrine, until the point where the path becomes snowy again (42,32).

Get back to full HP/mana.

a74img30.jpg Right-click the Destructive Wards.

Defend the ward until you get the complete message.

Kill what you still need for [74] No One to Save You and go back to Serinar. Turn in:

  • [74] No One to Save You
  • [74] No Place to Run, get [74] The Best of Intentions

3. Serinar will give you a disguise.

Go west through the cave until you find Rothin the Decayed. You’ll get the complete message, then go back to Serinar.

==Note== If you lose the disguise, go back to Serinar and talk to him for a new one.

Turn in [74] The Best of Intentions, get:

  • [74] Culling the Damned
  • [74] Defiling the Defilers

4. Clear the way west towards the end of the cave while looking for Necromantic Runes.

a74img31.jpg

Right-click them to destroy them.

Kill what you need for [74] Culling the Damned.

Go back to Serinar. Turn in:

  • [74] Culling the Damned
  • [74] Defiling the Defilers, get [75] Neltharion’s Flame

5. Go west back to Rothin the Decayed at the end of the cave.

a74img32.jpg Right-click Neltharion’s Flame.

Kill Rothin the Decayed.

Go back to Serinar, turn in [75] Neltharion’s Flame, get [74] Tales of Destruction.

You should be level 75 by now.


Level 75


h74circuit21.jpg

1. Get out of the cave, ride out of the Obsidian Dragonshrine and go northeast until you’re back in the Dragon Wastes. Summon your Wyrmrest Vanquisher.

2. Fly a long way east towards Light’s Trust (84,26), until your drake dismounts you.

Turn in [74] The Call Of The Crusade, get [74] The Cleansing of Jintha’kalar.

3. Go northeast to Jintha’kalar (88,20). Kill every Scourge mob on your way.

4. Find Overseer Deathgaze (90,19) at the eastern tip of this camp.

a72image10.jpg Target him and right-click the Seeds of Nature’s Wrath.

Kill him.

Kill stuff in the area until you have 15 Scourge kills.

Go back to Light’s Trust, turn in [74] The Cleansing of Jintha’kalar, get [75] Into the Breach!

h74circuit22.jpg

1. Follow the road west and then go southwest to the Bronze Dragonshrine (72,38). We’re about to trigger an event where you’ll help your “Future You” to defeat waves of dragons.

Just let your Future You tank and kill things one at a time to be safe. If you die it doesn’t matter, just run back. Your “Future You” will finish the event, you’ll get the quest complete message.

a72image11.jpg Right-click the Hourglass of Eternity from your inventory to start the event.
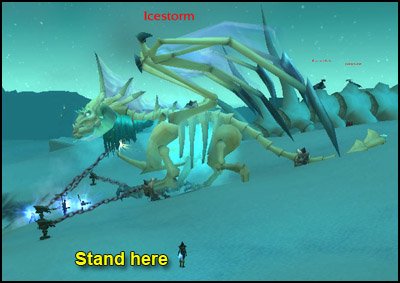
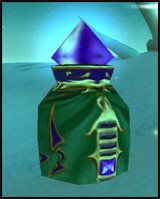
2. Go west and get back to the Dragon Wastes. Summon your drake.

Fly to Wyrmrest Temple.

==Warning== We’re about to turn in the quest [74] On Ruby Wings. That means we won’t be able to summon the Wyrmrest Vanquisher to travel anymore. So if you still have some of the group quests unfinished, try to do them now!

Summon your drake. Go to Tariolstrasz on the western side of the temple. Turn in [75] The Steward of Wyrmrest Temple, get [75] Informing the Queen.

Summon your drake and fly to the top floor, where Alexstrasza is. Turn in:

  • [74] That Which Creates Can Also Destroy
  • [74] Tales of Destruction
  • [75] Mystery of the Infinite
  • [75] The Fate of the Ruby Dragonshrine
  • [75] Informing the Queen, get [74] Report to Lord Afrasastrasz
  • [74] On Ruby Wings, get [74] Return To Angrathar

Ask Torastrasza to fly you down to the middle floor.

Turn in [74] Report to Lord Afrasastrasz, get [74] Defending Wyrmrest Temple.

Go on the balcony and talk to a Wyrmrest Defender, click on the text and you’ll ride it.

  • Ability #1: Direct damage, use everytime it’s up.
  • Ability #2: DoT. Use it once at the start of a fight.
  • Ability #3: Self heal
  • Ability #4: Use it to escape when you get attacked by several dragons at the same time
  • Ability #5: Go inside the big beam in the Azure Dragonshrine and use it once.
a74img38.jpg

Fun quest, kill dragons. Not much else to say, it’s rather easy, just escape and heal up if things get dangerous.

This is a daily quest by the way, and you get an achievement if you finish it in under 2 minutes.

When done, go back to Lord Afrasastrasz and turn in [74] Defending Wyrmrest Temple.

Ask him to fly you back to the ground level.

Go to the flightmaster and fly to Kor’kron Vanguard.

Go to Saurfang the Younger, turn in [74] Return To Angrathar.

Enjoy the super cool cinematic.

Mount up, ride to the Wrathgate (38,19). If you want to watch the cinematic again, you can talk to Alexstrasza and click on the text.

Get the quest [74] Darkness Stirs.

Loot the Armor of Saurfang, it is on the ground right infront of Alexstrasza. It’s quite small so zoom in and look thoroughly.

Go back to Kor’kron Vanguard. Fly to Warsong Hold, Borean Tundra.

Go to High Overlord Saurfang, turn in [74] Darkness Stirs, get [74] Herald of War.

He’ll open a portal to Orgrimmar for you, take it.

Go to Thrall‘s Chamber and turn in [74] Herald of War, get [74] A Life Without Regret. You can watch the script between Thrall and Jaina if you want, it’s not mandatory though.

Take the portal to the Undercity.

Turn in [74] A Life Without Regret at Vol’jin, get [74] The Battle For The Undercity.

1thrallsylvanas.jpg

Talk to Thrall, tell him you’re ready. Or if someone else already started the event, just stand by Thrall until it starts.

Now all you have to do is follow Thrall and Sylvannas through this amazing quest. You’re pretty much unkillable thanks to the auras you get from Thrall and Sylvannas, but don’t be too reckless though. Have fun and help them fight till the end of the event.

At the end of the script, turn in [74] The Battle For The Undercity.

This will teleport you to the zeppelin pad.

While you’re here, you can go train your new skills, visit the AH, etc.

Once you’re ready to go again, go take the zeppelin to Borean Tundra and fly to Venomspite, Dragonblight.

Try a last time to get a group for the group quests of Dragonblight, if you don’t find one, just abandon those groups quests now, we are done with Dragonblight. You can come back here at level 80 to finish those group quests.

This guide ends here, time to go to go to Grizzly Hills.

WoW WotLK Classic Alliance 70-80 Leveling Guide: 72-74 Howling Fjord

If you followed previous guide, you should already be in Valgarde Keep.

If you didn’t, simply go to Menethil Harbor. Go to the northern pier (5,57). Take the boat to Howling Fjord. The Boat will take you to Valgarde Keep.

Once in Valgarde Keep, get off the boat and get the quest [70] Hell Has Frozen Over…

Zoom out your minimap to the maximum, this will make it easier for you to locate quests.

Go to the yellow “?” on your minimap. Turn in [70] Hell Has Frozen Over… and get [70] If Valgarde Falls…

FPicon.jpg Get the new flight path

hs.jpg Go to the inn and make it your home location.

==Note== If you wish to train First Aid, the grand master trainer is in the middle of the town, walking around the bonfire.

Go to the gate on the north side of the village. Kill stuff there until you finish [70] If Valgarde Falls… It’s quite easy, let the guards help you.

Turn in [70] If Valgarde Falls… and get [70] Rescuing the Rescuers.

a70circuit1.jpg

1. Go back to the north gate, go northwest while looking for Ceremonial Dragonflayer Harpoons on your way.

a70image1.jpg

Right-click them.

At (56,55) you should find a path to get to Scout Valory. Go to her and get the quest [71] Fresh Legs.

After that, find the remaining Ceremonial Dragonflayer Harpoons you need to finish [70] Rescuing the Rescuers.

2. Go back to Valgarde, turn in [70] Rescuing the Rescuers, get [70] Prisoners of Wyrmskull.
A bunch of quests should have just popped up on your minimap, get them all:

  • [70] The Human League
  • [71] Into the World of Spirits
  • [71] The Path to Payback

3. Dive in the water and swim northeast to Harold Lagras (63,59). Get his quest [71] Daggercap Divin’.

a70image2.jpg Equip the Diving Helm from your inventory (you don’t need to though if your class has some sort of underwater breathing spell).
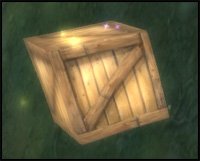
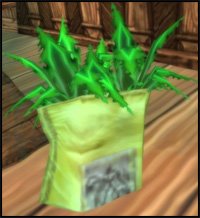
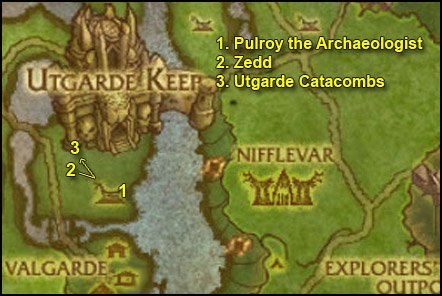
Now look around for Valgarde Supply Crates and loot them.

a70image3.jpg

Also look for a Reagent Pouch on the deck of the wrecked ships nearby.

a70image4.jpg

Once you have looted 10 Valgarde Supply Crates, go back to Harold Lagras, turn in [71] Daggercap Divin’.

Go back to Valgarde, turn in [71] Into the World of Spirits, get [71] The Echo of Ymiron.

a70circuit2.jpg

1. Go north to Wyrmskull Village and go to the yellow “?” labelled “Pulroy the Archaeologist“. Enter the building, turn in [70] The Human League, get [70] Zedd’s Probably Dead.

==Note== Kill Dragonflayer TribesmanThaneDeath Weaver or Harpooner on your way until you have 3 Dragonflayer Cage Keys. Use those keys to rescue 3 Captured Valgarde Prisoners.

a70image5.jpg

Once you’ve rescued 3 prisoners, go back to Valgarde, turn in [70] Prisoners of Wyrmskull, get [70] Dragonflayer Battle Plans.

2. Go back to Wyrmskull Village, go northwest and down to a pit where you’ll find Zedd (57,52).

a70image6.jpg

Turn in [70] Zedd’s Probably Dead, get [70] And Then There Were Two…

Go in the cave just west of Zedd, at the end of it you should find the Dragonflayer Battle Plans.

a70image6b.jpg

Loot them.

3. Get out of that pit and take the bridge going over it. At the end of the path after the bridge you’ll find the entrance to the Utgarde Catacombs (57,50).

Go down and keep going until you find Glorenfeld. Turn in [71] And Then There Were Two… and get [71] The Depths of Depravity.

==Note== From now on, look on the floor for Wyrmskull Tablets while following the next steps.

a70image7.jpg

Go further inside and at the T intersection, turn left. At the end of this corrider you’ll find the Harpoon Operation Manual lying on the floor.

a70image8.jpg

Loot the manual. Get full HP/mana before you get the quest from Ares the Oathbound. It’s a timed quest so you’ll have to follow my instructions quickly.

When ready, take the quest [71] The Shining Light.

Go back to the T intersection and go straight ahead.

Go down 2 flights of stairs.

Head north till the end of the corridor, don’t worry about all the ghouls down there, your shield will protect you.

At the end of that corridor you’ll find a Sacred Artifact.

a70image9.jpg

Loot it and go back to Ares the Oathbound, turn in [71] The Shining Light, get [71] Guided by Honor.

Gather the last Wyrmskull Tabelts you still need and go back to Glorenfeld. Turn in [71] The Depths of Depravity, get [71] The Ring of Judgement.

Go back to the T intersection, go down 1 flight of stairs and go west to Daegarn, turn in [71] The Ring of Judgement. Get full HP/mana before you get the follow up, it’s a little ring event where you have to defeat several gladiators before Oluf shows up.

When ready, take [71] Stunning Defeat at the Ring. Kill Firjus the Soul Caller, then 2 other gladiators will come, beat them all and then Oluf the Violent will come. Kill him and the Ancient Cipher will appear on the floor.

a70image10.jpg

Loot it.

Go back to Glorenfeld, turn in [71] Stunning Defeat at the Ring, get [71] Return to Valgarde.

Hearthstone back to Valgarde. Turn in:

  • [71] Return to Valgarde, get [71] The Explorers’ League Outpost
  • [70] Dragonflayer Battle Plans, get [70] To Westguard Keep!
  • [71] The Path to Payback, get [71] Locating the Mechanism
  • [71] Guided by Honor
a70circuit3.jpg

1. Go north, past the first two houses on your right. Enter the 3rd house at (60,51). This house is bigger than the other and there’s a big harpoon-launcher right infront of it.

a70image11.jpg Inside the building and right-click the Incense Burner.
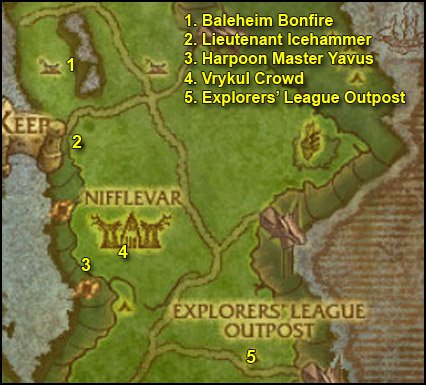
You should see two Vrykuls having a conversation.

a70image12.jpg

Listen to them and you’ll get a quest complete messsage for [71] The Echo of Ymiron. Once that’s done, right-click the Echo of Ymiron buff to cancel it.

Get out of the house, kill a Dragonflayer Harpooner and loot a Harpoon Control Mechanism.

2. From there, follow the trail going north along the water and then turn left, you’ll find Defender Mordun at the end of the path (60,49). Turn in [71] Fresh Legs, get [71] Into Utgarde!
Also get [71] Disarmament.


Optional – Instance: Utgarde Keep

Now you can start looking for a group for the Utgarde Keep instance.

You already have all the quests for it:

  • [71] Disarmament
  • [71] Into Utgarde!

It’s a very quick instance for level 71-73 players, I recommend it.

If you don’t feel like it or if you don’t find a group, you can abandon the above 2 quests. They can easily be picked up in the future anyway, if you change your mind.


3. Ride back to Valgarde, turn in:

  • [71] The Echo of Ymiron, get [71] Anguish of Nifflevar
  • [71] Locating the Mechanism, get [71] Meet Lieutenant Icehammer…

Talk to Captain Zorek again, ask him to send you to Lieutenant Icehammer.

After landing, turn in [71] Meet Lieutenant Icehammer…, get the follow up [71] Drop It then Rock It!

a70circuit4.jpg

1. Mount up, go straight north to Baleheim and find the Baleheim Bonfire (65,40).

a70image13.jpg Right-click the Alliance Banner.

3 Defenders will come and attack the banner. Defend it until you get the quest complete message.

2. Go back to Lieutenant Icehammer, turn in [71] Drop It then Rock It! and get [71] Harpoon Master Yavus.

3. Go south to Nifflevar and clear yourself a path to the big harpoon hut pointing southwest at top of the hill (67,55). Inside the hut you’ll find Harpoon Master Yavus. Kill him.

4. a70image11.jpg Get out of the hut and right-click the Incense Burner.

Go east towards the big crowd of Vrykul and listen to the speech until you complete the quest [71] Anguish of Nifflevar.

5. Mount up and ride southeast, the Echo of Ymiron buff will cancel itself once you’re out of Nifflevar.

Ride further southeast to the Explorers’ League Outpost. Turn in [71] The Explorers’ League Outpost and get [71] Problems on the High Bluff.

Turn in [71] Problems on the High Bluff and get [71] Tools to Get the Job Done.
Also get [71] Trust is Earned.

A few steps southeast of Hidalgo the Master Falconer you should find a loose rock next to a tree (75,66).

a70image14.jpg

Right-click it and you’ll get some Fjord Grubs.

Go back to Hidalgo, right-click one of the Rock Falcons in the cage and feed them the grub.

Turn in [71] Trust is Earned, get [71] The Ransacked Caravan.

Go back to the Loose Rock and right-click it several times (it takes a couple of seconds to be clickable again) until you have 5 Fjord Grubs.

a70circuit5.jpg

1. Ride north/northeast towards Ivald’s Ruin, clear the way to Donny (79,50). Get his quest [71] Out of My Element?.

2. Go down in the pit and look for Building Tools. They are up on the wooden planks at (79,48 ).

a70image15.jpg

Loot them.

Kill what you still need for [71] Out of My Element? and then go back to Donny. and turn in [71] Out of My Element?

3. Go back to the Explorers’ League Outpost, turn in [71] Tools to Get the Job Done, get [71] We Have the Technology and [71] We Can Rebuild It.

==Note== From now on, kill ShoveltusksShoveltusks Calves and Shoveltusks Stags on sight until one of them drops a Pristine Shoveltusk Hide.

4. Follow the trail westwards until you reach the intersection. You should see many Fjord Turkeys at this spot.

a70image16.jpg Target one and use your Trained Rock Falcon on it.
Repeat this step 5 times.

==Optional== You can easily complete the Friend of Fowl achievement here, there are lots of turkeys at this spot.

5. Ride back to Lieutenant Icehammer, turn in [71] Harpoon Master Yavus, get [71] It Goes to 11…

6. Ride straight north to Baleheim and find the Industrial Strength Rope at (65,41)

a70image17.jpg

Loot it.

7. Ride southeast to Nifflevar and find a Large Barrel close to the northern entrance (68,52).

a70image18.jpg

Loot the barrel.

After that, go to the western harpoon-hut at (66,54). Go down and locate a Vrykul Harpoon Gun:

a70image19.jpg

There’s one on each side.

a70image20.jpg Right-click the Harpoon Control Mechanism.
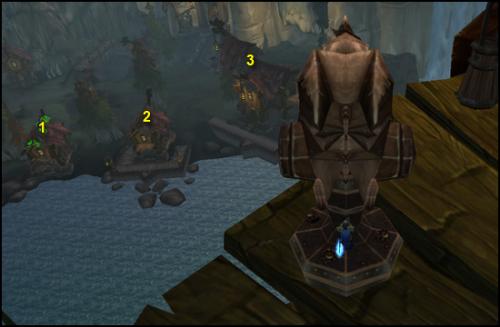
You’ll get the following action bar:

a70image21.jpg

Ability #1 is to destroy buildings.
Ability #2 is to kill Flying Defenders. 2-4 of them come whenever you destroy a building.

The 3 buildings you have to destroy are actually on the other side of the Fjord, as shown on the screenshot below:

a70image22.jpg

Use Ability #1, aim for the roof of the first building with the green circle and left-click TWICE. (This cannon just works weirdly).

If you aimed well, some Flying Defenders will come and attack you. Target them one by one and use Ability #2.

Repeat this for the other two building and you should be done.

==Note== If you need more Defender kills, you can spawn extra by shooting the same buildings again, even if you’ve already destroyed them.

unmounticon.jpg When you’re done, click the leave vehicle button.

a70circuit6.jpg

1. Go to Lieutenant Icehammer. Turn in [71] It Goes to 11… and get [71] Let’s Go Surfing Now.

2. Go back to Nifflevar. If you haven’t found a Steel Ribbing yet, kill Dragonflayer Warriors and Dragonflayer Rune-Seers in this village until one drops.

Once you got the Steel Ribbing, go to the southwestern harpoon-hut. The same one we went to when we killed Harpoon Master Yavus. When there, look for the harpoon-gun with a Large Harpoon Lever next to it:

a70image23.jpg

Right-click it and you’ll harpoon-surf back to Valgarde.

3. In Valgarde, turn in:

  • [71] Anguish of Nifflevar
  • [71] Let’s Go Surfing Now

Sell junk and repair.

Go to McGoyver, the gnome working on a gyrocopter by the water.

Dismount.

Talk to him and choose the bottom option: “Walt sent me to pick up some dark iron ingots” and then click on “Yarp”. This will fly you back to the Explorers’ League Outpost.

Once there, turn in:

  • [71] We Can Rebuild It
  • [71] We Have the Technology, get [71] Iron Rune Constructs and You: Rocket Jumping
  • [71] The Ransacked Caravan, get [71] Falcon Versus Hawk

Right-click on the Work Bench which is just next to Walt and click on the text.

Stand on the teleport rune and use the Rocket Jump ability. This should complete the quest.

a70image24.jpg

unmounticon.jpg Click on Leave Vehicle.

Go back to Walt, turn in [71] Iron Rune Constructs and You: Rocket Jumping, get the follow up [71] Iron Rune Constructs and You: Collecting Data.

Right-click on the Work Bench again and click the text.

Go to the blue crystal next to the cart where Gwendolyn is.

a70image25.jpg

Use the Collect Data ability. This should complete the quest.

unmounticon.jpg Click on Leave Vehicle and go back to Walt.

Turn in [71] Iron Rune Constructs and You: Collecting Data, get [71] Iron Rune Constructs and You: The Bluff.

Right-click on the Work Bench again and click the text.

Go step on Lebronski’s Rug. Once Lebronski starts talking to you, use the Bluff ability.

a70image25b.jpg

This should complete the quest.

unmounticon.jpg Click on Leave Vehicle and go back to Walt.

Turn in [71] Iron Rune Constructs and You: The Bluff, get the two follow ups [71] Lightning Infused Relics and [71] The Delicate Sound of Thunder.

a70circuit7.jpg

1. Right-click the Work Bench, click on the text.

Go southwest to Baelgun’s Excavation Site. If any Iron Rune Dwarf questions you, use the Bluff ability.

Jump down to the bottom of the pit. Yes, just let yourself fall down, it’s safe because you take no falling damage while in the suit.

Warning: Stay away from Rampaging Earth Elementals. If you aggro one, just run away until he forgets you.

Once at the bottom, look around for blue crystals and use the Collect Data ability on them until you have collected 15 Iron Rune Data.

2. Look for the teleport rune called “Golem Transport – Top Level” at (73,73). Stand on the rune and use the Rocket Jump ability.

You will land on a platform with 3 Teleport Runes. Go to the middle one, called “Golem Transport – Level 2” and used the Rocket Jump ability.

Go to the cave just west of the landing spot.

Once inside the cave go deeper until you’re infront of a big statue of a titan.

Watch the script until you get the complete message.

3. Get out of the cave the same way you came from and take the lift east, it will take you back to the top. Go back to the Explorers’ League Outpost.

Turn in [71] Lightning Infused Relics and [71] The Delicate Sound of Thunder, get the follow up [71] News From the East.

Go to the loose rock a few steps southeast of Hidalgo the Master Falconer (75,66). Right-click it until you have 10 Fjord Grubs.

a70image16.jpg Put your Trained Rock Falcon on a hotkey.

We’re gonna look for Fjord Hawks, they’re found in pairs.

a70image26.jpg

Problem: When you use your Falcon on one of them, the other one attacks you and you can’t use your Falcon on it as long as you’re still in combat. The only option is to kill it or run away.
Solution: We run away, come back and capture the second hawk, then move to the next spot. (Of course, if your class got some sort of aggro reset, use it, it saves time).

a70circuit8.jpg

1. First Hawk Pair is right next to the Explorers’ League Outpost. Use your falcon and capture both Hawks.

2. Go north/northwest to the next Hawk Pair (74,60). Capture them both.

Then look up in the skies, there’s another Hawk Pair flying close to this spot every 15 seconds or so. Target one and wait for it to come close, then capture it. Run away and then capture the second hawk.

3. Keep going southwest to the next Hawk Pair (71,63). Capture Both

4. A little further west/southwest, past the road intersection, you should find another pair (68,64).

That should be 10 Hawks Captured now. If you’re missing some, then just restart this circuits and wait for respawns.

If you have any Fjord Grubs left in your inventory, destroy them for more bag space.

Go back to Hidalgo the Master Falconer and turn in [71] Falcon Versus Hawk, get [71] There Exists No Honor Among Birds.

5. Follow the road east to Stonewall Lift. When there, face south and you should see the Vrykul Hawk Roost (77,67).

a70image27.jpg

a70image16.jpg Stand next to it and right-click your Falcon.

Your action bar will be replaced by this one:

a70image28.jpg
  • Ability #1 is to pick up eggs.
  • Ability #2 is a speed boost, use it whenever it’s up to go to an egg.
  • Ability #3 is 6 second stun, use it on Hawk Matriarch if they attack you and then fly away

Fly down and look for Fjord Hawk Eggs, they are all over the bluffs.

a70image29.jpg

a70image30.jpg Once you have 8 eggs, click on the cancel button.

Go back to the Explorers’ League Outpost. Turn in [71] There Exists No Honor Among Birds.

Go talk to Walt and tell him you’re ready to go.
This will fly you to Westguard Keep.

FPicon.jpg Get the new flight path.

Go to the main keep southwest. Go to the upper floor and find Captain Adams.

Turn in [70] To Westguard Keep! and [71] News From the East, get [71] The Clutches of Evil.

Get out of the keep and go to the blue “!” on your minimap. Get the daily bombing mission [71] Break the Blockade.

Wait for the Zeppelin and get on it.

a70image31.jpg Put Petrov’s Cluster Bombs on a hotkey.
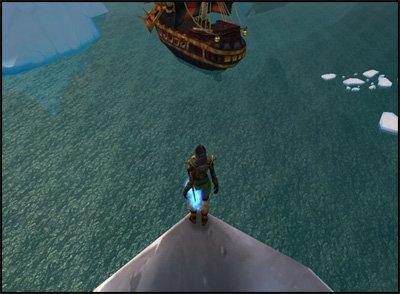
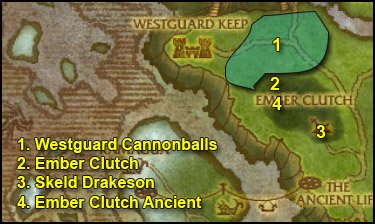
In my experience, it’s best to position yourself at the very tip of the zeppelin, switch to walk mode for safety (hit the / key on your numpad), like on the screenshot below:

a70image32.jpg

And then don’t move, just use your mouse’s left-click the rotate your camera, use the bombs and aim the green circle at the pirate canons. It’s best to aim for the canons, the pirates will die too in the process anyway.

If you don’t manage to complete the quest in one run, just stay on the zeppelin and do one more run.

Go back to Bombardier Petrov and turn in [71] Break the Blockade.

==Tip== You can repeat this quest everyday, it gives 20K exp everytime.

Sell junk, repair and re-stock food/drink.

Go to the Westguard Inn, get [71] Shoveltusk Soup Again?.

hs.jpg Make this inn your home location.

Go east and out of Westguard Keep, get the quest [71] One Size Does Not Fit All from Cannoneer Ely outside the gates.

a70circuit9.jpg

1. Go to the area south and east around the cannons, complete the following 2 objectives:

  • Kill ShoveltusksShoveltusk Calves and Shoveltusk Stags until you’ve looted 6 Shoveltusk Meat.
  • Gather 10 Westguard Cannonballs:a70image33.jpg

2. Go southeast to the Ember Clutch (37,47). Kill every Proto-Whelp on your way and destroy all Proto-Drake Egg you see.

a70image34.jpg

Find the Ember Clutch Ancient. It’s a big treant who patrols this area, he’s easy to find if you look for the yellow “!” on your minimap. Get his quest [71] Root Causes.

3. Clear the way towards the southeastern tip of the Ember Clutch. You’ll find a couple of buildings there and inside the back one you’ll find Skeld Drakeson (42,53). Kill him.

Around this building you should find plenty of Dragonflayer Handlers. Kill 5 of them.

4. Go back to the Ember Clutch Ancient, turn in [71] Root Causes.

Now kill what you still need for [71] The Clutches of Evil and then go back to Westguard Keep. Turn in [71] One Size Does Not Fit All.

Go to the main keep and turn in [71] The Clutches of Evil, get [71] Mage-Lieutenant Malister.
Turn in [71] Mage-Lieutenant Malister, get [71] Two Wrongs….

Go to the Westguard Inn, turn in [71] Shoveltusk Soup Again?.

a70circuit10.jpg

1. Go back to the Ember Clutch. Look up in the skies for Proto-Drakes.

a70image35.jpg Target a Proto-Drake and right-click Malister’s Frost Wand
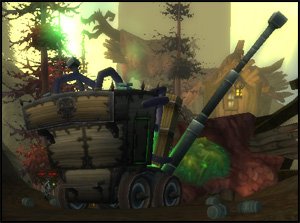
Kill the Proto-Drake. Repeat 3 times.

Go back to Westguard Keep, turn in [71] Two Wrongs… and get [71] Report to Scout Knowles.

Sell junk, repair and re-stock food/drink.

2. Get out of the keep, ride a little south and find Lunk-tusk (32,47), get [71] Orfus of Kamagua.

==Note== If he doesn’t give you that quest, it means you’ve been a very naughty guide follower and that you took the quest [71] The Dead Rise! even though I never mentioned you should take it. Abandon [71] The Dead Rise! and Lunk-Tusk will give you the quest.

3. Ride southeast to Ember Spear Tower (44,58 ). Find Scout Knowles, turn in [71] Report to Scout Knowles, get [71] Mission: Eternal Flame.

4. Ride northeast to the first Plague Tank (48,56).

a70image36.jpg

a70image37.jpg Right-click the Ever-Burning Torches while being 20 yard close to the plague tank.
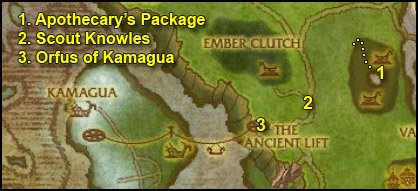
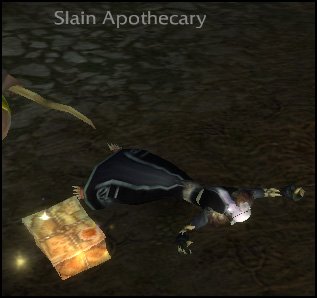
This should destroy it.

5. Ride a little north to the Northwest Plague Tank (48,53). Use the torch.

6. Ride north and then east around Halgrind, until the Northeast Plague Tank (51,50). Use the torch.

7. Ride south and then southwest around Halgrind until you find the Southeast Plague Tank (52,58 ). Use the torch.

Ride back to Scout Knowles, turn in [71] Mission: Eternal Flame, get [71] Mission: Package Retrieval.

a70circuit11.jpg

1. Go northeast to Halgrind, enter it by the northern path at (48,50). Then follow the path southeast towards the eastern tip of the pond, there you should find a Slain Apothecary and the Apothecary’s Package (51,54).

a70image38.jpg

Loot it.

2. Go back to Scout Knowles, turn in [71] Mission: Package Retrieval, get [71] Mission: Forsaken Intel.

3. Follow the road west to The Ancient Lift (40,60). Turn in [71] Orfus of Kamagua, get [71] The Dead Rise!.

h71circuit21.jpg

1. Ride southeast to Shield Hill (57,74).

2. First go southeast and look for a Mound of Debris inside a small pit at (58,77).

a70image39.jpg

Right-click it and loot Fengir’s Clue.

3. Go about 100 yard east to another pit, look for an Unlocked Chest (60, 77).

a70image40.jpg

Right-click it and loot Rodin’s Clue.

4. Go another 100 yard south/southeast to another pit. Look for a Long Tail Feather (60,80).

a70image41.jpg

Right-click it and loot Isuldof’s Clue.

5. Go about 150 yards east to a last pit, look for a Cannonball (62,80).

a70image42.jpg

Right-click it and loot Windan’s Clue.

Get back on the road and ride back to the Ancient Lift, turn in [71] The Dead Rise! and get [71] Elder Atuik and Kamagua.

Take the ancient lift (just stand on the Drakkar). This will take you to the Isle of Spears.

h71circuit26.jpg

1. Ride north to Kamagua (25,58 ).

FPicon.jpg Get the new flight path.

Turn in [71] Elder Atuik and Kamagua, get [71] Grezzix Spindlesnap.
Also get the other quest [71] Feeding the Survivors.

2. Go southeast to the colored area. There you’ll find Island Shoveltusks and Spearfang Worgs. You have to kill both, because if you don’t kill the worgs, they’ll killsteal the Shoveltusks from you. You can find Shoveltusks anywhere on the grass area of this isle, as colored on the map. You can also try to find the Shoveltuk Herd, they walk up and down the snow line:

a70image43.jpg

Kill stuff in this area until you have 6 Island Shoveltusk Meat.

Go back to Kamagua, turn in [71] Feeding the Survivors, get [71] Arming Kamagua.

3. Go to the snow hills south of the village (27,65). Kill Frostwing Chimaeras until you get 3 Chimaera Horns.

Go back to Kamagua, turn in [71] Arming Kamagua, get [71] Avenge Iskaal.

4. Swim southwest to a small boat with Grezzix Spindlesnap (23,63). Turn in [71] Grezzix Spindlesnap, get [71] Street “Cred”.

Talk to Lou the Cabin Boy and click on the text. He will ferry you to Scalawag isle.

Once you’re there, go north and find “Silvermoon” Harry under a tent, turn in [71] Street “Cred”, get the follow up [71] “Scoodles”.

Get [71] Forgotten Treasure from Handsome Terry.

h71circuit27.jpg

1. Swim southeast to (38,84). There you’ll find a big orca named “Scoodles”.

Kill it and loot the Sin’dorei Scrying Crystal.

a70image44.jpg Right-click the Fish Bladder in your inventory.
This will make you breathe underwater, it has 3 charges too, so you can re-use it if needed.

Now dive down and you should see 3 Wrecked Ships under you, go to the middle one (the only one who still got a mast). Go inside the ship and loot the Eagle Figurine (38,85):

a70image45.jpg

2. Swim to the other wrecked ship southwest of this one, go inside and loot the Amani Vase (37,85):

a70image46.jpg

3. Go back to the pirate camp. Turn in:

  • [71] Forgotten Treasure, get [71] The Fragrance of Money
  • [71] “Scoodles”, get the 4 follow ups:
    • [71] The Ancient Armor of the Kvaldir
    • [71] The Frozen Heart of Isuldof
    • [71] The Lost Shield of the Aesirites
    • [71] The Staff of Storm’s Fury

Get the quest [71] Gambling Debt from Taruk.

Go back to “Silvermoon” Harry. Talk to him, click on the text, beat him. After he gives up, talk to him again, click the text.

Go back to Taruk, turn in [71] Gambling Debt, get [71] Jack Likes His Drink.

Go inside the wooden building, talk to Olga, the Scalawag Wench. Click on the text and give her 1 Gold. Watch her drunk Jack Adams, once he passes out, right-click him and click on the text.

Go back to Taruk, turn in [71] Jack Likes His Drink, get [71] Dead Man’s Debt.

Go a little east and get [71] Swabbin’ Soap from Scuttle Frostprow (38,80)

h71circuit28.jpg

1. Follow the little path north, it will take you to a plateau with lots of Rabid Brown Bears (34,78 ). Kill them all until you have 4 Bear Musk (Drop rate is ~40%)

2. Swim northeast to a little isle with a ghost called Juniper on it (38,75). Wait for the boat there and get on it when it comes.

On the boat, turn in [71] The Lost Shield of the Aesirites, get [71] Mutiny on the Mercy.

Go down in the Ship’s Hold, kill 5 Mutinous Sea Dog and loot 5 Barrel of Blasting Powder off them.

Go back to Captain Ellis, turn in [71] Mutiny on the Mercy, get [71] Sorlof’s Booty.

Go to the other side of the ship where you should see The Big Gun.

a70image47.jpg

Wait for the ship to engage Sorlof and when it does, right-click The Big Gun repeatedly until Sorlof dies. Jump off the ship and loot Sorlof’s Booty.

a70image48.jpg

3. Swim north/northwest towards the ship docked on the southeastern side of the Isle of Spears (35,65).

==WARNING== Before you get close to the ship, read the next paragraph.

There’s a tough elite called Abdul the Insane on the ship, he’s immune to cc. You just have to avoid him, wait for him to go to the top deck and go down in the ship’s hold, where you’ll find The Staff of Storm’s Fury.

a70image49.jpg

Loot it.

Get out of the ship, run away from Abdul if he jumps you.

a70image50.jpg Right-click the Horn of Kamagua. This will summon a tuskarr to help you kill those pirates.
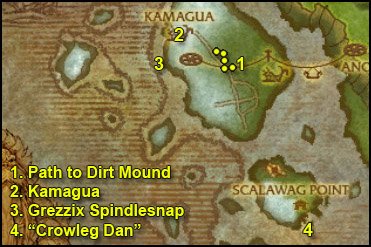
Kill 8 Crazed Northsea Slaver.

h71circuit29.jpg

1. Go northwest and find the way up a plateau at (29,61), then cross the bridge east to the next plateau. On that plateau you should find a Dirt Mound.

Get full HP/mana before you right-click it, cause you’ll get attacked by 3 ghost pirates when you do.

When ready, right-click the Dirt Mound, kill Black Conrad’s Ghost and loot Black Conrad’s Treasure.

2. Ride back to Kamagua, turn in [71] Avenge Iskaal.

==Note== If you didn’t follow my Borean Tundra guide, a new quest should be up in the village, get [72] Travel to Moa’ki Harbor. Don’t forget to turn it in next time you stop by Moa’ki Harbor, because I won’t mention it.

Sell junk, repair, re-stock food/drink.

3. Go southwest to Grezzix Spindlesnap (23,63) and once again talk to Lou the Cabin Boy and click on the text.

Back at Scalawag Point, turn in:

  • [71] A Dead Man’s Debt
  • [71] The Fragrance of Money, get [71] A Traitor Among Us
  • [71] A Traitor Among Us at Zeh’gehn, get [71] Zeh’gehn Sez
  • [71] Zeh’gehn Sez at Handsome Terry, get [71] A Carver and a Croaker

Look around for a Scalawag Frog and right-click it.

a70image51.jpg

Go to “Silvermoon” Harry and buy a Shiny Knife.

Turn in [71] A Carver and a Croaker, get the follow up [71] “Crowleg” Dan

4. Go to the docked ship just south of here, you’ll find “Crowleg” Dan on the top deck (36,83). Talk to him and kill him.

Go back to Handsome Terry and turn in [71] “Crowleg” Dan, get [71] Meet Number Two.

Go to the top of the wooden building, turn in [71] Meet Number Two, get [71] The Jig is Up.

h71circuit30.jpg

1. Follow the path north and then west to the other side of the isle. There in the water you should see Big Roy. Kill it and loot Big Roy’s Blubber.

2. Go northeast and you should find a cave entrance (33,75).

[71] The Jig is Up, one of the two quests we’ll do in this cave, can be easily soloed by classes who can kite or fear (like mages, warlock, hunter, maybe shadowpriests). It can also be soloed by melee classes with cooldowns/pots, depending on your gear and talent spec. It requires you to beat “Mad” Jonah Sterling down to 30% and then to kill Hozzer, a huge bear. They are both elite and hit kinda hard, but they can be slowed and stunned. Jonas can be feared as well, Hozzer is immune to fear though.

If you can’t solo it, try to find help. The rewards for this quest are:

Sailor’s Knotted Charm
First Mate’s Pocket Watch
Strike of the Seas

Don’t forget to loot Jonah Sterling’s Spyglass from Hozzer after you kill it.

If you can’t find help for this quest, just save it for later or abandon it, as you prefer. There’s no follow up so not a big deal.

We still have another quest to do in this cave, and it’s doable even if you can’t kill “Mad” Jonah Sterling.

Inside the cave, you just have to hug the left wall and you can go past “Mad” Jonah without aggroing him, don’t worry about Hozzer either, he’s sleeping, you can run past him and go to the end of the cave, where you’ll find The Frozen Heart of Isuldof.

a70image52.jpg

Loot it and get out of the cave.

Ride back to Scalawag Point. Turn in [71] The Jig is Up if you did it.

3. Go south to Alanya (36,82). She stands on the docks next to the flying machine. Talk to her and click on the text.

This will fly you to a small isle with a ghost ship. Go down in the ship’s hold and loot The Ancient Armor of the Kvaldir.

a70image53.jpg

Once you got it, go back to the flying machine fly back to Scalawag Point.

h71circuit31.jpg

1. Go east to Scuttle Frostprow, turn in [71] Swabbin’ Soap.

2. Go northeast, swim to the small isle and wait for the ghost ship to come. Then turn in [71] Sorlof’s Booty, get the follow up [71] The Shield of the Aesirites and get off the ship.

3. Swim northeast to Sorlof’s Strand, mount up and ride further northeast to the Westwind Lift (42,68 ). Take the lift.

4. Once up top, ride northwest to the Ancient Lift (40,60). Turn in the 4 quests:

  • [71] The Ancient Armor of the Kvaldir
  • [71] The Frozen Heart of Isuldof
  • [71] The Lost Shield of the Aesirites
  • [71] The Staff of Storm’s Fury

Get the follow up [71] A Return to Resting

h71circuit21.jpg

1. Go to Shield Hill and visit the four ghosts we visited before (58,77). Besides this time, you have to stand next to their skeleton.

a70image54.jpg

a70image55.jpg And right-click the Bundle of Vrykul Artifacts.

Do this on the 4 skeletons to complete [71] A Return to Resting.

When done, go back to The Ancient Lift, turn in [71] A Return to Resting, get [71] Return to Atuik.

Take lift down and ride to Kamagua, turn in [71] Return to Atuik.

Go to the Westguard Inn, turn in [71] Mission: Forsaken Intel, get [71] Absholutely… Thish Will Work!

Get out of the inn, mount up.
Go northeast and get [71] Send Them Packing from Explorer Abigail.
Go southwest and get [71] Danger! Explosives! from Sapper Steelring.

Go to the keep. Inside the keep, go straight ahead and slightly to the left and take the stairs going down.

a70image56.jpg Right-click Peppy’s Special Mix on the Dragonflayer Vrykul Prisoner.

Go back to the inn, turn in [71] Absholutely… Thish Will Work! and get [71] You Tell Him …Hic!.

Go back to the keep, go up to Captain Adams, turn in [71] You Tell Him …Hic! and get [71] Mission: Plague This!.

Go to the gryphon master Greer Orehammer, talk to him and click on the text.

a70image57.jpg Put the Orehammer’s Precision Bombs on a hotkey.
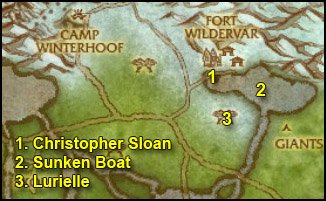
Destroy 5 Plague Tanks in New Agamand. You already know what they look like, it’s an easy bombing mission.

Go back to Captain Adams, turn in [71] Mission: Plague This! and get [71] Operation: Skornful Wrath.
Get out of the keep and get [71] Everything Must Be Ready from Quartermaster Brevin.

Sell junk, repair and re-stock food/drink.

Ride north to Steel Gate (30,29). Get the quests:

  • [71] The Cleansing
  • [71] Scare the Guano Out of Them!
  • [71] See to the Operations
  • [71] Where is Explorer Jaren?

Turn in [71] See to the Operations at the Steel Gate Archaeologist, just off the platform. Get the follow up [71] I’ve Got a Flying Machine!.

Get inside the Steel Gate Flying Machine. The Flying Machine doesn’t behave like a normal mount. It keeps going in one direction until you make it turn (hold your mouse right-click and move to do that). To land, you simply have to bump against the floor. For a quick take off, you can use the space bar.

Fly down and land next to one of those big sacks:

a70image58.jpg

Then use the Grappling Hook ability, this should hook the sack to your flying machine.

Hit your space bar to take-off and fly back up to the top. Land on one of those platforms with the red arrow above. This should deliver the sack.

Repeat this step 3 times.

Go back to the Steel Gate Archaeologist.

unmounticon.jpg Click the Leave Vehicle button.

Turn in [71] I’ve Got a Flying Machine! and get [71] Steel Gate Patrol.

Get back in the Flying Machine, kill 8 Gargoyles. No need to explain this quest, it’s quite easy and fun.

Go back to the Steel Gate Archaeologist, leave vehicle, turn in [71] Steel Gate Patrol.

==Note== This is a daily quest, you can re-do it everyday for extra reputation, exp and gold.

a70circuit13.jpg

1. Ride a long way east until Fort Wildervar (60,18 ).

In Fort Wildervar, get [70] I’ll Try Anything! from Christopher Sloan.

Dive in the water, look for Water Plants.

a70image60.jpg

Right-click the plant and a Forsaken Spy, a Caldemere Snapper, or a Northern Barbfish to spawn. What you want to spawn is the northern barbfish. In any case, keep opening plants and killing what spawns until you have 7 Northern Barbfish.

Go back to Christopher Sloan, turn in [70] I’ll Try Anything! and get the follow up [71] The One That Got Away.

Mount up, go into Fort Wildervar. First go to the west side of the town, get [71] The Yeti Next Door from Foreman Colbey.

FPicon.jpg Get the new flight path.

Go to the east side of the town, turn in [71] Everything Must Be Ready, get all the available quests:

  • [71] The Enigmatic Frost Nymphs
  • [71] The Book of Runes
  • [70] Down to the Wire
  • [70] Preying Upon the Weak
  • [72] March of the Giants

2. Jump into the lake southeast, swim towards the center of it and you’ll find a Sunken Boat (64,19).

a70image61.jpg Right-click the Fresh Barbfish Bait from your inventory.

Kill Frostfin.

Swim southwest until you’re out of the lake.

==Note== From now on, look for the following two things while going through the next steps.

=====Trapped Animals==== =-& ==Spotted Hippogryph Down

a70image62.jpg
a70image63b.jpg

3. Go a little further southwest to Lurielle (62,23). Turn in [71] The Enigmatic Frost Nymphs, get [71] Spirits of the Ice.

Kill 15 Ice Elementals and loot 15 Icy Cores. They can be found all around the Frozen Glade.

Go back to Lurielle, turn in [71] Spirits of the Ice, get [71] The Fallen Sisters and [71] Wild Vines.

a70circuit14.jpg

1. Ride east to the other side of the river, until you reach Giant’s Run (67,24).

Kill Every Iron Rune Stonecaller / Binder on your way, they drop the Book of Runes Chapters we need. Keep killing them until you’ve got Chapter 1, 2 & 3.

a70image64.jpg Then right-click one of the chapters to combine them together, you’ll get the Book of Runes.
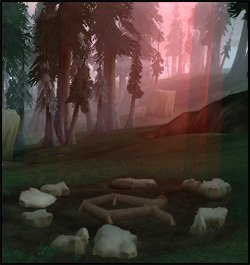
2. Now let’s find Runed Stone Giants. They spawn at various stone circles in Giant’s Run.

a70image65.jpg

Then they take a walk towards the snowy hills to the north, and they despawn there. It’s easiest to wait for them at the line where the snow starts (72,16).

They’re elite and rather tough, but can be kited and stunned. Melee classes will probably have troubles to solo them, so they should try to find help. You really must try hard to finish that quest, because it has several follow ups.

a70image66.jpg Whenever you kill a Runed Stone Giant, loot it, target its corpse and right-click the Runeseeking Pick.
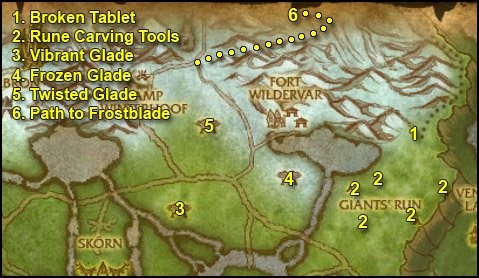
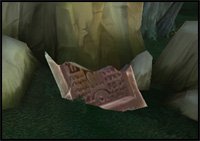
You can also kill Frosthorn Rams in the area while waiting for a Runed Stone Giant to show up, as you need their meat for another quest.

Once you have 4 Runed Stone Giant Corpse Analyzed and 4 Tough Ram Meat, move on to the next step.

3. Ride west back to Wildervar, turn in:

  • [71] The Book of Runes, get [71] Mastering the Runes
  • [72] March of the Giants, get [72] The Lodestone

You should be level 73 by now.


Level 73


a70circuit15.jpg

1. Ride east back to the spot where we fought Runed Stone Giants. A few steps south of the snow line you should see a Broken Tablet (72,17).

a70image67.jpg

a70image68.jpg Right-click the Rune Sample from your inventory while being close to the tablet.
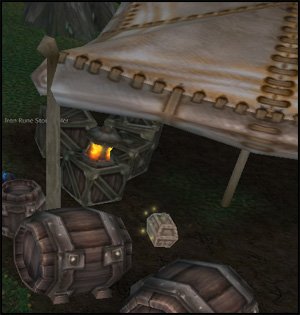
Watch the script and you should get a quest complete message.

2. Ride a long way south and slightly southwest until you find a canopy at (71,29). Under the canopy you should find the Iron Rune Carving Tools.

a70image69.jpg

If they are not there, try the other locations (shown as number “2” on the map). It’s always under a canopy.

3. Ride southwest until you hit the road, follow it west, cross the bridge and follow the road until the inverted “Y” intersection. At this point cut through the forest west until you reach the Vibrant Glade (53,27). We have 2 objectives to complete here:

  • Kill 8 Scarlet Ivy
  • a70image70.jpg Beat down a Chill Nymph below 30% health then use Lurielle’s Pendant. Repeat 7 times.

4. Ride east/northeast back to the Frozen Glade (62,23). Turn in:

  • [71] The Fallen Sisters
  • [71] Wild Vines

Get the two follow ups:

  • [71] Spawn of the Twisted Glade
  • [71] Seeds of the Blacksouled Keepers

5. Ride west/northwest to the Twisted Glade (55,19). Two objectives here as well:

  • Kill 10 Thornvine Creepers
  • a70image71.jpg Kill 8 Spores and use the Enchanted Ice Core on their corpse
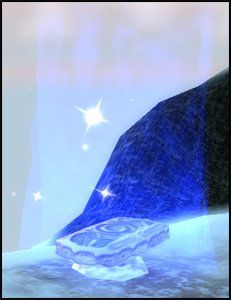
6. Go northeast until you hit the road, follow it northwest until you find a crossroad (53,8 ).

Take the small frozen path going up into the mountains. Follow this path all the way to the top (I warn you it’s long). There you’ll find the Frostblade Shrine.

a70image72.jpg

Right-click it and defeat Your Inner Turmoil.

Mount up. You have a 3 minute levitation buff now, so aim for Fort Wildervar (southwest) and levitate straight to it, cancel the levitation buff once you’re above the lake. Then go to Wildervar.

Turn in:

  • [71] Mastering the Runes, get [71] The Rune of Command
  • [72] The Lodestone, get [71] Demolishing Megalith

a70image73.jpg Right-click the Tough Ram Meat from your inventory.

Go on the west side of the town, follow the path west until you reach the Wildervar Mine (60,13). Go to the bottom of the mine where you’ll find Shatterhorn.

a70image74.jpg Right-click the Giant Yeti Meal.

Kill Shatterhorn.

Go back to the town, turn in [71] The Yeti Next Door.

Go south to Christopher Sloan (60,19). Turn in [71] The One That Got Away.

a70circuit16.jpg

1. Ride southeast to the Frozen Glade (62,23). Turn in:

  • [71] Spawn of the Twisted Glade
  • [71] Seeds of the Blacksouled Keepers

Get the follow up [71] Keeper Witherleaf.

2. Ride west/northwest, to the Twisted Glade (yes, again). This time we’re looking for a blue’ish centaur called Keeper Witherleaf.

a70image75.jpg

Kill him.

Go back to to the Frozen Glade and turn in [71] Keeper Witherleaf.

==Note== Now is your last chance to finish [70] Down to the Wire and
[70] Preying Upon the Weak.

3. Ride east to (72,25). There you should find Binder Murdis.

a70image76.jpg

Kill him.

4. Move a little northwest and you should find a Stone Giant (71,23). It looks just like a Runed Stoned Giant, besides it’s non-aggressive.

Now we’re going to solo [71] Demolishing Megalith, a 3-player quest. To do that, we’re going to use that Stone Giant as a pet. Here’s how:

a70image77.jpg Thanks to the Rune of Command we have from the other quest, we’ll make this stone giant our pet for 5 minutes.

After that, mount up, ride north towards the snowy hills while carefully avoiding any aggro. Go all the way up and at (70,12) you should see a snowy path going northwest (as shown on the map). Take this snowy path and you should find Megalith.

Then, let Megalith hit you once and let your stone giant pet tank for you. Give him time to build some aggro, wait till he’s down to 60% HP or so before you start attacking. With the help of the pet, any class should be able to solo megalith.

==Note== If you fail, you can go get a new stone giant pet and try again, every 5 minutes.

Good luck.

5. After you kill Megalith, go back to Fort Wildervar, turn in:

  • [71] Demolishing Megalith
  • [71] The Rune of Command
  • [70] Preying Upon the Weak
  • [70] Down to the Wire, get [71] We Call Him Steelfeather

a71image1.jpg Type /target Steel, you should get Steelfeather in target, then right-click the Feathered Charm.
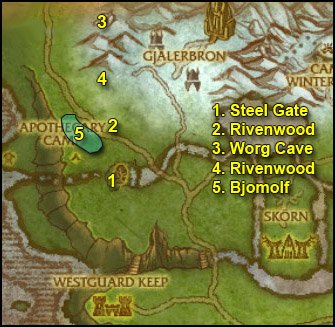
See through Steelfeather’s Eyes until you get the quest complete message.

Turn in [71] We Call Him Steelfeather

Sell junk, repair and re-stock food/drink.

Hearthstone to Westguard Keep.

a70circuit17.jpg

1. Get out and ride north to Steel Gate (30,29). Turn in [71] The Cleansing, get [71] In Worg’s Clothing.

2. Ride straight north until you enter Rivenwood (30,21). While going through Rivenwood, look up in the trees for Darkclaw Bat.

a71image2.jpg Put Feknut’s Firecrackers on an action bar and use it on the floor next to a tree with a Darkclaw Bat.
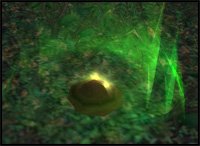
The bat will come and attack you, kill it. Then look on the floor for Darkclaw Guano, it should appear just where you threw the firecrackers.

a71image3.jpg

Right-click it and loot a Darkclaw Guano.

Keep going north while you do this, until you get out of the woods.

3. Once you’re out of the woods, mount up and ride north to a cave at (30,6).

a71image4.jpg Right-click the Worg Disguise from your inventory.
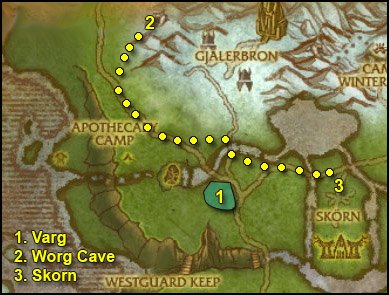
Go inside the cave, turn in [71] In Worg’s Clothing, get [71] Brother Betrayers.

4. Get out of the cave, mount up and ride back to Rivenwood. Get the Darkclaw Guano you still need while going south through the woods.

5. Once done, go to the woods on the other side of the road southwest (27,21). Put on the Worg Disguise and look for a Bjomolf. He’s easy to find, he’s the only agressive worg here while you have the disguise on. He’s also bigger and has a different color. Kill him.

Ride southeast back to Steel Gate. Turn in [71] Scare the Guano Out of Them!.

a70circuit18.jpg

1. Go to the woods southeast of Steel Gate (33,30). Put on the Worg Disguise and find Varg. Kill him.

2. Mount up and ride back all the way north to the cave. Put on the Worg Disguise, go inside the cave, turn in [71] Brother Betrayers, get [71] Eyes of the Eagle.

3. Get out, mount up and get back on the road. Follow it southeast until you reach West Spear Tower. Then, follow the road northeast until you reach Skorn (44,26).

a71image5.jpg Once you’re in Skorn, right-click the Westguard Command Insignia from your inventory.

Westguard Sergeant will spawn. Get the 3 quests he has:

  • [71] Towers of Certain Doom
  • [71] Gruesome, But Necessary
  • [71] Burn Skorn, Burn!

Go inside Skorn, kill things on your way.

a71image6.jpg Whenever you kill a Vrykul, loot it and then use The Sergeant’s Machete on their corpse.
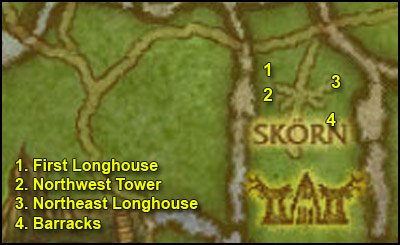
h71circuit9.jpg

1. Go a little southwest to the first longhouse on your right (44,28 ).

a71image7.jpg Go inside the longhouse and right-click the Sergeant’s Torch.

2. Just south of this you should see a tower, don’t get too close to it or the mages up there will shoot you. You just need to be 90 yards close.

a71image8.jpg Use the Sergeant’s Flare.

If you’re close enough, you should get the following quest update: “Northwest Tower Targeted“.

3. Go east to the opposite end of the village, where you’ll find the Northeast Longhouse (46,28 ). Go inside and use the Torch.

4. Go a little south and you’ll find the Barracks (46,30). Go inside and use the Torch.

a70circuit20.jpg

1. Go southwest and follow the trail going up. At the intersection go southeast.

2. A little further east you’ll find the East Tower (46,33). Use the Flare.

3. Go a little further south and you’ll find the Southeast Tower (47,36). Use the Flare.

4. Keep following the trail further south and then take a right turn, you’ll soon find The Thane’s Pyre (45,35).

a71image9.jpg

At this point, you should have found a Vrykul Scroll of Ascension from one of the Vrykuls you killed. If not, kill some more Vrykul until it drops.

a71image10.jpg Right-click the Vrykull Scroll of Ascension and get the quest [72] Stop the Ascension!.
Stand next to the pyre, right-click the Vrykull Scroll of Ascension and kill Halfdan the ice-Hearted.

5. Go southwest, take a right turn and you’ll find the Southwestern Tower (43,36). Use the Sergeant’s Flare.

You should also be done with [71] Gruesome, But Necessary. If not, kill some more Vrykuls and dismember them until you’re done.

Use your Westguard Command Insignia to summon the sergeant (not needed if he’s still with you).

Turn in:

  • [71] Towers of Certain Doom
  • [71] Gruesome, But Necessary
  • [71] Burn Skorn, Burn!

Get the follow up [72] All Hail the Conqueror of Skorn!.

6. Go south of the tower, close to the cliff edge, this is a safe spot. Watch the video below, it will show you where to jump down to get to the next quest.

Video: [71] Eyes of the Eagle

Once you open the egg, Talonshrike will swoop and attack you. Kill him and loot the Eyes of the Eagle. Basically reproduce what I did in the video and you’ll end up in the Whisper Gulch, where our next quests are.

7. If you followed the video till the end, you should be in Whisper Gulch (37,36).

Make a /raise macro. Whenever you see an Abandoned Pack Mule, target it and use your macro.

Also look for Whisper Gulch Ore.

a71image11.jpg

a71image12.jpg Use Steelring’s Foolproof Dynamite on the ores.
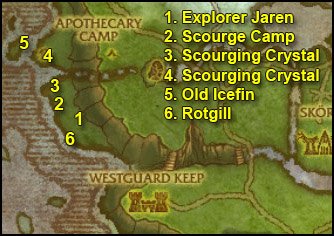
This will split the ore in little fragments which you have to loot.

Explore the Whisper Gulch until you complete [71] Danger! Explosives! and [71] Send Them Packing.

a70circuit21.jpg

1. Jump down in the water, swim west until you can get back on land. Then ride northwest until you find Explorer Jaren (23,33). Turn in [71] Where is Explorer Jaren? and get [71] And You Thought Murlocs Smelled Bad!.

2. Go a little northwest and you should find a scourge camp (22,31). Kill scourges until one of them drops a Scourge Device.

a71image13.jpg Right-click it to get the quest [71] It’s a Scourge Device.
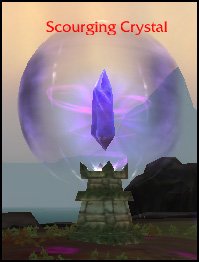
Go back to Explorer Jaren, turn in [71] It’s a Scourge Device, get [71] Bring Down Those Shields.

Go back towards the scourge camp, clear the way to the Scourging Crystal.

a71image14.jpg

a71image13.jpg Get close to it and use the Scourging Crystal Controller.

This will destroy the shield protecting the crystal, destroy it.

==Note== Pet classes, make sure you destroy the crystal yourself. If your pet does it, you won’t get the credit.

3. Go north to the next crystal (22,29). Destroy it.

4. Go north across the water and you should find another crystal. Destroy it.

5. Swim west to the isle. There you should find Old Icefin. Get his quest [71] Trident of the Son.

6. Swim back to the previous spot. From there go south along the coast and look for Rotgill. He patrols in between the wrecked ship at (23,35) and the murloc camp north of it (22,32).

a71image15.jpg

Kill Rotgill and loot Rotgill’s Trident.

Go back to Old Icefin, turn in [71] Trident of the Son.

Once done, go back to Explorer Jaren and turn in:

  • [71] And You Thought Murlocs Smelled Bad!
  • [71] Bring Down Those Shields

Hearthstone to Westguard Keep. Turn in:

  • [71] Send Them Packing
  • [71] Danger! Explosives! get [71] Leader of the Deranged

Go to the keep and turn in:

  • [72] Stop the Ascension!
  • [72] All Hail the Conqueror of Skorn!

Get all the follow ups:

  • [71] Dealing With Gjalerbron
  • [72] Of Traitors and Treason
  • [71] Of Keys and Cage

Sell junk, repair and re-stock food/drink.

Don’t turn in [72] Of Traitors and Treason, we’ll do that later.

a70circuit22.jpg

1. Ride north to Gjalerbron (35,15). Kill every Vrykul you see on your way and loot their keys. Open cages with those keys.

a71image16.jpg

If you’re lucky you might also get a Large Gjalerbron Cage Key, which you can use on the Large Gjalerbron Cage on the upper platform at (36,12). You can free up to 5 prisoners at once with this cage.

==Warning== A Sepulchral Overseer patrols this area, avoid him. It’s immune to cc and kinda hurts.

Stay here until you finish both quests and find the Gjalerbron Attack Plans.

a71image17.jpg Right-click them to start the quest [72] Gjalerbron Attack Plans.
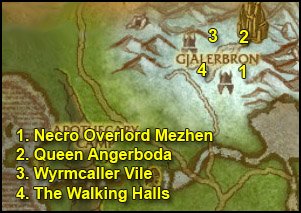
2. Ride northwest and then north to the cave at (30,6). Put on the Worg Disguise, go inside the cave, turn in [71] Eyes of the Eagle, get [71] Alpha Worg.

3. Go southwest and look for Garwal while being in the Worg Disguise. He patrols between (27,8 ) and (26,12) and (28,17). As shown on the map.

a71image18.jpg

Kill him

4. Go back to Steel Gate, turn in [71] Alpha Worg.

5. Ride south to a drop off point at (31,35). Jump down as shown in this video:

Video: [71] Leader of the Deranged – Shortcut

Go inside the cave and kill Squeeg Idolhunter.

6. Then just clear the way back to the top, or just ride out (use at your own risk).

Ride back to Westguard Keep. Turn in:

[71] Leader of the Deranged

Go inside the keep, turn in:

  • [71] Of Keys and Cage, get [71] In Service to the Light
  • [71] Dealing With Gjalerbron, get [71] Necro Overlord Mezhen
  • [72] Gjalerbron Attack Plans, get [72] The Frost Wyrm and its Master

Also get [71] Sleeping Giants from Mage-Lieutenant Malister.

Sell junk, repair and re-stock food/drink.

a70circuit23.jpg

1. Go back to Gjalerbron. Go up to the higher plateau and go northeast until you reach another higher plateau. Take a right turn and go up the east slope, you’ll end up on the rear right platform (38,12).

==Note== Kill Deathless Watchers and Putrid Wights on sight from now on.

Kill the 5 Necrolords guarding Necro Overlord Mezhen, they can be pulled solo. Then kill Necro Overlord Mezhen and loot Mezhen’s Writings.

a71img21.jpg Right-click them to start the quest [72] The Slumbering King.

2. Go to the big gate north of here. Enter the building and you should see a bunch of Necrolords trying to awake King Ymiron. Don’t worry, they can’t attack you. Clear the way around that platform and access it from the backdoor. There you should see Queen Angerboda. Kill her. You’ll see a little script involving Arthas.

3. Get out of this building and go west to the rear-west platform (37,8 ).

==Warning== We’re about to attempt to solo an elite frost wyrm. It should be doable for every class with normal gear, provided you use everything you got.

Clear the platform and kill Wyrmcaller Vile last, loot the Wyrmcaller’s Horn.

a71img20.jpg Right-click it and eat/drink quickly while the frost wyrm flies to you.

Glacion is immune to all forms of CC, you can’t even interrupt his spells. He hits for about 1000 on cloth and sometimes cast a frost breath which does about 800 damage. If you use all your cooldowns and a pot you should be fine. It might not even been needed depending on your class/gear.

Anyway, if you can’t solo this one, try to find a friend. If all fails, just abandon the quest and come back to do it later or at level 80. It has no follow up, so no big deal.

In any case, before you go to the next step, you must have killed 10 Deathless Watchers and 2 Putrid Wights. You know where to find them, on the side platforms. There are two other side platforms southwest of the two we just visited, should you run short on Deathless Watchers.

4. Go back to the entrance of Gjalerbron. This time go inside the building right at the entrance. This will take you down to The Walking Halls (35,13).

Go down, turn either left or right. You should have several Awakening Rods by now. At least 5. If you have less than 5, you’ll have to kill a few more Necrolords, and there are plenty in these halls.

a71image19.jpg Use the Awakening Rod on a Dormant Vrykul.
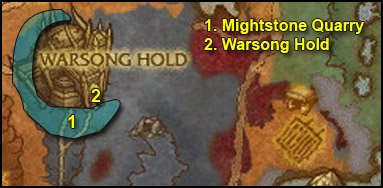
Once you’ve awakened 5 Dormant Vrykuls and slain 4 Fearsome Horrors, get out of this building.

Hearthstone back to Westguard Keep (or ride back if HS not up). Turn in:

  • [71] In Service to the Light
  • [71] Necro Overlord Mezhen
  • [72] The Slumbering King
  • [72] Sleeping Giants
  • [72] The Frost Wyrm and its Master (if you did it)

Sell junk, repair and re-stock food/drink.

Go to the Gryphon Master. Dismount.

Turn in [72] Of Traitors and Treason, get the follow up [72] High Commander Halford Wyrmbane.

This will fly you to Wintergarde Keep in Dragonblight.

Don’t worry if you’re not level 74 yet, it’s normal.

Move on to Dragonblight.

WoW WotLK Classic Horde 70-80 Leveling Guide: 72-74 Borean Tundra

You should be in Warsong Hold, Borean Tundra.

If you are not there, simply go to the zeppelin tower southwest of Orgrimmar. Take a zeppelin to Borean Tundra.

Once in Warsong Hold, get the quest [71] Hellscream’s Vigil.

In Warsong Hold you’ll find tradeskills trainers, so feel free to train new skills or to grab whatever tradeskill quest they might have for you. They are not included in the guide, you’ll have to figure this out on your own.

Go further down the stairs, turn in [71] Hellscream’s Vigil, get the follow up [71] The Defense of Warsong Hold.

hs.jpg Find the innkeeper and make Warsong Hold your home location.

Get out of Warsong Hold and turn left, find Overlord Razgor (43,55), turn in and get the follow up [71] Taking Back Mightstone Quarry.

On your minimap (if it’s totally zoomed out) you should see two new yellow “!“. Go get those quests:

  • [71] Taken by the Scourge
  • [71] Patience is a Virtue that We Don’t Need

Before we begin, you must know that every 30 minutes or so, waves of flying Nerub’ars will attack the barricades infront of Warsong Hold and the Warsong Captain will yell: “Marksmen! Front and center! Scourge attacking incoming!

About 10 minutes after that, a boss will come and yell, so keep an eye on your chat log for this message: “Ith’rix the Harvester yells: I will take great pleasure in tearing the forces of the Horde apart… limb from limb and piece by piece…

When you see that, go back quickly to the main gate (43,57) and help the NPCs kill Ith’rix (or just watch), until he dies. After he’s dead, Ith’rix’s Hardened Carapace will appear on the floor. Loot it. Right-click it to start the quest [71] What the Cold Wind Brings…


Now let’s get started!

h72circuit1.jpg

1. Go down in the Mightstone Quarry, we have 3 objectives here:

  • Kill 15 Nerub’ar on your way
  • Look for Warsong Munitions Crate – Loot 15h70guide1.jpg
  • Look for Nerub’ar Victims – Destroy the cocoons and free 5 Warsong Peonsh70guide2.jpg

2. When done with all that, go back to Warsong Hold, turn in:

  • [71] Taken by the Scourge
  • [71] Patience is a Virtue that We Don’t Need, get [71] Bury Those Cockroaches!
  • [71] Taking Back Mightstone Quarry, get [71] Cutting Off the Source

Also get [71] Untold Truths from Shadowstalker Barthus.

h72circuit2.jpg

1. Jump down in the pit to the left of the barricades and you’ll find a hole blocked by webs (44,57).

h70guide4.jpg

h70guide5_0.jpg Right-click the Seaforium Depth Charge Bundle from your inventory while standing on the webs.
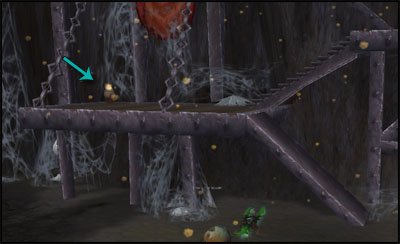
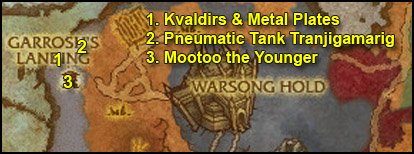
2. Get out of this pit and go a few paces southwest until you find some scaffolds at (43,59). You should find Nerub’ar Egg Sacs there. Destroy them.

h70guide3.jpg

There’s more of those scaffolds just a few paces southwest of this one. If you destroy all eggs on both scaffolds you should be done with the quest.

3. Go directly northwest of the scaffolds for about 20 paces and you’ll find the Southern Nerub’ar Sinkhole (42,58). Blow it up.

4. Follow a narrow path northwest until you find the next Nerub’ar Sinkhole at (40,53). Blow it up.

Right next to this hole you should find the corpse of Shadowstalker Luther. Turn in [71] Untold Truths, get [71] Nerbu’ar Secrets

5. A little northeast you should find the last Nerub’ar Sinkhole (41,50). Blow it up.

6. Go back to Warsong Hold, turn in:

  • [71] Bury Those Cockroaches!
  • [71] Cutting Off the Source, get [71] Wind Master To’bor
  • [71] Nerbu’ar Secrets, get [71] Message to Hellscream

Go inside Warsong Hold, turn in:

  • [71] What the Cold Wind Brings…
  • [71] Message to Hellscream, get the [71] Reinforcements Incoming…

While you’re here, also get those three other quests:

  • [71] To Bor’gorok Outpost, Quickly!
  • [71] Ride to Taunka’le Village
  • [71] Too Close For Comfort

Go up the stairs and take the lift up.

FPicon.jpg Once at the top of the fortress, get the new flight path.

Go southeast to Wind Master To’Bor. Turn in [71] Wind Master To’bor, get [71] Magic Carpet Ride.

Go talk to Yanni, a blood elf standing nearby. Ask him to send you to Garrosh’s Landing.

After landing, turn in [71] Magic Carpet Ride, get [71] Tank Ain’t Gonna Fix Itself.

Turn in [71] Tank Ain’t Gonna Fix Itself immediately at Mobu. Get the 2 follow ups:

  • [71] Mobu’s Pneumatic Tank Transjigamarig
  • [71] Super Strong Metal Plates!

Also get the other quests:

  • [71] Into the Mist
  • [71] Horn of the Ancient Mariner
h72circuit3.jpg

1. Go north and enter the mist. Kill every Kvaldir you find on your way, they drop the Tuskarr Relics we need.

Also pick up Super Stronge Metal Plates on the way:

h70guide6.jpg

2. Keep going north until you get to a hut at (32,49). Inside it you’ll find a Pneumatic Tank Transjigamarig. Loot it:

h70guide7.jpg

Now just stay in this area and kill stuff until you finish:

  • [71] Into the Mist
  • [71] Super Strong Metal Plates!
  • [71] Horn of the Ancient Mariner (the Horn of the Ancient Mariner can only drop from Kvaldir Mistweavers)

3. Go to the building at (32,52), where you should see a yellow “!” labelled as Mootoo the Younger. If you don’t see it, it means someone else is on the escort quest, so just kill things in the area while waiting.

Get the quest [71] Escaping the Mist, escort Mootoo back to Garrosh’s Landing.

Turn in the 5 quests:

  • [71] Into the Mist, get [71] Burn in Effigy
  • [71] Mobu’s Pneumatic Tank Transjigamarig
  • [71] Super Strong Metal Plates, get [71] Tanks a lot…
  • [71] Horn of the Ancient Mariner, get [71] Orabus the Helmsman
  • [71] Escaping the Mist

Finally, turn in [71] Tanks a lot… at Gorge the Corpsegrinder and get [71] The Plains of Nasam.

h72circuit4.jpg

1. Mount up, go west/northwest until you find the first ship you need to burn, Bor’s Hammer (30,53)

h70guide8.jpg

h70guide9.jpg Right-click the Turskarr Torch while standing close to the ship to burn it.
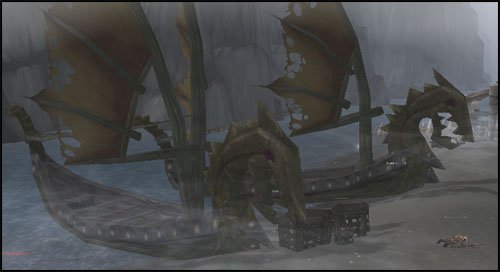
2. A little further north you’ll find two other ships, The Kur Drakkar and The Serpent’s Maw. Burn them both.

h70guide10.jpg

3. Ride south along the coast until Warsong Jetty (30,57). Go west towards the end of the jetty.

h70guide11.jpg Use the Horn of the Ancient Mariner while standing at the very edge of the jetty, but your feet must not touch the water though.
When you use the horn, a Drakkar will come. You’ll have to fight the crewmen first and then Orabus. Kill him and you’ll complete the quest [71] Orabus the Helmsman.

4. Get off the jetty and go a little south, you’ll find the last boat you need to burn at (30,62)Bor’s Anvil.

h70guide12.jpg

Burn it.

5. Go back to Garrosh’s Landing, turn in:

  • [71] Burn in Effigy
  • [71] Orabus the Helmsman, get [71] Seek Out Karuk!

Time for a fun quest now.

Right-click one of the Horde Siege Tanks.

h70guide13.jpg

Your action bars will be replaced by the following bar:

h70guide14.jpg

Ability #1 is rather difficult to use, because you have to aim your cannon properly. I’d recommend to set your cannon like this:

h70guide15.jpg

That way, when you use Ability #1, you’ll shoot directly infront of you, and it’s nice to get rid of bunch of mobs attacking you (they’re all melee types). Anyway, it costs a lot of mana for what it does, other abilities are better.

Ability #2 is great. Use it when you’re overwhelmed and drive around so mobs step onto your mines and blow up. It costs a lot of mana though.

Ability #3 is cheap but doesn’t do much damage. It’s just a frontal attack for about 3-4K damage. Use it when other abilities are on cooldown.

Ability #4 is the best. Just rush into a bunch of mobs and use it, let it channel fully 🙂

Ability #5 is to pick up Injured Warsong Soldiers. They are rather small in comparison to you, so you have to look out for them:

h70guide16.jpg

When you find one of them, go next to it, target it and use Ability #5 to rescue it.

Other things you need to know:

  • The tank’s abilities cost mana. To replenish your tank’s mana, you have to drive over barrels. There are a lot of those barrels scattered across the field
  • If your tank gets destroyed, just go back to Garrosh’s Landing and get a new one
  • To finish the mission, you need to kill 100 Scourge minions, rescue 3 Injured Warsong Soldiers but you also need to identify the leader of the scourge. He’s very easy to find, it’s Kel’Thuzad, he stands on the platform in the middle of the field. Just drive close to him and you’ll get the quest update

With that said, have fun completing this quest.

Once you’re done, stay in the tank and go further southeast past the battle field. When you are out of the battle, you’ll get a warning “Ejection Imminent“.

unmounticon.jpg When you see this message, click on the “Leave Vehicle” button.

a71circuit16.jpg

1. After landing with a parachute, you should be in an area called the Bloodspore Plains. Go east to Karuk (47,75). Turn in [71] Seek Out Karuk! and get the follow up [71] Karuk’s Oath.

2. Go down to Riplash Strand and go west until you see a Captured Tuskarr Prisoner, fighting a naga at (44,78).

h70guide17.jpg

Help the tuskarr to kill the naga and he’ll give you a quest [71] Cruelty of the Kvaldir.

Now kill what you still need for [71] Karuk’s Oath.

Go back to Karuk, turn in [71] Cruelty of the Kvaldir and [71] Karuk’s Oath, get the follow up [71] Gamel the Cruel.

3. Go south to a cave at (46,79). Go inside and kill Gamel the Cruel.

Go back to Karuk, turn in and get the follow up [71] A Father’s Words.

4. Go precisely southwest to Veehja (44,80).

h70guide18.jpg

Turn in and get the follow up [71] The Trident of Naz’jan.

5. Swim east/southeast towards a big tower far in the distance. There you’ll find a spot where you can jump out of the water, as shown on the image below:

h70guide19.jpg

From there you’ll see some stairs to your left.

At the top of those stairs you’ll find Ragnar Drakkarlund. Kill him and loot the Trident of Naz’jan.

6. Swim west/northwest back to Veehja, turn in [71] The Trident of Naz’jan, get the follow up [71] The Emissary.

7. Go back to spot 5.

h70guide20.jpg Look in your inventory for the Trident of Naz’jan, put it on an action bar.
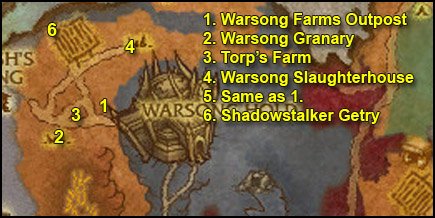
This time instead of going up on the isle, we’re going to swim down and look for Leviroth, a big monster at the bottom of the sea. Make sure your breath is full before you dive in.

Use the Trident of Naz’jan on Leviroth and then finish him off.

When done with that, swim northwest back to the mainland, go to Karuk and turn in [71] The Emissary.

Hearthstone back to Warsong Hold, go to Garrosh Hellscream and turn in [71] The Plains of Nasalm.

Sell junk, repair and restock food/drink.

You should be level 72 by now if you followed my previous chapter.


Level 72


h72circuit5.jpg

1. Get out of Warsong Hold, go west to Warsong Farms Outpost (38,52), turn in [71] Reinforcements Incoming, get all 3 quests from here:

  • [71] The Warsong Farms
  • [71] Merciful Freedom
  • [71] Damned Filthy Swine

==Note== From now on, kill Unliving SwinesWarsong Aberrations and En’kilah Necrolords on your way, until you have:

  • 10 Unliving Swine kills
  • 5 Scourge Cage Keys

Also, once you have a key, if you run near a Scourge Prison, right-click it to free the prisoner.

h70guide21.jpg

2. Go west/southwest to the Warsong Granary (35,55).

Get close to it until you get the “Scout Warsong Granary” quest update.

3. Go northeast to Torp’s Farm (36,53).

Scout it.

4. Go further northwest to the Warsong Slaughterhouse (39,48).

Scout it.

5. Get 10 Unliving Swine kills and free 5 prisoners, then go back to Warsong Farms Outpost and turn in the 3 quests, get the follow ups:

  • [71] Bring ’em Back Alive
  • [71] Get to Getry

You’re on a quest timer now, so we need to hurry. Go find an Infected Kodo Beast.

h70guide22.jpg

h72imgx1.jpg Target it and right-click Torp’s Kodo Snaffle.

  • Use Ability #1 to sprint
  • Ride back to Torp
  • Use Ability #2 to deliver the kodo once you’re at Torp

Repeat this 8 times and then turn in [71] Bring ’em Back Alive.

If you fail, you can abandon the quest and restart it.

6. Mount up, ride northwest to a guard tower at the edge of the plains (35,46).

Up top you’ll find Shadowstalker Getry, turn in [71] Get to Getry, get the follow up [71] Foolish Endeavors.

Help Getry defeat Varidus the Flenser. Saurfang will help, let him tank. If you get low on health, just back off and let saurfang take care of the rest.

7. Ride back to Warsong Hold, turn in [71] Foolish Endeavors, get the follow up [71] Nork Bloodfrenzy’s Charge.

Get out by the southeastern gate, check your minimap and go to the yellow “?“. Turn in [71] Nork Bloodfrenzy’s Charge and get [71] Coward Delivery… Under 30 Minutes or it’s Free.

h72circuit6.jpg

1. Follow the path north to get out of Mightstone Quarry, then keep following the trail eastwards. Make sure the Alliance Deserter is still following you. Keep following the trail until you reach a crossroads at (55,51).

h70guide23.jpg Use the Warsong Flare Gun.

Wait here until you get the quest complete message.

2. Go back the way you came from and you should find Scout Tungok on the trail (53,52). Turn in and get the follow up [71] Vermin Extermination.

==Note== From now on, kill all the Bloodspore HarvestersFirestarters and Roasters on your way, until you get the required amount of kills.

3. Go a little southwest to Bloodmage Laurith (52,53). Get her quest [71] The Wondrous Bloodspore.

Gather 10 Bloodspore Carpels, they can be found all around this camp and look like this:

h70guide24.jpg

When done with that, go turn in at Bloodmage Laurith, get the follow up [71] Pollen from the Source.

Kill Bloodspore Moths in this area until you finish the quest.

Go back to Bloodmage Laurith, turn in and get the follow up [71] A Suitable Test Subject.

h70guide25.jpg Right-click the Pollinated Bloodspore Flower.

After 10 seconds, you’ll be able to turn in the quest, get the follow up [71] The Invasion of Gammoth, which you can turn in immediately at the other NPC here, Primal Mighthorn. Get the follow up [71] Gammothra the Tormentor.

4. Ride southwest until you find a big cave entrance at (50,59).

h70guide26.jpg Put the Pouch of Crushed Bloodspore on an action bar.

Go inside the cave, if a Magnataur gets in your way, use the Pouch of Crushed Bloodspore on it and it will become easy to kill. Clear the spiraling way down, all the way down till you find Gammothra the Tormentor in a cavity on your left-hand side.

h70guide27.jpg

Use the pouch on him and kill him. Loot the Head of Gammothra.

5. Get out of the cave and check your minimap, you should see a yellow “!” labelled “Massive Glowing Egg“. To get there, go a little north until you find a small path to your left (50,55). Follow that path a little and take the slope going up, on your right-hand side:

h70guide27b.jpg

At the top of the slope turn left and from there just go south around the ledge and then southeast until you find the Massive Glowing Egg.

h70guide28.jpg

Right-click it to get the quest [71] Massive Moth Omelet?

6. Kill Bloodspore HarvestersFirestarters and Roasters on your way back to Bloodmage Laurith, until you finish [71] Vermin Extermination.

Turn in:

  • [71] Gammothra the Tormentor, get [71] Trophies of Gammoth
  • [71] Massive Moth Omelet?

Go a little northeast to Scout Tungok and turn in [71] Vermin Extermination.

Ride back to Warsong Hold. Turn in [71] Trophies of Gammoth, get the follow up [71] Hellscream’s Champion.

Sell junk, repair and re-stock food/drink.

Go to the stables southwest of Garrosh Hellscream. Talk to Durkot Wolfbrother and tell him “I am ready to leave, Durkot.

The wolf will take you to Taunka’le Village.

FPicon.jpg When there, get the new flight path.

Turn in [71] Ride to Taunka’le Village and [71] Hellscream’s Champion. Get all the available quests from this village:

  • [71] Load ‘er Up!
  • [71] Sage Highmesa is Missing
  • [71] Scouting the Sinkholes
  • [71] What Are They Up To?
h72circuit7.jpg

1. Mount up, go west to the Geyser Fields, where you’ll find the first Sinkhole (70,37):

h70guide29.jpg

h70guide30.jpg Stand on it and right-click the Map of the Geyser Fields.

2. Go north to the 2nd Sinkhole (70,32). Mark it.

3. Go west to the 3rd Sinkhole (66,33). Mark it.

4. Go southwest and you’ll find a Crashed Recon Pilot (64,36):

h70guide31.jpg

Get the quest [71] Emergency Supplies.

5. Now look for Fizzcrank Recon Pilots, they look exactly like the other gnome we just took a quest from.

Right-click them and search their bodies to get Emergency Toolkits.

They can be found in the southern half of the Scalding Pools, as shown on my map. You can do that while staying mounted, even if attacked. Gather 7 Emergency Toolkits.

6. When done with that, mount up and go towards the Fizzcrank Pumping Station (64,23) until you get a quest update for [71] What Are They Up To?

h70guide32.jpg

7. Go back to where we found the Crashed Recon Pilot. Close to it you should see a Wrecked Flying Machine.

h70guide32b.jpg

h70guide33.jpg Stand next to it and right-click Jenny’s Whistle.

Mount up, go south until you hit the trail and then ride east back to Taunka’le Village while avoiding monsters and making sure the mule keeps on following you.

Turn in:

  • [71] Scouting the Sinkholes, get [71] The Heart of the Elements
  • [71] What Are They Up To?, get [71] Master the Storm
  • [71] Load ‘er Up!
  • [71] Emergency Supplies, get [71] The Power of the Elements from Dorain Frosthoof, who stands next to the goblin.

In the hut behind where Sage Earth and Sky stands, you should see a Storm Totem.

h70guide34.jpg

Right-click it and defeat the Storm Tempest.

Turn in [71] Master the Storm, get [71] Weakness to Lightning.
Two additional quests should have popped on your minimap, get them both:

  • [71] Cleaning Up the Pools
  • [71] Souls of the Decursed
h72circuit8.jpg

1. Go west to the Steam Springs (74,39) where you should see several Steam Ragers.

h70guide34b.jpg Right-click the Windsoul Totem and kill Steam Ragers close to it. If you’re close enough, the totem should cast a blue ray towards the mob.

There are more Steam Ragers to be found all across the Steam Springs, as shown on my map. Re-summon the totem whenever needed and collect 10 Energy.

When done, go back to Taunka’le Village, turn in [71] The Power of the Elements, get [71] Patching Up

==Note== Kill Marsh Caribous on your way from now on, until you get 5 Uncured Caribou hide

2. Go southeast until you hit the shore (84,47). Kill Frozen Elementals along this shore until you have 5 Elemental Hearts.

3. Go back to the area with Marsh Caribous, as shown on my map. Kill Caribous until you have 5 Uncured Caribou hides.

4. Go to Wind Tamer Barah (76,36), she’s just northwest of Taunka’le Village. Turn in [71] The Heart of the Elements, get [71] The Horn of Elemental Fury.

5. Go northeast to the Gorloc camp. You should find Chieftain Gurgleboggle there (78,29):

h70guide35.jpg

Kill it and loot Gurgleboggle’s Key.

In the pond nearby you should see Gurgleboggle’s Bauble.

h70guide36.jpg

Right-click it and loot the Lower Horn Half.

h72circuit9.jpg

1. Ride southwest and find a steam vent at (75,32):

h70guide36b.jpg

h70guide36c.jpg Stand on the steam vent and right-click your Uncured Caribou hides 5 times.

2. Go northwest to the area around the Fizzcrank Pumping Station. There are 3 things we neeed to do here:

  • h70guide37.jpg Use Sage’s Lightning Rod on robots in this area and kill them. Do this 15 times
  • h70guide38.jpg Kill Fizzcrank Mechagnomes, loot them and then use The Greatmother’s Soulcatcher on their corpse. Do this 10 times. You can find a lot of those gnomes on the Pumping Station itself
  • Pick up 15 Fizzcrank Spare Parts:h70guide39.jpg

All of this can be done in the large area I colored on the map.

3. Ride a long way south to a gorloc camp at (68,40). You should find Chieftain Burblegobble there:

h70guide40.jpg

Kill him, loot his key and then right-click Chieftain Burblegobble’s Bauble, which should be in the pond nearby.

Loot the Upper Horn Part.

4. Ride east back to Taunka’le Village. Turn in:

  • [71] Cleaning Up the Pools
  • [71] Weakness to Lightning, get [71] The Sub-Chieftains
  • [71] Patching Up
  • [71] Souls of the Decursed, get [71] Defeat the Gearmaster

Sell junk, repair and re-stock food/drink.

Get [71] Shrouds of the Scourge from Chieftain Wintergale.

hs.jpg Go to the inn and make it your home location.

Go to Wind Tamer Barah northwest of the village, turn in [71] The Horn of Elemental Fury. She’ll do a little ritual and then give you the follow up [71] The Collapse.

h72circuit10.jpg

1. Ride west to the Southern Sinkhole we marked earlier (70,37).

h70guide41.jpg Right-click the Horn of Elemental Fury.

Lord Kryxix will show up shortly after, kill him.

2. Ride northwest to South Point Station (65,29). Right-click the South Point Station Valve:

h70guide42.jpg

The Grinder will spawn, kill it.

3. Ride northwest to West Point Station (60,20). Click the valve, kill Twonky.

4. Ride northeast to North Point Station (65,18). Click the valve, kill ED-210.

5. Ride south to Mid Point Station (64,22). Click the valve, kill Max Blasto.

6. Go to the top of the Fizzcrank Pumping Station (you can access it by a ramp on the northeastern side of the station). In a small cabin at the top of the station, you’ll find The Gearmaster’s Manual:

h70guide43.jpg

Loot it.

Gearmaster Mechazod will spawn behind you and talk to you. After he’s done, kill him and loot Mechazod’s Head.

7. Get off the platform and ride a long way east until you find Sage Highmesa (75,23).

Turn in [71] Sage Highmesa is Missing, get [71] A Proper Death.

h72circuit11.jpg

1. Go east toward the snowy hills, kill Scourged Mammoths and Plagued Magnataurs until you finish [71] Shrouds of the Scourge and [71] A Proper Death.

2. Go back to Sage Highmesa, turn in [71] A Proper Death, get [71] Stop the Plague.

3. Ride northeast to the Dens of Dying (78,19). You should see a Plague Cauldron inside the cave.

h70guide44.jpg Stand close to the cauldron and right-click Highmesa’s Cleansing Seeds.

Ride back to Sage Highmesa, turn in [71] Stop the Plague, get:

  • [71] Find Bristlehorn
  • [71] Fallen Necropolis

4. Ride northwest until the necropolis of Talramas. Find the lower entrance on the southwestern side of the necropolis (69,15).

From there stick to the left, go up a small balcony and find Longerunner Bristlehorn in a cage.

h70guide45.jpg

Turn in [71] Find Bristlehorn, get [71] The Doctor and the Lich-Lord.

5. Get out of Talramas and ride to the other side of it (northern side), you should see Lich-Lord Chillwinter on the top of the necropolis. Kill him.

From there, look down in the room below and you should see Doctor Razorgrin. Jump down and kill him.

Now just kill stuff around here until you finish [71] Fallen Necropolis.

Go back to Sage Highmesa, turn in:

  • [71] Fallen Necropolis
  • [71] The Doctor and the Lich-Lord, get the follow up [71] Return with the Bad News

6. Hearthstone back to Taunka’le Village, turn in:

  • [71] Return with the Bad News
  • [71] Defeat the Gearmaster
  • [71] The Sub-Chieftains
  • [71] Shrouds of the Scourge, get [71] The Bad Earth
  • [71] The Collapse

Sell junk, repair and re-stock food/drink.

You can destroy the Legend of the Horn for more inventory space.

h72circuit12.jpg

1. Ride northeast towards the Temple City of En’Kilah and look for Scourged Earth:

h70guide46.jpg

They can be found all around the city of En’Kilah, west and south of it.

Gather 8 of them, go back to Taunka’le Village.

Turn in [71] The Bad Earth, get [71] Blending In.

2. Go back to the Temple City of En’Kilah. Go inside this time.

h70guide47.jpg Put on the Imbued Scourge Shroud.

==Note== You can mount up while invisible.

You’ll be invisible to everything in En’Kilah now besides to Abominations, so just try to stay away from those. If they detect you, just kill them and then re-equip the cloak.

Go east to the Spire of Pain (89,29). Go inside and explore until you get the “Spire of Pain Scouted” message.

3. Go west back towards the main stairs and go northeast to the Spire of Blood (88,21), you’ll probably have to kill an abomination to get there.

When there, climb to the top of it using the outdoor stairs, explore the spire until you get the “Spire of Blood Scouted” message.

4. Get out and go west to the Spire of Decay (84,22), go inside and explore until you get the quest update.

5. Get out of En’Kilah, re-equip your normal cloak and ride back to Taunka’le Village.

Turn in [71] Blending In, get [71] Word of Power.

Also get the two newly available quests:

  • [71] Neutralizing the Cauldrons
  • [71] A Courageous Strike
h72circuit13.jpg

1. Go back to En’Kilah.

This time, no sneaking around, kill stuff on the way, especially Ghouls.

First go east to the Spire of Pain (89,29).

Go inside, kill the two Mystical Webbing and then kill High Priest Talet-Kha. Loot High Priest Talet-Kha’s Scroll.

2. Get out of the spire and look towards the south, you should see a Scourge Cauldron:

h70guide48.jpg

h70guide49.jpg Get close to it and use Sage Aeire’s Totem.

3. Now we’re going to look for a Darkfallen Bloodbearer:

h70guide49b.jpg

He patrols between the Spire of Blood (88,22) and the entrance, as shown by the green dots on my map.

Kill him and loot the Vial of Fresh Blood. Right-click it to start the quest [71] The Spire of Blood.

4. Go inside the Spire of Blood’s lower floor and find Snow Tracker Grumm. Turn in [71] The Spire of Blood, get [71] Shatter the Orbs.

Now destroy 5 En’kilah Blood Globe. They can be found in this spire:

h70guide50.jpg

Go to the upper floor, kill the boss and loot High Priest Andorath’s Scroll.

5. Get out of the Spire of Blood, just a little southwest you should see another Scourge Cauldron (86,23). Use the totem to cleanse it.

6. A little northwest you should find the last Scourge Cauldron (85,20). Cleanse it.

7. Go to the Spire of Decay, kill the necromancers and then the boss. Loot High Priest Naferset’s Scroll.

Now just kill Ghouls and Necromancers until you finish [71] A Courageous Strike.

8. Go back to Taunka’le Village. Turn in:

  • [71] Shatter the Orbs
  • [71] Neutralizing the Cauldrons
  • [71] A Courageous Strike
  • [71] Word of Power, get the follow up [71] Breaking Through

[71] Breaking Through is a quest most classes won’t be able to solo, depending on gear as well. It can be duo’d easily if one of the two classes can heal (a Death Knight tanking and self healing also works). Bringing 3+ players will make it a breeze though. If you don’t find help immediately, just skip the next part and go on with the guide. Just come back and read this part once you find a group for breaking through.


[71] Breaking Through

After entering En’kilah. Look to your right and you’ll find the teleporter:

h70guide51.jpg

Step on it and you’ll enter Naxxanar. If you want to get out, simply step on the green teleporter, right next to where you arrived.

Vanthryn the Merciless

Go to the northwestern room and kill Vanthryn the Merciless. He’s elite but should be soloable if you use your cooldowns. He’s just a melee mob, doesn’t do anything special. He can be stunned and snared. Just make sure you pull him solo, there’s a gargoyle behind him sometimes, just wait till it goes away.

Luthion the Vile

Next, go to the northeastern wing and kill Luthion the Vile. He’s the same as Vanthryn.

Prince Valanar

Go back to the center of the room and take the upper teleporter (the blue one). It might take a while to activate depending on lag, so just jump around on the teleporter until it works. Once you’re up, take one of the small doors and go to the upper floor, clear the way to Prince Valanar, he’s on the northwestern alcove.

Abilities

  • Immune to Stuns or to any form of cc
  • Immune to any form of spell interruption
  • Shadowbolts for 2K and hits fairly hard. You can try to use line of sight to avoid his shadowbolts.
  • a73img25.jpg !!Soul Deflection!! Stop attacking immediately while he channels this. All the damage you do to him is reflected to you while under this spell. Watch out for this one. It’s easy to see when he does it, as he channels violet beams on everyone near him.

Once you kill him, go back to Taunka’le Village and turn in [71] Breaking Through, get [71] The Fall of Taunka’le Village. Keep this quest, don’t turn it in for now, we’ll use it at the end of this chapter.


h72circuitfix1.jpg

1. Make sure you don’t kill any animal on the way for now, or you’ll get attacked on sight by the whole camp where we’re going.

h70guide52.jpg If you killed an animal, just wait for the Animal Blood debuff to fade from you or simply jump into some water and it will remove the debuff.

Ride southwest until you hit the road, follow it west to the D.E.H.T.A. Encampment (57,44). Complete the quest [72] A Mission Statement.

A bunch of quests should be available now, take them all:

  • [72] Ears of Our Enemies
  • [72] Happy as a Clam
  • [72] Help Those That Cannot Help Themselves
  • [72] Ned, Lord of Rhinos…
  • [72] Unfit for Death

==Note== From now on kill any Loot Crazed PoacherHunter or Diver on your way

2. Go to the field south of the D.E.H.T.A camp, look for Caribou Traps.

h70guide53.jpg

h70guide54.jpg Right-click your Pile of Fake Furs while standing next to the traps.

Repeat 8 times.

3. Go west to Lake Kum’uya (53,45), go westwards through the lake while killing 10 Loot Crazed Divers.

4. On the western side of the lake, go up the high bluffs and look for Nedar, Lord of Rhinos (47,44). He roams in the field (as colored on the map).

He’s kinda easy for an elite. Kill him and his mount “Lunchbox”.

5. Go north to Amber Ledge.

FPicon.jpg Get the new flight path.

6. Go east and look for Trapped Mammoth Calfs, you can find them in the area I colored on the map.

h70guide55.jpg

h70guide56.jpg Stand next to them and right-click your D.E.H.T.A Trap Smasher.

Repeat 8 times.

If you don’t have 15 Nesingwary Lackey Ears at this point, go get the rest then go back to D.E.H.T.A Encampment. Turn in:

  • [72] Unfit for Death, get [72] The Culler Cometh
  • [72] Happy as a Clam, get [72] The Abandoned Reach
  • [72] Ned, Lord of Rhinos…
  • [72] Help Those That Cannot Help Themselves, get [72] Khu’nok Will Know
  • [72] Ears of Our Enemies, no need to get the follow up

(It’s just a repeatable quest you can turn in anytime you want, should you get extra 15 Ears)

h72circuit14.jpg

1. Ride north to Khu’nok the Behemoth (59,30). Turn in [72] Khu’nok Will Know, get the follow up [72] Kaw the Mammoth Destroyer.

2. Find a Wooly Mammoth Bull, they should no longer be agressive towards you now. Right-click it to mount it.

Once you mount a Wooly Mammoth Bull, you’ll get the following action bar:

h70guide57.jpg

Ability #1 AoE Damage, short cooldown, use it everytime it’s up.
Ability #2 It’s a charge stun. Use it wheenver it’s up. For that, you have to run away to get a little bit of range and then re-cast it.
Ability #3 It’s an AoE Fear and it only works on Kaw’s minions, which you don’t need to fear anyway because they’ll die to Ability #1 very fast.

Basically, kill Kaw’s mount with Ability #1 and then you can “kite” Kaw. Run away from him, use the charge stun and follow it up with Ability #1. Run away again and repeat, you should take no more damage after Kaw’s Mount is dead.

Now that’s you’re prepared, ride northwest to (54,24), you’ll find Kaw the Mammoth Destroyer there. When you get close, he’ll jump on his mount and attack you.

Kill his mount, then kill him and his halberd will appear on the floor.

h70guide58.jpg

Loot Kaw’s War Halberd.

==Note== The Halberd can be looted even if someone else killed Kaw.

a71circuit12.jpg

1. Ride south to a rock called Elder Atkanok (55,36). Get both quests from here:

  • [72] The Honored Ancestors
  • [72] Reclaiming the Quarry

2. Go down in the Coldrock Quarry. Kill Beryl Treasure Hunters on sight as you go.

Just a little down the first slope you should find the first elder you need to identify: “Elder Sagni” (53,34).

h70guide58b.jpg

Right-click it.

3. Go a little further northwest until (52,32). You should see the two elders you’re missing to your left and right. Right-click Elder Takret and Elder Kesuk.

Go back to Elder Atkanok, turn in [72] The Honored Ancestors, get [72] The Lost Spirits.

Go back in the quarry. Kill a Beryl Hound and loot its Core of Malice.

h70guide59.jpg Use the Core of Malice on Kaskala Craftsmen and Kaskala Shamen to free them.

Repeat this until you finish [72] The Lost Spirits. There are many Beryl Hounds at (52,31).

Kill the remaining Beryl Treasure Hunters you need for [72] Reclaiming the Quarry.

4. Go back to Elder Atkanok. Turn in:

  • [72] The Lost Spirits, get [72] Picking Up the Pieces
  • [72] Reclaiming the Quarry, get [72] Hampering Their Escape

==Note== Look for Tuskarr Ritual Objects while following the next steps.

h70guide60.jpg
a71circuit13.jpg

1. This time, we’re not going inside the quarry, but around it. Follow the cliff line south of the quarry, kill Beryl Reclaimers until one drops a Gnomish Grenade.

Get close to the East Platform (53,35) as shown on the screenshot below.

h70guide61.jpg

h70guide62.jpg Right-clik the Gnomish Grenade.

2. Get another grenade. Go further west along the cliff line until (50,34) and destroy the Western Platform.

3. Go down inside the quarry, clear the way to the North Platform (52,32). Stand under it and use a grenade.

4. Gather the last Tuskarr Ritual Objects you need and then go back to Elder Atkanok. Turn in:

  • [72] Picking Up the Pieces, get [72] Leading the Ancestors Home
  • [72] Hampering Their Escape, get [72] A Visit to the Curator
h72circuit15.jpg

1. This quest is exactly like the first one we did in the quarry with the 3 Elders we identified. You have to go to the exact same 3 stones.

h70guide63.jpg Besides this time, whenever you stand next to one of the stones, right-click the Tuskarr Ritual Object.

2. Go up the slope northwest until you are out of the quarry, then go west and then south along the cliff edge until you find Curator Insivius on a blue platform at (50,32). Kill him.

3. Go back to the quest givers, turn in:

  • [72] Leading the Ancestors Home
  • [72] A Visit to the Curator

We’re done here.

4. Ride south/southeast to Hierophant Liandra (58,55). Turn in [72] The Abandoned Reach, get [72] Not On Our Watch.

5. Go southeast towards the shore, kill Northsea Thugs on your way and loot Shipment of Animal Parts. They drop from Northsea Thugs and can also be found on the floor.

h70guide64.jpg

Go back to Hierophant Liandra, turn in [72] Not On Our Watch, get [72] The Nefarious Claim Master…

h72circuit16.jpg

1. Mount up, ride southeast all the way to the shore, dive in the water and you should see a wrecked ship at the bottom of the sea (62,66).

Around that ship you should find Clam Master K, kill him.

2. Go back to Hierophant Liandra, go up the slope behind her and then make a U-turn to the left.

Go to the end of that cliff and you should find Karen “I Don’t Caribou” the Culler (57,56). She has two guards, stealthed. It’s still an easy fight. Kill her.

3. Go back to D.E.H.T.A Encampment. Turn in everything:

  • [72] The Nefarious Claim Master…
  • [72] The Culler Cometh
  • [72] Kaw the Mammoth Destroyer

Get the final quest from D.E.H.T.A Encampment: [72] The Assassination of Harold Lane. You can also turn in extra ears if you got 15 of them to get the buff, which will be help you solo our next quest.

4. This quest has you kill Harold Lane, an elite humanoid located on the northwestern side of Lake Kum’uya (50,42). He can probably be solo’d by any class if done properly, thanks to an item provided for the quest, the Cenarion Horn.

h70guide65.jpg I recommend using the horn right after you start the fight, this will stun Harold Lane for a few seconds and take a large chunk out of his HPs (about 50%), as long as the whole stampede tramples over him. So make sure he doesn’t move. Stand still while you cast the horn.

Then you have to take care of the rest of his health. Harold Lane can be stunned and his movement can be slowed. Use every cooldown you got and you should be fine. Health pot too if needed.

==Tip== Melee classes, when he drops his trap, move away fast before it activates, that way you won’t get rooted.

If you don’t manage to solo it, because of your class or your lack of gear, try to find help, with two people this quest is a pushover, because you get to use 2 Stampedes on poor Harold Lane.

Once you’ve killed him, go back to D.E.H.T.A encampment, turn in [72] The Assassination of Harold Lane. Congratulations on your achievement.

a71circuit18.jpg

1. Go east to Kaskala (64,46).

Get the two other quests:

  • [72] Not Without a Fight!
  • [72] Preparing for the Worst

2. Kill 12 Kvaldir Raiders and pick up 8 Kaskala Supplies.

h70guide66.jpg

There are a lot of those supplies further sourtheast down the shore (73,53).

3. Go back to the quest givers, turn in:

  • [72] Not Without a Fight!, get [72] Muahit’s Wisdom
  • [72] Preparing for the Worst

4. Go to the isle southeast and find Elder Muahit (67,55). Turn in [72] Muahit’s Wisdom, get [72] Spirits Watch Over Us.

5. Go directly north of here and a little bit northeast, dive in the water and look for Iruk (68,50). He’s directly under the last “A” of Kaskala on the map.

h71guide1.jpg

Right-click it and search for Issliruk’s Totem.

Go back to Elder Muahit. Turn in [72] Spirits Watch Over Us, get [71] The Tides Turn.

6. Go a little south and kill Heigarr the Horrible (68,56).

Go back to Elder Muahit, turn in [71] The Tides Turn.

==Note== If you didn’t do my Howling Fjord guide, then Hotawa (who is standing next to Elder Muahit) should now offer you the quest [72] Travel to Moa’ki Harbor. Take it and turn it in next time you go to Moa’ki Harbor, it won’t be mentioned in the guide so make a mental note.

7. Swim east and go to Unu’pe (78,52).

Sell junk and repair. Re-stock food/drink.

Fly to Amber Ledge.

Turn in [71] Too Close For Comfort, get [71] Prison Break.
Also get [71] Monitoring the Rift: Cleftcliff Anomaly.

a71circuit23.jpg

1. Go southwest to Beryl Point (43,37). Kill Beryl Mage Hunters until one drops a Beryl Prison Key.

Find an Arcane Prison.

h71guide2.jpg

Right-click it to free a Mage Prisoner.

2. Go further south. At (41,42) you’ll find a slope going down to the water.

3. Swim west/southwest to the Westrift (34,42)

h71guide3.jpg

h71guide4.jpg Right-click the Arcanometer while standing next to the rift.

4. Go back the way you came from and then ride back to Amber Ledge.

Turn in:

  • [71] Prison Break, get [71] Abduction
  • [71] Monitoring the Rift: Cleftcliff Anomaly, get [71] Monitoring the Rift: Sundered Chasm

Time for some mission impossible action. We’re gonna jump off a cliff and try to land in the water.

You need to have a 100% speed mount for it to work and you need to jump from the thin plank at the edge of the bridge, as shown on the image below:

h71guide5.jpg

If you go splat it’s not a big deal, because you can ressurect immediately and try again.

If you don’t have a 100% speed mount or just don’t want to risk dying, there’s a path going down to the same spot at (43,35), easy to spot thanks to the blue torches.

a71circuit24.jpg

1. Swim north until (44,29). At this spot, dive down, all the way down to the rift.

h71guide6.jpg

Right-click the Arcanometer.

2. Swim back to the surface.
Swim south to the path lit by blue torches at (43,35).

3. Go up the path and you should be at Beryl Point. Find a Beryl Sorcerer, beat him down to below 25%HP.

arcanebinder.jpg Right-click the Arcane Binder.

This should capture the Beryl Sorcerer.

4. Mount up, go back to Amber Ledge. Turn in:

  • [71] Abduction, get [71] The Borean Inquisition
  • [71] Monitoring the Rift: Sundered Chasm, get [71] Monitoring the Rift: Winterfin Cavern

Go inside the mage tower and turn in [71] The Borean Inquisition, get the follow up [71] The Art of Persuasion.

h71guide8.jpg Target the Imprisoned Beryl Sorcerer and right-click the Neural Needler several times, until he speaks.

Turn in [71] The Art of Persuasion, get [71] Sharing Intelligence.

Get out of the tower, turn in [71] Sharing Intelligence, get [71] A Race Against Time.

Go back down to Beryl Point, go to the biggest of the blue circles.

h71guide9.jpg Right-click the Beryl Shield Detonator.

Kill Inquisitor Salrand. After you kill her, Salrand’s Lockbox will appear on the floor.

h71guide10.jpg

Right-click it and loot Salrand’s Broken Key.

Go back to Amber Ledge, turn in [71] A Race Against Time, get [71] Reforging the Key.

Turn in [71] Reforging the Key at Surristrasz, that big red dragon. Get the follow up [71] Taking Wing.

Go southeast to Warmage Anzim, turn in [71] Taking Wing. Before you get the follow up, read the following lines.

When you take the next quest, you’ll fly on a drake and help rescue Evanor. All you have to do is right-click her cage once the drake drops you on the platform, and then let Evanor teleport you, stay close to her.

That’s it, now get [71] Rescuing Evanor.

==Warning== There’s a bug currently and this quest sometimes takes a very long time to appear (sometimes hours). If that happens, skip it, go to the dragon and ask him to fly you to the Transitus Shield, then follow the guide from there. When you’re done with the Coldarra part of the guide, you can come back here and this quest should be available.

After the teleport, turn in [71] Rescuing Evanor, get [71] Dragonspeak.

Get out of the tower, go to Surristrasz, turn in [71] Dragonspeak, get [71] Traversing the Rift. This will make you fly to Coldarra.

After landing, turn in [71] Traversing the Rift, get all the available quests from here:

  • [71] Basic Training
  • [71] Nuts for Berries
  • [71] Reading the Meters
  • [71] Secrets of the Ancients

==Note== While following the next steps, complete the following objectives:

  • Kill 10 Coldarra Spellweaver
  • Kill Glacial Ancients until you have 3 Glacial Splinters
  • Kill Magic-bound Ancients until you have 3 Magic-bound Splinters
  • Look for Frostberry Bushes until you have 10 Frostberries.h71guide11.jpg
a71circuit25.jpg

1. Go north towards the blue circle at (33,28) and kill Coldarra Spellbinders until one drops a Scintillating Fragment.

h71guide12.jpg Right-click it to start the quest [71] Puzzling…

2. Go back to Transitus Shield, turn in [71] Puzzling… and get [71] The Cell.

3. Follow the path west until (29,35), there you should find a Coldarra Geological Monitor.

h71guide13.jpg

Right-click it to get the Southern Coldarra Reading.

4. Go northwest to a blue circle at (24,30). Kill Warbringer Goredrak, loot the Energy Core.

5. Go further northwest to (23,24) and you’ll find another Coldarra Geologial Monitor. Right-click it to get the Western Coldarra Reading.

6. Go northeast to another blue circle (27,21), kill General Cerulean, loot the Prison Casing.

7. Go further east to (31,21), where you should find the Northern Coldarra Reading.

Go back to Transitus Shield. Turn in [71] The Cell.

h71guide14.jpg Right-click your Augmented Arcane Prison.

Keristrasza will spawn. Get her quest [71] Keristrasza. Turn it in immediately and get the follow up [71] Bait and Switch.

Go back outside and look for Crystalyzed Mana.

h71guide15.jpg

They can be found all around the Nexus.

Keep doing laps around the Nexus until you have 10 Crystalyzed Mana Shards and finish the 4 other objectives mentioned in the note above.

Go back to Transitus Shield, turn in all quests:

  • [71] Basic Training, get [71] Hatching a Plan
  • [71] Nuts for Berries, get [71] Keep the Secret Safe
  • [71] Secrets of the Ancients, get [71] Quickening

Right-click your Augmented Arcane Prison to summon Keristrasza. Turn in [71] Bait and Switch, get [71] Saragosa’s End.

Get back to full HP/mana, talk to Keristrasza, tell her that you’re prepared to face Saragosa.

h71guide16.jpg Right-click the Arcane Power Focus.

Saragosa will come and get weakened. Kill her and loot Saragosa’s Corpse.

Right-click your Augmented Arcane Prison to summon Keristrasza. Turn in [71] Saragosa’s End, get [71] Mustering the Reds.

Talk to Keristrasza and ask her to return you to the Transitus Shield.

Turn in [71] Mustering the Reds at Raelorasz, get [71] Springing the Trap.

a71circuit26.jpg

1. Go westwards killing Coldarra Wyrmkins until you have 5 Frozen Axes.

2. Once you have 5 Frozen Axes, go to the crack at (29,33).

==Note== From now on kill Arcane Serpents on your way until you have looted 5 Nexus Mana Essence.

Follow the crack going down north until you reach the Meeting Stone for the Nexus (28,29).

Right next to it you should find another Coldarra Geological Monitor. Right-click it to get the Nexus Geological Reading.

3. Stay down the crack and go around the Nexus, killing Arcane Serpents and looking for Blue Dragon Eggs.

h71guide17.jpg

Right-click them to destroy them. Keep doing laps around the nexus until you finish both quests.

4. Once you’re done, get out of the ravine at (26,26) and go northeast until you reach the Nexus’s Northwestern Entrance (26,23).

h71guide18.jpg

==Note== You must unmount before the next step, and druids must not be shapeshifted.

h71guide19.jpg Stand infront of the doorway and right-click Raelorasz’s Spark.

Keristrasza will come. All you have to do is stay close to her until she takes off and quickly run to her when she lands, or you won’t get the quest update and will have to restart.

==Note== If it fails, I suggest relogging before going back to the northwest gate and using the flare.

5. Ride back to the Transitus Shield and turn in all quests:

  • [71] Keep the Secret Safe
  • [71] Hatching a Plan, get [71] Drake Hunt
  • [71] Springing the Trap, get [71] Prisoner of War
  • [71] Reading the Meters, get [71] Postponing the Inevitable

Instance: The Nexus

You have all the quests for the first instance of the Nexus, called “The Nexus“.

  • [71] Have They No Shame?
  • [71] Postponing the Inevitable
  • [71] Prisoner of War
  • [71] Quickening

So from now on, if you feel like it, you should look for a group for The Nexus. It’s a very quick instance for level 71-73 players, I recommend it.

If you don’t feel like it or if you don’t find a group, you can abandon the above 4 quests. They can easily be picked up in the future anyway, if you change your mind.

You should be level 73 by now if you followed my previous chapter.


Level 73


a71circuit27.jpg

1. Ride to the area northwest of the Nexus (23,26).

h71guide20.jpg Put Raelorasz’s Spear on a hotkey.

Look up in the skies and find a Nexus Drake Hatchling.

h71guide21.jpg

Target it and use Raelorasz’s Spear when you’re in range (the range is quite big though).

Then just “tank” the drake until it becomes friendly. You can use stuns or heal yourself or simply just take the beating. It takes about 10 seconds.

Mount up and ride back to the Transitus Shield as fast as you can. You have 3 minutes.

Turn in [71] Drake Hunt, get [71] Cracking the Code.
Also get [71] Drake Hunt again, it’s a daily quest and it gives another 20K exp.

2. Go north to the blue circle at (33,28).

Kill Inquisitor Caleras, loot the Azure Codex.
Kill Coldarra Spellbinders, loot 3 Shimmering Runes.

3. Go catch a drake, you know how it works. Bring the drake back to Transitus Shield.

Turn in [71] Cracking the Code and [71] Drake Hunt.

Fly to Amber Ledge.

h72circuit17.jpg

1. From Amber Ledge, mount up and ride northeast, jump down a few cliffs and cut through the plains until you hit the road, then follow the road north until you reach Bor’gorok Outpost (50,11).

FPicon.jpg Get the new flight path.

Turn in [71] To Bor’gorok Outpost, Quickly! and get the follow up [71] The Sky Will Know.

Also get the other quests:

  • [71] Report to Steeljaw’s Caravan
  • [71] King Mrgl-Mrgl

2. Go west to Imperean (47,9). Turn in [71] The Sky Will Know, get [72] Boiling Point.

3. Go directly south to the Blistering Pool and defeat Churn (46,13).

4. Go east/slightly southeast to the Charred Rise and defeat Simmer (51,15).

5. Go northwest back to Imperean, turn in [72] Boiling Point, get [72] Motes of the Enraged.

6. Go west to the Ruins of Eldra’nath (45,9).

Kill Enraged Tempests. Loot 5 Tempest Motes (drop rate is about ~40%)

a71circuit28.jpg

1. Mount up, go southwest and jump down in the water infront of the steaming waterfall at (44,14). You should find King Mrgl-Mrgl (43,13).

Turn in [71] King Mrgl-Mrgl, get [71] Learning to Communicate.

2. Dive down in the water west of King Mrgl-Mrgl. Go to the bottom of the sea and look for a water elemental called Scalder (42,16). He roams up and down the bottom of the sea. Kill it.

h71guide22.jpg Target Scalder’s corpse and right-click the King’s Empty Conch.

==Note== Scalder is immune to frost.

Go back to King Mrgl-Mrgl, turn in [71] Learning to Communicate, get [71] Winterfin Commerce.

3. Swim west across the water to Winterfin Village (41,16).

Look for Winterfin Clams, they are quite small and look like this:

h71guide23.jpg

Loot 5 Winterfin Clams.

4. Go back to the Winterfin Retreat, turn in [71] Winterfin Commerce at Ahlurglgr. Get the two new quests:

  • [71] Oh Noes, the Tadpoles! from King Mrgl-Mrgl
  • [71] Them! from Brglmurgl

5. Go back to Winterfin Village, this time look around for cages.

h71guide24.jpg

Right-click them to free the Murloc Tadpoles. Keep freeing tadpoles while doing the next steps.

6. Go southwest to the cave at (40,20).

h71guide4.jpg Right-click the Arcanometer while standing inside the cave.

7. Go further inside the cave, always follow the wall on your left-hand side and you will eventually find two caged murlocs, Glrglrglr and Lurgglbr at (38,23).

Don’t get the quest from Lurgglbr for now.
Only get the quest [71] Keymaster Urmgrgl from Glrglrglr.

8. Get out of this room, and jump down on the left to the slope going down. Further down this path you’ll find Keymaster Urmgrgl. Kill him, loot Urmgrgl’s Key.

Go back to the previous room with the two caged murlocs. Turn in [71] Keymaster Urmgrgl.

Now get [71] Escape from the Winterfin Caverns from Lurgglbr. Escort him out.

After the escort, just kill stuff in the area until you finish [71] Them! and [71] Oh Noes, the Tadpoles!

Go back to King Mrgl-Mrgl. Turn in:

  • [71] Oh Noes, the Tadpoles! get [71] I’m Being Blackmailed By My Cleaner
  • [71] Escape from the Winterfin Caverns
  • [71] Them!

Go a little northwest, turn in [71] I’m Being Blackmailed By My Cleaner, get [71] Grmmurggll Mrllggrl Glrggl!!!
Also get [71] Succulent Orca Stew from Cleaver Bmurglbrm.

a71circuit29.jpg

1. Swim northwest while killing Glimmer Bay Orcas on your way, loot Succulent Orca Blubbers off them.

2. Further north you should find a bigger orca called Glrggl. He swims in circles around the iceberg at (39,9)

Kill him and loot Glrggl’s Head.

Now just kill orcas until you finish [71] Succulent Orca Stew.

3. Go back to Winterfin Retreat, turn in

  • [71] Grmmurggll Mrllggrl Glrggl!!!, get [71] The Spare Suit
  • [71] Succulent Orca Stew

Go southeast to King Mrgl-Mrgl, turn in [71] The Spare Suit, get [72] Surrender… Not!

4. Swim over to the Winterfin Village again.

h71guide25.jpg Right-click King Mrgl-Mrgl’s Spare Suit.

Take a look at yourself while running around in the suit. I also recommend trying the /dance. When you’re done laughing you can go on with the guide 😛

Go inside the cave. This time keep hugging the wall to your right-hand side until you reach the end of the cave, where you’ll find Claximus.

Kill him and loot the Claw of Claximus.

Put your murloc suit back on and get out of the cave.

Go back to Winterfin Retreat. Turn in [72] Surrender… Not!

h72circuit18.jpg

1. Go back up on the main land and go to Imperean. Turn in [71] Motes of the Enraged, get [71] Return to the Spirit Talker.

2. Go back to Bor’gorok Outpost, turn in [71] Return to the Spirit Talker, get [71] Vision of Air.

h72guide1.jpg Right-click Imperean’s Primal.

Watch the little scene and then turn in [71] Vision of Air, get the follow up [71] Farseer Grimwalker’s Spirit.
Also get [71] Revenge Upon Magmoth from Ortrosh.

Sell junk, repair and re-stock food/drink.

3. Ride southeast to Magmoth, you’ll find the cave entrance at (54,14).

Clear the way down, killing stuff as you go. All the way down the spiral.

==Tip== Kill the fire totems first before the shamans, they hurt.

Stick to the left while going down and you should eventually find Farseer Grimwalker’s Spirit in a cave to the left:

h72guide2.jpg

Kill the 3 shamans channeling around him and then you’ll be able to turn in [71] Farseer Grimwalker’s Spirit, get the follow up [72] Kaganishu.

4. Now go kill Kaganishu, he’s in a little alcove just outside and to the left of the cavity where you just found Farseer Grimwalker’s Spirit.

Kill him and loot Kaganishu’s Fetish.

Go back to Farseer Grimwalker’s Spirit.

h72guide3.jpg Right-click Kaganishu’s Fetish while targeting Farseer Grimwalker’s Spirit.

Turn in [72] Kaganishu, get [71] Return My Remains.

Right-click the pile of bones under Farseer Grimwalker’s Spirit and loot Farseer Grimwalker’s Remains.

h72guide4.jpg

5. Kill what you still need for [71] Revenge Upon MagmothForagers and Crushers are found outside of the cave.

Then go back to Bor’gorok Outpost.

Turn in [71] Return My Remains and [71] Revenge Upon Magmoth.

h72circuit19.jpg

1. Ride south/southwest to Steeljaw’s Caravan (48,20). Turn in [71] Report to Steeljaw’s Caravan at Grunt Ragefist.

Get his two quests:

  • [71] The Honored Dead
  • [71] Put Them to Rest

Before you take the quest from the other NPC, Longrunner Proudhoof, read the next paragraph:

The quest [72] We Strike! is an escort. Longrunner Proudhoof will start running and will get ambushed by a bunch of mobs, the first fight might be difficult depending how many mobs you aggroed on the way, so try to be sneaky while following Proudhoof. Use your cooldowns and a pot if needed, he’ll let you rest after the first ambush, no time to loot, just eat/drink fast. The 2nd ambush is rather easy. And finally you’ll have to fight an elite, let Proudhoof tank it as much as possible, this will make it easy.

Now that’s your ready, take the quest [72] We Strike! and good luck.

2. If you were successful, you should have defeated Steeljaw.

First thing, go back the way you came from and loot the corpses you couldn’t loot during the escort.

h72guide5.jpg Look for Ragefist’s Torch in your inventory and put it on an action bar.

Now look around for Dead Caravan Guards/Workers:

h72guide6.jpg

Use the torch on them.

Repeat this 10 times and kill stuff in the area until you finish [71] Put Them to Rest.

3. Go back to Grunt Ragefist, turn in [71] The Honored Dead and [71] Put Them to Rest.

4. Go back to Bor’Gork Outpost, turn in [72] We Strike!

Fly to Amber Ledge, turn in [71] Monitoring the Rift: Winterfin Cavern.

Believe it or not, but we’re almost done with Borean Tundra.

==Note== If you didn’t do the quest [71] Breaking Through, now is your last chance. It would be nice to do it, because the follow up is a quest which takes you to the next zone, so it’s quite an efficient way to make the transition. If you don’t manage to do [71] Breaking Through, just abandon it and simply fly to Taunka’le Village. From there follow the road east until you enter Dragonblight. The guide ends here for you, go to the next chapter of my guide: Dragonblight.

If you did [71] Breaking Through, you should have the quest [72] The Fall of Taunka’le Village.

Fly to Taunka’le Village. Turn in [72] The Fall of Taunka’le Village, get [72] Across Transborea.

h72circuit20.jpg

A Taunka’le Evacuee will follow you. Mount up and ride east, make sure your evacuee follows you.

At one point, he’ll stop and read smoke signals, then start to run very fast. Follow him and he’ll take you to Wartook Iceborn.

Turn in [72] Across Transborea, get the follow up [72] A Tauren Among Taunka.

Go to the Westwind Refugee Camp (13,49). Turn in [72] A Tauren Among Taunka.

Time to move on to Dragonblight.

WoW WotLK Classic Alliance 70-80 Leveling Guide: 70-72 Borean Tundra

Go to Stormwind Harbor, go to the northern pier, take the boat to Borean Tundra. The boat will take you to Valiance Keep.

==Note== Zoom out your minimap to the maximum, it’s easier to find quests that way.

In Valiance Keep, get the quest [71] Enlistment Day.

FPicon.jpg Get the new flight path.

Go south to the barracks, go up a floor and into the main room. Turn in [71] Enlistment Day, get [71] A Time for Heroes.

Get out of the barracks, go to Sergeant Hammerhill and turn in [71] A Time for Heroes, get [71] The Siege.
Also get [71] A Soldier in Need from Medic Hawthorn just outside the gates.

a71circuit1.jpg

1. Kill 6 Crypt Crawlers.

Go back to Sergeant Hammerhill, turn in [71] The Siege, get [71] Death From Above.

2. Go back to the keep and go inside the ship’s cargo. Kill the cultists in there and right-click the First Aid Supplies.

a73img1.jpg

Loot Hawthorn’s Anti Venom.

Also right-click the Cultist Shrine and get the quest [71] Cultists Among Us.

Go to Captain “Lefty” Lugsail on the upper deck of the ship. Turn in [71] Cultists Among Us and get [71] Notify Arlos.

Go back to Medic Hawthorn, turn in [71] A Soldier in Need.

3. Go just a little south, look above and you’ll see Scourged Flamespitters.

a73img2.jpg Target one and use the Reinforced Net.

Kill it. Repeat this 6 times.

4. Go back to Sergeant Hammerhill, turn in [71] Death From Above, get [71] Plug the Sinkholes.

a71circuit2.jpg

1. Ride northwest to (54,64). There you’ll find the Northern Sinkhole.

a73img3.jpg

a73img4.jpg Right-click the Incendiary Explosives next to them.

2. Ride south/southwest to the Southern Sinkhole (51,72). Blow it up.

3. Go back to Valiance Keep. Turn in [71] Plug the Sinkholes, get [71] Farshire.

Get [71] Word on the Street from Mark Hanes, standing a few feet away.

Go to the barracks, turn in [71] Notify Arlos, get the newly available quests:

  • [71] A Diplomatic Mission
  • [71] Enemies of the Light

4. Go to the Valiance Keep Inn (59,68). On the upper floor you’ll find Leryssa. Turn in [71] Word on the Street, get [71] Thassarian, My Brother.
Also get all the other available quests from around the inn:

  • [71] Nick of Time
  • [71] Distress Call
a71circuit3.jpg

1. Take the northern exit of Valiance Keep, go further north and you’ll find Gerald Green (58,63). Turn in [71] Farshire, get [71] Military? What Military?.

2. Go north/northwest to the Farshire Mine (57,57).

You should see two yellow “?“s on your minimap. Go to the first one, turn in [71] Military? What Military? and get [71] Pernicious Evidence.

Go to the 2nd one, turn in [71] Thassarian, My Brother, get [71] The Late William Allerton.

Get out of the mine, go back to Gerald Green, turn in [71] Pernicious Evidence and get the 3 available quests:

  • [71] It’s Time for Action
  • [71] Take No Chances
  • [71] Reference Material

==Note== From now on, kill Plagued Scavengers on the way and look for Farshire Grain.

a73img5.jpg

a73img6.jpg Right-click Wendy’s Torch near them.

3. Go north/northwest to the burning building next to the mine (56,58). Look for a red book called Fields, Factories and Workshops.

a73img7.jpg

Loot it.

Finish the other two quests and go back to Gerald Green. Turn in:

  • [71] It’s Time for Action, get [71] Fruits of Our Labor
  • [71] Take No Chances
  • [71] Reference Material, get [71] Repurposed Technology
a71circuit4.jpg

1. About 100 yards west of here you should find a small patch with Harvest Collectors.

a73img8.jpg Kill one, loot it, target its corpse and use Jeremiah’s Tools on it.

Do that for all the Harvest Collectors you find on your way from now on.

2. Further west you should find three camps of Cultist Necrolytes channeling magic around pink summoning circles at (56, 63)(54,62) and (54,60).

Kill Cultists Necrolytes until one drops a Cultist Communique.

3. Go to the Farshire Mine again. Go to the end of the mine, kill Captain Jacobs and loot the Cart Release Key.
Go back a few steps and locate a cart with a Cart Release Lever.

a73img9.jpg

Right-click it.

Now get out of the mine and finish [71] Repurposed Technology.

4. Go back to Gerald Green, turn in:

  • [71] Fruits of Our Labor, get [71] One Last Delivery
  • [71] Repurposed Technology

5. Go back to Valiance Keep, turn in [71] One Last Delivery at Hilda Stoneforge (57,67). Get the follow up [71] Weapons for Farshire.

Sell junk, repair and re-stock food/drink.

Go to the barracks, to the upper floor, turn in [71] Enemies of the Light, get [71] Further Investigation.

Go to the inn, go to the upper floor and turn in [71] Further Investigation at Vindicator Yalaa. Get the follow up [71] The Hunt is On.

Turn in [71] The Late William Allerton at Leryssa, get [71] Lost and Found.
Go down and turn in [71] Lost and Found, get [71] In Wine, Truth.

a71circuit5.jpg

1. Go to the kitchen, where you should find “Salty” John Thorpe (59,67).

a73img10.jpg Right-click the Oculus of the Exorcist.

Talk to “Salty” John Thorpe and click on the text. Kill him when he turns agressive.

2. Get out of the inn, turn left and go down to the docks, where you should find Tom Hegger (59,69).

Use the Oculus of the Exorcist, talk to Tom Hegger and kill him.

3. Mount up, go to the barracks, go to the jail downstairs where you should find Guard Mitchells (57,72).

Use the Oculus of the Exorcist, talk to Guard Mitchells and kill him.

Go back to Vindicator Yalaa at the inn, turn in [71] The Hunt is On.

4. Get out of the inn, mount up and go back to Gerald Green, turn in [71] Weapons for Farshire, get [71] Call to Arms!

5. Ride north/northwest to the Farshire Townhall (57,59). Go to the upper floor and you should see a Bell Rope there.

a73img11.jpg

Right-click it.

Go back to Gerald Green and get your blue reward.

a71circuit6.jpg

1. Make sure you don’t kill any animal on the way for now, or you’ll get attacked on sight by the whole camp where we’re going.

h70guide52.jpg If you killed an animal, just wait for the Animal Blood debuff to fade from you or simply jump into some water and it will remove the debuff.

Ride northwest until you hit the road, follow it north to the D.E.H.T.A. Encampment (57,44).

Get the quest [72] A Mission Statement and turn it in immediately.

A bunch of quests should be available now, take them all:

  • [72] Ears of Our Enemies
  • [72] Happy as a Clam
  • [72] Help Those That Cannot Help Themselves
  • [72] Ned, Lord of Rhinos…
  • [72] Unfit for Death

==Note== From now on kill any Loot Crazed PoacherHunter or Diver on your way

2. Go to the field south of the D.E.H.T.A camp, look for Caribou Traps.

h70guide53.jpg

h70guide54.jpg Right-click your Pile of Fake Furs while standing next to the traps.

Repeat 8 times.

3. Go west to Lake Kum’uya (53,45), go westwards through the lake while killing 10 Loot Crazed Divers.

4. On the western side of the lake, go up the high bluffs and look for Nedar, Lord of Rhinos (47,44). He roams in the field (as colored on the map).

He’s kinda easy for an elite. Kill him and his mount “Lunchbox”.

5. Go east/northeast and look for Trapped Mammoth Calfs, you can find them in the area I colored on the map.

h70guide55.jpg

h70guide56.jpg Stand next to them and right-click your D.E.H.T.A Trap Smasher.

Repeat 8 times.

6. If you don’t have 15 Nesingwary Lackey Ears at this point, go get the rest then go back to D.E.H.T.A Encampment. Turn in:

  • [72] Unfit for Death, get [72] The Culler Cometh
  • [72] Happy as a Clam, get [72] The Abandoned Reach
  • [72] Ned, Lord of Rhinos…
  • [72] Help Those That Cannot Help Themselves, get [72] Khu’nok Will Know
  • [72] Ears of Our Enemies, no need to get the follow up

(It’s just a repeatable quest you can turn in anytime you want, should you get extra 15 Ears)

a71circuit7.jpg

1. Ride north to Khu’nok the Behemoth (59,30). Turn in [72] Khu’nok Will Know, get the follow up [72] Kaw the Mammoth Destroyer.

2. Find a Wooly Mammoth Bull, they should no longer be agressive towards you now. Right-click it to mount it.

Once you mount a Wooly Mammoth Bull, you’ll get the following action bar:

h70guide57.jpg

Ability #1 AoE Damage, short cooldown, use it everytime it’s up.
Ability #2 It’s a charge stun. Use it whenever it’s up. For that, you have to run away to get a little bit of range and then re-cast it.
Ability #3 It’s an AoE Fear and it only works on Kaw’s minions, which you don’t need to fear anyway because they’ll die to Ability #1 very fast.

Basically, kill Kaw’s mount with Ability #1 and then you can “kite” Kaw. Run away from him, use the charge stun and follow it up with Ability #1. Run away again and repeat, you should take no more damage after Kaw’s Mount is dead.

Now that’s you’re prepared, ride northwest to (54,24), you’ll find Kaw the Mammoth Destroyer there. When you get close, he’ll jump on his mount and attack you.

Kill his mount, then kill him and his halberd will appear on the floor.

h70guide58.jpg

Loot Kaw’s War Halberd.

==Note== The Halberd can be looted even if someone else killed Kaw.

3. Go northeast to the Scalding Pools (59,22). Kill robots there (Scavenge-bot 004-A8Sentry-bot 57-K or Defendo-tank 66D) until one drops The Ultrasonic Screwdriver.

a73img12b.jpg Right-click it to start [71] The Ultrasonic Screwdriver.

4. Go northwest to Fizzcrank Airstrip (57,20).

FPicon.jpg Get the new flight path.

Turn in [71] Distress Call at Fizzcrank Fullthrottle, he is on the upper floor of the inn (there’s a small elevator in it). Get the follow up [71] The Mechagnomes.

Talk to Fizzcrank Fullthrottle and go through his text until you complete the quest.

Get out of the inn turn in:

  • [71] The Mechagnomes, get [71] Re-Cursive
  • [71] The Ultrasonic Screwdriver, get [71] Master and Servant

Also get all the available quests:

  • [71] Dirty, Stinkin’ Snobolds!
  • [71] King Mrgl-Mrgl
  • [71] What’s the Matter with the Transmatter?
a71circuit8.jpg

1. Go north to Magmoth (58,15). Look for Crafty’s Stuff while going through the next steps.

a73img13.jpg

==Tip== If you fight Magmoth Shamans, kill the Fire Totems first before the shamans, they hurt but they die in one hit.

2. Clear the way northwest and you’ll find a hole entrance at (55,12). Jump from the spot shown on the video below and you should land in the water. Down there you should find Bonker Togglevolt.

Video: Shortcut to Bonker Togglevolt

If he’s not there it just means someone else is already doing the escort quest, so just kill stuff around here while waiting for him to come back.

Get the quest [72] Get Me Outa Here! and escort him out while looting as many Crafty’s Stuff as you can.

3. Once you’ve escorted Bonker successfully, get the last crates you need while going back to Fizzcrank Airstrip.

Turn in:

  • [72] Get Me Outa Here!
  • [71] Dirty, Stinkin’ Snobolds!, get [71] Just a Few More Things…

4. Go southeast to the area around the Fizzcrank Pumping Station. There are 3 things we need to do on the way:

  • Pick up Fizzcrank Spare Parts.h70guide39.jpg
  • a73img14.jpg Kill Fizzcrank Mechagnomes, loot them and then use the Re-Cursive Transmatter Injection on their corpse. You can find a lot of those gnomes under and on the pumping station itself.
  • a73img12b.jpg Kill robots on your way, loot them and then use The Ultrasonic Screwdriver on their corpses.

Follow the pipeline southeast until you reach the Pumping Station (64,23). There you should find Crafty’s Tools.

a73img15.jpg

Loot them.

Now finish [71] Re-Cursive, then go back to Fizzcrank Airstrip. Turn in:

[71] Re-Cursive, get [71] Lefty Loosey, Righty Tighty.

Go inside the inn and up the elevator, get [71] Finding Pilot Tailspin from Fizzcrank Fullthrottle.

a71circuit9.jpg

1. Follow the pipeline southeast until you reach West Point Station (60,20).

a73img15b.jpg

Right-click the West Point Station ValveTwonky will spawn and attack you, kill it.

2. Go east/northeast to North Point Station (65,18). Click the valve, kill ED-210.

3. Go south/southwest to Mid Point Station (64,22). Click the valve, kill Max Blasto.

4. Go south/southeast to South Point Station (65,29). Click the valve, kill The Grinder.

==Note== Finish gathering Fizzcrank Spare Parts before going to the next step.

5. Mount up, ride southwest to Iggy “Tailspin” Cogtoggle (62,36). Turn in [71] Finding Pilot Tailspin, get [71] A Little Bit of Spice.

==Note== The robots in this area also count for [71] Master and Servant

a70fix1.jpg

1. Ride southeast to the Flood Plains (65, 41). Kill gorlocs there until you loot 4 Gorloc Spice Pouches. There are more gorloc camps east of this one if you need.

2. Go back to Iggy, turn in [71] A Little Bit of Spice, get [71] Lupus Pupus.

a73img16.jpg Target an Oil-stained Wolf and right-click the Wolf Bait from your inventory.

Right-click the Wolf Droppings and loot the Microfilm. There are more wolves in the pools all around this one. Keep doing this until you get 8 Microflims.

Then turn in [71] Lupus Pupus, get [71] Emergency Protocol: Section 8.2, Paragraph C.

3. Now look for Fizzcrank Recon Pilots.

fizzcrankpilots.jpg

Right-click them and search their bodies to get Fizzcrank Pilot’s Insignias. They can be found in the southern half of the Scalding Pools, as shown on my map. You can do that while staying mounted, even if attacked. Gather 6 Fizzcrank Pilot’s Insignias.

When done, go back to Iggy, turn in [71] Emergency Protocol: Section 8.2, Paragraph C, get [71] Emergency Protocol: Section 8.2, Paragraph D.

a71circuit11.jpg

1. Go northwest to (61,34). There you should find a Wrecked Flying Machine.

a73img17.jpg

a73img18.jpg Right-click the Emergency Torch next to it.

2. Go south to (61,40). There should be another Wrecked Flying Machine. Use the Emergency Torch.

3. Go northeast to (63,37). There should be another Wrecked Flying Machine. Use the Emergency Torch.

4. Go back to Iggy, turn in [71] Emergency Protocol: Section 8.2, Paragraph D, get [71] Give Fizzcrank the News.

a71circuit12.jpg

1. Ride west to a rock called Elder Atkanok (55,36). Get both quests from here:

  • [72] The Honored Ancestors
  • [72] Reclaiming the Quarry

2. Go down in the Coldrock Quarry. Kill Beryl Treasure Hunters on sight as you go.

Just a little down the first slope you should find the first elder you need to identify: “Elder Sagni” (53,34).

h70guide58b.jpg

Right-click it.

3. Go a little further northwest until (52,32). You should see the two elders you’re missing to your left and right. Right-click Elder Takret and Elder Kesuk.

Go back to Elder Atkanok, turn in [72] The Honored Ancestors, get [72] The Lost Spirits.

Go back in the quarry. Kill a Beryl Hound and loot its Core of Malice.

h70guide59.jpg Use the Core of Malice on Kaskala Craftsmen and Kaskala Shamen to free them.

Repeat this until you finish [72] The Lost Spirits. There are many Beryl Hounds at (52,31).

Kill the remaining Beryl Treasure Hunters you need for [72] Reclaiming the Quarry.

4. Go back to Elder Atkanok. Turn in:

  • [72] The Lost Spirits, get [72] Picking Up the Pieces
  • [72] Reclaiming the Quarry, get [72] Hampering Their Escape

==Note== Look for Tuskarr Ritual Objects while following the next steps.

h70guide60.jpg
a71circuit13.jpg

1. This time, we’re not going inside the quarry, but around it. Follow the cliff line south of the quarry, kill Beryl Reclaimers until one drops a Gnomish Grenade.

Get close to the East Platform (53,35) as shown on the screenshot below.

h70guide61.jpg

h70guide62.jpg Right-clik the Gnomish Grenade.

2. Get another grenade. Go further west along the cliff line until (50,34) and destroy the Western Platform.

3. Go down inside the quarry, clear the way to the North Platform (52,32). Stand under it and use a grenade.

4. Gather the last Tuskarr Ritual Objects you need and then go back to Elder Atkanok. Turn in:

  • [72] Picking Up the Pieces, get [72] Leading the Ancestors Home
  • [72] Hampering Their Escape, get [72] A Visit to the Curator
a71circuit14.jpg

1. This quest is exactly like the first one we did in the quarry with the 3 Elders we identified. You have to go to the exact same 3 stones.

h70guide63.jpg Besides this time, whenever you stand next to one of the stones, right-click the Tuskarr Ritual Object.

2. Go up the slope northwest until you are out of the quarry, then go west and then south along the cliff edge until you find Curator Insivius on a blue platform at (50,32). Kill him.

3. About 200 yards south of this platform you should find a path going up towards Amber Ledge at (50,36). Ride to Amber Ledge.

FPicon.jpg Get the new flight path.

4. Go back to the quest givers, turn in:

  • [72] Leading the Ancestors Home
  • [72] A Visit to the Curator

We’re done here.

a71circuit15.jpg

1. Ride south/southeast to Hierophant Liandra (58,55). Turn in [72] The Abandoned Reach, get [72] Not On Our Watch.

2. Go southeast towards the shore, kill Northsea Thugs on your way and loot Shipment of Animal Parts. They drop from Northsea Thugs and can also be found on the floor.

h70guide64.jpg

Go back to Hierophant Liandra, turn in [72] Not On Our Watch, get [72] The Nefarious Claim Master…

3. Mount up, ride southeast all the way to the shore, dive in the water and you should see a wrecked ship at the bottom of the sea (62,66).

Around that ship you should find Clam Master K, kill him.

At the bottom of the ship you should also see a Wine Crate.

a73img12.jpg

Right-click it to loot the Kul’Tiras Wine.

4. Swim southwest back to Valiance Keep. Go to the inn, turn in [71] In Wine, Truth, get [71] A Deserter.

Get out of the inn, mount up and ride to the barracks, go down to the jail and turn in [71] A Deserter, get [71] Cowards and Fools.

Sell junk, repair and re-stock food/drink.

a71circuit16.jpg

1. Ride southwest to Karuk (47,75). Turn in [71] A Diplimatic Mission and get the follow up [71] Karuk’s Oath.

2. Go down to Riplash Strand and go west until you see a Captured Tuskarr Prisoner, fighting a naga at (44,78).

h70guide17.jpg

Help the tuskarr to kill the naga and he’ll give you a quest [71] Cruelty of the Kvaldir.

Now kill what you still need for [71] Karuk’s Oath.

Go back to Karuk, turn in [71] Cruelty of the Kvaldir and [71] Karuk’s Oath, get the follow up [71] Gamel the Cruel.

3. Go south to a cave at (46,79). Go inside and kill Gamel the Cruel.

Go back to Karuk, turn in and get the follow up [71] A Father’s Words.

4. Go precisely southwest to Veehja (44,80).

h70guide18.jpg

Turn in and get the follow up [71] The Trident of Naz’jan.

5. Swim east/southeast towards a big tower far in the distance. There you’ll find a spot where you can jump out of the water, as shown on the image below:

h70guide19.jpg

From there you’ll see some stairs to your left.

At the top of those stairs you’ll find Ragnar Drakkarlund. Kill him and loot the Trident of Naz’jan.

6. Swim west/northwest back to Veehja, turn in [71] The Trident of Naz’jan, get the follow up [71] The Emissary.

7. Go back to spot 5.

h70guide20.jpg Look in your inventory for the Trident of Naz’jan, put it on an action bar.
This time instead of going up on the isle, we’re going to swim down and look for Leviroth, a big monster at the bottom of the sea. Make sure your breath is full before you dive in.

Use the Trident of Naz’jan on Leviroth and then finish him off.

When done with that, swim northwest back to the mainland, go to Karuk and turn in [71] The Emissary.

a71circuit17fix.jpg

1. Go northeast to the end of the cliff at (57,56). There you should find Karen “I Don’t Caribou” the Culler . She has two guards, stealthed. It’s still an easy fight, no elites. Kill her.

2. Go back to D.E.H.T.A Encampment. Turn in everything:

  • [72] The Nefarious Claim Master…
  • [72] The Culler Cometh
  • [72] Kaw the Mammoth Destroyer

Get the final quest from D.E.H.T.A Encampment: [72] The Assassination of Harold Lane. You can also turn in extra ears if you got 15 of them to get the buff, which will be help you solo our next quest.

3. This quest has you kill Harold Lane, an elite humanoid located on the northwestern side of Lake Kum’uya (50,42). He can probably be solo’d by any class if done properly, thanks to an item provided for the quest, the Cenarion Horn.

h70guide65.jpg I recommend using the horn right after you start the fight, this will stun Harold Lane for a few seconds and take a large chunk out of his HPs (about 50%), as long as the whole stampede tramples over him. So make sure he doesn’t move. Stand still while you cast the horn.

Then you have to take care of the rest of his health. Harold Lane can be stunned and his movement can be slowed. Use every cooldown you got and you should be fine. Health pot too if needed.

==Tip== Melee classes, when he drops his trap, move away fast before it activates, that way you won’t get rooted.

If you don’t manage to solo it, because of your class or your lack of gear, try to find help, with two people this quest is a pushover, because you get to use 2 Stampedes on poor Harold Lane.

Once you’ve killed him, go back to D.E.H.T.A encampment, turn in [72] The Assassination of Harold Lane. Congratulations on your achievement.

a71circuit18.jpg

1. Go east to Kaskala (64,46). Turn in [71] Cowards and Fools, get [72] The Son of Karkut.

Get the two other quests:

  • [72] Not Without a Fight!
  • [72] Preparing for the Worst

2. Kill 12 Kvaldir Raiders and pick up 8 Kaskala Supplies.

h70guide66.jpg

There are a lot of those supplies further sourtheast down the shore (73,53).

3. Go back to the quest givers, turn in:

  • [72] Not Without a Fight!, get [72] Muahit’s Wisdom
  • [72] Preparing for the Worst

4. Go to the isle southeast and find Elder Muahit (67,55). Turn in [72] Muahit’s Wisdom, get [72] Spirits Watch Over Us.

5. Go directly north of here and a little bit northeast, dive in the water and look for Iruk (68,50). He’s directly under the last “A” of Kaskala on the map.

h71guide1.jpg

Right-click it and search for Issliruk’s Totem.

Go back to Elder Muahit. Turn in [72] Spirits Watch Over Us, get [71] The Tides Turn.

6. Go a little south and kill Heigarr the Horrible (68,56).

Go back to Elder Muahit, turn in [71] The Tides Turn.

Hotawa (who is standing next to Elder Muahit) should now offer you the quest [72] Travel to Moa’ki Harbor. Take it.

7. Swim east and go to Unu’pe (78,52).

Sell junk and repair. Re-stock food/drink.

FPicon.jpg Get the new flight path.

Fly to Fizzcrank Airstrip. Turn in:

  • [71] What’s the Matter with the Transmatter?, get [71] Check in With Bixie
  • [71] Give Fizzcrank the News
  • [71] Lefty Loosey, Righty Tighty, get [72] The Gearmaster

hs.jpg Make this inn your home location.

Get out of the inn and get [71] Scouting the Sinkholes from Abner Fizzletorque.

You should be level 71 by now.


Level 71


a70fix2.jpg

1. Go southeast to the Geyser Fields, where you’ll find the first sinkhole (66,33).

h70guide29.jpg

h70guide30.jpg Stand on it and right-click the Map of the Geyser Fields.
2. Go east to the 2nd sinkhole (70,32). Mark it.

3. Go south to the 3rd sinkhole (70,37). Mark it.

Hearthstone back to Fizzcrank Airstrip.

Turn in [71] Scouting the Sinkholes, get [71] Fueling the Project

a70fix3.jpg

1. Go to the pools southeast and look for Oil Slicks.

a73img19.jpg

a73img20.jpg Right-click the Portable Oil Collector near them.

Repeat this 8 times.

Also finish [71] Master and Servant if you haven’t already, there should be plenty of robots in this area.

Go back to Fizzcrank Airstrip, turn in:

  • [71] Master and Servant
  • [71] Fueling the Project, get [71] A Bot in Mammoth’s Clothing

2. Go to the plains southwest of Fizzcrank Airstrip. Kill Mammoths there (all of them, even the small calves) and loot 6 Thick Mammoth Hide.

Go back to Fizzcrank Airstrip, turn in [71] A Bot in Mammoth’s Clothing, get [71] Deploy the Shake-n-Quake!

3. Go to the Flight Master. Dismount and ask her to fly you to the “Dens of Dying to find Bixie.”

You’ll land next to Bixie Wrenchshanker (73,19), turn in [71] Check in With Bixie, get [71] Oh Great… Plagued Magnataur!

4. Go east toward the snowy hills, kill Plagued Magnataurs until you finish [71] Oh Great… Plagued Magnataur!

Go back to Bixie, turn in [71] Oh Great… Plagued Magnataur! and get [71] There’s Something Going On In Those Caves.

5. Ride east to a cave at (78,19). You should see a Plague Cauldron inside the cave.

a73img21.jpg Stand close to the cauldron and right-click Bixie’s Inhibiting Powder.

Go back to Bixie, turn in [71] There’s Something Going On In Those Caves, get:

  • [71] Rats, Tinky Went into the Necropolis!
  • [71] Might As Well Wipe Out the Scourge
a71circuit20.jpg

1. Ride northwest until the necropolis of Talramas. Kill any scourge on your way. Find the lower entrance on the southwestern side of the necropolis (69,15).

From there stick to the right and you’ll find Tinky Wickwhistle in a cage on the ground floor.

Turn in [71] Rats, Tinky Went into the Necropolis! and get [72] I’m Stuck in this Damned Cage… But Not For Long!

2. Get out of Talramas and ride to the other side of it (northern side), you should see Lich-Lord Chillwinter on the top of the necropolis. Kill him and loot the Piloting Scourgestone.

From there, look down in the room below and you should see Doctor Razorgrin. Jump down, kill him and loot the Magical Gyroscope.

Clear the way back down and kill Festering Ghouls until one drops an Engine-Core Crystal.

Once you have those 3 items, go back to Tinky. Turn in [72] I’m Stuck in this Damned Cage… But Not For Long! and get [71] Let Bixie Know.

If you still haven’t killed 20 Talramas Scourge, do it now

3. Ride southeast back to Bixie, turn in:

  • [71] Might As Well Wipe Out the Scourge
  • [71] Let Bixie Know, get [71] Back to the Airstrip

4. Ride west/southwest to the Fizzcrank Pumping Station. There’s a ramp northeastern side of the station, take it and go to the top of the station.

In a small cabin at the top of the station, you’ll find The Gearmaster’s Manual.

a73img22.jpg

Loot it. Gearmaster Mechazod will spawn behind you and talk to you. After he’s done, kill him and loot Mechazod’s Head.

5. Get off the platform and ride southeast to the southern sinkhole we marked earlier (70,37).

a73img23.jpg Right-click the Shake-n-Quake 5000 Control Unit.

Lord Kryxix will show up shortly after, kill him.

6. Ride southeast to Death’s Stand (82,47). Turn in [72] The Son of Karkut, get [72] Surrounded!

a71circuit21.jpg

1. Go just a little north and kill Rocknar (81,43). Loot A Handful of Rocknar’s Grit.

Also kill 7 Ziggurat Defenders on the way, they are all around this place.

2. Go back to Death’s Stand, turn in [72] Surrounded! and get [72] Thassarian, the Death Knight.

3. Go northeast to The Wailing Ziggurat (85,42). You’ll find Thassarian in it, turn in [72] Thassarian, the Death Knight, get [71] Finding the Phylactery.

4. Ride northeast to a small pool (85,33.5). After you dismount, get back to full HP/mana, because you’ll get ambushed by 4 mobs in the water.

Once ready, dive in the pool and right-click the Frozen Phylactery. If it’s not there, it means someone did the quest recently, you’ll have to wait until the Frozen Phylactery respawns.

Defeat the Phylactery Guardian and loot Tanathal’s Phylactery.

Go back to Thassarian in the Wailing Ziggurat. Turn in [71] Finding the Phylactery, get [72] Buying Some Time.

a71circuit22.jpg

1. Ride northeast to the Temple City of En’kilah (84,32). Kill every scourge you see.

a73img24.jpg You can use Lurid’s Bone whenever it’s up to help you kill faster.

Finish [72] Buying Some Time.

2. Go back to Thassarian. Turn in [72] Buying Some Time, get [72] Words of Power.

3. Go back to En’Kilah. First go east to the Spire of Pain (89,29).

Go inside, kill the two Mystical Webbing and then kill High Priest Talet-Kha. Loot High Priest Talet-Kha’s Scroll.

4. Go northwest to the Spire of Blood (88,22). Go to the upper floor, kill High Priest Andorath and loot High Priest Andorath’s Scroll.

5. Go west to the Spire of Decay (84,22). Kill the necromancers and then the boss. Loot High Priest Naferset’s Scroll.

6. Go back to Thassarian, turn in [72] Words of Power, get [72] Last Rites.

[72] Last Rites is a quest most classes won’t be able to solo, depending on gear as well. It can be duo’d easily if one of the two classes can heal (a Death Knight tanking and self healing can also work). Bringing 3+ players will make it a breeze though. If you don’t find help immediately, just skip the next part and go on with the guide. Just come back and read this part once you find a group for [72] Last Rites.


[72] Last Rites

After entering En’kilah. Look to your right and you’ll find the teleporter:

h70guide51.jpg

You’ll enter Naxxanar. If you want to get out, simply step on the green teleporter, right next to where you arrived.

In Naxxanar, take the upper teleporter (the blue one).

You’ll be teleported next to Thassarian. Read the following information about Prince Valanar before you tell Thassarian that you’re ready.

Prince Valanar

Abilities

  • Immune to Stuns or to any form of cc
  • Immune to any form of spell interruption
  • Shadowbolts for 2K and hits fairly hard. If the person tanking is wearing cloth, leather or mail, I’d recommend not interrupting his spells, because they’ll probably do less damage than his melee hits (3K crits on a rogue for example). However, you can also try hiding behind walls to avoid his shadow bolts, using line of sight
  • a73img25.jpg !!Soul Deflection!! Stop attacking while he channels this. All the damage you do to him is reflected to you while under this spell. Watch out for this one. It’s easy to see when he does it, as he channels violet beams on everyone near him.
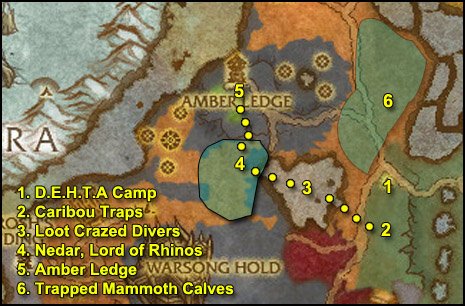
Tips

  1. Start slow, let Thassarian tank at the start. But don’t let him die though, he must survive or the quest will fail
  2. If you get low on health, just run away and run in circles under the platform until Valanar stops chasing you. Use line of sight to avoid the shadowbolts

==Note== If Thassarian dies, it’s not a big deal, Valanar will despawn too. 30 seconds later, Thassarian will respawn, talk to him again to re-start the event.


==WARNING== If you took the quest [72] The Lost Courier by mistake, abandon it.
Why? Because if you take this quest, you won’t be able to get a quest line in Howling Fjord later, which is basically a mirror quest line of this one, besides it’s better and fits into my guide better. So please, ABANDON [72] The Lost Courier.

Hearthstone to Fizzcrank Airstrip. If your hearthstone is not up, ride to Unu’pe and fly to Fizzcrank Airstrip.

Turn in:

  • [71] Deploy the Shake-n-Quake!
  • [71] Back to the Airstrip
  • [72] The Gearmaster

Go to the mailbox and grab the Overcharged Capacitor I asked you to buy in the shopping list. If you don’t have it, no worries, you’ll finish this quest later when you get the item.

If you do have the Overcharged Capacitor, turn in [71] Just a Few More Things…, get [71] Hah… You’re Not So Big Now!.

Sell junk, repair and re-stock food/drink.

Go north to Magmoth.

a70fix4.jpg Look for Magmoth Crushers or Mates of Magmoth, use Crafty’s Ultra-Advanced Proto-Typical Shortening Blaster on them and kill them.

Repeat 5 times.

Go back to Fizzcrank Airstrip.

Turn in [71] Hah… You’re Not So Big Now!, get [71] Plan B.

Fly to Amber Ledge.

In Amber Ledge, turn in [71] Nick of Time, get [71] Prison Break.
Also get [71] Monitoring the Rift: Cleftcliff Anomaly

a71circuit23.jpg

1. Go southwest to Beryl Point (43,37). Kill Beryl Mage Hunters until one drops a Beryl Prison Key.

Find an Arcane Prison.

h71guide2.jpg

Right-click it to free a Mage Prisoner.

2. Go further south. At (41,42) you’ll find a slope going down to the water.

3. Swim west/southwest to the Westrift (34,42)

h71guide3.jpg

h71guide4.jpg Right-click the Arcanometer while standing next to the rift.
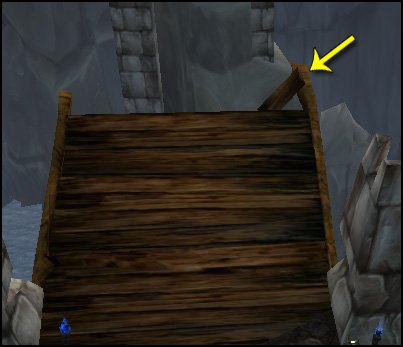
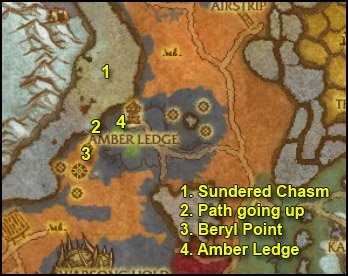
4. Go back the way you came from and then ride back to Amber Ledge.

Turn in:

  • [71] Prison Break, get [71] Abduction
  • [71] Monitoring the Rift: Cleftcliff Anomaly, get [71] Monitoring the Rift: Sundered Chasm

Time for some mission impossible action. We’re gonna jump off a cliff and try to land in the water.

You need to have a 100% speed mount for it to work and you need to jump from the thin plank at the edge of the bridge, as shown on the image below:

h71guide5.jpg

If you go splat it’s not a big deal, because you can ressurect immediately and try again.

If you don’t have a 100% speed mount or just don’t want to risk dying, there’s a path going down to the same spot at (43,35), easy to spot thanks to the blue torches.

a71circuit24.jpg

1. Swim north until (44,29). At this spot, dive down, all the way down to the rift.

h71guide6.jpg

Right-click the Arcanometer.

2. Swim back to the surface.
Swim south to the path lit by blue torches at (43,35).

3. Go up the path and you should be at Beryl Point. Find a Beryl Sorcerer, beat him down to below 25%HP.

arcanebinder.jpg Right-click the Arcane Binder.

This should capture the Beryl Sorcerer.

4. Mount up, go back to Amber Ledge. Turn in:

  • [71] Abduction, get [71] The Borean Inquisition
  • [71] Monitoring the Rift: Sundered Chasm, get [71] Monitoring the Rift: Winterfin Cavern

Go inside the mage tower and turn in [71] The Borean Inquisition, get the follow up [71] The Art of Persuasion.

h71guide8.jpg Target the Imprisoned Beryl Sorcerer and right-click the Neural Needler several times, until he speaks.

Turn in [71] The Art of Persuasion, get [71] Sharing Intelligence.

Get out of the tower, turn in [71] Sharing Intelligence, get [71] A Race Against Time.

Go back down to Beryl Point, go to the biggest of the blue circles.

h71guide9.jpg Right-click the Beryl Shield Detonator.
Kill Inquisitor Salrand. After you kill her, Salrand’s Lockbox will appear on the floor.

h71guide10.jpg

Right-click it and loot Salrand’s Broken Key.

Go back to Amber Ledge, turn in [71] A Race Against Time, get [71] Reforging the Key.

Turn in [71] Reforging the Key at Surristrasz, that big red dragon. Get the follow up [71] Taking Wing.

Go southeast to Warmage Anzim, turn in [71] Taking Wing. Before you get the follow up, read the following lines.

When you take the next quest, you’ll fly on a drake and help rescue Evanor. All you have to do is right-click her cage once the drake drops you on the platform, and then let Evanor teleport you, stay close to her.

That’s it, now get [71] Rescuing Evanor.

==Warning== There’s a bug currently and this quest sometimes takes a very long time to appear (sometimes hours). If that happens, skip it, go to the dragon and ask him to fly you to the Transitus Shield, then follow the guide from there. When you’re done with the Coldarra part of the guide, you can come back here and this quest should be available.

After the teleport, turn in [71] Rescuing Evanor, get [71] Dragonspeak.

Get out of the tower, go to Surristrasz, turn in [71] Dragonspeak, get [71] Traversing the Rift. This will make you fly to Coldarra.

After landing, turn in [71] Traversing the Rift, get all the available quests from here:

  • [71] Basic Training
  • [71] Nuts for Berries
  • [71] Reading the Meters
  • [71] Secrets of the Ancients
  • [71] Have They No Shame?

==Note== While following the next steps, complete the following objectives:

  • Kill 10 Coldarra Spellweaver
  • Kill Glacial Ancients until you have 3 Glacial Splinters
  • Kill Magic-bound Ancients until you have 3 Magic-bound Splinters
  • Look for Frostberry Bushes until you have 10 Frostberries.h71guide11.jpg
a71circuit25.jpg

1. Go north towards the blue circle at (33,28) and kill Coldarra Spellbinders until one drops a Scintillating Fragment.

h71guide12.jpg Right-click it to start the quest [71] Puzzling…
2. Go back to Transitus Shield, turn in [71] Puzzling… and get [71] The Cell.

3. Follow the path west until (29,35), there you should find a Coldarra Geological Monitor.

h71guide13.jpg

Right-click it to get the Southern Coldarra Reading.

4. Go northwest to a blue circle at (24,30). Kill Warbringer Goredrak, loot the Energy Core.

5. Go further northwest to (23,24) and you’ll find another Coldarra Geologial Monitor. Right-click it to get the Western Coldarra Reading.

6. Go northeast to another blue circle (27,21), kill General Cerulean, loot the Prison Casing.

7. Go further east to (31,21), where you should find the Northern Coldarra Reading.

Go back to Transitus Shield. Turn in [71] The Cell.

h71guide14.jpg Right-click your Augmented Arcane Prison.
Keristrasza will spawn. Get her quest [71] Keristrasza. Turn it in immediately and get the follow up [71] Bait and Switch.

Go back outside and look for Crystalyzed Mana.

h71guide15.jpg

They can be found all around the Nexus.

Keep doing laps around the Nexus until you have 10 Crystalyzed Mana Shards and finish the 4 other objectives mentioned in the note above.

Go back to Transitus Shield, turn in all quests:

  • [71] Basic Training, get [71] Hatching a Plan
  • [71] Nuts for Berries, get [71] Keep the Secret Safe
  • [71] Secrets of the Ancients, get [71] Quickening

Right-click your Augmented Arcane Prison to summon Keristrasza. Turn in [71] Bait and Switch, get [71] Saragosa’s End.

Get back to full HP/mana, talk to Keristrasza, tell her that you’re prepared to face Saragosa.

h71guide16.jpg Right-click the Arcane Power Focus.

Saragosa will come and get weakened. Kill her and loot Saragosa’s Corpse.

Right-click your Augmented Arcane Prison to summon Keristrasza. Turn in [71] Saragosa’s End, get [71] Mustering the Reds.

Talk to Keristrasza and ask her to return you to the Transitus Shield.

Turn in [71] Mustering the Reds at Raelorasz, get [71] Springing the Trap.

a71circuit26.jpg

1. Go westwards killing Coldarra Wyrmkins until you have 5 Frozen Axes.

2. Once you have 5 Frozen Axes, go to the crack at (29,33).

==Note== From now on kill Arcane Serpents on your way until you have looted 5 Nexus Mana Essence.

Follow the crack going down north until you reach the Meeting Stone for the Nexus (28,29).

Right next to it you should find another Coldarra Geological Monitor. Right-click it to get the Nexus Geological Reading.

3. Stay down the crack and go around the Nexus, killing Arcane Serpents and looking for Blue Dragon Eggs.

h71guide17.jpg

Right-click them to destroy them. Keep doing laps around the nexus until you finish both quests.

4. Once you’re done, get out of the ravine at (26,26) and go northeast until you reach the Nexus’s Northwestern Entrance (26,23).

h71guide18.jpg

==Note== You must unmount before the next step, and druids must not be shapeshifted.

h71guide19.jpg Stand infront of the doorway and right-click Raelorasz’s Spark.
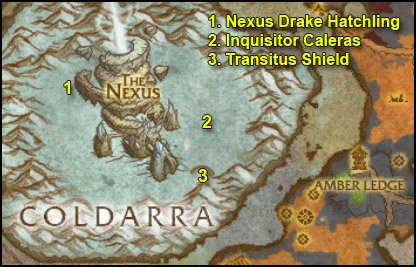
Keristrasza will come. All you have to do is stay close to her until she takes off and quickly run to her when she lands, or you won’t get the quest update and will have to restart.

==Note== If it fails, I suggest relogging before going back to the northwest gate and using the flare.

5. Ride back to the Transitus Shield and turn in all quests:

  • [71] Keep the Secret Safe
  • [71] Hatching a Plan, get [71] Drake Hunt
  • [71] Springing the Trap, get [71] Prisoner of War
  • [71] Reading the Meters, get [71] Postponing the Inevitable

Instance: The Nexus

You have all the quests for the first instance of the Nexus, called “The Nexus“.

  • [71] Have They No Shame?
  • [71] Postponing the Inevitable
  • [71] Prisoner of War
  • [71] Quickening

So from now on, if you feel like it, you should look for a group for The Nexus. It’s a very quick instance for level 71-73 players, I recommend it.

If you don’t feel like it or if you don’t find a group, you can abandon the above 4 quests. They can easily be picked up in the future anyway, if you change your mind.


a71circuit27.jpg

1. Ride to the area northwest of the Nexus (23,26).

h71guide20.jpg Put Raelorasz’s Spear on a hotkey.

Look up in the skies and find a Nexus Drake Hatchling.

h71guide21.jpg

Target it and use Raelorasz’s Spear when you’re in range (the range is quite big though).

Then just “tank” the drake until it becomes friendly. You can use stuns or heal yourself or simply just take the beating. It takes about 10 seconds.

Mount up and ride back to the Transitus Shield as fast as you can. You have 3 minutes.

Turn in [71] Drake Hunt, get [71] Cracking the Code.
Also get [71] Drake Hunt again, it’s a daily quest and it gives another 20K exp.

2. Go north to the blue circle at (33,28).

Kill Inquisitor Caleras, loot the Azure Codex.
Kill Coldarra Spellbinders, loot 3 Shimmering Runes.

3. Go catch a drake, you know how it works. Bring the drake back to Transitus Shield.

Turn in [71] Cracking the Code and [71] Drake Hunt.

a71circuitfix2.jpg

1. Fly to Amber Ledge.

2. Ride northeast to Steeljaw’s Caravan and loot the Warsong Banner (49.5,27).

a70fix5.jpg

Now go northwards while looking for Dead Caravan Guards/Workers, they are bodies with green smoke around them.

Right-click them and click the text to loot 10 Warsong Outfits. You can stay mounted while doing this, but be careful not to run through too many mobs.

a71circuit28.jpg

1. Go further north until you hit the road.

From there follow the road west, all the way to Winterfin Retreat, where you should find King Mrgl-Mrgl (43,13).

Turn in [71] King Mrgl-Mrgl, get [71] Learning to Communicate.

2. Dive down in the water west of King Mrgl-Mrgl. Go to the bottom of the sea and look for a water elemental called Scalder (42,16). He roams up and down the bottom of the sea. Kill it.

h71guide22.jpg Target Scalder’s corpse and right-click the King’s Empty Conch.
==Note== Scalder is immune to frost.

Go back to King Mrgl-Mrgl, turn in [71] Learning to Communicate, get [71] Winterfin Commerce.

3. Swim west across the water to Winterfin Village (41,16).

Look for Winterfin Clams, they are quite small and look like this:

h71guide23.jpg

They can also drop from murlocs in the area, so feel free to kill some while you’re here.

Loot 5 Winterfin Clams.

4. Go back to the Winterfin Retreat, turn in [71] Winterfin Commerce at Ahlurglgr. Get the two new quests:

  • [71] Oh Noes, the Tadpoles! from King Mrgl-Mrgl
  • [71] Them! from Brglmurgl

5. Go back to Winterfin Village, this time look around for cages.

h71guide24.jpg

Right-click them to free the Murloc Tadpoles. Keep freeing tadpoles while doing the next steps.

6. Go southwest to the cave at (40,20).

h71guide4.jpg Right-click the Arcanometer while standing inside the cave.

7. Go further inside the cave, always follow the wall on your left-hand side and you will eventually find two caged murlocs, Glrglrglr and Lurgglbr at (38,23).

Don’t get the quest from Lurgglbr for now.
Only get the quest [71] Keymaster Urmgrgl from Glrglrglr.

8. Get out of this room, and jump down on the left to the slope going down. Further down this path you’ll find Keymaster Urmgrgl. Kill him, loot Urmgrgl’s Key.

Go back to the previous room with the two caged murlocs. Turn in [71] Keymaster Urmgrgl.

Now get [71] Escape from the Winterfin Caverns from Lurgglbr. Escort him out.

After the escort, just kill stuff in the area until you finish [71] Them! and [71] Oh Noes, the Tadpoles!

Go back to King Mrgl-Mrgl. Turn in:

  • [71] Oh Noes, the Tadpoles! get [71] I’m Being Blackmailed By My Cleaner
  • [71] Escape from the Winterfin Caverns
  • [71] Them!

Go a little northwest, turn in [71] I’m Being Blackmailed By My Cleaner, get [71] Grmmurggll Mrllggrl Glrggl!!!
Also get [71] Succulent Orca Stew from Cleaver Bmurglbrm.

a71circuit29.jpg

1. Swim northwest while killing Glimmer Bay Orcas on your way, loot Succulent Orca Blubbers off them.

2. Further north you should find a bigger orca called Glrggl. He swims in circles around the iceberg at (39,9)

Kill him and loot Glrggl’s Head.

Now just kill orcas until you finish [71] Succulent Orca Stew.

3. Go back to Winterfin Retreat, turn in

  • [71] Grmmurggll Mrllggrl Glrggl!!!, get [71] The Spare Suit
  • [71] Succulent Orca Stew

Go southeast to King Mrgl-Mrgl, turn in [71] The Spare Suit, get [72] Surrender… Not!

4. Swim over to the Winterfin Village again.

h71guide25.jpg Right-click King Mrgl-Mrgl’s Spare Suit.
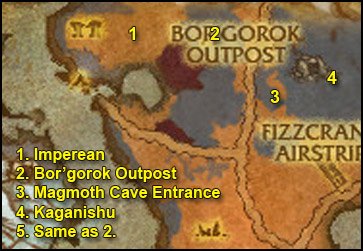
Take a look at yourself while running around in the suit. I also recommend trying the /dance. When you’re done laughing you can go on with the guide 😛

Go inside the cave. This time keep hugging the wall to your right-hand side until you reach the end of the cave, where you’ll find Claximus.

Kill him and loot the Claw of Claximus.

Put your murloc suit back on and get out of the cave.

Go back to Winterfin Retreat. Turn in [72] Surrender… Not!

Ride back to Fizzcrank Airstrip.

Turn in [71] Plan B, get [72] It Was The Orcs, Honest!.

a70fix6.jpg Right-click Crafty’s Sack and loot its content.

Go north to Magmoth, go to the drop off spot I showed you in the video earlier.

a70fix7.jpg Right-click the Orc Disguise.

Jump down. Kill Magmothregar and loot him.

a70fix8.jpg Target his corpse and right-click the Warsong Banner.
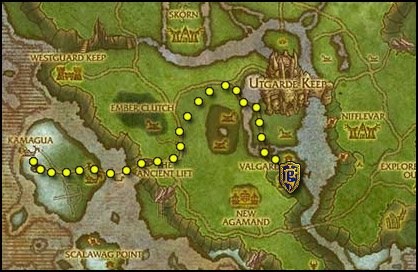
Hearthstone back to Fizzcrank Airstrip.

Turn in [72] It Was The Orcs, Honest!.

Fly to Amber Ledge, turn in [71] Monitoring the Rift: Winterfin Cavern.

We’re done with Borean Tundra. If you still haven’t completed [72] Last Rites, you should try it a last time. If you can’t find a group, just forget it for now, you can come back to do it later. It’s just a nice quest with good rewards, but it doesn’t have a follow up, so it’s not a big deal if you don’t do it now.

Time to go to Howling Fjord!

Fly to Unu’pe, take the turtle to Moa’ki Harbor.
Once there, go turn in [72] Travel to Moa’ki Harbor, don’t get the follow up.

FPicon.jpg Get the new flight path.

From Moa’ki Harbor, take the turtle to Kamagua (go to the pier on your left-hand side).

FPicon.jpg Get the new flight path.

Follow the map below and ride to Valgarde Keep.

a71circuit30.jpg

If you’re not level 72 yet, it’s normal, don’t worry, just keep going.