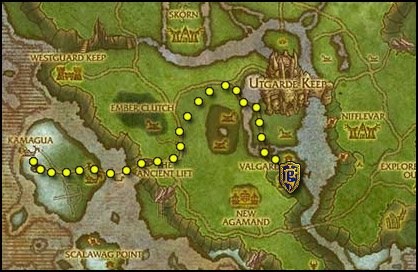
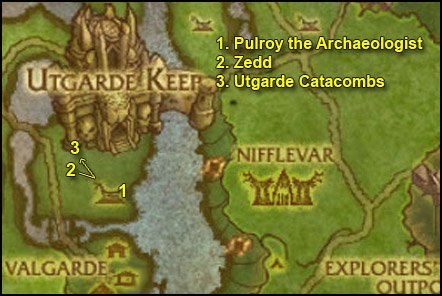
Get the quest [55] In Service Of The Lich King. I suggest to zoom out your minimap to the maximum, that way you’ll see the yellow “?” from far away on your minimap.
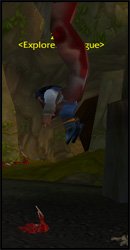
Go northwest to Instructor Razuvious, turn in the quest and get the follow up [55] The Emblazoned Runeblade.
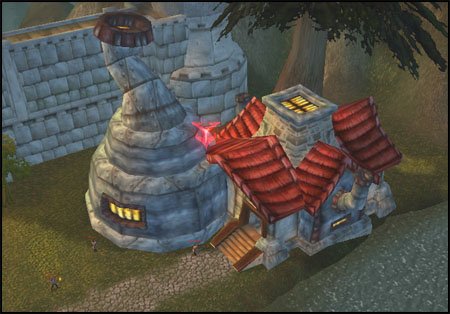
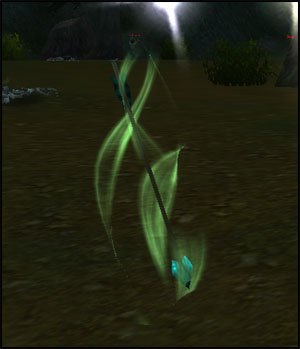
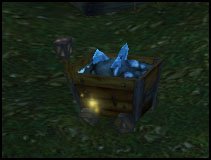
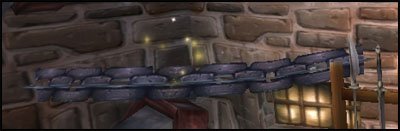
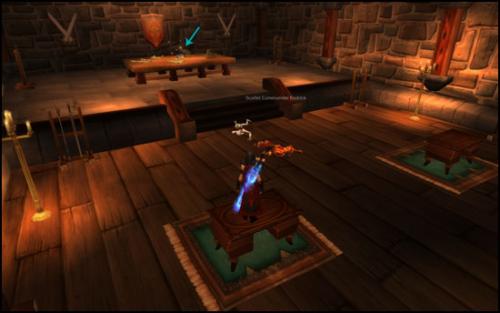
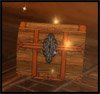
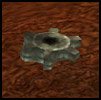
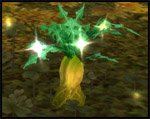
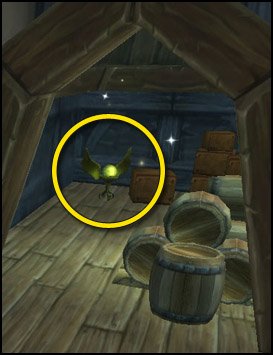
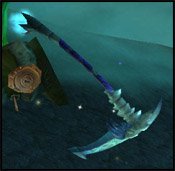
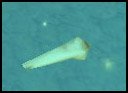
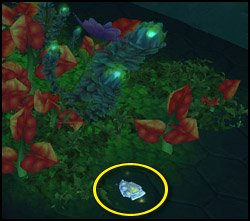
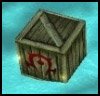
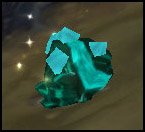
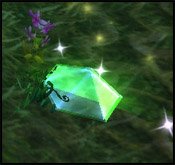
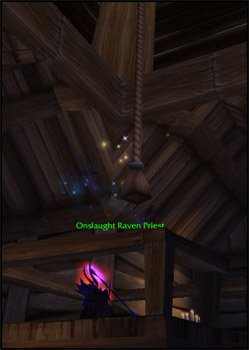
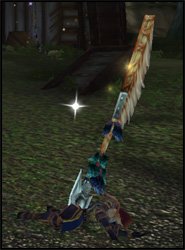
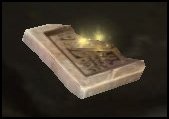
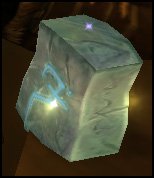
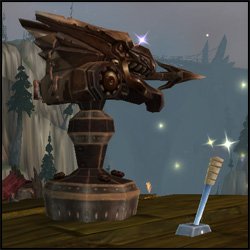
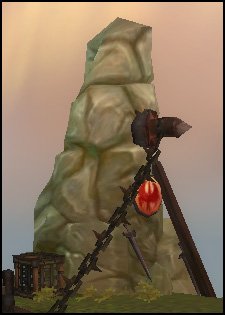
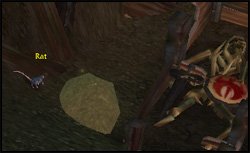
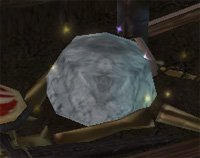
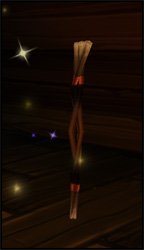
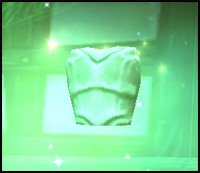
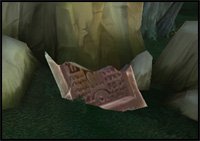
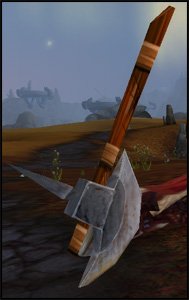
Now look for glowing weapon rack like the one in the picture below:
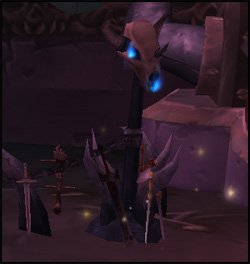
Right-click it to loot a Battle-worn Sword. Open your inventory and right-click the sword while standing next to a runeforge:
Go back to Instructor Razuvious, turn in the quest and get the follow up [55] Runeforging: Preparation For Battle.
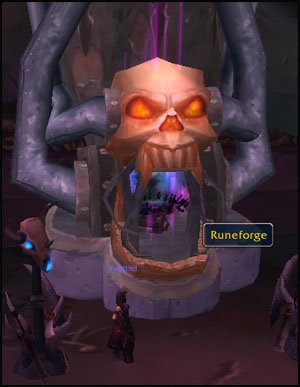
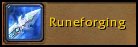
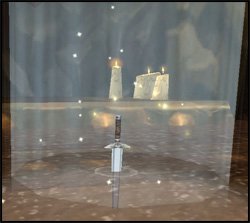
Go to the nearest runeforge, open your spellbook and click on runeforging:
Engrave your weapon with a Rune of Cinderglacier.
Go back to Instructor Razuvious, turn in the quest and get the follow up [55] The Endless Hunger.
Now time for our first fight. It’s pretty straight forward, use your attacks in this order:
Icy Touch –> Plague Strike –> Blood Strike –> Blood Strike –> Icy Touch –> Plague Strike –> Death Coil –> Restart the cycle
If one of your abilities get dodged or misses, keep re-casting it until it works. Your target must always have both the Icy Touch and the Plague Strike disease on before you use Blood Strike on them, that way you get the maximum damage out of Blood Strike.
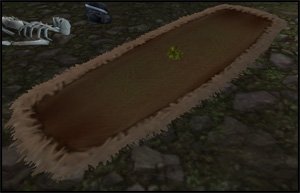
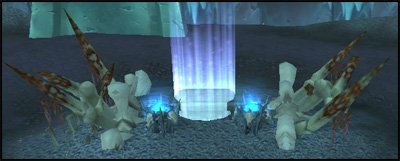
Go down in the pit, right-click an Acherus Soul Prison, wait for the Unworthy Initiate to become attackable and kill it.
Go back to Razuvious, turn in and get the follow up [55] The Eye Of Acherus.
Go to The Lich King, turn in and get the follow up [55] Death Comes From On High.
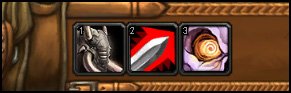
To the left and right of The Lich King you should find an Eye of Acherus Control Mechanism. Right-click it.
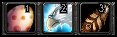
Your ability bar will be replaced by a new bar with the eye’s abilities.
After a short trip down, you’ll get control on the Eye of Acherus. First, rise higher in the air to be out of firing range of any scarlet mob and then use Ability #3 to become invisible.
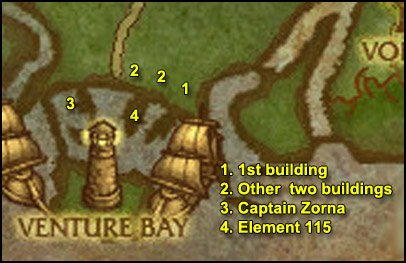
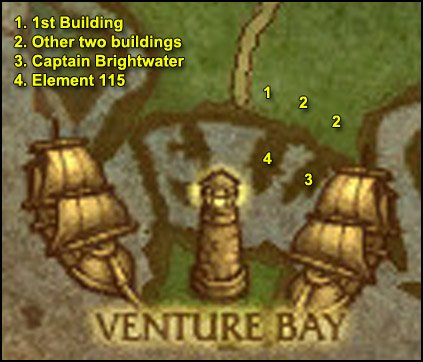
After that, find the first location we’re going to analyze: the New Avalon Forge.
Very easy to spot thanks to the red arrow floating over it.
Use Ability #2 and try to target as many scarlet npcs as you can. This will summon ghouls on each of them to distract them while you use Ability #1 to analyze the building.
When done, rise up in the air and go invisible again. If the Eye of Acherus is low on health, you can wait a little for his HPs to regen.
On to the next building, just south of the forge, you’ll find The Scarlet Hold. Apply the same strategy.
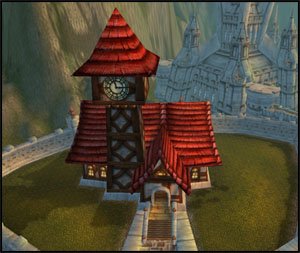
Directly west you’ll find the New Avalon Town Hall, analyze it:
Finally go directly south and you’ll find the Chapel of the Crimson Flame:
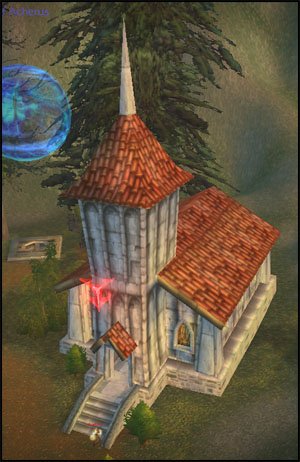
Analyze it and the quest should be complete.
Use Ability #5 and you’ll be back to your character. Turn in the quest, get the follow up [55] The Might of the Scourge.
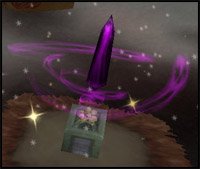
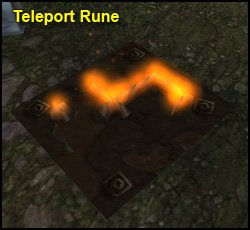
A few paces behind The Lich King you’ll find a glowing pink teleporter. Step on it and you’ll be teleported to another floor.
Go northwest to Highlord Darion Mograine, turn in the quest and get the follow up [55] Report To Scourge Commander Thalanor.
Equip your new necklace: Bladed Ebon Amulet
Further southwest is another quest called [55] The Power of Blood, Frost and Unholy, complete it immediately.
Go back to the balcony (not the teleporter) and turn in the quest at Scourge Commander Thalanor. Get the follow up [55] The Scarlet Harvest.
Right-click one of the Scourge Gryphons and fly down to Death’s Breach.
Go a few paces south and turn in the quest at Prince Valanor, get the follow up [55] If Chaos Drives, Let Suffering Hold The Reins.
3 other quests should have appeared on your minimap now, get them all.
First thing, we’re gonna look around the camp for Death Knight Initiates:
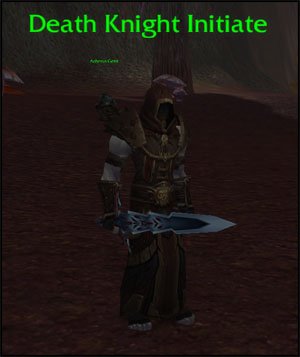
Right-click them, challenge them to a duel and defeat them. You can also challenge other players, but that’s more difficult. Repeat this 5 times. Use the food you have in your inventory if you’re low HP after a duel.
When done, go turn in [55] Death’s Challenge. You’ll get one talent point to spend as a reward. We’ll only put our points in the Unholy tree for now.
Spend your first talent point in Morbidity.
Time to kill stuff, finally!
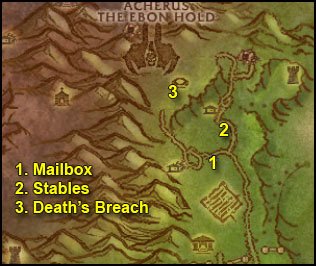
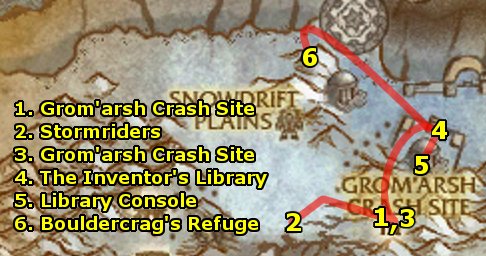
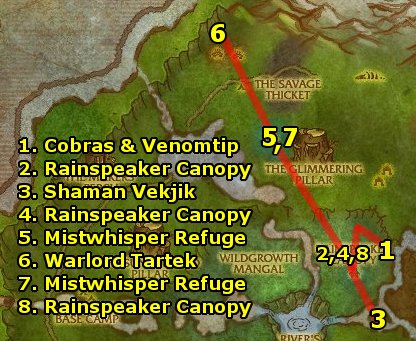
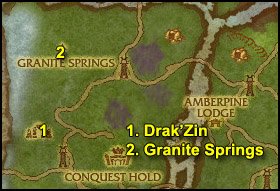
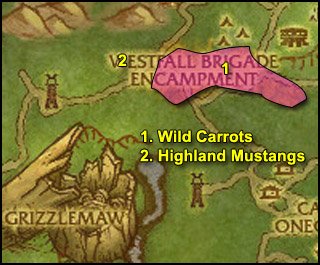
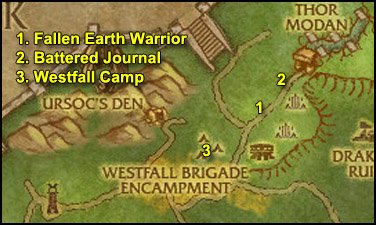
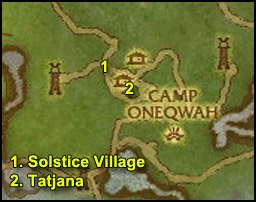
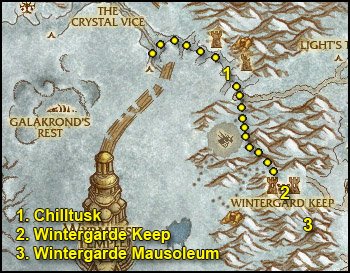
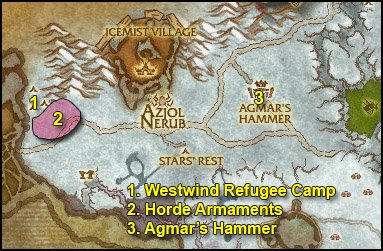
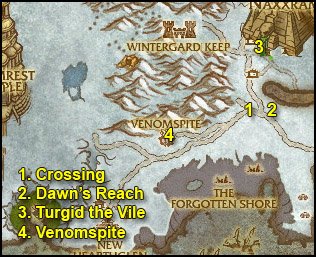
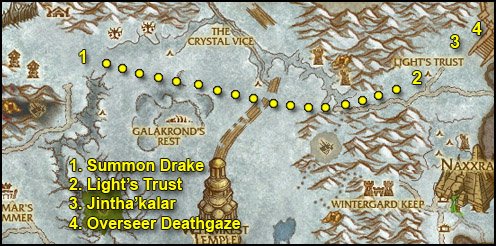
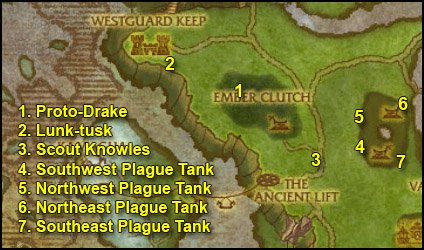
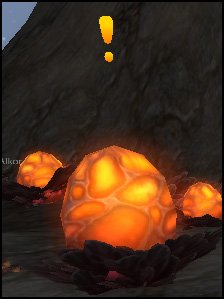
1. Go south down the path and then southeast towards the yellow “!” on your minimap while killing everything on the way and also picking up Saronite Arrows.
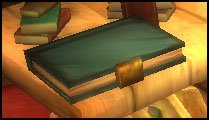
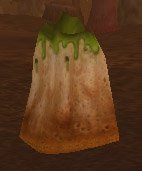
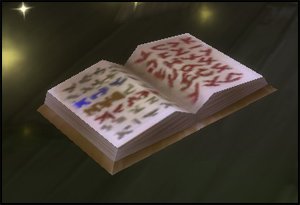
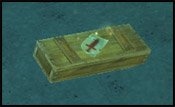
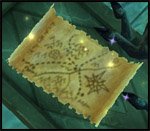
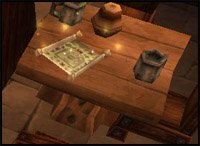
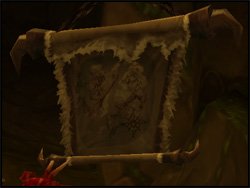
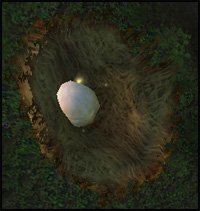
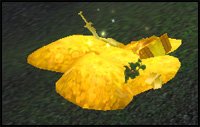
When you get to the yellow “!“, you’ll be infront of a mailbox with a scroll on top.
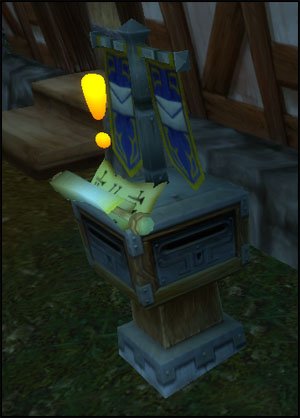
Right-click the scroll and complete the quest. You can then open the mailbox and get a book from it. It’s just lore though, you can read it if you want. I personally read it quickly and destroyed it, it can’t be sold.
After that go back to killing stuff and looting Sardonite Arrows until you finish both quests.
2. Once done, go to the stables, which are located on the northeastern part of the field.
Go to the nearest horse you can find and right-click it to mount it, then go back to Death’s Breach, you can use the horse’s Ability #2 to gallop.
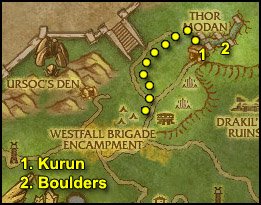
3. Go to Salanar the Horseman, he stands right in the middle of Death’s Breach, then use the horse’s Ability #1 to deliver it to Salanar.
Turn in [55] Grand Theft Palomino and get the follow up [55] Into the Realm of Shadows.
Put your new talent point in Morbidity.
You’ll be in the shadow world after accepting this quest. Go down back in the fields and look for a Dark Rider of Acherus, kill it and then right-click his horse.
Ride back to Death’s Breach and once there, use Ability #1, Horseman’s Call. A few seconds later you’ll be back in the normal world.
 Click on the “Leave Vehicle” button, go to Salanar the Horseman and turn in the quest.
You can now summon your own Deathcharger. To do that, open the character window (“c” key), go to the Pets tab, drag the Acherus Deathcharger icon on a free action bar slot. Click it and voila!
Turn in:
- [55] If Chaos Drives, Let Suffering Hold The Reins
- [55] Tonight We Dine in Havenshire
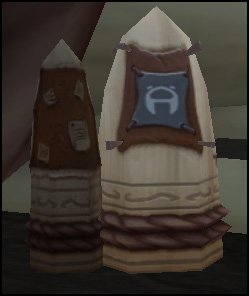
It doesn’t matter which cloak you pick, I personally like the one with frost resistance, because it fits the rest of the equipment better.
Get the quest [55] Gothik the Harvester from Prince Valanar. Go to Gothik the Harvester and turn in the quest, get the follow up [55] The Gift That Keeps On Giving.
You should be level 56. Equip your newly acquired items:
Cloak: Shroud of the North Wind
Relic: Sigil of the Dark Rider
Ring: Valanar’s Signet Ring
Spend your talent points as follows:
- 1 in Morbidity
- 2 in Vicious Strikes
- 2 in Epidemic
Level 56
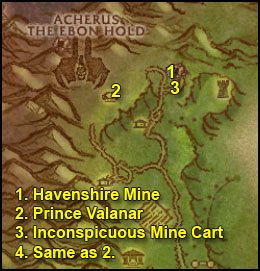
1. This time go down the path north then east and enter the Havenshire Mine (58,31).
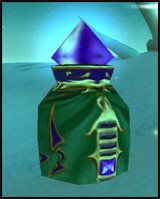
 Search your inventory for the Gift of the Havester and put it on a hotbar.
Use the Gift of the Harvester on Scarlet Miners. Repeat this step until you have 5 ghouls under your control.
Go back to Gothik the Harvester, turn in the quest and get the follow up [55] An Attack Of Opportunity.
Equip your new trinket: Soul Harvester’s Charm
Put your talent point in Ravenous Dead.
2. Go to Prince Valanar, turn in the quest and get the follow up [55] Massacre at Light’s Point. Now comes a fun quest, I suggest reading the rest of point 2. before proceeding.
Outside of Havenshire Mine you’ll find an Inconspicuous Mine Car.
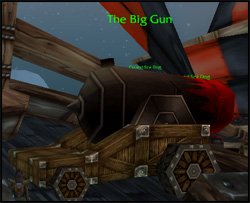
When you right-click it, you’ll be taken to a ship and will be facing 3 Scarlet Cannons.
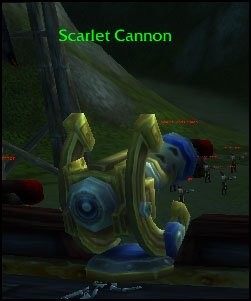
If you right-click one of them, you’ll take control of it and will this window will appear instead of your hotbars:

Ability #1 is your main ability, chain use it to kill as many Scarlet NPCs as you can. To aim, hold your mouse right-click button and move your mouse.
Ability #2 is to protect you. Whenever a few Scarlet NPCs make it close to you, use ability #2 to repell them.
Ability #5 is to escape. Use it once you’ve killed 100 Scarlet Defenders.
==TIP== Aim for the bridge leading to the ship every 2 or 3 shot to prevent them to get to you. If they do, there’s still Ability #2 anyway.
3. You should be more than ready now, go right-click the Inconspicuous Mine Car and have fun!
4. Go back to Prince Valanar, turn in [55] Massacre at Light’s Point, get the follow up [55] Victory At Death’s Breach!
Right-click on a Scourge Gryphon to fly back to Acherus.
Go to Highlord Darion Mograine, turn in and get the follow up [55] The Will Of The Lich King.
Equip your new items:
- Bracers: Plated Saronite Bracers
- Legplates: Engraved Saronite Legplates
Spend talent points as follows:
- 2 points in Ravenous Dead
- 2 points in Necrosis
Go to Lord Thorval (in the room just northwest of Mograine) and train your new skills:
Pestilence, Death Strike and Raise Dead.
Now things are starting to get interesting.
Raise Dead: Not much to explain, it summons a ghoul who fights for you. It’s great, the ghoul can take quite a lot of pain and deals a decent amount too.
Pestilence: this skill is very useful when fighting multiple enemies. Whenever you fight several enemies at the same time, choose a target and do this:
Icy Touch –> Plague Strike –> Pestilence
This will spread all the diseases to other nearby enemies, as long as they are close enough (about 20 yards).
Death Strike: Incredibly good skill. You’re gonna be much harder to kill from now on. The damage you do with it heals you once for each disease on your target. Needless to say, it’s better to use it after having diseased your target with Icy Touch and Plague Strike.
So from now on your attack cycle should look like this:
Icy Touch –> Plague Strike –> Death Strike –> Blood Strike –> Blood Strike –> Death Coil –> Death Strike –> Death Strike –> Blood Strike –> Blood Strike –> Death Coil –> Restart cycle
It might seem complicated, but it’s actually not. You’ll see that this rotation makes perfect sense as it uses all your cooldowns whenever they are up. You can try it on the practice dummies in Death’s Breach, close to the gryphon landing site. Of course, your enemies will die before you finish the full cycle most of the time, but that’s ok. Just try to get used to this, because dps cycles are a big part of the Death Knight class, and being able to perform them well will determine if you’re a good DK or a mediocre DK.
Go back to the Balcony and take a Gryphon ride down. Go to Prince Valanar, he’s at a new location closer to the cliff.
Turn in and get the follow up [55] The Crypt of Remembrance.
Go sell and repair at Hargus the Gimp (53,35), a few steps infront of Prince Valanar . Also buy some Corpse Dust from him (about 5), this will allow you to summon a ghoul even when there’s no corpse available.
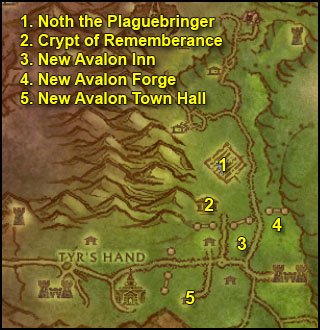
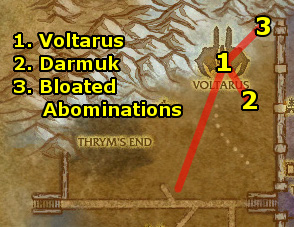
1. Mount up, ride south/southeast to Noth the Plaguebringer (56,52). Take his quest [55] The Plaguebringer’s Request.
2. You should see a yellow “?” on your minimap southwest of where you are. Go there, enter the Crypt of Rememberance (54,58) and turn in the quest.
Get [55] Nowhere To Run And Nowhere To Hide and [55] Lambs To The Slaughter.
3. Get out of the crypt and go southeast to New Avalon.
Kill everything on your way from now on. On your left-hand side after entering you should see a big building, the New Avalon Inn (58,65).
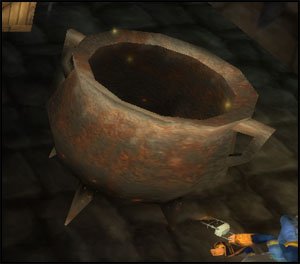
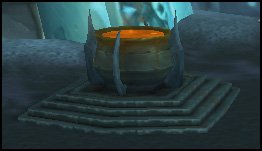
Go inside and go down to the basement cellar where you’ll find an Empty Cauldron, loot it.
4. Northeast of the inn you’ll find the New Avalon Forge (61,61).
Enter the building and loot an Iron Chain.
5. Mount up and ride southwest to the New Avalon Town Hall, a big building with a clock tower (53,71).
Go inside the Town Hall, kill Mayor Quimby and loot the New Avalon Registry.
Now just go out and kill stuff until you finish [55] Lambs To The Slaughter. You’ll find all the Citizens you need right outside the town hall (have some fun with pestilence).
Mount up and ride out of New Avalon.
First stop by Noth the Plaguebringer, turn in and get the follow up [55] Noth’s Special Brew.
Go to the cauldron next to him and turn in the quest to get 5 of those cool potions. Feel free to overuse them, we’ll get a lot more later on. You should put them on a hotbar, ready for use, just in case (but to tell you the truth, you won’t be needing them much unless you’re suicidal :P).
Go to the Crypt of Rememberance and turn in both quests, get the follow up [55] How To Win Friends And Influence Enemies
Equip your new items:
- Girdle: The Plaguebringer’s Girdle
- Greaves: Greaves of the Slaughter
Spend your talent points as follows:
- 3 points in Necrosis
- 2 points in On a Pale Horse
- 1 point in Shadow of Death
==Note== On a Pale Horse is a great talent. You have to realize that until level 77 in Northrend, you won’t be able to use a flying mount while leveling, so you will stick to ground mounts for 21 more levels starting from now. Now imagine how much time you’re going to save with this 20% extra mount speed. A very significant amount, trust me 😛 The fear and stun 20% reduction is also a nice bonus.

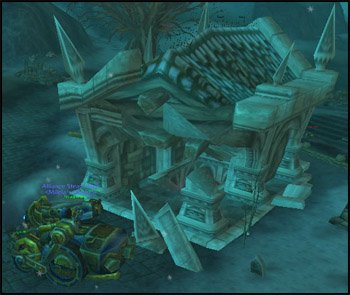
1. Go back in New Avalon, to the Scarlet Hold, it’s that big casern on the east side of New Avalon. When there, open the Ornately Jeweled Box in your inventory and equip the two One-Handed Swords. Then just start attacking people in there until one of them tells you what you want to know.
2. Go back to the Crypt of Rememberance, turn in and get the follow up [55] Behind Scarlet Lines.
Equip your new ring (instead of the green one of course): Keleseth’s Signet Ring
Spend your talent points as follows:
- 2 points in Blood-Caked Blade
3. Get out, mount up and ride a long way south to the Scarlet Tavern (56,80). Go to the upper floor and turn in, get the follow up [55] The Path Of The Righteous Crusader. Also get the other quest [55] Brothers in Death and get out of this building.
4. Ride northeast to the Scarlet Hold. Clear the way up to the upper floor and go to the central main room.
On a table there you’ll find the New Avalon Patrol Schedule.
Loot it.
After that, go down all the way to the cellar basement, where you will find Koltira Deathweaver. Turn in your quest, but before you get the follow up, read the next few lines.
Koltira will create an anti-magic barrier, you must fight inside it as much as possible to reduce the damage you’ll take from the acolytes. You can pull them inside with Death Grip as well. After about 2 minutes, High Inquisitor Valroth will come. Pull him inside the barrier with Death Grip and kill him. Mission accomplished. Don’t forget you have potions if things go wrong.
You’re more than ready now, so get the follow up [55] Bloody Breakout and protect Koltira. It doesn’t matter if you die, you’ll get resurected, but Koltira must survive.
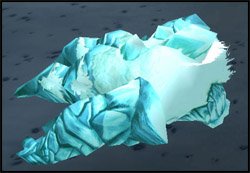
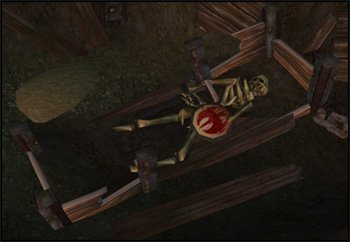
Once Valroth is dead, his remains will appear on the floor:
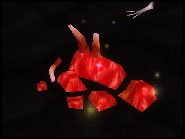
Right-click them to loot Valroth’s Head.
5. Go back to the Scarlet Tavern. Turn in both quests, get the follow up [55] A Cry For Vengeance!
Equip your new items:
- Gauntlets: Bloodbane’s Gauntlets of Command
- Breastplate: Saronite War Plate
You should be level 57 by now.
Level 57
Spend your talent points as follows:
- 1 point in Blood-Caked Blade
- 2 points in Dirge
- 1 point in Summon Gargoyle
- 1 point in Impurity
- 1 point in Master of Ghouls
==Note== You just became godlike. The biggest upgrade here is Master of Ghouls. Now you’ll always have a ghoul fighting for you, until it dies. And if it dies, just re-summon it. You’ll also be able to control your ghoul from now on and will get a pet bar:

Controlling your ghoul properly will be a nice advantage for you in the future. Here are a few tips to get the most out of your ghoul.
- Use Key bindings. The default keybindings are CTRL-1, CTRL-2, etc. I personally prefer to change them to SHIFT-1, SHIFT-2, etc, because I find reaching for CTRL plus a number is uncomfortable. That’s up to you, you can bind any key you like for your pet bar. If you want to change your pet bar key bindings, go to options > key bindings and change your Secondary Action Button 1, 2, 3, etc.Only 4 buttons are very important to bind anyway: Attack, Follow, Gnaw and Huddle.Gnaw is your pet’s stun, it’s great to interrupt spells and also to stop things from running. Use it smartly.
Huddle is a defensive boost for 10 seconds, use it to preserve your ghoul’s health when he’s taking a lot of damage. - Level your First Aid skill. It might not be very useful for now, but you’ll see in the future, when you solo difficult elites for certain quests, your ghoul will need healing after the fights, and trust me, Death Coil isn’t always enough. So instead, bandage your ghoul! Anyway, leveling first aid also gives you achievement points, so might as well get it done
An amazing skill. It’s a big dps burst, which can last a total of 1 minute if you provide enough runic power. Here are a few tips:
- Build up 100 Runic power before activating this skill
- Don’t even think about using Death Coil while your gargoyle is up. If your runic power goes down to zero, your gargoyle despawns
- Use it at the right time, like when about to fight an elite, it’s kind of a waste in most other cases
Thanks to dirge, you’ll get more runic power now, that means you’ll have to try to squish in some extra death coils in your attack cycles. If you pay attention to your cooldowns, you’ll see there’s often room for an extra death coil here and there during your cycles.
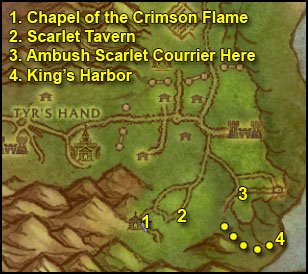
1. Go southwest to the Chapel of the Crimson Flame (53,81). Find Knight Commander Plaguefist, turn in and get the follow up [55] A Special Surprise
Go inside the long house and find the NPC corresponding to your race. (If you’re human, find the human Ellen Stanbridge. If you are Gnome, find the gnome Goby Blastenheimer, etc.)
Watch that NPC make his speech and you’ll have to kill it at the end. Put your ghoul on passive mode, because you won’t get the kill credit if the ghoul does more damage than you.
Go back to Knight Commander Plaguefist, turn in and get the follow up [55] A Sort of Homecoming.
2. Go back to the Scarlet Tavern, turn in [55] A Sort of Homecoming and get [55] Ambush at the Overlook.
Equip your new trinket (instead of the Insignia of the Scourge): Signet of the Dark Brotherhood
Spend your talent points as follows:
- 3 points in Reaping
Reaping: This converts your blood runes into death runes when you use Blood Strike or Blood Boil (which we’ll get soon). A Death Rune is a universal rune, it counts as any type of rune. Why is that good? For many reasons. It allows you to have more flexibility in your cycles. It allows you for example to re-cast your Bone Shield in fight without messing up your Death Strike cycles. Or better, if you convert both your blood runes into death runes, you’ll then be able to use Death Strike 3 times in a row, and that’s great when you’re having a tough fight and need a lot of lifedrain. Later on, you’ll be using Scourge Strike instead of Death Strike most of the time, and you’ll understand how valuable reaping is, because Scourge Strike is the kind of ability you want to spam as often as possible 😉
3. Mount up and ride east to the Scarlet Overlook (62,77).
Find a clear spot near the path.
 Look for a Makeshift Cover in your inventory
Right-click it, the Scarlet Courrier will appear, kill it and loot everything he has.
Go back to the Scarlet Tavern, turn in and get [55] A Meeting With Fate.
4. You should now be disguised as a Scarlet Courrier. Get out, mount up and ride to the Scarlet Overlook.
This time take the path south leading down to King’s Harbor, where you will find High General Abbendis (65,84).
Turn in and get [55] The Scarlet Onslaught Emerges.
5. Go back to the Scarlet Tavern, turn in the quest, but before your get the follow up, read the following paragraph.
You should have 4 talent points now, spend them as follows:
- 1 point in Impurity
- 3 points in Desecration
==Optional== Before going back to turn in this quest, I recommend killing some more Scarlet NPCs to get Crusader Skulls, which we you can turn in at the cauldron for extra health potions. 20 Crusader Skulls = 5 Potions, and you can carry a maximum of 20 potions. I personally farm 60 Skulls, and then I get out of this place with 20 Potions (including the 5 we got from quest earlier). The fastest way to get skulls is to kill the citizens outside of the town hall, it’s even easier if you put your ghoul on aggressive mode. However those don’t give exp, so you might want to kill other things, it will just take longer. After you have 60 skulls be sure to go back to the cauldron to turn in and get your 20 Potions *BEFORE* going back to the Scarlet Tavern. If you return to Acherus without turning the skulls in there is no way to turn them in later.
Got your 20 potions? Let’s move on then, go back to the Scarlet Tavern.
Get the follow up [55] Scarlet Armies Approach… Orbaz Bloodbane will then open a portal for you, take it and you’ll be back in Acherus.
Go to Highlord Darion Mograine, turn in and get [55] The Scarlet Apocalypse.
Equip your new pauldrons: Blood-soaked Saronite Plated Spaulders
Don’t worry about talents for now, we are not gonna fight for a while.
Go see your trainer, buy Frost Presence and Mind Freeze. Don’t waste money on the rest, Rune of Spellbreaking/Shattering is not useful to us at this point. Of course, if you’re rich, feel free to buy those skills anyway.
Frost Presence: That’s the tanking stance, pretty much like the defensive stance of warriors. We won’t use it much in this guide, it’s mostly for tanking in instances. However, it’s also useful when you’re running away from something, as it increases your armor and spell mitigation, making you much much more survivable. Other than that, stay in blood stance.
Mind Freeze: Our first spell interruption (well argueably the second, because you can interrupt spells with Death Grip too, but that’s not its main purpose). It doesn’t trigger the global cooldown, which is great, because that means you can cast it at any moment without disrupting your attack rotations.
Anyway, enough talking, let’s get back to business.
Take a gryphon ride back to Death’s Breach. Go talk to The Lich King, get the follow up [55] An End to All Things.
 Look in your inventory for a Horn of the Frostbrood.
Right-click it. You’ll climb on a Frostwyrm and your action bars will be replaced by this:

- Ability #1 is your attack. It’s just like with the canon we used before, aim by holding your mouse right-cilck button.
- Ability #2 is to refill the Wyrm’s mana. Should you need to do that, go find a lone Scarlet Defender and use it on him (have to be within 15 yards range).
You need to kill 150 Scarlet Soldiers (a piece of cake) and to destroy 10 Ballistas. The ballistas are a little more tricky, because their javelins kinda hurt so you must dodge them.
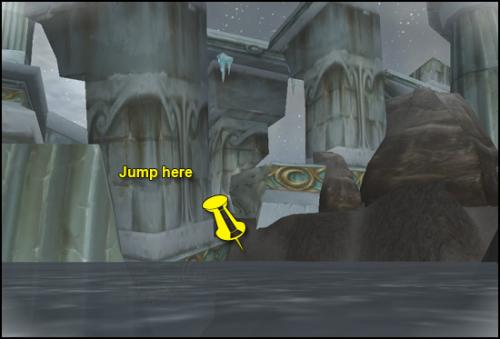
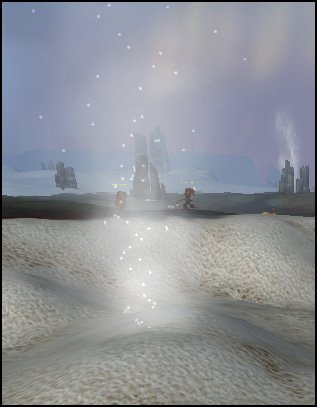
It’s quite straight forward though, you simply have to strafe to the left or to the right every time after you shoot, and the javelin will miss you. Like on the screenshot below:
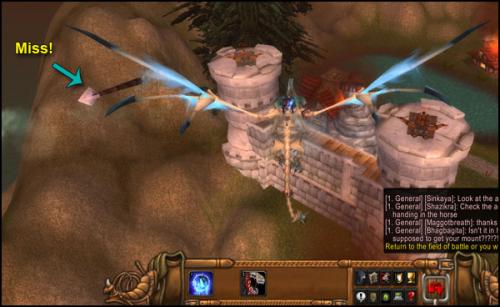
Basically it goes like this: Shoot –> Strafe left –> Shoot –> Strafe Right –> Repeat till ballista is destroyed.
For the 150 Scarlet Soldiers, go behind the walls of New Avalon, you’ll find big packs of them.
When done with that, fly back to The Lich King.
Click on the “Leave Vehicle” button and turn in the quest, get the follow up [55] The Lich King’s Command.
Equip your new helm: Greathelm of the Scourge Champion
Spend your talent points as follows:
- 2 points in Desecration
- 1 point in Bone Shield
- 3 points in Crypt Fever
- 1 point in Impurity
- 1 point in Scourge Strike
- 1 point in Ebon Plaguebringer
You are now officially unkillable.
Bone Shield: A great ability for just 1 Unholy Rune. Re-cast it after every fight if possible. Not only will you take less damage, but you’ll also do more while having this shield on.
Desecration: +5% damage and slows down enemies around you, which is great to escape if things go wrong. We mostly take it for the 5% damage boost.
Scourge Strike: Rejoice. Expect a big improvement in your damage output. This replaces Death Strike in your usual rotation. Only use Death Strike when you need healing.
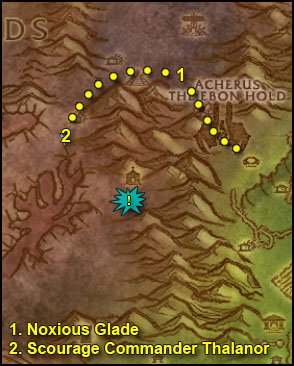
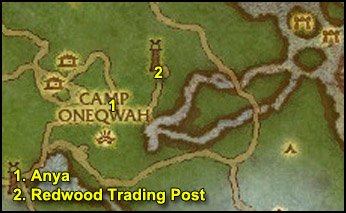
1. Mount up, go northwest through a tunnel, you’ll then be in the Noxious Glade (Eastern Plaguelands).
2. Go west and take the path going down at (40,20), all the way to Browman Mill, where you’ll find Scourge Commander Thalanor (34,30). Turn in and get the follow up [55] The Light of Dawn.
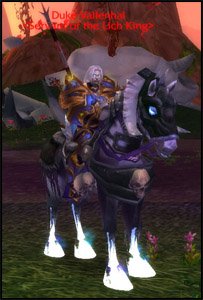
Now all you have to do is take part in a cool event, follow Highlord Darion Mograine and fight with him. You don’t actually have to fight, but I recommend doing it for fun, because you get a buff which makes you almost invincible and also makes you hit like a truck. Don’t be too reckless though, only attack the Defenders of the Light there, avoid the named NPCs such as Korfax, Duke Zverenhoff, etc.
At the end of the script, you can turn in your quest at Highlord Darion Mograine. Choose Sword or Axe, it doesn’t matter (pick the Sword if your race is human though).
Get the follow up [55] Taking Back Acherus.
Open your spell book and cast Death Gate (Unholy). Click the gate to be teleported back to Acherus. I suggest not lingering here too long, because the script will reset soon and all those imba argent dawn NPCs will soon be back to agressive mode and make quick work of you 😛
After teleporting, turn in your quest and get the follow up [55] The Battle For The Ebon Hold.
Equip your new weapon if you haven’t done that already.
Spend your new talent points as follows:
- 2 points in Ebon Plaguebringer
- 3 points in Wandering Plague
- 1 point in Rage of Rivendare
Take the pink teleporter up, kill 10 Scourge and help killing Patchwerk.
Take the teleporter back, turn in the quest at Mograine and get the follow up [55] Where Kings Walk.
Behind Mograine to the right you should see a portal to Stormwind, take it.
In Stormwind, run (yes, you can’t use your mount here for now) to King Varian Wrynn in Stormwind Keep:
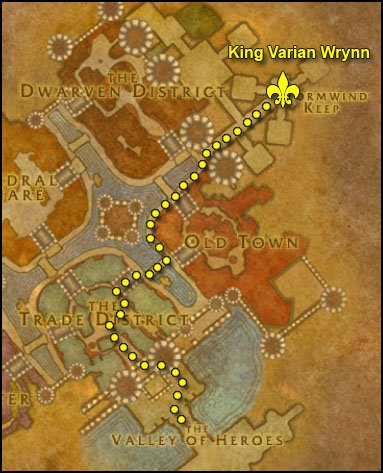
Turn in the quest.
Get the quest [62] The First and the Last from King Varian Wrynn.
1. Get out of Stormwind Keep, mount up (yes now you can!)
Find Mathias Shaw in the Old Town, he’s on the first floor of the big building named SI:7.
Turn in the quest [62] The First and the Last, get the follow up, turn it in and get the follow up [62] Flint Shadowmore.
2. Visit the auction house, put stuff on sale. Also get some better bags, because the 12-slot bags are gonna be a bother in the long run. However, if you’re low on cash, you must at least keep 3gold 50silver to buy your new skills.
3.  Go to the inn and make Stormwind your home location.
You should be level 58 by now.
Level 58
Death Gate back to Acherus. Visit one of the trainers, get Blood Boil and Chains of Ice.
Chains of Ice: A very useful skill to prevent enemies from running away. Can also be used to kite or to escape.
Blood Boil: This will basically replace blood strike when taking on multiple targets.
So from now on, against multiple enemies, your dps cycle will be:
Icy Touch –> Plague Strike –> Pestilence –> Blood Boil –> Death Strike –> Death Coil –> Death Strike –> Blood Boil –> Blood Boil –> Death Strike –> Death Coil –> Death Strike –> Blood Boil –> Blood Boil –> Stuff should be dead.
Spend you talent point as follows:
- 1 point in Rage of Rivendare
Take the pink teleporter up. Go to a runeforge and engrave a Rune of Cinderglacier to your weapon. Also buy some Corpse Dust while you’re here.
Take the teleporter back down. Go on the balcony and take a flight path to Chillwind Camp, Western Plaguelands.
Get [52] Clear the Way from Commander Ashlam Valorfist(the quest won’t appear over his head, so just find him).
Complete the quest Argent Dawn Commission at Argent Officer Pureheart, you will receive a trinket.
When you kill undeads while wearing this trinket, you can collect Scourgestones from their bodies. Turning in these Scourgestones at Argent Officer Pureheart gets you reputation increases with the Argent Dawn and a token. However, the argent dawn faction is old and outdated, there’s nothing useful we can get from it nowadays, so I suggest to just destroy the trinket (you can get a new one whenever you want by simply talking to an argent dawn quartermaster).
Turn in [62] Flint Shadowmore and get the follow up [62] The Eastern Plagues.
Don’t get the other quests.
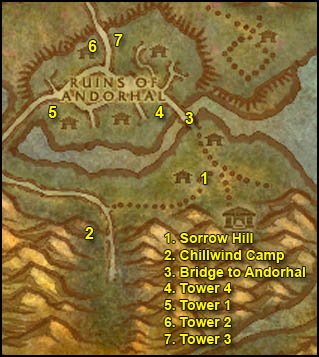
1. Take the eastern path to Sorrow hill (46,81). Kill 10 Skeletal Flayers and 10 Slavering Ghouls.
Also get the quest [55] Little Pamela from Marlene Redpath, who is inside a house at (49,78).
2. Go back to Chillwind Camp and turn in [52] Clear the Way, get the two follow up [53] The Scourge Cauldrons and [56] All Along the Watchtowers.
Go to High Priestess MacDonnell and turn in [53] The Scourge Cauldrons. Get the follow up [53] Target: Felstone Field.
3. Go back through Sorrow Hill and enter the Ruins of Andorhal by the south gate (49,73).
In Andorhal try to avoid the roads as much as possible, as level 56 elite abominations patrol them. So just clear yourself a path through the destroyed houses. Also avoid the middle of the town of course, there’s a huge bunch of mobs there and Araj the Summoner (lvl 61 elite).
4. Go to the Fourth Watch Tower (46,70). Clear what’s in your way. You can drop the torch at the entrance of the watch tower without aggroing the Skeletal Warlord if you just get close to it without being in it’s line of sight. Look for the Beacon Torch in your inventory and click it while standing next to the tower’s door.
5. Go to the Tower One which is direclty to the west (40,71). It’s close to the western entrance to Andorhal. Mark it with the torch just like you did for the previous tower.
6. Go to Tower Two, northeast of tower one (42,66). It’s close to the northern entrance to Andorhal. Mark it.
7. Tower Three is right behind tower two, northeast of it. Be careful of the scarlet patrol and abomination patrol when you go there (44,63). Mark tower three. You can destroy the Beacon Torch.
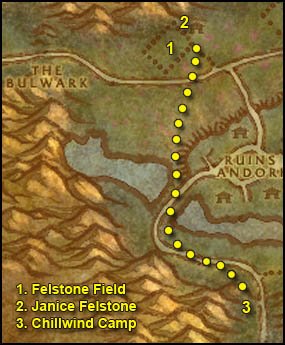
1. Get out of Andorhal by the north gate then go northwest to Felstone Field (37,58).
Clear yourself a path to the Cauldron in the middle of the field, when you get close, Cauldron Lord Bilemaw will spawn, kill it and loot the Felstone Field Cauldron Key from him, then go to the cauldron and click it, turn in the quest and get the follow up [53] Return to Chillwind Camp.
2. In the Felstone Field, go to the houses on the north side of the field, enter the one which is the most to the west (37,54).
On the 2nd floor of the house you’ll find Janice Felstone, get the quest [52] Better Late than Never.
Go to the next house at (38,55) and find Janice’s Parcel inside it. Click it, turn in the quest, then click it again and get the follow up [52] Better Late Than Never.
3. Ride back to Chillwind Camp, avoid Andorhal this time.
Turn in [56] All Along the Watchtowers. Get the follow ups [55] Scholomance and [60] Alas, Andorhal.
Turn in [55] Scholomance at Alchemist Arbington and get the follow up [57] Skeletal Fragments.
Turn in [53] Return to Chillwind Camp, get the follow up [55] Target: Dalson’s Tears.
Also get the quest [58] The Mark of the Lightbringer from Anchorite Truuen.
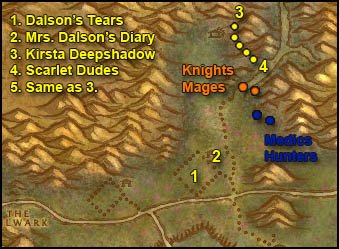
1. Go north, around Andorhal and then east to Dalson’s Tears (45,52), it’s the field directly east of Felstone Field. Clear yourself a path to the Scourge Cauldron, when you get close Cauldron Lord Malvinious will spawn, kill it and loot his key, go to the Cauldron and click it, turn in the quest and get the follow up [55] Return to Chillwind Camp.
2. Go to the houses on the north side of Dalson’s Tears, enter the eastern one (47,51). Clear what’s inside and look on the floor for Mrs. Dalson’s Diary, click it and choose “complete quest”.
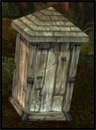
==Note== As of last patch, the outhouse (48,49) is sometimes bugged, it’s impossible to interract with it, making it impossible to kill Farmer Dalson and to get the cabinet key. If you can’t interract with the outhouse, just forget this quest and move on to step 3.
Get out of the barn and look around for a Wandering Skeleton, there is only one of this kind and he roams around the barn, so keep killing stuff around the barn until you find it, kill it and loot “Dalson Outhouse Key”. Go behind the barn, you’ll find an Outhouse (48,49). Open it, kill Farmer Dalson, loot Dalson Cabinet Key.
Go to the other house now (47,50), on the 2nd floor of it you’ll find a “Locked Cabinet”, click it and turn in the quest.
3. Go straight north to the Northridge Lumbermill, when you are next to the lumbermill, go northeast of it, follow a trail going down to a destroyed wagon. You’ll find Kirsta Deepshadow there (51,28), get the quest [56] Unfinished Business.
4. You can find the Scarlets Knights and Mages you need to kill for the quest just southeast of Kirsta, on the road to Hearthglen. For the Hunters and Medics go to the camp southeast (51,44).
5. When you completed the kill list, go back to Kirsta and turn in [56] Unfinished Business, get the follow up.
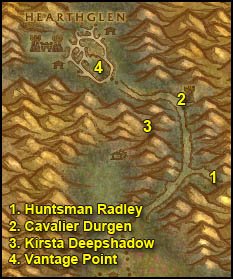
1. Go back on the road just east of Kirsta. And head north, at (54,34) the road forks off to the left and right. Go right and up the slope you will find Hunstman Radley (57,35). She can be pulled solo if you wait for the right moment: when the mage close to her goes far enough.
2. Get back on the main road and this time at the fork go left, keep going north until you hit the watch tower (53,24). Kill the 2 guards infront of it, clear the 1st floor of the tower carefully, then wait for Cavalier Durgen to show up. He goes to the top of the tower then walks back to the entrance. Wait for him to come down, you can’t kill him when he’s on top, he has 3 guards with him there.
After killing Durgen, clear the way to the top of the tower, there are 2 scarlet mages on top of the tower, you can actually pull just 1 if you take your time and body pull carefully. After you have cleared the top of the tower, you should find a Holy Coffer, right-click it and loot the Mark of the Lightbringer.
==Warning== Sometimes there is a high-level rare elite on top of the tower in addition to the above mentioned mobs.
3. After this, go back to Kirsta Deepshadow by going southwest and jumping down in the crater where she is. Turn in the quest [57] Unfinished Business, get the follow up.
4. Mount up and ride to Hearthglen (46,18).
Clear the way to the tower (45,18). Go to the top of the tower and you’ll get a quest complete message.
5. Exit the tower, mount up and get back to Kirsta. Turn in [58] Unfinished Business.
Hearthstone to Stormwind, go to the Cathedral Square and inside the City Hall (48,32) on the 2nd floor. Turn in [52] Better Late than Never.
Now try to find Ol’Emma, she wanders in between the Cathedral Square and the Trade district. Shouldn’t be hard to find because you’ll see the yellow “?” on the minimap. She makes a stop in a house bordering the canals close to the Cathedral district too (52,41).
When you find her turn in [52] Good Natured Emma. Get the follow up [52] Good Luck Charm.
==Note== You should have a few Bone Fragments in your inventory, don’t sell them, we’ll need them for a quest later on.
Sell junk, repair, re-stock consumables.
Get the following items from your mailbox/bank/AH, (see shopping list):
Death Gate back to Acherus.
Fly to Chillwind Camp.
In Chillwind Camp, turn in [55] Return to Chillwind Camp, get the follow up [55] Target: Writhing Haunt.
Now get ready for an escort quest, it’s rather easy. When you’re ready, turn in [58] The Mark of the Lightbringer, get the follow up [58] Tomb of the Lightbringer. Do the escort until you get the complete message.
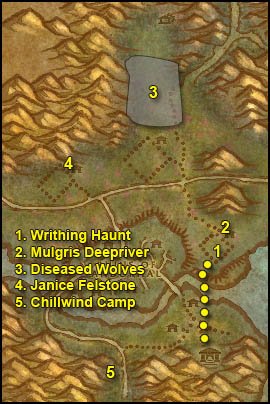
1. Go north/northeast, swim across the river and go to the Writhing Haunt (52,66). Clear a path to the scourge cauldron, when you get close to it, Cauldron Lord Razarch will spawn, kill it and loot the key. Clear what’s around the Cauldron and go click it, turn in the quest and get the follow up [55] Return to Chillwind Camp.
2. Directly north of the cauldron in a small house you should find a tauren lying down on the floor, Mulgris Deepriver. Get his quest [54] The Wildlife Suffers Too.
**From now on kill any Diseased Wolf you find on your way until you have completed [54]The Wildlife Suffers too**
3. Go north/northwest to an area just north of Dalson’s Tears (45,40), where you will find plenty of wolves to complete the quest. Kill everything in this area until you have 8 Diseased Wolf Kills. Also note that the spiders in this area are placeholders for wolves, so you have to kill spiders too if you need more wolves.
4. Go southwest to the Felstone Field, go into the left house (38,54) on the 2nd Floor. Turn in the quest [52] Good Luck Charm at Janice Felstone and get the follow up [54] Two Halves Become One.
Get out of the house and look for a Jabbering Ghoul.

This ghoul patrols all over the field. So just keep the area clean until it spawns, especially the Scarlet Patrol, as they might kill the Jabbering Ghoul before you even see it.
Once you find the Jabbering ghoul, kill it and it will drop a “Good Luck Other-Half-Charm”.
Once you have the other half charm, go back to Janice Felstone, right click on the other-half-charm in your inventory. Turn in the quest.
You should be level 59 by now.
Level 59
Death Gate to Acherus. Visit the trainer, buy Blood Strike (Rank 2) and Strangulate.
Blood Strike (Rank 2): More damage, cheers.
Strangulate: A 5 second silence, can be cast from 30 yard range. Great against casters.
Spend your talent point:
- 1 point in Rage of Rivendare
5. Fly back to Chillwind Camp.
Turn in:
- [55] Return to Chillwind Camp and get the follow up [58] Target: Gahron’s Withering.
- [58] Tomb of the Lightbringer
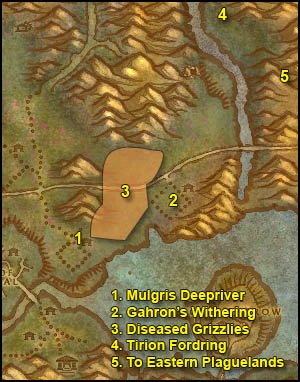
1. Ride east through Sorrow hill, then northeast, across the river and to the Writhing Haunt. Clear the way to the house with the tauren lying down on the floor, turn in [54]The Wildlife Suffers too, get the follow up [56]The Wildlife Suffers Too.
**From now on kill any Diseased Grizzly you see until you have killed 8**
2. Go east to Gahron’s Withering (62,57). Clear a path to the Scourge Cauldron, when you get close Cauldron Lord Soulwrath will, appear, kill it. He’s harder than the other cauldron lords, he knockbacks and silences, so be careful where you fight him. Loot his key then go to the Cauldron, turn in the quest and get the follow up [58] Return to Chillwind Camp.
3. Go to the area which is in between Garon’s Withering and the Writhing Haunt. There should be plenty of grizzlies there. If not, kill spiders, they are placeholders for grizzlies. Kill everything in this area until you have 8 Diseased Grizzly Kills.
Go turn in [56] The Wildlife Suffers Too at the Writhing Haunt, get [56] Glyphed Oaken Branch.
4. Ride northeast until you hit Thondroril River, go north along the river bank, then cross the river so you are on the eastern bank and ride north until you find a house. In front of it you’ll see Tirion Fordring, get his 3 quests:
- [56] Demon Dogs
- [56] Blood Tinged Skies
- [56] Carrion Grubbage
From now on, kill on sight the following:
- Plaguehound Runt
- Carrion Worm
- Plaguebat
5. Go south along the river and then east into Eastern Plaguelands.
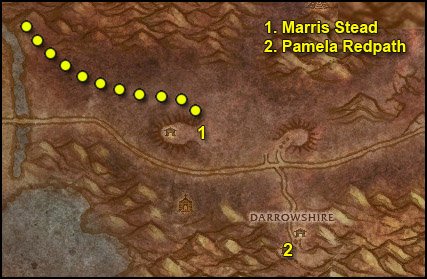
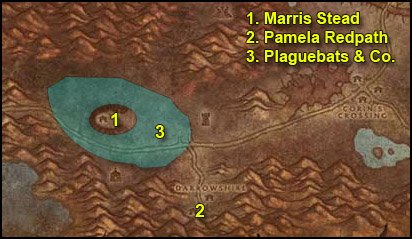
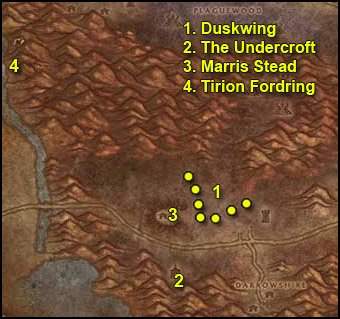
1. Go southeast while killing everything on the way. Find the Marris Stead but don’t get close to it! There’s a lvl 62 Elite NPC there, hits like a truck. Go around the Marris Stead so that you are east of it (29,74).
Just a bit closer to Nathanos Blightcaller you’ll find “Mangled Human Remains” (25,68). Loot the SI:7 Insignia (Turyen) from it.
Go a bit closer to Nathanos, on a small mound right infront of him you should find other human remains (23,68). Loot Fredo’s Insignia from it.
This is as close as you can get to Nathanos without aggroing it, and you should get the “Blightcaller Uncovered” (Complete) message.
Go backwards a bit and then south, you should find the last human remains close to the road (23,73). Loot Rutger’s Insignia.
2. Go southeast while killing everything on the way. Stay away from the Marris Stead though. Keep going southeast till Darrowshire.
Inside Darrowshire, find a small destroyed house on the western side of Darrowshire. You should find Pamela Redpath there, turn in the quest [55] Little Pamela and get the follow up [55] Pamela’s Doll.
Now you must find the 3 parts of Pamela’s Doll, they can be in any of the other houses in Darrowshire. Look on the floor for some brown objet. Everytime you get close to one of the doll parts, a level 55 ghost spawns and attack you.
Once you have Pamela’s Doll’s Left Side, Right Side and Head. Right click them in your inventory to combine them. Go to Pamela and turn in the quest. Get the two follow up quests:
- [56] Uncle Carlin
- [56] Auntie Marlene
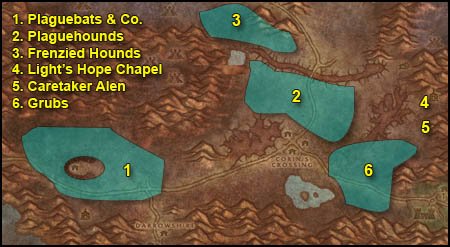
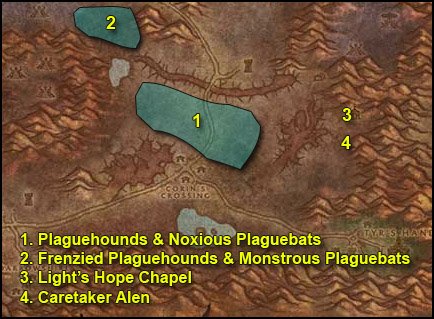
1. Go back towards the area around the Marris Stead and keep doing wide circles around it killing everything until you got 30 Plaguebat and 20 Plaguehound Runts slain. Also focus on Carrion Grubs until you finish [56] Carrion Grubbage. This is the best area to find these mobs.
==Tip== To avoid getting feared by the Plaguebats, use strangulate.
Icy Touch –> Plague Strike –> Scourge Strike –> Strangulate –> Blood Strike –> Death Coil.
You’ll get feared very seldomly this way.
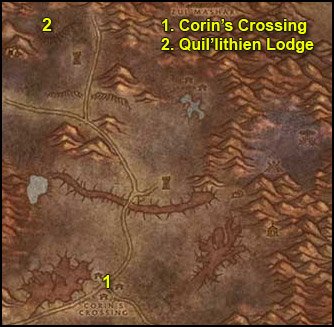
2. Go east to the area north of the infectis scar and Corin’s Crossing. Kill everything around until you have 5 Plaguehound Kills.
3. Once you got 5 Plaguehound kills, go to the area which is north of Blackwood Lake (51,41). You should find Frenzied Plaguehounds around this area.
4. Once you have 5 Frenzied Plaguehound kills. Death Gate back to Acherus, sell junk quickly (careful, don’t sell Bone Fragments).
Fly to Light’s Hope Chapel, Eastern Plaguelands
Get the following quests and turn them in immediately:
- [60] Savage Flora at Rayne
- [60] Cryptstalker Armor Doesn’t Make Itself… at Huntsman Leopold
- [60] The Elemental Equation at Archmage Angela Dosantos
- [60] Binding The Dreadnaught at Korfax, Champion of the Light
Also get [60] Bonescythe Digs from Rohan the Assassin, we’ll finish that one later.
Turn in [56] Uncle Carlin, get the follow up [55] Defenders of Darrowshire
5. Just a bit south of Light’s Hope Chapel find Caretaker Alen (73,57). Get the quests [55] Zaeldarr the Outcast and [60] The Restless Souls from him.
6. Step removed, ignore it.
Go back to Light’s Hope Chapel, fly to Chillwind Camp.
Turn in [58] Return to Chillwind Camp, go to Commander Ashlam Valorfirst and complete the quest “Mission Accomplished!”
Turn in [62] The Eastern Plagues at Flint Shadowmore, get the follow up [62] The Blightcaller Cometh.
Get the quest [55] A Plague Upon Thee from Nathaniel Dumah.
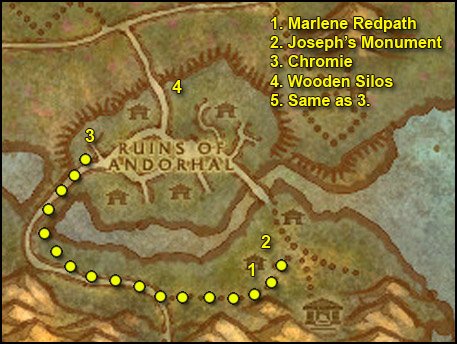
1. Ride east to Sorrow hill and find Marlene Redpath in the house (49,78).
Turn in [56] Auntie Marlene and get the follow up [56] A Strange Historian (Elite).
2. Search the graveyard just north of the house where Marlene Redpath is, look for “Joseph Redpath’s Monument” among the graves (49,76). Click the grave and get Joesph’s Wedding Ring.
3. Go back towards Chillwind Camp and take the other path to Andorhal, go inside the Ruins of Andorhal by the western entrance.
Inside Andorhal go to the house to the north, it’s the only house around with a floor and not totally destroyed (39,68). Inside the house go to the 2nd floor, in one of the rooms you’ll find Chromie. Turn in [b][56] A Strange historian, get the follow up [56] The Annals of Darrowshire. Also ge the other quest [56] A Matter of Time.
4. Go to the northern gate of Andorhal, and east of the first watch tower you’ll find two wooden silos (45,62) which look like this:
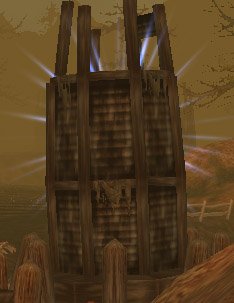
Get close to a silo and click your Temporal Displacer (the icon is actually a horn).
1 to 3 lvl 57 worms will spawn and attack you. Kill them. Move on to the next silo and repeat. Keep doing that until you have 10 Temporal Parasites slain. The worms only appear when the silo is sparkling blue. They take a while to sparkle again after you use them. However there’s 3 more silos just a bit more to the east in case you need.
5. Go back to Chromie, turn in [56] A Matter of Time and get the follow up [56] Counting Out time.
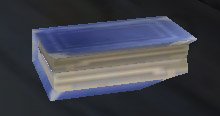
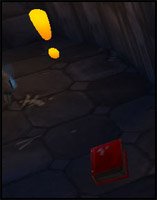
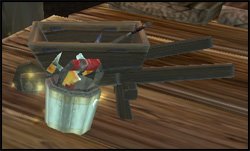
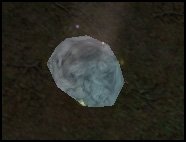
Now what you have to do is check destroyed houses in Andorhal and look for Small Lockboxes like this:
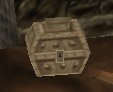
Loot the Andorhal Watch from it. Keep doing this until you have 5 Andorhal Watches.
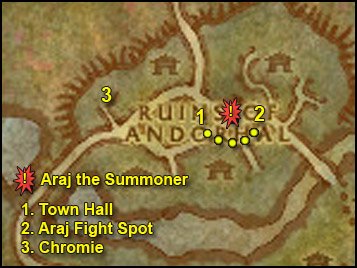
1. Go to the town hall (with a tower clock) which is in the middle of Andorhal, close to where Araj the Summoner is, you can sneak in the town hall without having to fight any of the bunch of mobs around it, just hug the walls.
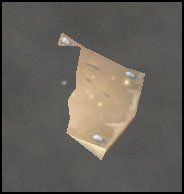
Inside the town hall you’ll find several “Musty Tome” lying on the floor. When you click one, there is a chance you will find the Annals of Darrowshire, but there is a higher chance that you will get a “Ruined Tome” and 1 or 2 level 57 mobs will attack you. They give no loot and no exp. Hoewever there is a trick to know which tome is the right one. There is a slight graphical difference. The pages of the fake tomes have two-tone colored pages, lightbrown and white, like this one:
The good tome looks “newer”, and its pages only have one color tone, like this one:

You can easily see the difference if you zoom in 1st person view and put your mouse pointer over the books to highlight them. Loot the Annals of Darrowshire.
2. Time for a little challenge. Let’s solo Araj the Summoner. Here’s how:
Fight your way around Araj, so that you end up on the east side of him, like on the screenshot below.

We’ll pull from here, and you have to pull all the stuff I marked with a dot, because if you don’t, they’ll add when you attack Araj, and we want him solo.
- 1. The first pull will be 4 mobs at least, some of them are Skeletal Acolytes, you need to kill those first because they heal. Pull one with Death Grip, use Strangulate on another so that he comes in your melee range. Icy Touch –> Plague Strike –> Pestilence –> Blood Boil –> Death Strike. Etc.
- 2. Next, pull the 3 Spectral Attendants. This should be easy.
- 3. North of Araj there should be a Skeletal Warlord and two ghouls. Pull those carefully, it should be an easy fight too.
- 4. South of Araj should be 1 Skeletal Warlod and 1 Ghoul. Pull those and then you’ll only have Araj the Summoner left to kill.
Pull Araj from this spot, to make sure you don’t get jumped by respawns or by a patrol while fighting him:
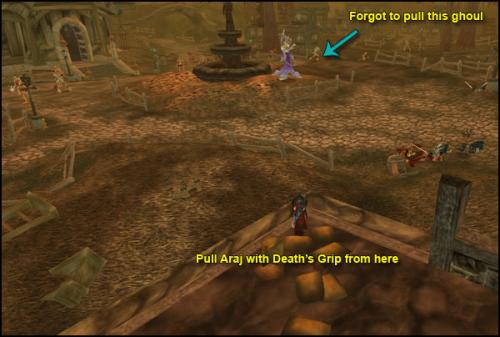
As you can see on the screenshot, I forgot to pull one ghoul, it will add when I pull Araj. However, I managed because Death Knights are imba. Don’t do this at home though!
When you’re ready, pull Araj with Death Grip, then Strangulate him and pull him backwards a little more (to where I stand on the screenshot below), to be 100% safe from the respawns/patrols. Then just fight him normally, interrupt his spells with Mind Freeze and use Summon Gargoyle as soon as you have 100 Runic Power. You also have potions if things go wrong.
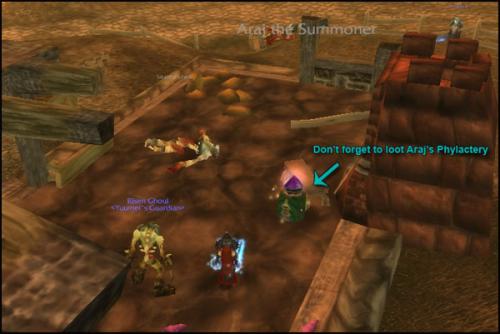
Loot Araj’s Phylactery.
3. Go back to Chromie, turn in [56] Counting Out time. The Attuned Dampener you get as a reward is only useable on Araj the Summoner, so you don’t care about that, destroy it. Yes I’m evil and made you kill Araj without using this on him, but it really wasn’t necessary, was it? 😛
Turn in [56] The Annals of Darrowshire, get the follow up [56] Brother Carlin.
Now you should also have finished [57] Skeletal Fragments and be close to finish [60] Bonescythe Digs. Kill some more skeletons in Andorhal until you have 30 Bone Fragments.
Get out of Andorhal by the north gate, then go east till Thondroril River and ride north to Tirion Fordring (7,43).
Turn in:
- [56] Demon Dogs
- [56] Blood Tinged Skies
- [56] Carion Grubbage
Get the follow up [56] Redemption.
Right-click Tirion and go through his text.
Turn in the quest and get the follow up [57] Of Forgotten Memories.
You should be level 60 by now.
Put your talent point in Unholy Blight.
Unholy Blight: Our ultimate. It’s basically extra AoE power, great for taking on multiple enemies. However, 60 Runic Power is a bit pricy, so it’s not worth casting Unholy Blight on easy fights (single target or two monsters only), simply because by the time you build up 60 Runic Power, one of your target will already be dead and the other one will follow quickly, and the majority of your Unholy Blight will be wasted while you run to the next monster. Use it only on big fights, 3+ mobs, preferably more. You can chain kill packs of 5,6 or 7 mobs now.
If you want to know how, check out my AoE tutorial videos:
How to AoE with a Death Knight
Mount up and go to the Eastern Plaguelands.
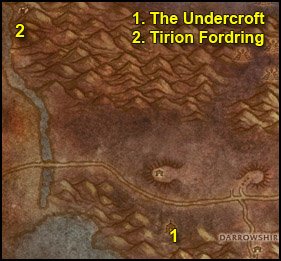
1. Go southeast to the Undercroft, which is directly south of the Marris Stead.
Behind the crypt in the Undercroft you’ll find Tiron Fordring’s Grave (28,86). Next to it should be a “Loose Dirt Mound”.
Click the dirt mount, Mercutio Filthgorger and 3 Dwarf Graverobbers will spawn. Kill them and loot Taelan’s Hammer.
Go inside the crypt (27,85), clear the way down, kill Zaeldarr the Outcast and loot his head.
In the same room look for a “Torn Scroll” on the floor, click it and get the quest [60] Hameya’s Plea.
2. Go back to Tiron Fordring, turn in [56] Of Forgotten Memories, get the follow up [58] Of Lost Honor.
Death Gate to Acherus. Visit your trainer, train Rune of Lichbane, Death and Decay and Plague Strike (Rank 2).
Rune of Lichbane: This will be great for our final circuits in the plaguelands, as there are plenty of undeads just waiting to be whacked. Go engrave it on your weapon (unless you bought a better enchant like Executioner). Also buy some Corpse Dust and sell junk while you’re up there.
Death and Decay: It’s an AoE skill, but it’s not as efficient as the Pestilence/Blood Boil/Death Strike combo. It’s main use is to build a lot of threat when you’re tanking several mobs.
Fly to Light’s Hope Chapel. Turn in:
- [60] Bonescythe Digs
- [56] Brother Carlin, get [57] Villains of Darrowshire and [56] Heroes of Darrowshire
Go south to Caretaker Alen and turn in [55] Zaeldarr the Outcast.
You should have the following quests at the moment:
- [55] Defenders of Darrowshire
- [56] Glyphed Oaken Branch
- [56] Heroes of Darrowshire
- [57] Villains of Darrowshire
- [58] Of Lost Honor
- [60] Hameya’s Plea
- [60] The Restless Souls
- [55] A Plague Upon Thee
- [57] Skeletal Fragments
- [60] Alas, Andorhal
- [62] The Blightcaller Cometh

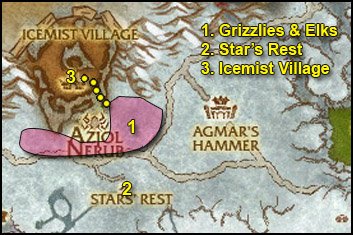
1. Ride west to Corin’s Crossing (57,60), kill all the Gibbering Ghouls you can find while going west through the town. Anytime you kill one of these ghouls, a Spirit of Darrowshire will appear, right-click it to free it. We’ll finish this quest later, so don’t wait on respawns, just clear through the town.
2. Go west to the Infectis scar by passing Corin’s crossing by the south side. Go down the Infectis Scar at (44,68), then go to (49,59) where you’ll find the “Shattered Sword of Marduk”, as marked on the map. It looks like this:

Loot it.
Get out of the Infectis scar the same way you came in.
3. Go north to Blackwood Lake (49,51). Take a dive, in the middle of the pool at the bottom you’ll see Ghosts of Darrowshire fighting each other, amongst them you should see a glowing violet skull named “Horgus Skull” (51,50), it looks like this:

Loot it.
4. Go west to the Plaguewoods. In the plaguewoods look around for Large Termite Mounds and loot them.
While looking for those termite mounds, hunt for Cannibal Ghouls. Anytime you kill one of these, a Spirit of Darrowshire will appear, right-click it to free it. The Cannibal Ghouls are not so numerous though, so don’t stay here trying to finish the quest, we’ll kill more later.
Keep killing stuff in this area until you are done with [55] A Plague Upon Thee. If you have more than 100 Termites, destroy the extras.
5. Go west to Egan (11,29).
Turn in [60] The Restless Souls, don’t get the follow up.
Get the quest [55] Augustus’ Receipt Book from the other npc.
The book is very easy to find, just go a little east and enter the inn type building.

The book is on the 2nd floor.
Make sure you kill all the Cannibal Ghouls you find in the house and to free their spirit. You should also check the other house on the opposite side of the street, it probably has a couple of ghouls inside.
Once you got Augustus’s Receipt Book, go back to Augustus and turn in the quest.
1. Go back to the Plaguewoods, kill Cannibal Ghouls until you finish [55] Defenders of Darrowshire while going east.
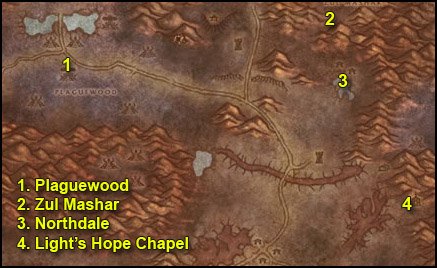
2. Go further east to Zul’Mashar (64,24).
Clear the way up the slope.
==Tip== Death Grip the scouts and Chains of Ice them, it prevents them from getting help, making this step much less annoying.
Keep clearing the way and you’ll soon face a big pyramid. At it’s base you should see some tombs with some trolls roaming about them. One of them is Infiltrator Hameya.
Pull him and kill him, then loot Hameya’s Key.
3. Clear your way out of Zul’Mashar then go southeast to Northdale, take a dive in the pool which is just south of Northdale. Clear the elementals in the way. At (71,33) underwater, next to a cage you should see a white flag with a blue runed on it named Symbol of Lost Honor:

Loot it.
4. Ride southeast back to Light’s Hope Chapel.
Turn in:
- [55] Defenders of Darrowshire
- [57] Villains of Darrowshire
Ride west/southwest to the Undercroft. Right behind the crypt in the Undercroft you should find a “Mound of Dirt”. Not the one next to Tiron’s grave, the other one close to a charriot at (28,86).
Click it, turn in [60] Hameya’s Plea.
Ride northwest to Tirion Fordring, turn in [58] Of Lost Honor and get the follow up [58] Of Love and Family.
Go south and then west back into the Western Plaguelands.
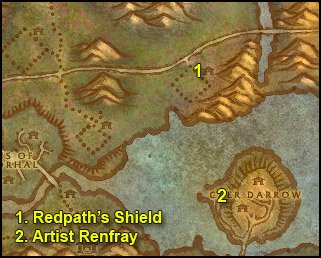
1. First make a stop at Gahrron’s Withering. There in front of the first building when you arrive from the north you’ll see a glowing shield looking like this:
Clear the mobs around it then loot the Redpath’s Shield.
2. Go south and swim to Caer Darrow Isle. On the western side of Caer Darrow, find Artist Renfray in a wooden house (65,75). Turn in [58] Of Love and Family, don’t get the follow up.
Swim west until you reach Sorrow Hill, then ride west to Chillwind Camp.
Turn in:
- [57] Skeletal Fragments
- [60] Alas, Andorhal
- [55] A Plague Upon Thee, take the follow up [55] A Plague Upon Thee
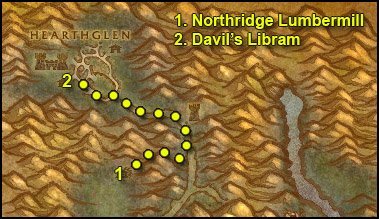
1. Ride north around Andorhal and then northeast to Northridge Lumber Camp.
Go straight to the lumber mill which is at the northeastern tip of the lumber camp.
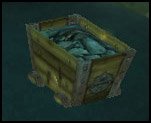
Inside the lumber mill you should find a big crate named “Northridge Lumber Mill Crate”.
Click it and place the Termite Barrel on it. A barrel with green smoke should appear, click it and get the follow up [55] A Plague Upon Thee.
2. Mount up and ride to Hearthglen. Clear your way into the village until you see the townhall:
Clear your way inside and loot the Davil’s Libram from the table.
Death Gate back to Acherus.
Go to the top floor and engrave a Rune of Cinderglacier to your weapon.
Fly down to Light’s Hope Chapel. Turn in [56] Heroes of Darrowshire, don’t get the follow up.
Fly to Chillwind Camp, turn in [55] A Plague Upon Thee.
Hearthstone to Stormwind.
Go to Stormwind Keep and turn in [62] The Blightcaller Cometh at King Varian Wrynn, don’t take the follow up.
Ride to the Stormwind Harbor, go to the southern docks and take the boat to Auberdine in Darkshore.
Once in Auberdine, fly Rut’theran Village and then ride to Darnassus.
In Darnassus, find Mathrengyl Bearwalker in the Cenarion Enclave (35,8.5).
Turn in [56] Glyphed Oaken Branch.
You should be close to level 61 now.
 As soon as you have 7, right-click the Mortar and Pestle from your inventory, you should receive some Coagulated Rot.
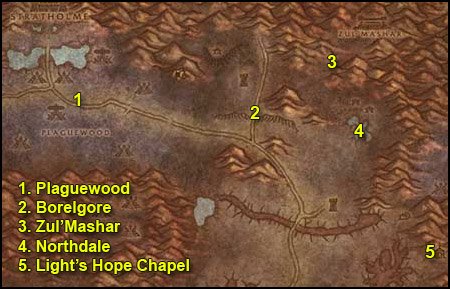


 Get the new flight path.
 Use Budd’s Ability #4. This will put the troll to sleep for 15 seconds.
 Right-click the Bounty Hunter’s Cage on the troll (must be in melee range).
 Right-click the Dull Carving Knife from your inventory.
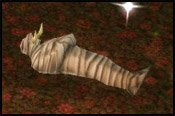
 Right-click the Scourged Troll Mummy from you inventory.
 Right-click Drakuru’s Elixir.

 Throw Mack’s Dark Grog at them. It has a huge range, so you’ll probably need to back off a little.
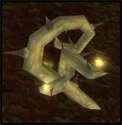
 Right-click it to start [74] Descent Into Darkness.
 Right-click the Geomancer’s Orb from your inventory.
 Use the Renewing Bandage on 10 Wounded Westfall Infantry
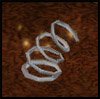
 Use the Smoke Bomb on them.
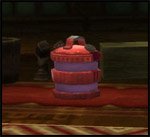

 Right-click the Stick from your inventory, this will equip it in your main weapon slot.
 Kill Undead Miners and use the Miner’s Lantern on their corpses.
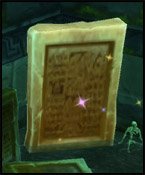
 Right-click the Incomplete Journal.
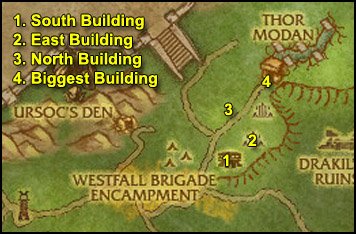
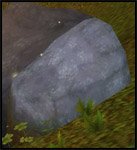
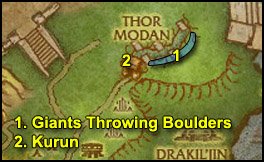
 Right-click the Boulder from your inventory and aim for a dwarf down in the trench.
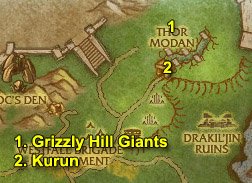
 Right-click the Shard of the Earth on the Grizzly Hill Giant.
 Right-click the Portable Seismograph from your inventory.
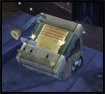
 Right-click the Gossamer Potion.
 Right-click the Verdant Torch from your inventory.
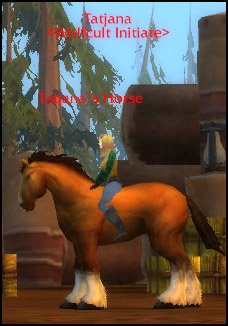
 Target Tatjana and right-click the Tranquilizer Dart.
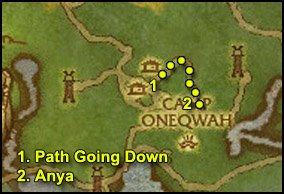
 Get very close to it and right-click the Fishing Net.
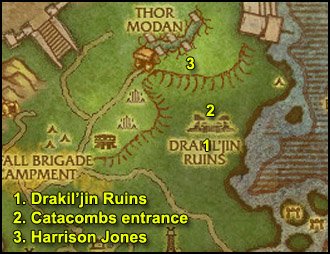

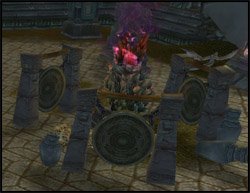
 Right-click the Drakil’jin Mallet while being very close to the one of the gongs.
 Target an Ancient Drakkari Warmonger or Soothsayer and right-click the Snow of Eternal Slumber.
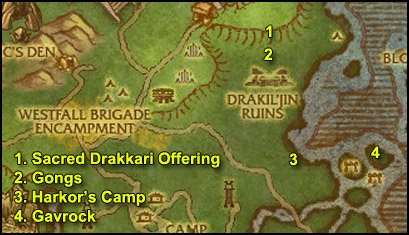

 Right-click the Drakkari Spirit Dust from your inventory.
 Right-click the Infused Drakkari Offering from your inventory.
 Right-click the Shard of Gavrock.
 Once you have them, right-click one of the Golem Blueprint Sections and you’ll obtain the War Golem Blueprint.
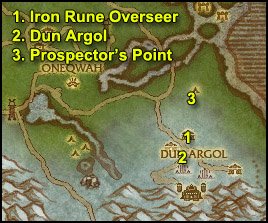
 Kill a dwarf, loot it, target the corpse and use Kilian’s Camera from your inventory.
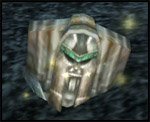
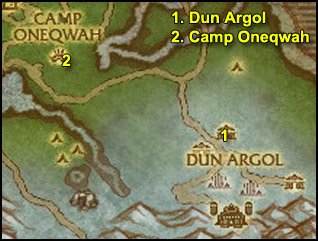
 Once in Dun’Argol, right-click the Overseer Disguise Kit. Yes, it works while mounted, and only if you are already mounted!
 Right-click the Golem Control Unit from your inventory.
 Target it and right-click Raegar’s Explosives from your inventory.
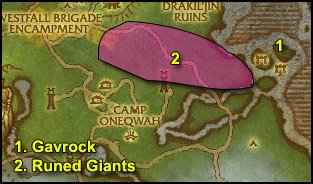
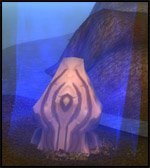
 Look for Runed Giants and use Gavrock’s Runebreaker on them.
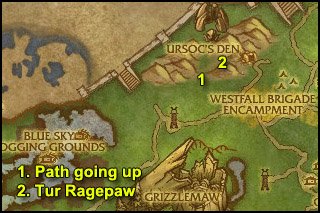
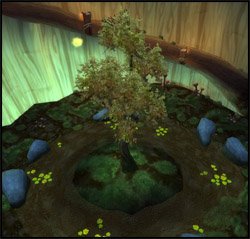
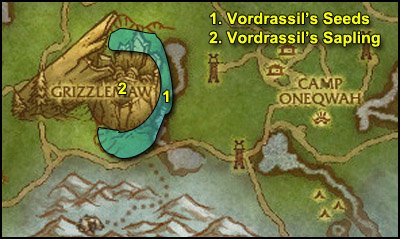
 After the fight is over, target Ursoc’s corpse and use the Purified Ashes of Vordrassil.
 Use the Renewing Tourniquet on 10 Wounded Skirmishers
 Target them and use the Silver Feather from your inventory.
 Use the Flashbang Grenade on them.
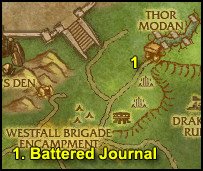

 Right-click the Wintergarde Gryphon Whistle.
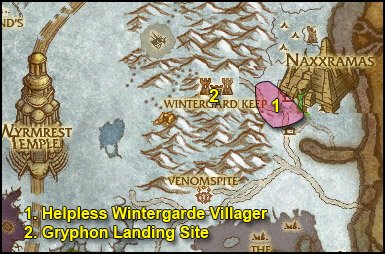

 Right-click Quarterflash’s Homing Bot and mount up.
 Right-click the Wintergarde Mine Bomb while standing there.
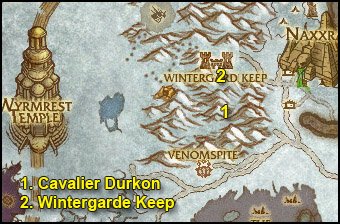
 Right-click the Liquid Fire of Elune on their corpse.
 Right-click it to start the quest [72] The Favor of Zangus.
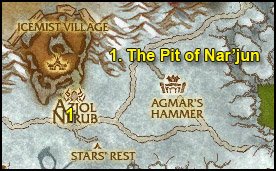
 Right-click them and loot the contents. Repeat this step until you find the Moonrest Gardens Plans.
 Right-click it to start [72] A Strange Device.
 Get close to the Ley Line Focus and right-click the Ley Line Focus Control Ring.
 Also Right-click Captain Malin’s Letter, accept the quest [72] A Letter for Home.
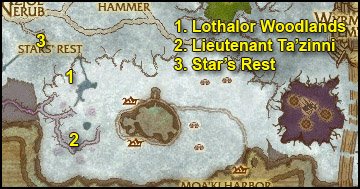
 Get close to them and right-click the Bark of the Walkers.
 Right-click it while being close to the Ley Line Focus.
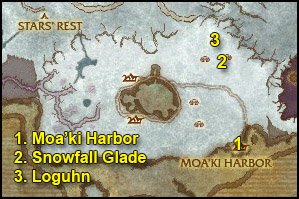
 Right-click the Blood of Loguhn.
 Right-click Toalu’u’s Spiritual Incense.
 Get close to the Ley Line Focus and right-click the Ley Line Focus Control Talisman.
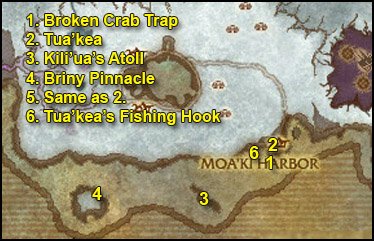
 Right-click Tua’kea’s Breathing Bladder. It has 6 charges.
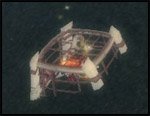

 Right-click Tu’u’gwar’s Bait.
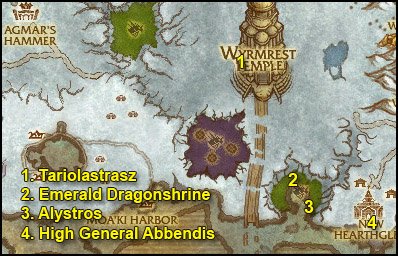
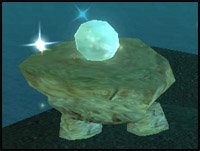
 Right-click Skytalon Molts and Alystros will attack you. Better have your tank use the Skytalon Molts, so he gets attacked first.
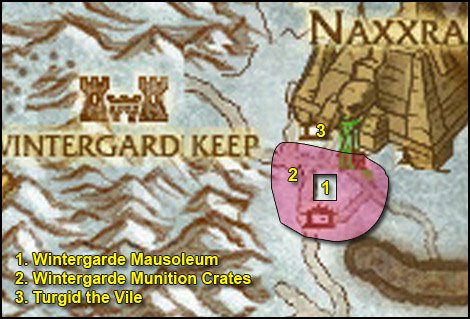
 Target him and right-click the Seeds of Nature Wrath.
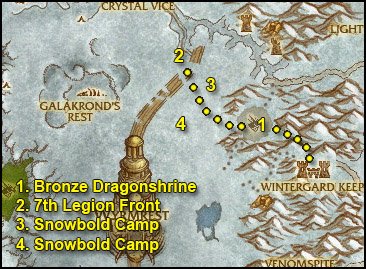
 Right-click the Hourglass of Eternity from your inventory to start the event.
 Right-click it to start [73] Disturbing Implications.
 Right-click the Ruby Beacon of the Dragon Queen.
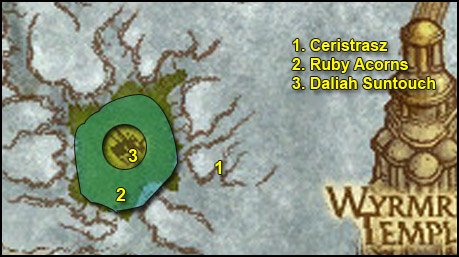

 Target it and right-click the Ruby Acorn.
 Right-click the Ruby Brooch, get the quest [75] The Fate of the Ruby Dragonshrine.
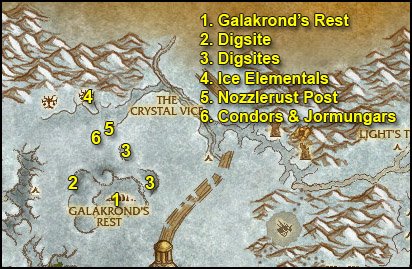

 Right-click the Potent Explosive Charges.
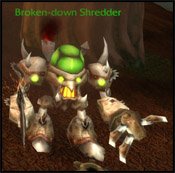
 Right-click Xink’s Shredder Control Device.
 Put Zort’s Scraper on an action bar.
 Use the Sturdy Crates on it.
 Right-click the Destructive Wards.
 Right-click Neltharion’s Flame.
 Right-click the Murkweed Elixir.
 Right-click Orik’s Crystalline Orb from your inventory.

 Right-click the Letter from Saurfang and read it if you like lore, you don’t have to though.
 Right-click Ironbender’s Mining Pick and then left-click the mining node.
 Right-click the Flesh-Bound Tome, get [72] The Flesh-Bound Tome.
 Right-click the Warsong Battle Standard right away.
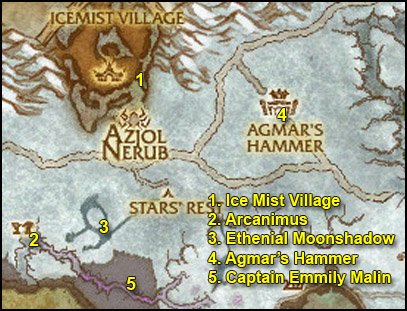
 Right-click Valnok’s Flare Gun.
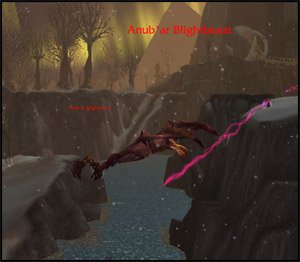

 Right-click Lieutenant Ta’zinni’s Letter, get [72] A Letter for Home.
 Find a Deranged Indu’le Villager, beat him down to 35% HP use the Blood Gem on him.
 Right-click Tu’u’gwar’s Bait.
 Right-click the Flask of Blight while being close to the Scarlet Onslaught Prisoner next to Apothecary Vicky Levine.
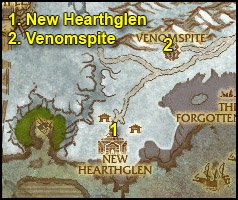
 Target their corpse use the Container of Rats.
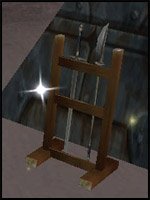

 Beat one down to 35% HP and then right-click the Frost Gem.
 Right-click the Siegesmith Bombs and aim for the Ballista to destroy it.
 Right-click the Levine Family Termites and left-click on the floor.
 Target the horse and right-click the Onslaught Riding Crop.
 Target him and right-click the High Execturor’s Branding Iron 5 times on him, then kill him.
 Right-click it to start [72] The Rod of Compulsion.
 Target him and right-click the Banshee’s Magic Mirror, then kill him.
 Right-click the Apothecary’s Burning Water and aim for the ship’s sails. This will distract the deckhands 2 minutes.
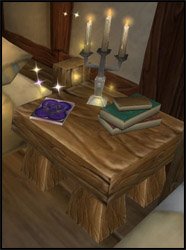
 Beat him down to 35% HP and right-click the Unholy Gem.
 Put the Pack of Vaccine on an action bar and throw it like a grenade at them.

 Equip the Diving Helm from your inventory (you don’t need to though if your class has some sort of underwater breathing spell).
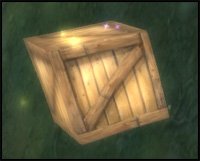


 Inside the building and right-click the Incense Burner.
 Right-click the Alliance Banner.
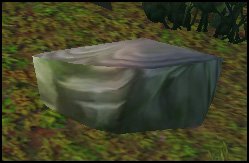
 Target one and use your Trained Rock Falcon on it.
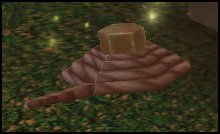

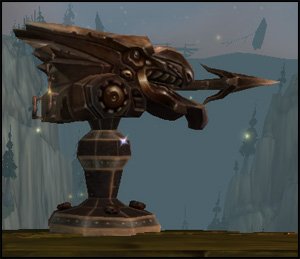
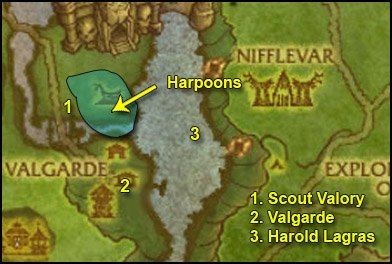
 Right-click the Harpoon Control Mechanism.

 Once you have 8 eggs, click on the cancel button.
 Put Petrov’s Cluster Bombs on a hotkey.
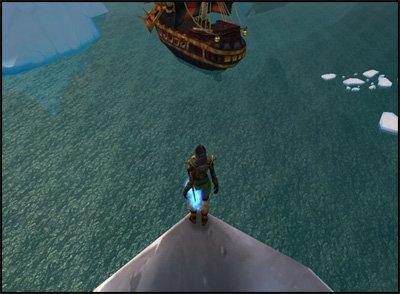

 Target a Proto-Drake and right-click Malister’s Frost Wand
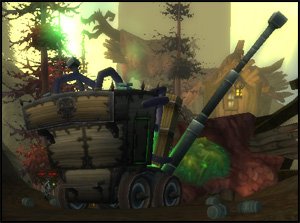
 Right-click the Ever-Burning Torches while being 20 yard close to the plague tank.
 Right-click the Fish Bladder in your inventory.
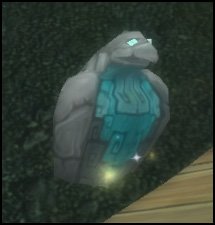
 Right-click the Horn of Kamagua. This will summon a tuskarr to help you kill those pirates.


 And right-click the Bundle of Vrykul Artifacts.
 Right-click Peppy’s Special Mix on the Dragonflayer Vrykul Prisoner.
 Put the Orehammer’s Precision Bombs on a hotkey.
 Right-click the Fresh Barbfish Bait from your inventory.


 Then right-click one of the chapters to combine them together, you’ll get the Book of Runes.
 Whenever you kill a Runed Stone Giant, loot it, target its corpse and right-click the Runeseeking Pick.
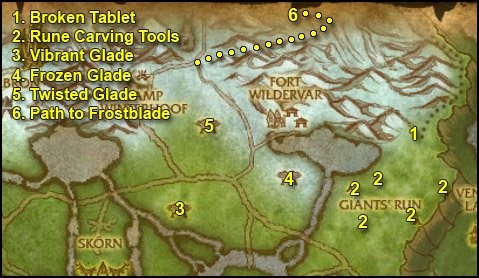
 Right-click the Rune Sample from your inventory while being close to the tablet.
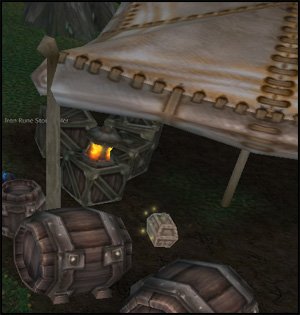
 Beat down a Chill Nymph below 30% health then use Lurielle’s Pendant. Repeat 7 times.
 Kill 8 Spores and use the Enchanted Ice Core on their corpse
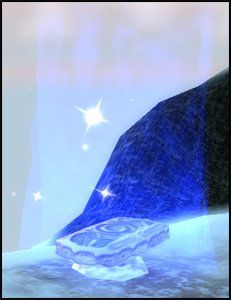
 Right-click the Tough Ram Meat from your inventory.
 Right-click the Giant Yeti Meal.
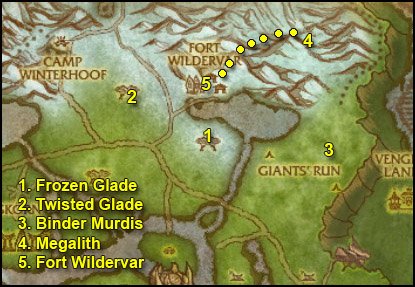
 Thanks to the Rune of Command we have from the other quest, we’ll make this stone giant our pet for 5 minutes.
 Type /target Steel, you should get Steelfeather in target, then right-click the Feathered Charm.
 Put Feknut’s Firecrackers on an action bar and use it on the floor next to a tree with a Darkclaw Bat.
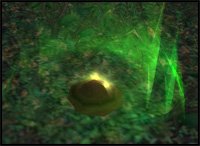
 Right-click the Worg Disguise from your inventory.
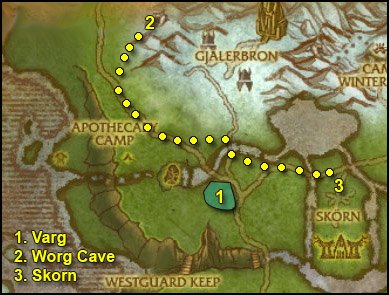
 Once you’re in Skorn, right-click the Westguard Command Insignia from your inventory.
 Whenever you kill a Vrykul, loot it and then use The Sergeant’s Machete on their corpse.
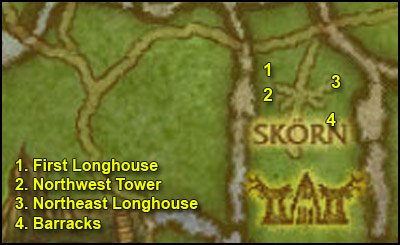
 Go inside the longhouse and right-click the Sergeant’s Torch.
 Use the Sergeant’s Flare.

 Right-click the Vrykull Scroll of Ascension and get the quest [72] Stop the Ascension!.
 Use Steelring’s Foolproof Dynamite on the ores.
 Right-click it to get the quest [71] It’s a Scourge Device.

 Right-click them to start the quest [72] Gjalerbron Attack Plans.
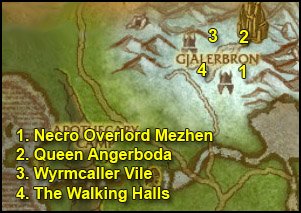
 Right-click them to start the quest [72] The Slumbering King.
 Right-click it and eat/drink quickly while the frost wyrm flies to you.
 Use the Awakening Rod on a Dormant Vrykul.


 Right-click the Seaforium Depth Charge Bundle from your inventory while standing on the webs.
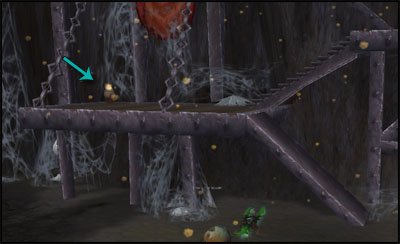
 Right-click the Turskarr Torch while standing close to the ship to burn it.
 Use the Horn of the Ancient Mariner while standing at the very edge of the jetty, but your feet must not touch the water though.


 Look in your inventory for the Trident of Naz’jan, put it on an action bar.
 Target it and right-click Torp’s Kodo Snaffle.
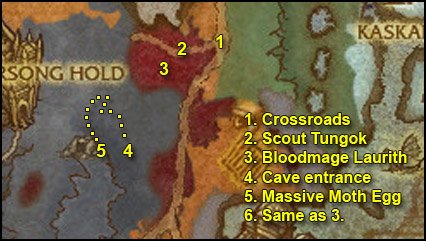
 Use the Warsong Flare Gun.
 Right-click the Pollinated Bloodspore Flower.
 Put the Pouch of Crushed Bloodspore on an action bar.
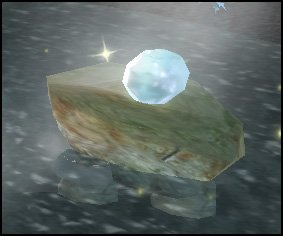
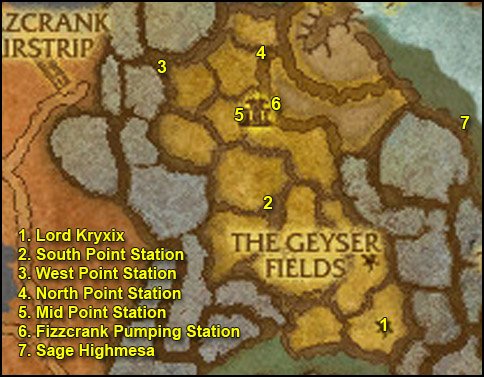
 Stand on it and right-click the Map of the Geyser Fields.

 Stand next to it and right-click Jenny’s Whistle.
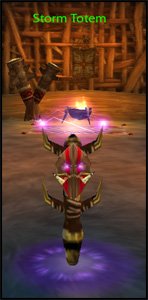
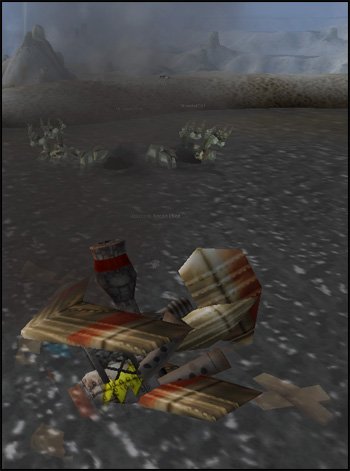
 Right-click the Windsoul Totem and kill Steam Ragers close to it. If you’re close enough, the totem should cast a blue ray towards the mob.
 Stand on the steam vent and right-click your Uncured Caribou hides 5 times.
 Use Sage’s Lightning Rod on robots in this area and kill them. Do this 15 times
 Kill Fizzcrank Mechagnomes, loot them and then use The Greatmother’s Soulcatcher on their corpse. Do this 10 times. You can find a lot of those gnomes on the Pumping Station itself
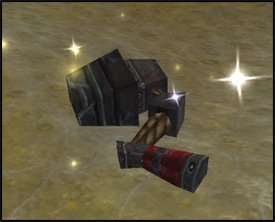
 Right-click the Horn of Elemental Fury.
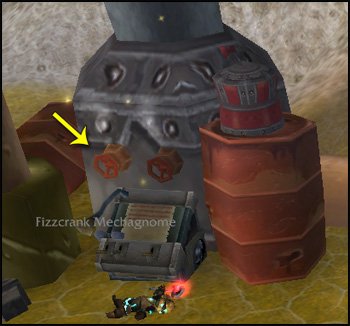

 Stand close to the cauldron and right-click Highmesa’s Cleansing Seeds.
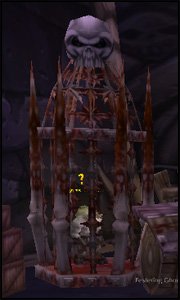
 Put on the Imbued Scourge Shroud.
 Get close to it and use Sage Aeire’s Totem.
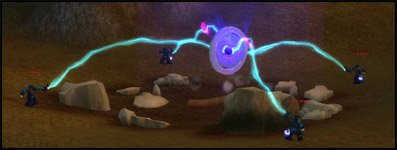
 !!Soul Deflection!! Stop attacking immediately while he channels this. All the damage you do to him is reflected to you while under this spell. Watch out for this one. It’s easy to see when he does it, as he channels violet beams on everyone near him.
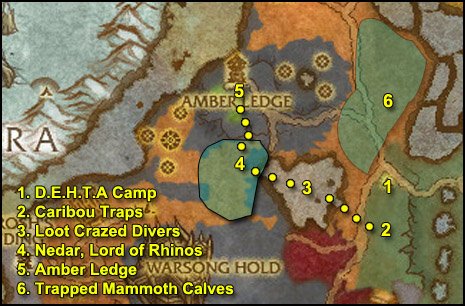
 If you killed an animal, just wait for the Animal Blood debuff to fade from you or simply jump into some water and it will remove the debuff.
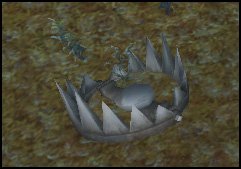
 Right-click your Pile of Fake Furs while standing next to the traps.
 Stand next to them and right-click your D.E.H.T.A Trap Smasher.
 Use the Core of Malice on Kaskala Craftsmen and Kaskala Shamen to free them.
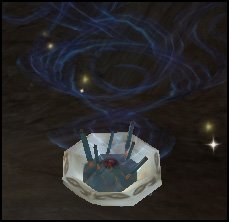
 Right-clik the Gnomish Grenade.
 Besides this time, whenever you stand next to one of the stones, right-click the Tuskarr Ritual Object.
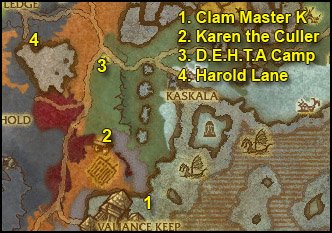
 I recommend using the horn right after you start the fight, this will stun Harold Lane for a few seconds and take a large chunk out of his HPs (about 50%), as long as the whole stampede tramples over him. So make sure he doesn’t move. Stand still while you cast the horn.
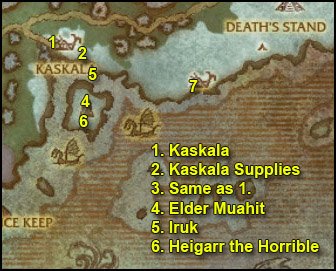
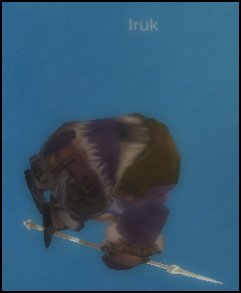
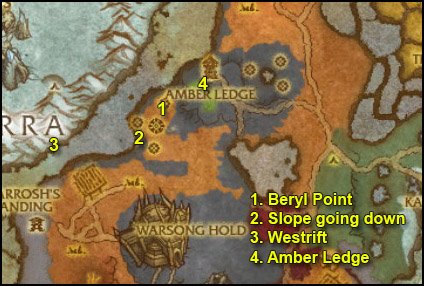

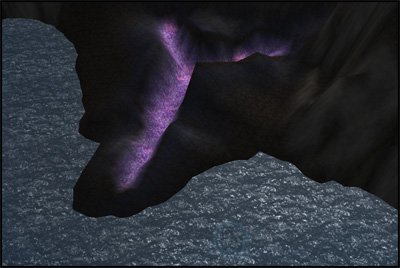
 Right-click the Arcanometer while standing next to the rift.
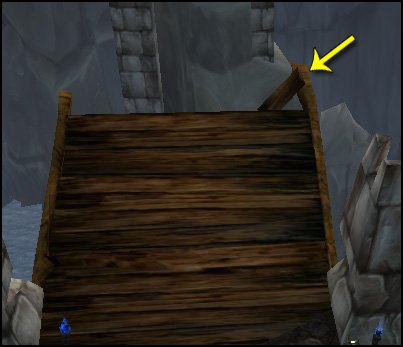
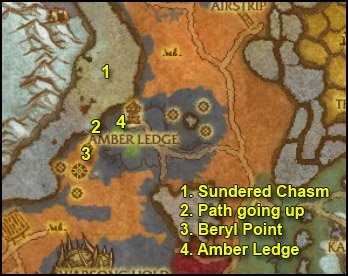
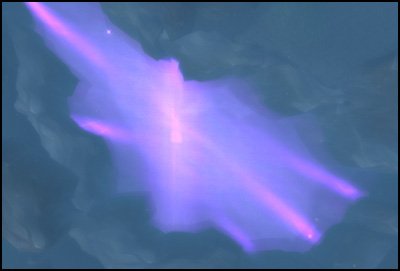
 Right-click the Arcane Binder.
 Target the Imprisoned Beryl Sorcerer and right-click the Neural Needler several times, until he speaks.
 Right-click the Beryl Shield Detonator.
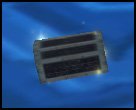
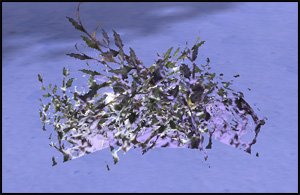
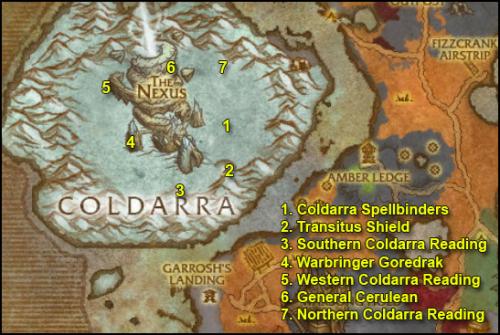
 Right-click it to start the quest [71] Puzzling…
 Right-click your Augmented Arcane Prison.
 Right-click the Arcane Power Focus.
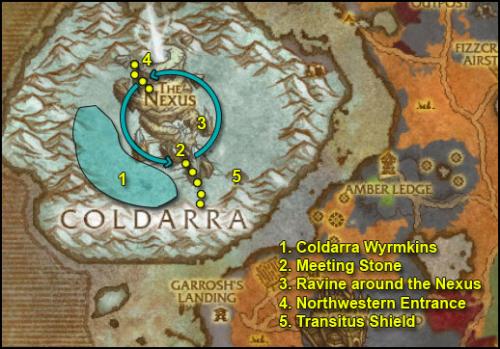
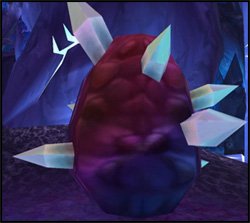
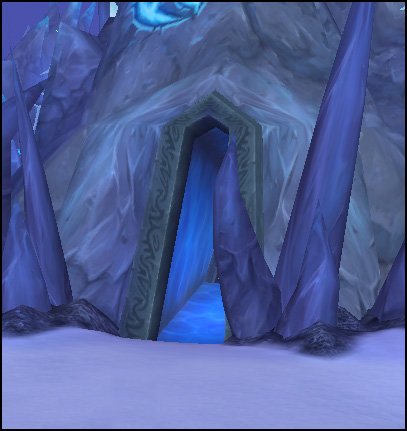
 Stand infront of the doorway and right-click Raelorasz’s Spark.
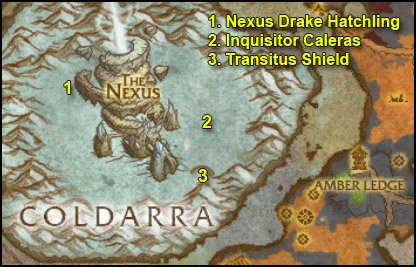
 Put Raelorasz’s Spear on a hotkey.
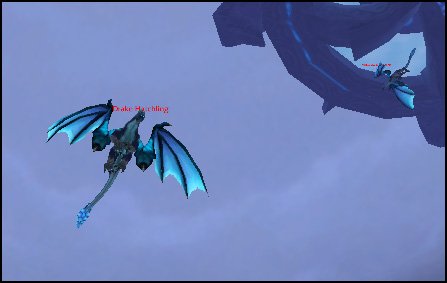
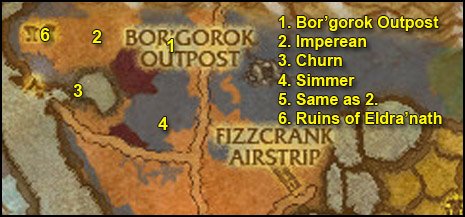
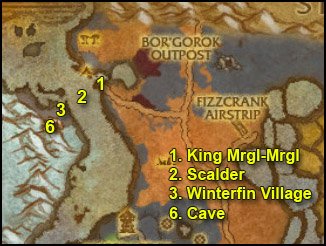
 Target Scalder’s corpse and right-click the King’s Empty Conch.
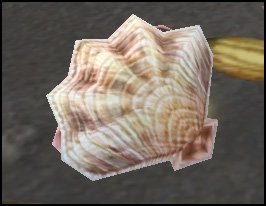
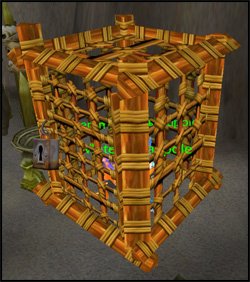
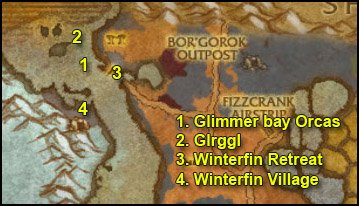
 Right-click King Mrgl-Mrgl’s Spare Suit.
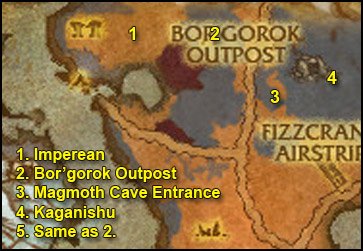
 Right-click Imperean’s Primal.
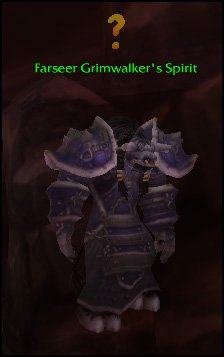
 Right-click Kaganishu’s Fetish while targeting Farseer Grimwalker’s Spirit.
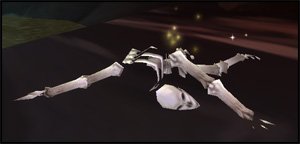
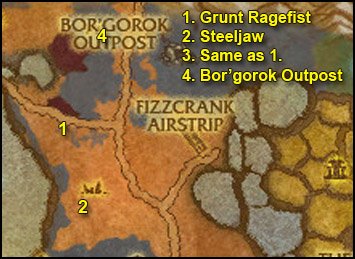
 Look for Ragefist’s Torch in your inventory and put it on an action bar.
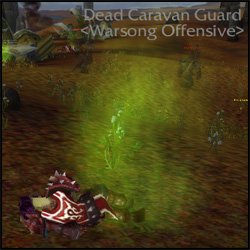
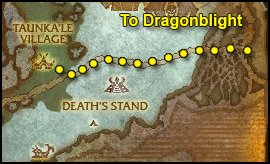
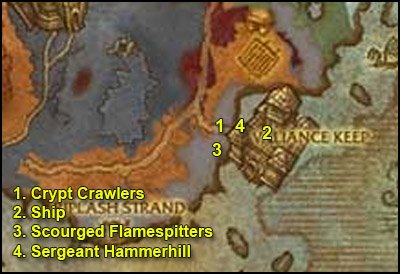

 Target one and use the Reinforced Net.
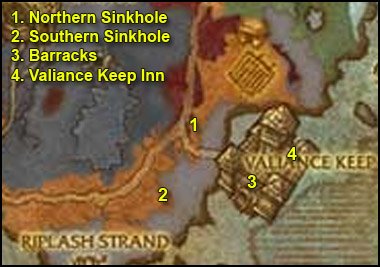

 Right-click the Incendiary Explosives next to them.
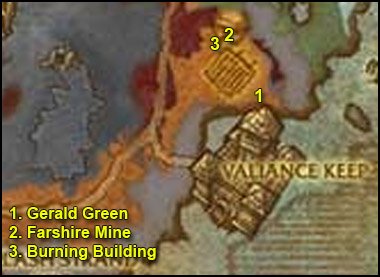
 Right-click Wendy’s Torch near them.
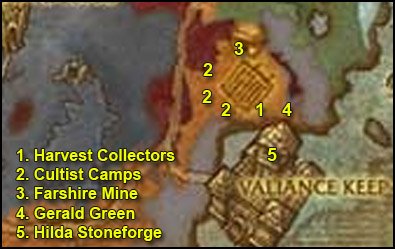
 Kill one, loot it, target its corpse and use Jeremiah’s Tools on it.
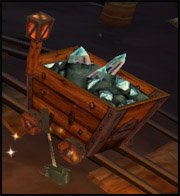
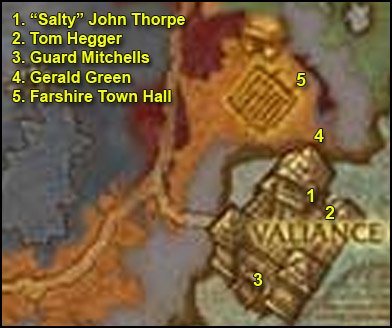
 Right-click the Oculus of the Exorcist.
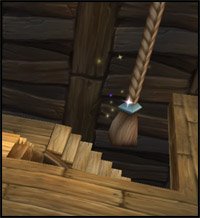

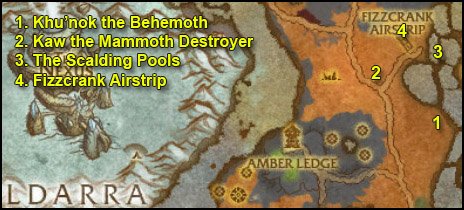
 Right-click it to start [71] The Ultrasonic Screwdriver.
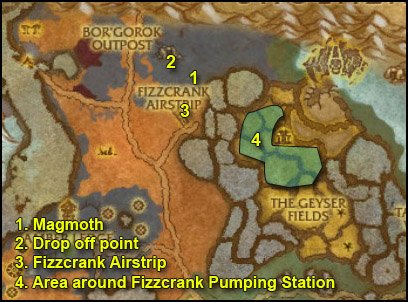
 Kill Fizzcrank Mechagnomes, loot them and then use the Re-Cursive Transmatter Injection on their corpse. You can find a lot of those gnomes under and on the pumping station itself.
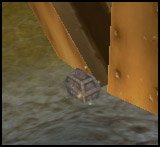
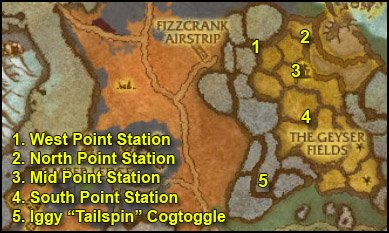
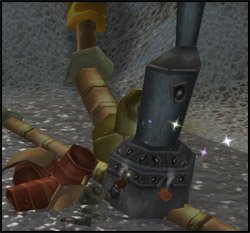
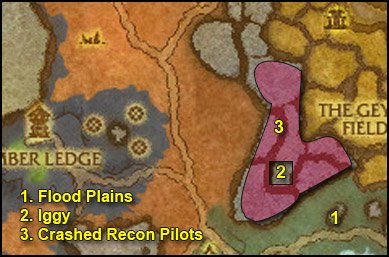
 Target an Oil-stained Wolf and right-click the Wolf Bait from your inventory.
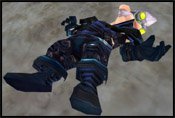
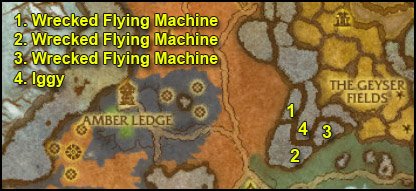
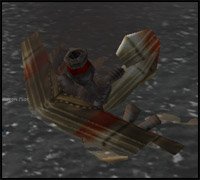
 Right-click the Emergency Torch next to it.
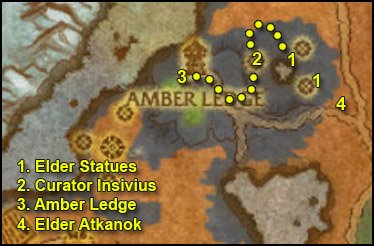
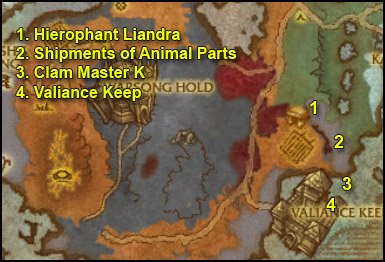
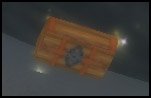
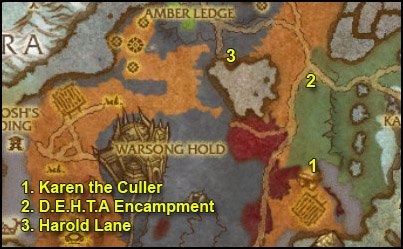
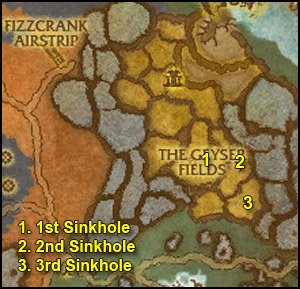

 Right-click the Portable Oil Collector near them.
 Stand close to the cauldron and right-click Bixie’s Inhibiting Powder.
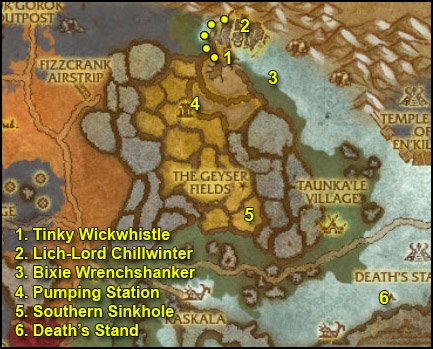
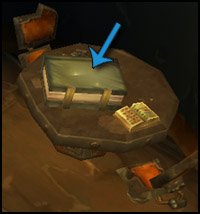
 Right-click the Shake-n-Quake 5000 Control Unit.
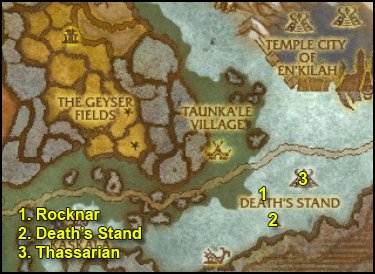
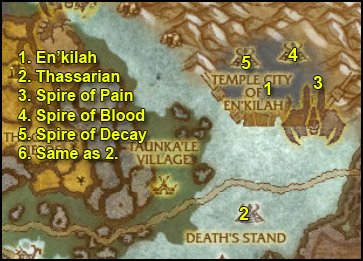
 You can use Lurid’s Bone whenever it’s up to help you kill faster.
 Look for Magmoth Crushers or Mates of Magmoth, use Crafty’s Ultra-Advanced Proto-Typical Shortening Blaster on them and kill them.
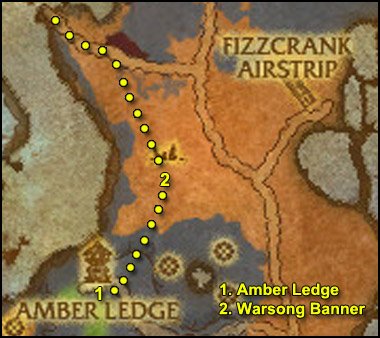
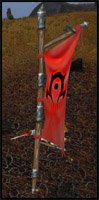
 Right-click Crafty’s Sack and loot its content.
 Right-click the Orc Disguise.
 Target his corpse and right-click the Warsong Banner.