You must have  Blacksmith Hammer in your inventory to craft any of items!
Approximate amount of materials required:
150 x  Rough Stone
150 x  Copper Bar
95 x  Coarse Stone
5 x  Silver Bar
195 x  Bronze Bar
105 x  Heavy Stone
5 x  Gold Bar
230 x  Iron Bar
190 x  Steel Bar
520 x  Solid Stone
60 x  Mageweave Cloth
250 x  Mithril Bar
20 x  Dense Stone
730 x  Thorium Bar
30 x  Star Ruby
5 x  Aquamarine
Apprentice 1-75
(1-30)  Rough Sharpening Stone
(30-65)  Rough Grinding Stone
(65-75)  Coarse Sharpening Stone
Journeyman 75-125
(75-90)  Coarse Grinding Stone
(90-110)  Runed Copper Belt
(110-125)  Rough Bronze Leggings
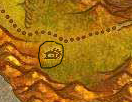
Alternate: If you have  Silver Bar, craft
  Silver Skeleton Key from 100-110 for easy skill-up.
Expert 125-200
(125-140)  Heavy Grinding Stone
(140-150)  Patterned Bronze Bracers
(150-160)  Golden Skeleton Key
(160-165)  Green Iron Leggings
(165-190)  Green Iron Bracers
(190-200)  Golden Scale Bracers
Artisan 200-300
(200-210)  Solid Grinding Stone
(210-225)  Heavy Mithril Gauntlet
(225-235)  Heavy Mithril Axe (alternative:
  Steel Plate Helm)
(235-250)  Mithril Spurs
Alternate: If you cannot acquire  Plans: Mithril Spurs, you can create
  Mithril Coif from 235-250.
(250-260) Dense Sharpening Stone
(260-270) Mithril Spurs
Alternate: If you cannot acquire Plans: Mithril Spurs, you can create  Thorium Belt,
  Thorium Bracers or
  Radiant Belt from 260-270.
(270-295)  Imperial Plate Bracers
(295-300)  Imperial Plate Boots
You can find the recipe for  Plans: Imperial Plate Boots (requires
  Thorium Bar x40) and Plans: Imperial Plate Bracers (requires Thorium Bar x20) from Derotain Mudsipper in Gadgetzan.
Choose Blacksmithing Specialization
Once you reach skill level 200 and at least level 40, you can choose between  Armorsmith or
  Weaponsmith. When you choose a specialization it can be changed only when you re-learn
  Blacksmithing.
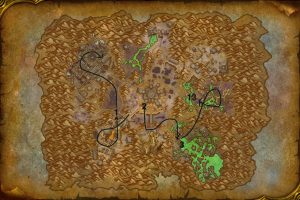
Start at:
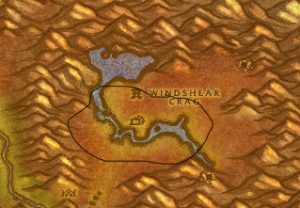
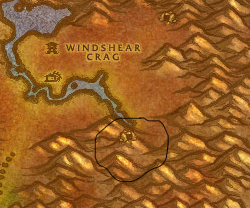
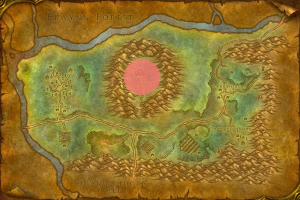
Bengus Deepforge (52, 40) at the Great Forge in Ironforge.
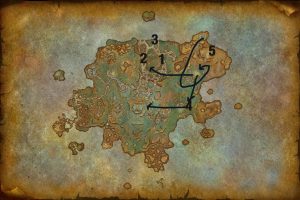
Krathok Moltenfist (75, 33) in the Valley of Honor in Orgrimmar.
They’ll direct you to either the Master Armorsmith or Weaponsmith.
Armorsmith Specialization
From now you will focus on armor recipes.  Titanic Leggings and
  Lionheart Helm are the best items for DPS Warriors.
Speak to:
Alliance: Grumnus Steelshaper (50, 42) at the Great Forge in Ironforge.
Horde: Okothos Ironrager (75, 34) at the Valley of Honor in Orgrimmar
Then:
Alliance: Speak to Hank the Hammer (63, 36) in Stormwind City, giving you the quest  The Origins of Smithing, to give him Golden Scale Bracers x6. Take In Search of Galvan to speak to McGavan.
Horde: Speak to Aturk the Anvil (75, 36) in Orgrimmar, giving you the quest The Old Ways, to give him  Steel Breastplate x 4 and Steel Plate Helm x 4. Take the follow up quest Booty Bay or Bust! to speak to McGavan in Booty Bay.
McGavan will give you the quest The Mithril Order and send you to Galvan the Ancient.
Galvan the Ancient will give 3 quests:
Smelt On, Smelt Off requires  Mithril Bar x 40 and
  Iron Bar x 40
The Art of the Imbue requires Mithril Bar x 40 and  Citrine x 4
The Great Silver Deceiver requires Mithril Bar x 40 and  Truesilver Bar x 5
The follow up quest is Expert Blacksmith! Take the follow up quest Galvan’s Finest Pupil to speak to Trenton Lighthammer in Tanaris.
The next quests are:
The World At Your Feet requires Heavy Mithril Boots x 2 and Ornate Mithril Pants x 1
A Good Head On Your Shoulders requires Mithril Coif x 2 and  Ornate Mithril Shoulders x 1
The Mithril Kid requires  Heavy Mithril Breastplate x 2 and
  Ornate Mithril Gloves x 1
Hand in his quests and he will follow up with Did You Lose This?.
Now, return to where you started, either:
Alliance: Bengus Deepforge (52, 40) at the Great Forge in Ironforge.
Horde:Krathok Moltenfist (75, 33) at the Valley of Honor in Orgrimmar.
They’ll ask you to choose Armorsmith or Weaponsmith and speak with:
Grumnus Steelshaper (50, 42) at the Great Forge in Ironforge.
Okothos Ironrager (75, 34) at the Valley of Honor in Orgrimmar.
You’ll have to craft:
 Ornate Mithril Helm x 4
 Ornate Mithril Boots x 2
Ornate Mithril Breastplate x 1
Finally. Hand all of these items in, and you’ll become an Armorsmith!
Armorsmith Recipes
Dark Iron Bracers – Plans sold by Lokhtos Darkbargainer in Blackrock Depths, skill level 295.
 Dark Iron Gauntlets – Plans sold by Lokhtos Darkbargainer in Blackrock Depths, skill level 300.
 Dark Iron Helm – Plans sold by Lokhtos Darkbargainer in Blackrock Depths, skill level 300.
Dark Iron Leggings – Plans sold by Lokhtos Darkbargainer in Blackrock Depths, skill level 300.
 Dark Iron Boots – Plans sold by Lokhtos Darkbargainer in Blackrock Depths, skill level 300.
 Dark Iron Plate – Plans dropped by Ribbly Screwspigot in Blackrock Depths, skill level 285.
 Dawnbringer Shoulders – World-drop plans, skill level 290.
 Demon Forged Breastplate – Plans are a quest reward from The Demon Forge, skill level 285.
Enchanted Thorium Breastplate – Plans are a quest reward from Enchanted Thorium Platemail: Volume I, skill level 300.
 Enchanted Thorium Helm – Plans are a quest reward from Enchanted Thorium Platemail: Volume III, skill level 300.
Enchanted Thorium Leggings – Plans are a quest reward from Enchanted Thorium Platemail: Volume II, skill level 300.
 Fiery Chain Girdle – Plans sold by Lokhtos Darkbargainer in Blackrock Depths, skill level 295.
 Fiery Chain Shoulders – Plans sold by Lokhtos Darkbargainer in Blackrock Depths, skill level 300.
 Fiery Plate Gauntlets – Plans are a quest reward from Fiery Plate Gauntlets, skill level 290.
 Helm of the Great Chief – Plans dropped by Nefarian in Blackwing Lair, skill level 300.
 Invulnerable Mail – Plans dropped from both world and raid instance bosses, skill level 300.
Lionheart Helm – Plans dropped from elite creatures, skill level 300.
 Storm Gauntlets – Plans sold by Magnus Frostwake in Western Plaguelands, skill level 295.
Stronghold Gauntlets – Plans dropped from world bosses, skill level 300.
Titanic Leggings – Plans dropped from world bosses, skill level 300.
Truesilver Breastplate – Taught by Armorsmithing trainers, skill level 245.
 Truesilver Gauntlets – Taught by Armorsmithing trainers, skill level 225.
 Whitesoul Helm – Plans dropped by Nefarian and Blackwing Technician in Blackwing Lair, skill level 300.
 Wildthorn Mail – World-drop plans, skill 270
Weaponsmith Specialization
With Weaponsmith, you can choose one of these specializations:
 Master Axesmith
 Master Swordsmith
 Master Hammersmith
Axesmith has plans for  Annihilator and Nightfall,
  Arcanite Reaper. Another cool weapon is
  Hammer of the Titans requires Hammersmith.
Weaponsmith Quests
Speak to the Master Weaponsmith to take The Way of the Weaponsmith, which requires:
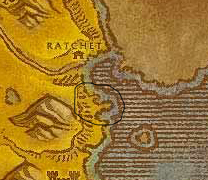
Moonsteel Broadsword x 4
Plans are from Plans: Moonsteel Broadsword is from Zarena Cromwind in Booty Bay. Respawn can take up to an hour.
 Big Black Mace x 2
This can be learned from Brikk Keencraft in Booty Bay (52, 40) for 5 as an Artisan Blacksmithing at skill level 230.
Heavy Mithril Axe x 2
This can also be learned from Brikk Keencraft in Booty Bay (52, 40) as well.
 Massive Iron Axe x 4
Plans are limited supply purchase from either Jaquilina Dramet or Vharr. Respawn can take up to an hour.
Turn in all of these items to become a Weaponsmith. Now, you can take your training either further to learn to become either Axesmith, Hammersmith or Swordsmith!
Weaponsmith Plans
Here is a complete list of all the weaponsmith plans you can learn, regardless of further specializations:
 Black Amnesty – Plans sold by Lokhtos Darkbargainer in Blackrock Depths once Revered with Thorium Brotherhood, skill level 300.
 Blackfury – Plans sold by Lokhtos Darkbargainer in Blackrock Depths once Revered with Thorium Brotherhood, skill level 300.
Dark Iron Pulverizer – Plans dropped by Grizzle in Blackrock Depths, skill level 265.
 Dark Iron Sunderer – Plans dropped by Hammered Patron and Ribbly’s Crony in Blackrock Depths, skill level 275.
 Heartseeker – Plans dropped by Cannon Master Willey in Stratholme, skill level 300.
 Phantom Blade – Plans dropped in the Stratholme Main Gate zone, skill level 270.
 The Shatterer – Taught by Weaponsmithing trainers, skill level 235.
 Truesilver Champion – Taught by Weaponsmithing trainers, skill level 260.
Master Axesmith
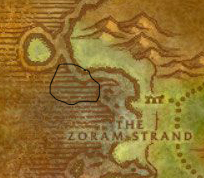
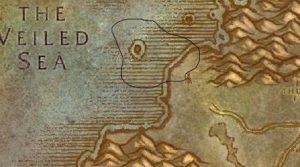
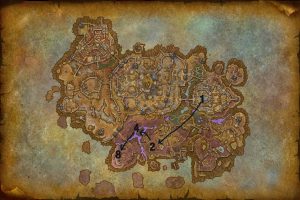
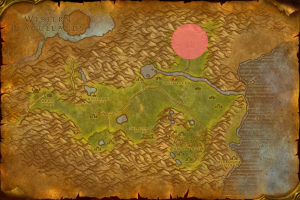
To become a Master Axesmith, speak to Kilram in Winterspring.
You’ll receive Snakestone of the Shadow Huntress, to kill Shadow Hunter Vosh’gajin in Blackrock Spire. As a reward you get Plans: Dawn’s Edge and become Axesmith! Additionally, Axesmiths can learn Plans: Arcanite Reaper, a drop from the rare mob Bannok Grimaxe in Lower Blackrock Spire
All Master Axesmith Recipe Plans:
Annihilator – Plans dropped from Quartermaster Zigris in Upper Blackrock Spire, skill level 300.
Arcanite Reaper – Plans dropped from Bannok Grimaxe in Lower Blackrock Spire, skill level 300.
Dark Iron Destroyer – Plans sold by Lokhtos Darkbargainer in Blackrock Depths once Honored with Thorium Brotherhood, skill level 300.
Dawn’s Edge – Plans are a quest reward from Snakestone of the Shadow Huntress, skill level 275.
Nightfall – Plans sold by Lokhtos Darkbargainer in Blackrock Depths once Exalted with Thorium Brotherhood, skill level 300.
Master Hammersmith
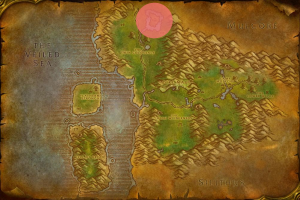
To become a Master Hammersmith, speak to Lilith the Lithe in Winterspring.
You’ll receive Sweet Serenity, to kill Crimson Hammersmith in Stratholme. Recover  Crimson Hammersmith’s Apron and return to Lilith the Lithe. You’ll receive Plans: Enchanted Battlehammer and become Hammersmith!
All Master Hammersmith Recipe Plans:
 Ebon Hand – Plans sold by Lokhtos Darkbargainer in Blackrock Depths once Exalted with Thorium Brotherhood, skill level 300.
 Enchanted Battlehammer – Plans are a quest reward from Sweet Serenity, skill level 280.
Hammer of the Titans – Plans are dropped from Maleki the Pallid in Stratholme, skill level 300.
 Masterwork Stormhammer – Plans are dropped from Goraluk Anvilcrack in Upper Blackrock Spire, skill level 300.
 Persuader – Plans dropped from both world and raid instance bosses, skill level 300.
 Serenity – Plans found on the floor in the Scarlet Bastion of Stratholme, skill level 285.
Master Swordsmith
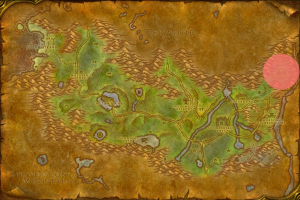
To become a Master Swordsmith, speak to Seril Scourgebane in Winterspring.
You’ll receive Corruption, to kill Black Guard Swordsmith in Stratholme. Recover  Insignia of the Black Guard and return to Seril Scourgebane. You’ll receive Plans: Blazing Rapier and become Swordsmith!
Master Swordsmith Recipe Plans:
 Arcanite Champion – Plans are dropped from Goraluk Anvilcrack in Upper Blackrock Spire, skill level 300.
Blackguard – Plans sold by Lokhtos Darkbargainer in Blackrock Depths once Exalted with Thorium Brotherhood, skill level 300.
 Blazing Rapier – Plans are a quest reward from Corruption, skill level 280.
 Corruption – Plans are from opening Blacksmithing Plans in Stratholme, skill level 290.
 Dark Iron Reaver – Plans sold by Lokhtos Darkbargainer in Blackrock Depths once Honored with Thorium Brotherhood, skill level 300.
 Frostguard – Plans drop from Foreman Marcrid in Western Plaguelands, skill level 300.
 Sageblade – Plans drop from level 61-62 elite mobs, skill level 300.


 (x5); Mid-level HP potion. Can only be used within PvP battlegrounds.
 36
36